Keurig K-Cup K10 MINI Plus Owner's Manual
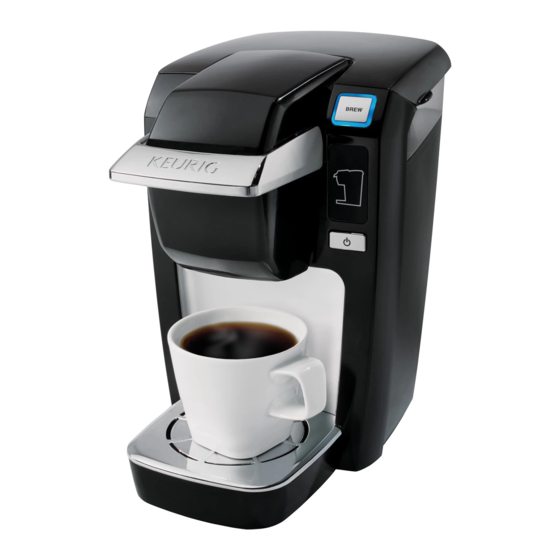
Single cup brewer system
Hide thumbs
Also See for K-Cup K10 MINI Plus:
- User manual ,
- Owner's manual (40 pages) ,
- Owner's manual (11 pages)

Related Manuals for Keurig K-Cup K10 MINI Plus


Summary of Contents for Keurig K-Cup K10 MINI Plus
- Page 1 P1 201309003 KER755_K10.pdf 4C( CMYK) ZB2319 2013.09.06 Owner’ s manual Keurig K-Cup K10 MINI Plus Brewer ® ®...
-
Page 2: Important Safeguards
Contact the power cord or use an adapter. with these instructions before it is used. Keurig Customer Service to report Consult a qualified electrician if The use of accessory attachments any malfunction of or damage to the... - Page 3 P3 201309003 KER755_K10.pdf 1C( K) ZB2319 2013.09.06 WARNING CAUTION: There are two sharp needles that puncture the KEEP ALL PLASTIC BAgS AwAY FROM CHILDREN. K-Cup pack, one above the K-Cup Pack Holder and the ® ® other in the bottom of the K-Cup Pack Holder.
-
Page 4: Table Of Contents
P4 201309003 KER755_K10.pdf 1C( K) ZB2319 2013.09.06 SeCtIon 1 table of ContentS Brewer Overview Water Level Guide KEURIG GOURMET SINGLE CUP HOME BREWING SYSTEM ® K10 MINI Plus Brewer — Using Your Brewer handle ............SeCTion 1—Brewer overview K-cup Pack holder assembly ® .............. - Page 5 P5 201309003 KER755_K10.pdf 1C( K) ZB2319 2013.09.06 For replacement parts, please visit www.keurig.com...
-
Page 6: Section 2 -Helpful Hints
® tall cup filled with ice on the Drip Tray, choose internal components on a regular basis. the K10 MINI Plus does not store water in the your favorite K-Cup pack and follow the ® See page 12 for more information. -
Page 7: Section 3-Buttons & Indicators
P7 201309003 KER755_K10.pdf 1C( K) ZB2319 2013.09.06 SeCtIon 3 Buttons & Indicators Power Button Your next Brew (does not illuminate) Press to turn the brewer power on and off. When the brewing process is complete, the Add Water Indicator light will appear. At this point you can begin add Water Indicator making the next beverage, or you can power off. -
Page 8: Section 4 -Set-Up & Operation
P8 201309003 KER755_K10.pdf 1C( K) ZB2319 2013.09.06 SeCtIon 4 Set-Up & Operation Initial cleansing & First Brew CAUTION: Two sharp needles are used to puncture the K-cup packs. one is above the K-cup Pack holder and ® ® the other is in the bottom of the K-cup Pack holder. - Page 9 P9 201309003 KER755_K10.pdf 1C( K) ZB2319 2013.09.06 For accurate measuring, do not fill if the handle is up. In the down position it prevents water from entering the lower heating compartment. 10 oz. 8 oz. 6 oz. Press the Power Button. The Add Water Indicator Lift the Cold Water Reservoir Lid.
- Page 10 P10 201309003 KER755_K10.pdf 1C( K) ZB2319 2013.09.06 SECTION 4 Set-Up & Operation (continued) Let water fully drain into brewer Do noT remove foil lid or puncture K-Cup pack. ® before lowering the Handle. 5 Sec Lift the Handle. Water starts to drain Place mug on the Drip Tray.
- Page 11 P11 201309003 KER755_K10.pdf 1C( K) ZB2319 2013.09.06 2 Min The BREW Button will flash blue. Press the The BREW Button will flash red to Enjoy your beverage! Your brewer is ready to use BREW Button. indicate that the water is heating. After again or you can power it off.
-
Page 12: Section 5-Cleaning & Maintenance
P12 201309003 KER755_K10.pdf 1C( K) ZB2319 2013.09.06 SeCtIon 5 Cleaning & Maintenance cleaning external Parts cleaning the K-cup Pack holder assembly ® IMPORTANT: Make sure the brewer is unplugged before cleaning. IMPORTANT: Make sure the brewer is unplugged before cleaning. Regular cleaning of the brewer’s external components is recommended. - Page 13 P13 201309003 KER755_K10.pdf 1C( K) ZB2319 2013.09.06 Separate the Funnel from the K-Cup Pack Holder by pulling it until it To replace the Funnel, just snap it back into the K-Cup ® ® snaps free (fig. 2). Pack Holder (fig. 4). Clean the Exit Needle on the bottom of the K-Cup Pack Holder.
-
Page 14: Cleaning The Cold Water Reservoir
Do not use a paper cup. STeP 1: FiRST DeSCALinG SoLUTion RinSe • Turn on your brewer. • Pour one third (4.6 oz.) of the Keurig Descaling Solution into the cold ™ Water Reservoir then add fresh water to the 10 oz. fill level. -
Page 15: Storage
30 minutes before continuing with the rinse. Beyond these recommended cleaning and maintenance procedures, this Visit us online for more information at www.keurig.com/descaling. brewer is not user serviceable. See page 18 for warranty guidelines. For... -
Page 16: Section 6-Troubleshooting
P16 201309003 KER755_K10.pdf 1C( K) ZB2319 2013.09.06 SeCtIon 6 Troubleshooting SiTUATion SoLUTion Brewer does not have power • Make sure the Power Button has been pressed. The Add Water Indicator should flash blue after pushing the Power Button. Note that the Power Button does not illuminate. • During normal operation, the brewer will shut off when it is idle for longer than 90 seconds. - Page 17 Red indicator appears in Drip Tray • This means that the Drip Tray is almost full. Carefully remove the Drip Tray and empty its contents into the sink. Should other issues arise with your brewer, please call Keurig Customer Service at 1.866.901.BReW (2739).
-
Page 18: Section 7-Warranty
SPECIFICALLY DISCLAIMS ALL OTHER WARRANTIES WITH RESPECT TO in our system. Keurig will, at its option, repair or replace a defective brewer YOUR K10 MINI PLUS BREWER, INCLUDING ANY IMPLIED WARRANTY OF without charge upon its receipt of proof of the date of purchase. - Page 19 We’re here to help! Scan this QR code with your smartphone for step-by-step videos on Keurig is committed to your satisfaction. If you have questions, just give cleaning, descaling and more. Or if you prefer, you can watch the videos us a call to have them answered quickly without leaving the comfort of on your computer at bit.ly/njTZ8W...
- Page 20 P20 201309003 KER755_K10.pdf 4C( CMYK) ZB2319 2013.09.06 To learn more about Keurig, visit www.keurig.com or call 1.866.901.BREW (2739) Keurig, Incorporated 55 Walkers Brook Drive © 2013 Keurig, Incorporated Reading, MA 01867 All rights reserved For Household Use Only Keurig, Incorporated is a wholly-owned P/N 60-202467-000 Rev B subsidiary of Green Mountain Coffee Roasters, Inc.