Table of Contents
Advertisement
Quick Links
Download this manual
See also:
User Manual
Advertisement
Table of Contents

Subscribe to Our Youtube Channel
Related Manuals for Gefen EXT-DVIKVM-841DL


Summary of Contents for Gefen EXT-DVIKVM-841DL
- Page 1 8x1 DVI KVM DL/SL Switcher EXT-DVIKVM-841DL User Manual www.gefen.com...
- Page 2 Notice Gefen Inc. reserves the right to make changes in the hard ware, packaging and any accompanying doc u men ta tion without prior written notice. 8x1 DVI KVM DL/SL Switcher is a trademark of Gefen Inc. © 2008 Gefen Inc., All Rights Reserved...
-
Page 3: Table Of Contents
CONTENTS Introduction Operation Notes Features Panel Layout Panel Descriptions Connecting & Operating The 8x1 DVI KVM DL/SL Switcher 8x1 DVI KVM DL/SL Remote Description 8x1 DVI KVM DL/SL Switcher Remote Installation RMT-8IR Remote and 8x1 KVM Switcher Confi guration 10 EDID Modes 12 DL (Dual Link) Only Modes 13 RS-232 Serial Communication 14 RS-232 Serial Communication Commands... -
Page 4: Introduction
The Gefen 8x1 DVI KVM DL/SL Switcher The rack-mountable Gefen 8x1 dual link/single link DVI KVM Switcher offers an economical solution by eliminating the need to purchase many displays for each computer in a studio or lab situation. -
Page 5: Operation Notes
OPERATION NOTES READ THESE NOTES BEFORE INSTALLING OR OPERATING THE GEFEN 8X1 DVI KVM DL/SL SWITCHER • The 8x1 DVI KVM DL/SL Switcher will take any of up to eight (8) DVI dual- link or single-link resolution inputs and switch them, one at a time, to a DVI output device such as a display/monitor or projector. -
Page 6: Features
FEATURES Features • Switches easily between any eight DVI-SL or DVI-DL sources • Switches USB 2.0, keyboard & mouse, and analog audio • Maintains highest resolution dual link DVI • Supports resolutions up through 3840x2400 • Extends the range of DVI video up to 50 feet •... -
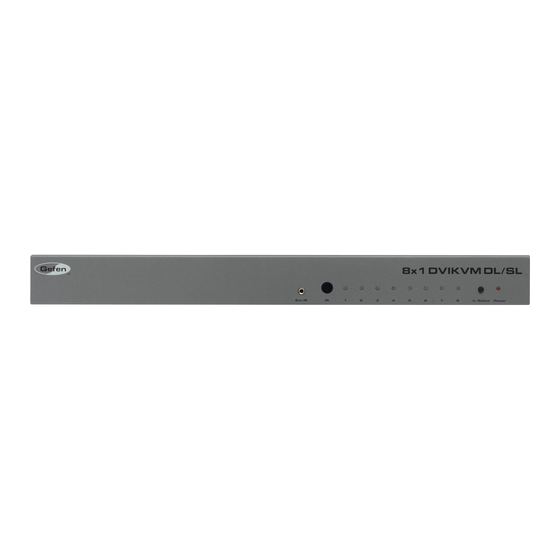
Page 7: Panel Layout
PANEL LAYOUT Front Panel Back Panel... -
Page 8: Panel Descriptions
PANEL DESCRIPTIONS External IR Port For connection of external IR extension device such as the Gefen IR Extender (part # EXT-RMT-EXTIR). IR Receiver Receives IR signal from the handheld Infrared remote control unit included with the 8x1 DVI KVM DL/SL Switcher. -
Page 9: Connecting & Operating The 8X1 Dvi Kvm Dl/Sl Switcher
CONNECTING & OPERATING THE 8X1 DVI KVM DL/SL SWITCHER How to Connect the 8x1 DVI KVM DL/SL Switcher to your devices: Connect your computers’ DVI, USB, and Audio sources to the 8x1 DVI KVM DL/SL Switcher inputs using the supplied cables. Connect your DVI display to the DVI output of the 8x1 DVI KVM DL/SL Switcher using a user-supplied DVI cable. -
Page 10: 8X1 Dvi Kvm Dl/Sl Remote Description
8X1 DVI KVM DL/SL REMOTE DESCRIPTION LED Indicator Input Selection Buttons The RMT-8IR remote control will allow the user to choose which of 8 DVI sources or computers will be selected. Please use the information below when selecting the desired source: RMT-8IR Button DVI Source... -
Page 11: 8X1 Dvi Kvm Dl/Sl Switcher Remote Installation
8X1 DVI KVM DL/SL SWITCHER REMOTE INSTALLATION To use the RMT-8IR remote, remove the battery cover on the back of the remote to reveal the battery compartment. Insert the included battery into the open battery slot. The positive (+) side should be facing up. Ensure that both DIP (Dual Inline Package) switches are in the OFF position. -
Page 12: Rmt-8Ir Remote And 8X1 Kvm Switcher Confi Guration
RMT-8IR REMOTE AND 8X1 KVM SWITCHER CONFIGURATION How to Resolve IR Code Confl icts In the event that IR commands from other remote controls confl ict with the supplied RMT-8IR remote control, changing the remote channel will alleviate this issue. The RMT-8IR remote control and the 8x1 DVI KVM DL/SL Switcher both have banks of DIP (Dual Inline Package) Switches for confi... -
Page 13: Edid Modes
EDID MODES EDID. What is it and what is it used for? Under normal circumstances, an source device (digital and analog) will require information about a connected device/display to assess what resolutions and features are available. The source can then cater its output to send only resolutions and features that are compatible with the attached device/ display. - Page 14 EDID MODES EDID Modes The diagram below illustrates the 4 DIP switch bank. The 8 DIP switch bank functions are outlined later on this page. DIP SWITCH Function IR Channel IR Channel EDID Mode 1 2 3 4 Use DIP switch 3 to set the desired EDID mode. LOCAL EDID Mode (Switch 3=OFF) •...
-
Page 15: Dl (Dual Link) Only Modes
DL (DUAL LINK) ONLY MODES DL (Dual Link) Only Modes The 8 DIP switch bank, located on the underside of the 8x1 DVI KVM DL/SL Switcher cab be used to set each individual input to work in a Dual Link Only mode. -
Page 16: Rs-232 Serial Communication
RS-232 SERIAL COMMUNICATION What features are available via the RS-232 serial communications port? The 8x1 DVI KVM DL/SL Switcher can accept commands through the RS-232 serial communications port located on the rear panel. The current RS-232 control features are: • Switching/routing of inputs to outputs without the RMT-8IR remote control. -
Page 17: Rs-232 Serial Communication Commands
RS-232 SERIAL COMMUNICATION COMMANDS 1. ECHO PROTOCOL Defi nition: Semi echo mode – the product send echo every byte it received, except on receiving EDID fi le. Full echo mode – the product send echo every byte it received, even on receiving EDID fi... - Page 18 RS-232 SERIAL COMMUNICATION COMMANDS DS EDID store in Locals EDID This function reads EDID fi le from DS and store it in all input Locals EDID #EDIDDSTOLO DS EDID store in EDID Bank This function read EDID fi le from DS and store it in EDID bank #EDIDDSTOBA_param1\r Parameter Name...
- Page 19 RS-232 SERIAL COMMUNICATION COMMANDS Print EDID bank This function read EDID fi le from EDID bank and send it to the serial port. #PRBAEDID_param1_param2\r Parameter Name Value EDID bank offset [1 : 7 ] Send BIN fi le Send TXT fi le Load EDID to Locals EDID These function loads EDID fi...
-
Page 20: Rs-232 Serial Communication - Upload Edid
RS-232 SERIAL COMMUNICATION - UPLOAD EDID 3. HOW TO LOAD FILE WITH HYPER TERMINAL 3.1 HYPER TERMINAL SETTING File->Properties->Setting->ASCII Setup: Unmark the check box of “Send line ends with Line feeds” 3.2 SEND THE FILE Transfer->Send text fi le… Change “Files of type:” to “All fi les (*.*)” Open the fi... -
Page 21: Rack Mount Installation
RACK MOUNT INSTALLATION Rack mount ears are provided for installation of this unit into a 1U rack mount space. Locate the side screws on the unit. Remove the front 2 screws that are located closest to the front of the unit. Using the removed screws, screw the rack mounting bracket into the unit. -
Page 22: Specifi Cations
SPECIFICATIONS Video Amplifi er Bandwidth:..............165 MHz x 2 Input Video Signal:................1.2 Volts p-p Input DDC Signal:................5 Volts p-p (TTL) Single Link Range:................1920 x 1200 Dual Link Range :................3840 x 2400 DVI Connector:............ DVI-I 29-pin female (digital only) Power Supply:....................5V DC Power Consumption:................20 Watts (max) Dimensions:..............17”...
Need help?
Do you have a question about the EXT-DVIKVM-841DL and is the answer not in the manual?
Questions and answers