
Related Manuals for Pride Quantum Rival series


Summary of Contents for Pride Quantum Rival series
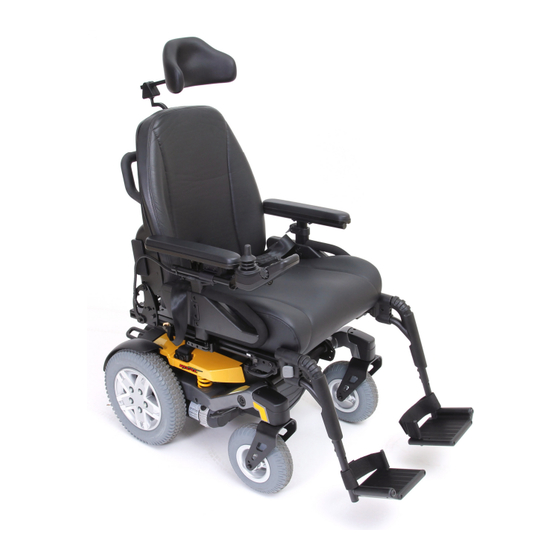
- Page 1 QUANTUM Rival Series Including Models: Quantum Rival 3S, Quantum Rival 3SP, and Quantum Rival 3MP...
- Page 2 S A F E T Y G U I D E L I N E S WARNING! A Quantum Rehab Provider or a qualified technician must perform the initial setup of this power chair and must perform all of the procedures in this manual.
-
Page 3: Table Of Contents
C O N T E N T S INTRODUCTION ........................... 4 SAFETY ..............................5 III. YOUR POWER CHAIR ........................18 IV. COMFORT ADJUSTMENTS ......................22 BATTERIES AND CHARGING ...................... 28 VI. CARE AND MAINTENANCE ......................32 Rival www.pridemobility.com... -
Page 4: Introduction
INFORMATION EXCHANGE We want to hear your questions, comments, and suggestions about this manual. We would also like to hear about the safety and reliability of your new power chair, and about the service you received from your Quantum Rehab Provider. - Page 5 I I . S A F E T Y PRODUCT SAFETY SYMBOLS The symbols below are used on the power chair to identify warnings, mandatory actions, and prohibited actions. It is very important for you to read and understand them completely. Read and follow the information in the owner’s manual.
-
Page 6: Ii. Safety
I I . S A F E T Y Removal of grounding prong can create electrical hazard. If necessary, properly install an approved 3-pronged adapter to an electrical outlet having 2-pronged plug access. Battery posts, terminals, and related accessories contain lead and lead compounds. Wear goggles and gloves when handling batteries and wash hands after handling. - Page 7 I I . S A F E T Y Use only AGM or Gel-Cell batteries to reduce the risk of leakage or explosive conditions. Keep tools and other metal objects away from battery terminals. Contact with tools can cause electrical shock. Battery Set Configuration: + = Positive (Red) Terminal Post - = Negative (Black) Terminal Post...
- Page 8 I I . S A F E T Y Disposal and recycling - Contact your Quantum Rehab Provider for information on proper disposal and recycling of your Pride product and its packaging. Unlocked and in freewheel mode. Place unit on level ground and stand to one side when changing from drive mode to freewheel mode or freewheel mode to drive mode.
- Page 9 I I . S A F E T Y Does not meet 7176-19 standards for occupied transport in a motor vehicle. Indicates power chair securement points. Indicates electrical shock hazard. Indicates flammable material. Do not expose to heat sources such as open flame or sparks.
-
Page 10: General Guidelines
The contents of this manual are based on the expectation that a mobility device expert has properly fitted the power chair to the user and has assisted the prescribing healthcare professional and/or the Quantum Rehab Pro- vider in the instruction process for the use of the product. -
Page 11: Weight Limitations
I I . S A F E T Y Weight Limitations Your power chair is rated for a maximum weight capacity. Please refer to the specifications table for this limit. Keep in mind that the maximum weight capacity includes the combined weight of the user and any accessories mounted to the power chair. - Page 12 I I . S A F E T Y WARNING! If your power chair is equipped with a reclining seatback, do not attempt to negotiate inclines with the seat in a reclined position. Do not attempt to negotiate obstacles with the seat in a reclined position unless an attendant is present to help stabilize the chair.
- Page 13 I I . S A F E T Y Public Streets and Roadways WARNING! You should not operate your power chair on public streets and roadways. Be aware that it may be difficult for traffic to see you when you are seated on your power chair. Obey all local pedestrian traffic rules.
-
Page 14: Stairs And Escalators
I I . S A F E T Y Figure 2. Correct Curb Approach Figure 3. Incorrect Curb Approach Stairs and Escalators Power chairs are not designed to travel up or down stairs or escalators. Always use an elevator. WARNING! Never use your power chair to negotiate steps or escalators. Doors Determine if the door opens toward or away from you. -
Page 15: Positioning Belts
Positioning Belts Your Quantum Rehab Provider, therapist(s), and other healthcare professionals are responsible for determining your requirement for a positioning belt in order to operate your power chair safely. WARNING! If you require a positioning belt to safely operate your power chair, make sure it is fastened securely in order to reduce the possibility of a fall from the power chair. -
Page 16: Reaching And Bending
I I . S A F E T Y Reaching and Bending Never reach, lean, or bend while driving your power chair. If it is absolutely necessary to reach, lean, or bend while seated on your power chair, it is important to maintain a stable center of gravity and keep the power chair from tipping. - Page 17 NOTE: For further information on EMI/RFI, go to the Resource Center on www.pridemobility.com. If unintended motion or brake release occurs, turn your power chair off as soon as it is safe to do so. Contact your Quantum Rehab Provider to report the incident. Rival...
- Page 18 I I I . Y O U R P O W E R C H A I R THE RIVAL Your power chair has two main assemblies: the seat and the power base. See figures 5 and 6. Typically, the seat assembly includes the armrests, seatback, and seat base.
-
Page 19: Iii. Your Power Chair
Next, push in the circuit breaker button, turn on the controller and continue normal operation. If the main circuit breaker continues to trip repeatedly, contact your Quantum Rehab Provider. The main circuit breaker may be located on either the left or right side of your power chair. See figure 6. - Page 20 I I I . Y O U R P O W E R C H A I R Sport-Trac Suspension Your power chair is equipped with Sport-Trac Suspension SECUREMENT BRACKETS (STS). STS is a suspension system designed to make your power chair traverse different types of terrain and obstacles while maintaining smooth operation.
- Page 21 See figure 8. MANDATORY! The power chair should be used as indicated in the manufacturer’s instructions. If you have any questions about the proper use of your power chair, contact your Quantum Rehab Provider. Manual Freewheel Levers For your convenience, your power chair is equipped with two manual freewheel levers mounted on the motors.
-
Page 22: Comfort Adjustments
WARNING! The center of gravity of your power chair was factory set to a position that meets the needs of the demographic majority of users. Your Quantum Rehab Provider has evaluated your power chair and made any necessary adjustments to suit your specific requirements. Do not change your seating configuration without first contacting Pride Mobility Products or your Quantum RehabProvider. -
Page 23: Iv. Comfort Adjustments
I V . C O M F O R T A D J U S T M E N T S 7. Remove the hardware that attaches the trapeze bars to the seat interface weldments. See figure 11. 8. Move the trapeze bars up or down to the desired height. -
Page 24: Armrest Width Adjustment
I V . C O M F O R T A D J U S T M E N T S Seatback Angle Adjustment If your power chair is equipped with an adjustable seat- back, you can adjust it to four (4) different angles: 90°, JAM NUT 102°, 105°, or 107°. -
Page 25: Controller Position
I V . C O M F O R T A D J U S T M E N T S Controller Position You can move the controller in toward or out away from the armrest, or change the position of the controller for either left-hand or right-hand use. - Page 26 BRACKET accelerating. You can compensate for this by having your Quantum Rehab Provider make a small adjustment pre-programmed acceleration setting in the controller or by Figure 15. Anti-Tip Wheel Assembly adjusting the seat assembly. WARNING! The anti-tip wheels may cause trouble when ascending or descending a curb if they are not adjusted correctly.
-
Page 27: Positioning Belt
NOTE: If your power chair is equipped with an optional seating system, please refer to the user manual provided with the seat for instruction on positioning belt installation or contact your Quantum Rehab Provider. To adjust the positioning belt: 1. -
Page 28: Batteries And Charging
Wear goggles and gloves when handling batteries and wash hands after handling. WARNING! Contact your Quantum Rehab Provider if you have any questions regarding the batteries in your power chair. PROHIBITED! Always use two batteries of the exact same type, chemistry, and amp- hour (Ah) capacity. -
Page 29: V. Batteries And Charging
We do not recommend using other types of chargers (e.g., an automotive battery charger). NOTE: Your power chair’s charger will not operate after the batteries have been discharged to nearly zero voltage. If this happens, call your Quantum Rehab Provider for assistance. How often must I charge the batteries? Many factors come into play when deciding how often to charge the batteries. - Page 30 V . B A T T E R I E S A N D C H A R G I N G Daily Use If you use your power chair on a daily basis, charge the batteries as soon as you are finished using your power chair.
- Page 31 V . B A T T E R I E S A N D C H A R G I N G How can I ensure maximum battery life? A fully charged deep-cycle battery will provide reliable performance and extended battery life. Keep your power chair’s batteries fully charged whenever possible.
-
Page 32: Care And Maintenance
3. Check the joystick operation and the brakes before using your power chair again. 4. If any inconsistencies are found, take your power chair to your Quantum Rehab Provider. Power chairs that are frequently exposed to sources of water, such as incontinence, should be inspected often for corrosion and electronic components may need to be replaced frequently. -
Page 33: Vi. Care And Maintenance
Check the rubber boot around the base of the joystick for damage. Visu- ally inspect the boot. Do not handle or try to repair it. See your Quantum Rehab Provider if there is a problem. -
Page 34: Cleaning And Disinfection
Your power chair must be disposed of according to applicable local and national statutory regulations. Contact your local waste disposal agency or Quantum Rehab Provider for information on proper disposal of power chair packaging, metal frame components, plastic components, electronics, batteries, neoprene, silicone, and polyurethane materials. -
Page 35: Battery Replacement
WARNING! Do not replace battery when seat is occupied. WARNING! The batteries on your power chair should only be serviced or replaced by a Quantum Rehab Provider or a qualified technician. WARNING! Power chair batteries are heavy. See specifications table. If you are unable to lift that much weight, be sure to get help. - Page 36 V I . C A R E A N D M A I N T E N A N C E To replace the batteries: 1. Turn off the power to the controller. 2. Push the manual freewheel levers down for drive mode. 3.
-
Page 37: Corrective Maintenance
When to See Your Quantum Rehab Provider for Service The following symptoms could indicate a serious problem with your power chair. If necessary, contact your Quantum Rehab Provider. When calling, have the model number, serial number, nature of the problem, and the trouble code if available. - Page 38 N O T E S www.pridemobility.com Rival...
- Page 40 Quality Control - Rival Inclusion of all Parts Joystick Serial Number Controller Serial Number Left Motor Serial Number Right Motor Serial Number Fit and Finish Performance Pride keeps a more detailed report on file at the factory. Date Inspected Inspector *INFMANU4309* Product Serial #...