
Related Manuals for Q-See QR4074-426


Summary of Contents for Q-See QR4074-426
-
Page 1: Quick Installation Guide
Quick Installation Guide 4 Channel H.264 Compression DVR with Built-in 7” LCD Display Screen, (CIF) Real-Time Recording and 2 Color CMOS Camera Kits 2 Decoy Cameras (non-operational) -
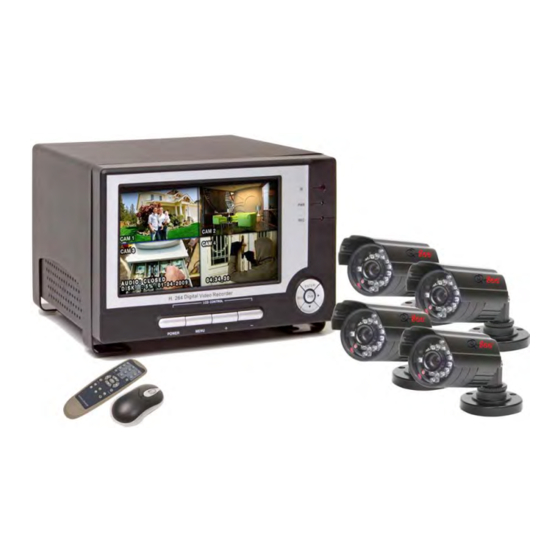
Page 2: Part 1 - Package Contents
Control Mouse Please note: Your Q-See DVR with built-in 7” display can support a total of 4 surveillance cameras. This bundle includes 2 real CMOS cameras and 2 non-operational decoy cameras. You may add up to 2 additional functional cameras. - Page 3 Q-SEE QUICK INSTALLATION GUIDE PART 2 - DVR CAMERA AND POWER CONNECTIONS Please note that it is STRONGLY recommended to use a surge protector that is UL-1449 rated. Look for a clamping voltage of 330 or lower, a Joule rating of at least 400 and a response time of 10 nanoseconds or less.
-
Page 4: Part 3 - Dvr Controls: Front Panel
Q-SEE QUICK INSTALLATION GUIDE PART 3 - DVR CONTROLS: FRONT PANEL Item Button Name / Device Function Number Symbol On: The LCD screen is displayed in a basic activation status; POWER Off: The LCD screen enters into sleep mode. MENU Press once to display LCD main menu. -
Page 5: Part 6 - To Start Recording
Q-SEE QUICK INSTALLATION GUIDE PART 4 - ACCESSING THE DVR MENUS Choose MENU by right clicking on the mouse or by pushing the MENU button on the DVR front panel or remote control. The Main Menu offers the following Setup Features: CAMERA: Setup name display, position, image view, and record quality of each channel (cameras). - Page 6 Q-SEE QUICK INSTALLATION GUIDE Grid Explanation: Red = Alarm (motion detection) recording Green = General (time schedule) recording Transparent = No recording Blue = The channel and date selected. Manual Recording: From the Record Setup screen set the Rec Mode to “ALWAYS”. Your DVR will continuously record and separate files will be created with the Pack Time intervals you selected.
- Page 7 Q-SEE QUICK INSTALLATION GUIDE The Motion detection Menu has three sections, including Channel Status, Sensitivity and Motion area. STATUS: This option allows you to enable motion detection on any channel. SENSITIVITY: This option allows you to set the sensitivity level of motion detection from 1 to 4, with 4 being the highest.
- Page 8 Q-SEE QUICK INSTALLATION GUIDE PART 8 - BACKING UP THE VIDEO ON THE DVR Attach a USB flash drive or USB hard drive to the USB backup port and follow the instructions in Part 8 to go to the File List in the Search menu.
- Page 9 Q-SEE QUICK INSTALLATION GUIDE Questions or Comments? Contact Us: Mailing Address: Customer Service: DPS, Inc. Phone: 877-998-3440 x 538 8015 E. Crystal Dr. Email: cs@dpsi-usa.com Anaheim, CA 92807 Live Chat from our Website Website: Tech Support: http://www.q-see.com Phone: 877-998-3440 x 539...
Need help?
Do you have a question about the QR4074-426 and is the answer not in the manual?
Questions and answers