
Related Manuals for Pride Jazzy 1101


Summary of Contents for Pride Jazzy 1101
- Page 1 Owner’s Manual ATTENTION: Please read the content of your owner’s manual before operating your power chair. “Jazzy 1121” Exeter, PA St. Catharines, ON 1-800-800-8586 www.pridemobility.com...
- Page 2 The symbol below is used throughout this owner’s manual to identify warnings. It is very important for you to read and understand them completely. WARNING! Failure to heed the warnings in this owner’s manual may result in personal injury. Copyright © 2004 Pride Mobility Products Corp. INFMANU1930/RevG/Dec04 www.pridemobility.com Jazzy 1101/1121...
-
Page 3: Table Of Contents
C O N T E N T S INTRODUCTION ..........................4 SAFETY ..............................6 III. THE JAZZY 1101/1121 ....................... 13 IV. ASSEMBLY............................18 COMFORT ADJUSTMENTS......................19 VI. BATTERIES AND CHARGING ....................26 VII. OPERATION ............................30 VIII. CARE AND MAINTENANCE ......................42 IX. -
Page 4: Introduction
I N T R O D U C T I O N SAFETY WELCOME to Pride Mobility Products Corporation (Pride). The power chair you have purchased combines state-of- the-art components with safety, comfort, and styling in mind. We are confident that these design features will provide you with the conveniences you expect during your daily activities. -
Page 5: I. Introduction
Name:_____________________________________________________________________________________ Address:___________________________________________________________________________________ Phone Number:______________________________________________________________________________ Purchase Date:_______________________________________________________________________________ NOTE: If you ever lose or misplace your product registration card or your copy of this manual, contact us and we will be glad to send you a new one immediately. Jazzy 1101/1121 www.pridemobility.com... - Page 6 Check all electrical connections. Make sure they are tight and not corroded. n Check all controller connections to the electronics tray. Make sure they are secured properly. n Check the brakes. See VIII. “Care and Maintenance.” n Check battery charge. See VI. “Batteries and Charging.” www.pridemobility.com Jazzy 1101/1121...
-
Page 7: Safety
WARNING! When on any sort of an incline or decline, never place the power chair in freewheel mode while seated on it or standing next to it. Doing so may result in personal injury and/or damage to your power chair. Jazzy 1101/1121 www.pridemobility.com... - Page 8 Reduce your power chair’s speed when driving on uneven terrain and/or soft surfaces. n Avoid tall grass that can entangle the running gear. n Avoid loosely packed gravel and sand. n If you feel unsure about a driving surface, avoid that surface. www.pridemobility.com Jazzy 1101/1121...
- Page 9 Your power chair is equipped with a manual freewheel system to allow for manual maneuverability by a trained attendant. For more information about how to place your power chair into and out of freewheel mode, see III. “The Jazzy 1101/1121.”...
-
Page 10: Motor Vehicle Transport
WARNING! Before transferring, position yourself as far back as possible in the power chair seat to prevent the power chair from tipping forward during transfer and causing injury. Figure 4. Ideal Transfer Position www.pridemobility.com Jazzy 1101/1121... -
Page 11: Positioning Belts
VI. “Batteries and Charging.” WARNING! Power chair batteries are heavy. See specifications table. If you are unable to lift that much weight, be sure to get help. Lifting beyond your capacity can result in personal injury. Jazzy 1101/1121 www.pridemobility.com... -
Page 12: Removable Parts
NOTE: For further information on EMI/RFI, go to www.pridemobility.com. If unintended motion or brake release occurs, turn the power chair off as soon as it is safe to do so. Call Pride at 800-424-8205 to report the incident. www.pridemobility.com Jazzy 1101/1121... -
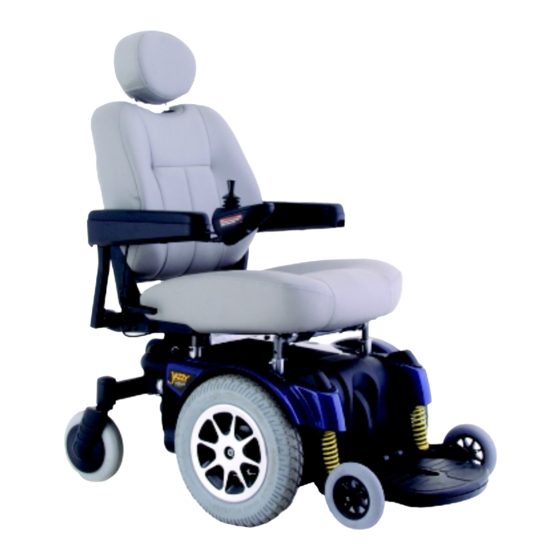
Page 13: The Jazzy 1101/1121
J A Z Z Y 1 1 0 1 / 1 1 2 1 THE JAZZY 1101/1121 The Jazzy has two main assemblies: the seat and the power base. See figures 5 and 6. Typically, the seat assembly includes the armrests, seatback, and seat base. The power base is the heart of the Jazzy. The power base assembly includes two motor/brake assemblies, two drive wheels, two anti-tip wheels, two caster wheels, two batteries, and wiring harnesses. -
Page 14: Specifications
400 lbs. (w ith 1121 HD option - includes 4 mph motors, 70-amp VSI, curved caster beam, and solid drive tires) Component Weights: Base: 135.5 lbs. (144.5 lbs. with 1121 HD option) Medium-Back Seat: 33 lbs. Batteries: 38 lbs. each *Varies with user weight and terrain. www.pridemobility.com Jazzy 1101/1121... -
Page 15: Assembly
ASSEMBLY Figure 6. The Jazzy 1121 Power Base (1101 is similar.) CHARGER INHIBIT CHARGER FUSE MAIN CIRCUIT CONTROLLER CONNECTOR CONNECTOR BREAKER (VSI SHOWN) (VSI ONLY) AMMETER CHARGER POWER CORD RECEPTACLE Figure 7. The Jazzy 1101/1121 Electronics Tray Jazzy 1101/1121 www.pridemobility.com... - Page 16 ATS also helps in day-to-day operating conditions. For instance, when you release the joystick, your Jazzy begins to slow down. As the chair slows down, the front anti-tip wheels will automatically drop toward the ground. This will reduce the forward tip that is typically encountered with center-wheel drive chairs. www.pridemobility.com Jazzy 1101/1121...
- Page 17 Figure 10. Freewheel Mode (Drive Disengaged) Figure 11. Drive Mode (Drive Engaged) NOTE: If the lever is difficult to move in either direction, rock your Jazzy back and forth slightly. The lever should then move to the desired position. Jazzy 1101/1121 www.pridemobility.com...
-
Page 18: Seat Installation
7. Route the cable to ensure that the cable cannot be pinched in the seat hinge. 8. Secure the controller cable to the armrest receiver with one or more wire ties. Figure 13. Universal Mounting System (Power Seat) Figure 12. Universal Mounting System www.pridemobility.com Jazzy 1101/1121... -
Page 19: Comfort Adjustments
5. Reinstall the seat. Reclining Seat If your Jazzy is equipped with a reclining seat, you can adjust the seatback angle with the seatback release lever. The lever is located on the right side of the seat base. Jazzy 1101/1121 www.pridemobility.com... - Page 20 1. Remove the nuts and bolts from the footrest bracket. See figure 17. 2. Raise or lower the footrest to the desired height. 3. Reinstall the bolts and nuts into the footrest bracket and tighten. Figure 16. Seatback and Armrest Adjustments www.pridemobility.com Jazzy 1101/1121...
-
Page 21: Controller Position
7. Tighten the setscrew. 8. Use a wire tie to secure the controller cable to the armrest. Figure 19. Underside of Armrest 9. Plug in the controller connector and the charger inhibit connectors to the electronics tray. Jazzy 1101/1121 www.pridemobility.com... - Page 22 1. Remove the two screws from the side of each leg rest extension. See figure 22. 2. Slide the leg rest in or out to the desired length. Figure 22. Elevating Leg Rests (Swing-away is similar.) 3. Reinstall the two screws. www.pridemobility.com Jazzy 1101/1121...
- Page 23 6. Raise or lower the other anti-tip bracket so that it is at the same height. NOTE: Each drive tire must have 35 psi in order for the anti-tip wheels to be properly adjusted. ANTI-TIP WHEEL BRACKET ANTI-TIP WHEEL Figure 23. Anti-Tip Wheel Assembly Jazzy 1101/1121 www.pridemobility.com...
- Page 24 1 – 2 inches. Always check to be sure this system is operating properly before using your Jazzy. NOTE: Be sure you are on a flat level surface before activating the power elevating seat. Figure 24. Power Elevating Seat Actuator www.pridemobility.com Jazzy 1101/1121...
- Page 25 To use the swivel feature: 1. Locate the swivel lever under the seat. It is located on the opposite side of the controller. 2. Push down on the lever to rotate the seat in 90° increments. Figure 25. Toggle Switch Jazzy 1101/1121 www.pridemobility.com...
-
Page 26: Batteries And Charging
The green light indicates that the batteries are fully charged. If it is not a Pride off-board charger, then follow the instructions that came with it. 6. When the batteries are fully charged, unplug the off-board charger from the wall outlet and from the controller. www.pridemobility.com Jazzy 1101/1121... - Page 27 If you use your Jazzy infrequently (once a week or less), you should charge the batteries at least once per week for 12 to 14 hours. NOTE: Keep your batteries fully charged and avoid deeply discharging your batteries. Do not charge the batteries for more than 24 hours at a charging cycle. Jazzy 1101/1121 www.pridemobility.com...
- Page 28 A fully charged deep-cycle battery will provide reliable performance and extended battery life. Keep your Jazzy’s batteries fully charged whenever possible. Batteries that are regularly and deeply discharged, infrequently charged, or stored with- out a full charge may be permanently damaged, causing unreliable Jazzy operation and limited battery life. www.pridemobility.com Jazzy 1101/1121...
- Page 29 We suggest you contact the carrier’s ticket counter in advance to determine that carrier’s specific requirements. What about shipping? If you wish to use a freight company to ship your Jazzy to your final destination, repack your Jazzy in the original shipping container and ship the batteries in separate boxes. Jazzy 1101/1121 www.pridemobility.com...
- Page 30 WARNING! If your power chair begins to move in an unexpected manner, immediately release the joystick. Unless the joystick is damaged, this action should stop your power chair. Keypad The keypad is located in front of the joystick. It contains keys necessary to operate your power chair. See figure 27. www.pridemobility.com Jazzy 1101/1121...
-
Page 31: Vii. Operation
If your power chair was programmed with a drive profile, contact your authorized Pride Provider for more information. NOTE: We recommend that the first few times you operate your power chair, you use the lowest speed setting until you become familiar with your new power chair. Jazzy 1101/1121 www.pridemobility.com... - Page 32 VSI when the battery charger is on. The charger inhibit connector is coded with colored dots. The dots are positioned so that you align the flat side of the male connector with the flat side of the female connector before making the connection. www.pridemobility.com Jazzy 1101/1121...
- Page 33 The parking brakes have a bad connection. Check the parking brake and motor connections. Make sure the controller connections are secure. An excessive voltage has been applied to the controller. This is usually caused by a poor battery connection. Check the battery connections. Jazzy 1101/1121 www.pridemobility.com...
- Page 34 Unless the joystick is damaged, this action should stop your power chair. Keypad The keypad is located directly in front of the joystick. See figure 29. It contains keys that you will use to control your power chair. www.pridemobility.com Jazzy 1101/1121...
- Page 35 Ripple up and down of lights: The joystick was not in the neutral position when the controller was turned on. If you get “ripple up and down of lights”, turn off the controller, allow the joystick to return to the neutral position, then turn on the controller. Jazzy 1101/1121 www.pridemobility.com...
- Page 36 Typically, the power module is mounted to the power base. The power module provides a power interface for the joystick module. It routes the battery power to the motors and other powered accessories such as lights and power seats. www.pridemobility.com Jazzy 1101/1121...
- Page 37 Unplug charger. Check connections. Right Motor Wiring Fault Check right motor wiring. Right Motor Disconnected Check right motor wiring. Left Motor Wiring Fault Check left motor wiring. Left Motor Disconnected Check left motor wiring. Low Battery Voltage Check batteries/battery wiring. Jazzy 1101/1121 www.pridemobility.com...
- Page 38 If this has happened and the all the lights on the battery condition meter are flashing, you may have set flash code 1. www.pridemobility.com Jazzy 1101/1121...
- Page 39 3. Hold the magnetic key on or near the key symbol again to unlock the controller. When the key symbol stops flashing, you may turn on the power chair. NOTE: If you turn on the power chair while it is locked and don’t unlock it after one minute, the power chair will automatically turn off itself. Jazzy 1101/1121 www.pridemobility.com...
- Page 40 The socket may also be used for reprogramming the controller by using a Dynamics Programmer, should this be necessary. If you use an off-board charger, the charger current should not exceed 8 amps. Contact your authorized Pride Provider for more information. www.pridemobility.com Jazzy 1101/1121...
-
Page 41: Sleep Mode
The controller must be turned off and then on again even if the source of the fault is removed. If you cannot resolve the problem, contact your authorized Pride Provider. Jazzy 1101/1121 www.pridemobility.com... -
Page 42: Care And Maintenance
Use a rubber conditioner on the tire sidewalls to help preserve them. WARNING! Never use a rubber conditioner on the tread area of the tires; doing so may make the tires slippery and cause your Jazzy to skid. www.pridemobility.com Jazzy 1101/1121... - Page 43 5. The battery condition meter lights up from one light to ten lights, and then back to one light. It does this twice, then blinks once, and then it blinks continuously. 6. Turn off the controller. Now the joystick and controller are set up to function properly together. Jazzy 1101/1121 www.pridemobility.com...
-
Page 44: Cleaning Instructions
4. Use a socket wrench to remove the drive wheel nut from the center hub of the wheel. 5. Pull the wheel off the axle. 6. Remove the old tube from the pneumatic tire and replace it with a new tube. 7. Slide the wheel back onto the shaft. www.pridemobility.com Jazzy 1101/1121... - Page 45 To replace the batteries: 1. Turn the power off. 2. Make sure that the Jazzy is in drive mode. See III. “The Jazzy 1101/1121.” 3. Remove the ball detent pin that secures the footrest to the frame. See figure 17.
-
Page 46: Corrective Maintenance
Disconnect both batteries before load testing and follow the directions that come with the load tester. If either one of the batteries fails the load test, replace both of them. If your Jazzy still does not power up, contact your authorized Pride Provider. www.pridemobility.com Jazzy 1101/1121... - Page 47 Pride to be defective in material and/or workmanship: n Bearings and bushings n Plastic components, except body n Batteries: The batteries are covered by a separate six-month warranty, provided by the battery manufacturer. The batteries are not warranted by Pride. Jazzy 1101/1121 www.pridemobility.com...
-
Page 48: Ix. Warranty
Circumstances beyond the control of Pride n Labor, service calls, shipping, and other charges incurred for repair of the product, unless specifically authorized by Pride Mobility Products Corporation n Repairs and/or modifications made to any part without specific consent from Pride... - Page 49 N O T E S Jazzy 1101/1121 www.pridemobility.com...
- Page 50 N O T E S www.pridemobility.com Jazzy 1101/1121...
- Page 51 Quality Control- 1101/1121 Q u a l i t y C o n t r o l - M o d e l 1 400 Thank you for making the Pride Jazzy your choice in power chairs. We have thoroughly inspected your Jazzy. The following checkmarks indicate that it has been test driven and inspected.