Table of Contents
Advertisement
Quick Links
Advertisement
Table of Contents

Related Manuals for Fujitsu Siemens Computers LIFEBOOK S Series


Summary of Contents for Fujitsu Siemens Computers LIFEBOOK S Series
-
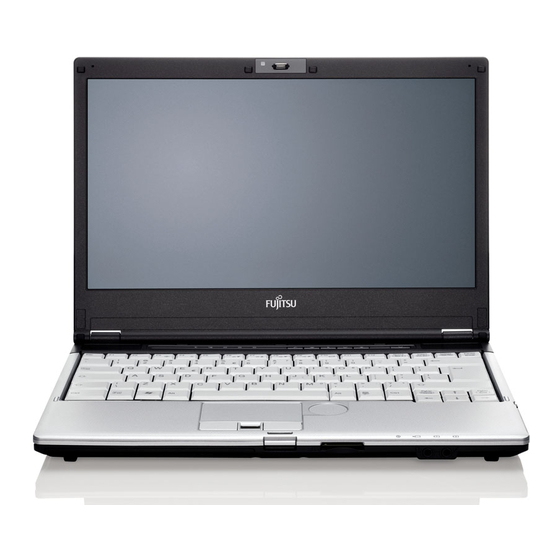
Page 1: Lifebook S Series
Professional Notebook English EasyGuide LIFEBOOK S Series... - Page 2 Are there ..any technical questions or problems? Please contact: • our Hotline/Help Desk (refer to the enclosed Help Desk List or go to: "www.fujitsu-siemens.com/support/") • your sales partner • your sales office Additional information is contained in the Help Desk list and the "Warranty" manual. The "Warranty"...
- Page 4 This manual was produced by Xerox Global Services Published by Fujitsu Siemens Computers GmbH AG 05/07 Edition 1 Order no.: A26391-K233-Z120-1-7619...
- Page 5 LIFEBOOK S Series EasyGuide Innovative technology... Important notes Ports and operating elements Removing and installing components during servicing Technical data Index...
- Page 6 All other trademarks referenced are trademarks or registered trademarks of their respective owners, whose protected rights are acknowledged. Copyright © Fujitsu Siemens Computers GmbH 2007 All rights reserved, including rights of translation, reproduction by printing, copying or similar methods, in part or in whole.
-
Page 7: Table Of Contents
Contents Contents Innovative technology..............Notational conventions . - Page 8 Contents A26391-K233-Z120-1-7619, edition 1...
-
Page 9: Innovative Technology
Innovative technology... Innovative technology... and ergonomic design make your LIFEBOOK S Series notebook a user-friendly and reliable notebook. Your notebook is available in several different versions. Most of the sections in this manual apply to all models – any differences are indicated separately. Some of the illustrations and features in this manual may differ from your model and are for guidance only. -
Page 10: Notational Conventions
• Cross-references to an external source, e.g. a web address: For more information, go to" www.fujitsu-siemens.com" • indicates names of CDs and DVDs as well as names and titles of other materials, e.g.: "CD/DVD Drivers & Utilities" or "Safety" manual refers to a key on the keyboard, e.g.:... -
Page 11: Important Notes
Important notes Important notes Take note of the safety hints provided in the "Safety" manual, in the "Professional Notebook" operating manual and in this manual. A26391-K233-Z120-1-7619, edition 1... -
Page 12: Ports And Operating Elements
Ports and operating elements Ports and operating elements Ports This chapter presents the individual hardware components of your notebook. You can obtain an overview of the ports and operating elements of the notebook. Please familiarise yourself with these components before you start to work with your notebook. Notebook open Camera(optional) Microphone... -
Page 13: Left Side
Ports and operating elements Left side LANport DCinputconnector Monitorport PCcardslot PCcardejectbutton Infraredinterface Memorycardslot 1 = LAN port 5 = PC card eject button 2 = DC input connector (DC IN) 6 = Infrared interface 3 = Monitor port 7 = Memory card slot 4 = PC card slot Right side Modulebay... -
Page 14: Rear
Ports and operating elements Rear KensingtonLock 1 = Kensington Lock Underside 1 = Battery release 5 = Cover for memory modules 2 = Battery 6 = Air filter 3 = Port for port replicator 7 = Release mechanism for module bay 4 = Battery release latch A26391-K233-Z120-1-7619, edition 1... -
Page 15: Switching On The Notebook
Ports and operating elements Switching on the notebook ► Press the release button (1) and open the LCD–display panel (2). ► Press the ON/OFF switch (1) to switch the notebook on. The power-on indicator is lit. Windows XP: You can configure the ON/OFF switch under Start – (Settings) – Control Panel – Performance and Maintenance –... -
Page 16: Switching Off The Notebook
Ports and operating elements Switching off the Notebook ► Close all applications and shut down your operating system (please see operating system manual). If the notebook cannot be shut down properly, press and hold the ON/OFF button for approximately four seconds. The notebook will switch off. Any unsaved data may be lost. ►... -
Page 17: Status Indicators
Ports and operating elements Status indicators Statusindicators The status indicators provide information about the status of the power supply, the drives and the keyboard functions. Power-on indicator Power indicator Battery charging indicator (first Drive indicator battery) First battery indicator Num Lock indicator Battery charging indicator Caps Lock indicator (second battery) - Page 18 Ports and operating elements The meanings of the symbols are as follows: Power-on indicator • Indicator continuously lit: the notebook is switched on. • Indicator flashes: the notebook is in suspend mode • The indicator is not lit: the notebook is switched off or in Save-to-Disk mode. Power indicator Powerindicator Indicator...
- Page 19 Ports and operating elements Battery charging indicator (second battery) • The indicator lights up yellow: the mains adapter is connected and the second battery is being charged. • The indicator flashes yellow: the mains adapter is connected and the second battery cannot be charged (the battery is too hot for charging).
-
Page 20: Key Combinations
Ports and operating elements Key combinations The following description of key combinations refers to functions when using Microsoft Windows. Some of the following key combinations may not function in other operating systems and with some device drivers. Key combinations are entered as follows: ►... - Page 21 Ports and operating elements Volume increase Fn+F9 Volume This key combination raises the volume of the integrated loudspeakers. Toggle output screen Fn+F10 Toggleoutputscreen If an external monitor is connected, the monitor on which the output is to be displayed can be selected with this key combination. You can opt to use: •...
-
Page 22: Easy Launch Keys
Ports and operating elements Easy Launch keys Easy Launchkeys Your notebook is equipped with four Easy Launch keys. Lock Workstation key This key allows you to lock your workstation. However, you can also configure this key as desired. Mobility Center key This button starts the Mobility Center. -
Page 23: Camera (Optional)
Ports and operating elements Camera (optional) Your device is fitted with a VGA camera (1), which can also be used as a webcam. Further information on the use of the camera can be found in the supplied software. A26391-K233-Z120-1-7619, edition 1... -
Page 24: Removing And Installing The Battery
Removing and installing the battery Notes Battery Only use batteries approved by Fujitsu Siemens Computers for your notebook. Never use force when inserting or removing a battery. Make sure that no foreign bodies get into the battery connections. Removing the battery ►... -
Page 25: Installing Battery
Ports and operating elements Installing battery ► Position the battery at the edge. ► Push the battery into the battery slot until you feel it lock into place (1). ► Slide the release button in direction of the arrow (2). A26391-K233-Z120-1-7619, edition 1... -
Page 26: Removing And Installing The Air Filter
Ports and operating elements Removing and installing the air filter Clean the existing air filter regularly. Dirty air filters will lead to an increased temperature inside the device. Operating temperatures which are too high can lead to loss of data and unreliable operation. Air filter removal ►... -
Page 27: Install Air Filter
Ports and operating elements Install air filter Make sure that the arrow (a) on the air filter points in the correct direction and that you reinsert the air filter with the same orientation that it had before the cleaning operation. ►... -
Page 28: Module
Ports and operating elements Module Modulebay Module The design of your notebook enables the flexible use of notebook batteries and drives. The following modules can be operated in the module bay of your notebook: • DVD/CD-R/RW drive • DVD Super Multi Drive •... -
Page 29: Installing A Module
Ports and operating elements Installing a module ► Place the module into the module bay so that the contacts enter first. ► Push the module into the module bay until you feel it locking into place. SIM card Follow the instructions supplied by the provider of the SIM card. Inserting the SIM card ►... -
Page 30: Removing A Sim Card
Ports and operating elements Removing a SIM card ► Switch the notebook off and pull the power plug out of the mains socket. ► Close the LCD screen so that it locks into place. ► Disconnect all cables connected to the notebook. ►... -
Page 31: Radio Components: Umts (Optional)/Wireless Lan/Bluetooth
Wireless LAN Bluetooth UMTS The installation of a wireless LAN, Bluetooth or UMTS module not approved by Fujitsu Siemens Computers GmbH voids the permits (CE!, FCC) issued for this device. The modules for radio components are switched off during shipping. -
Page 32: Removing And Installing Components During Servicing
Removing and installing components during servicing Removing and installing components during servicing Only qualified technicians should repair your notebook. Unauthorised opening or incorrect repair may greatly endanger the user (electric shock, fire risk) and will invalidate your warranty. Servicing Components You may remove and install the components described in this chapter yourself after consulting the Hotline/Help Desk. -
Page 33: Removing And Installing Memory Modules
Removing and installing components during servicing Removing and installing memory modules Mainmemory Memoryexpansion Memoryupgrade System expansion The notebook will not start without memory modules, as no fixed RAM is installed. Your notebook supports dual-channel DDR2 technology. The dual-channel DDR2 technology can only be used with two identical memory modules. -
Page 34: Removing Cover
Removing and installing components during servicing Removing cover ► Remove the screws (1). ► Pull the cover off the notebook (2). Removing memory modules ► Carefully push the two mounting clips outwards (1). Memory expansion Memory module The memory module snaps upwards (2). ►... -
Page 35: Installing A Memory Module
Removing and installing components during servicing Installing a memory module ► Insert the memory module with the contacts and the recess (a) facing the slot (1). Memory expansion Memory module ► Carefully push the memory module downwards until you feel it click into place (2). -
Page 36: Technical Data
Technical data Technical data Notebook Technicaldata The installation and removal of memory modules in one of the two slots should only be carried out by an authorised technician. General Processor Intel Dual Core 2 Main memory Maximum 4 GByte 2 slots - max. 4GB DD2 1 GByte or 2 GByte DDR2 SDRAM SO-DIMM module, 667 MHz Suitable modules... -
Page 37: Battery
The data sheet for this notebook contains further technical data. You can find the data sheet on your notebook or on the supplied "Drivers & Utilities" CD/DVD. The data sheet can also be downloaded from the Internet at "www.fujitsu-siemens.com". Battery Technicaldata Rated voltage 10.8 V... -
Page 38: Mains Adapter
Technical data Mains adapter Technicaldata Primary Rated voltage 100 V to 240 V (automatic) Rated frequency 50 Hz to 60 Hz (automatic) Secondary Rated voltage 19 V Max. rated current 4.22 A An additional mains adapter or power cable can be ordered at any time. A26391-K233-Z120-1-7619, edition 1... -
Page 39: Index
Index Index Alt+Tab 13 Kensington Lock 6 Keyboard 4 Back tab 13 Battery LAN port 5 important notes 16 LCD screen 4 removing 16 Loudspeaker 4 Bluetooth 23 Loudspeaker port 4 Switching off 23 Loudspeakers Switching on 23 disable 12 Board 24 enable 12 Camera (optional) 4... - Page 40 Index Touchpad and touchpad buttons 4 Screen brightness decrease 12 increase 12 UMTS 23 Screen lock 4 USB port 5 Servicing 24 Shift+Tab 13 Sleep mode activating 12 Volume Status indicators 4, 9 decrease 12 System expansion increase 13 memory expansion 25 Warm boot 13 Technical data Weight Saver...