Table of Contents
Advertisement
Available languages
Available languages
Commercial
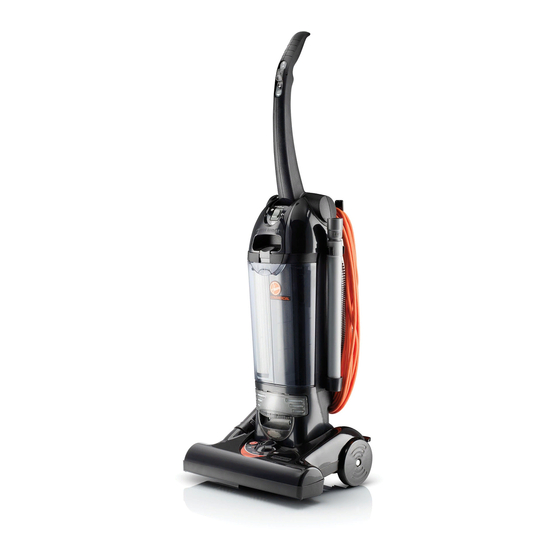
Upright Vacuum Cleaner
Read this manual
before operating
cleaner
Contents
Getting Started ......................................2
How to use ............................................3
Cleaner Description ..........................3
Cleaning Tools ..................................5
If You Have a Problem ........................11
Clearing Blockages ........................12
Important Safeguards ..........................1
Maintenance
Authorized Service ..........................11
Cleaning Filters ..............................7-8
Emptying Dirt Cup ............................7
Lubrication ......................................10
Replacing Agitator Brush Roll ......10
Replacing Belt ..............................9-10
Replacing Headlight..........................8
Thermal Protector ..............................11
© 2004 The Hoover Company
www.hoover.com
Please enter the COMPLETE model and serial numbers in the spaces provided.
The numbers are located on the bottom of your cleaner.
Model_________________________________________
Serial number_________________________________________
Hint: Attach your sales receipt to this owner's manual.
Verification of date of purchase may be required for warranty service
of your HOOVER product.
Important Safeguards
When using an electrical appliance, always follow
basic precautions, including the following:
READ ALL INSTRUCTIONS BEFORE USING THIS APPLIANCE
Warning:
• Do not use outdoors or on wet surfaces.
• Connect to a suitable extension cord. See "Extension cord instructions".
• Connect to a properly grounded outlet only. See "Grounding Instructions".
• Close supervision is necessary when any appliance is used by or near children.
Do not allow vacuum cleaner to be used as a toy or to run unattended at any time.
• Keep hair, loose clothing, fingers, feet and all parts of body away from openings,
rotating agitator and other moving parts. Do not operate cleaner in bare feet or
when wearing open toe shoes or sandals.
• Do not pick up anything that is burning or smoking, such as cigarettes, matches, or
hot ashes.
• Do not use to pick up flammable or combustible materials such as gasoline or fine
wood sandings or use in areas where they may be present.
• Avoid picking up hard, sharp objects with the cleaner. They may damage the
cleaner.
• Always turn off this appliance before connecting or disconnecting hose.
• Do not use without dirt cup or filters in place. Empty dirt cup and clean filters fre-
quently when picking up very fine materials such as powder.
• Use extra care when cleaning on stairs.
• Do not put any object into openings. Do not use with any opening blocked; keep
free of dust, lint, hair, or anything that may reduce air flow.
• Do not pull or carry by cord, use cord as a handle, close door on cord or pull cord
around sharp edges or corners. Do not run appliance over cord. Keep cord away
from heated surfaces.
• Always disconnect cord from electrical outlet before servicing the cleaner.
• Unplug cleaner when not in use. Turn off all controls before unplugging.
• Do not unplug by pulling on cord. To unplug, grasp the plug, not the cord. Never
handle plug or appliance with wet hands.
• Do not use with damaged cord or plug. If appliance is not working as it should, has
been dropped, damaged, left outdoors, or dropped into water, take it to a Hoover
Factory Service Center or Authorized Hoover Warranty Service Dealer (Depot).
• Use vacuum cleaner only for its intended use as described in the instructions.
Use only attachments recommended by The Hoover Company; others may cause
hazards.
Save these instructions!
User's Manual
ENGLISH
pp. 1-12
ESPAÑOL
pág. 13-19
FRANÇAIS
p. 20-26
To reduce the risk of fire, electric shock, or injury:
®
Advertisement
Chapters
Table of Contents

Related Manuals for Hoover EmPower C1660900


Summary of Contents for Hoover EmPower C1660900
-
Page 1: Important Safeguards
• Do not use with damaged cord or plug. If appliance is not working as it should, has been dropped, damaged, left outdoors, or dropped into water, take it to a Hoover Factory Service Center or Authorized Hoover Warranty Service Dealer (Depot). -
Page 2: Getting Started
1. Getting started Carton contents Operate cleaner only at voltage specified on data plate on bottom of cleaner. Warning: Electrical shock could occur if used outdoors or on wet surfaces. Grounding instructions This appliance must be grounded. If it should malfunction or breakdown, grounding provides a path of least resis- tance for electrical current to reduce the risk of electric shock. -
Page 3: Cleaner Description
Using fold down handle Raise upper handle (A) to upright posi- tion until it locks in place. 2. How to use Cleaner description Operate cleaner only at voltage specified on data plate on bottom of cleaner. Press upper handle release button (B) back to fold handle to storage position. -
Page 4: Handle Positions
Hose connection Hose must be attached to cleaner base for floor cleaning. To attach hose, use the end of the hose to push the cover (A) down and push hose onto opening. Twist hose end slightly to tighten the con- nector. -
Page 5: Cleaning Tools
Carpet height adjustment The cleaning of carpet and rugs takes place at the nozzle (D). When it is necessary to raise and lower the nozzle for various carpet pile heights, turn the carpet height adjustment knob (E) to the desired setting. For ease in turning the knob, place handle in upright position. -
Page 6: Attach Wand And Tools
2-13 Remove hose When using cleaning tools, cleaner handle should be in the upright posi- tion. Also, turn cleaner OFF before disconnecting and connecting the hose (J). Remove hose end from cleaner base. Extra reach hose (available at additional cost) The extra reach hose provides easier cleaning of stairs and hard to reach places. -
Page 7: Dirt Cup
3. Maintenance Familiarize yourself with these home maintenance tasks as proper use and care of your cleaner will ensure contin- ued cleaning effectiveness. Dirt cup The dirt cup assembly consists of the following parts: Lid (A) Dirt cup (B) Pre-filter (C) HEPA cartridge filter (D) Dirt inlet opening (E) While the cleaner is in operation, the pre-... -
Page 8: Headlight Replacement
Let filter air dry then reposition. Replace lens and screws. Should you want to replace this filter, ask for HOOVER part no. 38765024 (filter package part no. 40110004). Do not operate cleaner without any of the filters in place. -
Page 9: Belt Replacement
Remove agitator and used belt. Discard used belt. Belt replacement The belt on your Hoover cleaner causes the agitator to rotate and is important for the effective operation of the cleaner. The belt is located under the hood of the... -
Page 10: Lubrication
Therefore, do not add lubricant to motor bearings. The agitator brush roll is equipped with two ball bearings that should be lubri- cated periodically by a Hoover Factory Service Center or an Authorized Hoover Warranty Service Dealer (Depot). -
Page 11: Authorized Service
• calling 1-800-944-9200 for an automated referral of authorized service outlet locations (U.S. only). Do not send your cleaner to The Hoover Company in North Canton for service, this will only result in delay. If further assistance is needed, contact... -
Page 12: Clearing Blockages
Clear out hose. Check hose inlet 6. Turn cleaner OFF and unplug. 7. Remove hose end from cleaner. 8. Press hose inlet door open and clear any blockages. 8-04 C1660-900 HOOVER and are registered trademarks ® Printed in Mexico 56511-C31... -
Page 13: Table Of Contents
Número de serie ___________________________________ Consejo: Adjunte su recibo de compra a este manual del propietario. Para obtener el servicio de garantía de su producto HOOVER puede requerirse la verificación de la fecha de compra. Asegúrese de rellenar y enviar la tarjeta adjunta de registro del producto incluida con su aspiradora (vea la contraportada). -
Page 14: Para Comenzar
(solamente en EE.UU.) O llame al 1-330-499-9499 para hablar con un representante en el Centro de respuesta al cliente de Hoover. POR FAVOR NO DEVUELVA ESTE PRODUCTO A LA TIENDA. 1. Para comenzar... - Page 15 19. Accesorio para hendiduras: se guarda dentro del tubo de extensión 20. Ganchos para el cordón: cuelgue el cordón del gancho para guardarlo 21. Cordón 22. Interruptor de encender/apagar/HUSH™ (silencio): ubicado en la parte delantera del cuerpo de la aspiradora Haga funcionar la aspiradora solamente con el voltaje especificado en la placa de datos que se encuentra...
-
Page 16: Accesorios De Limpieza
Accesorios de limpieza Los accesorios le permiten limpiar superficies que están a mayor altura que el piso y llegar a zonas difíciles de limpiar. • La aspiradora está lista para usarse con los accesorios cuando el mango está en posición vertical. •... -
Page 17: Limpieza De Los Filtros
Vuelva a colocar la lente (L) y asegúrela con dos tornillos. Reemplazo de la correa La correa de su aspiradora Hoover hace posible que el agitador gire y es importante para el funcionamiento eficaz de la aspiradora. La correa está... -
Page 18: Servicio Autorizado
El rodillo de escobillas del agitador tiene dos cojinetes de bolas que deberán ser lubricados periódicamente en un Centro de servicio de fábrica de Hoover o por un Concesionario autorizado de servicio de garantía de Hoover (Depósito). Protector térmico Su aspiradora tiene incorporado un protector térmico para impedir el... -
Page 19: Si Tiene Un Problema
4. Si tiene un problema Si ocurre un problema menor, generalmente puede resolverse con bastante facilidad cuando se halla la causa, usando esta lista de verificación. Problema: La aspiradora no funciona Causa posible Solución posible • No está bien enchufada en la pared y/o el cordón de extensión •... -
Page 20: Consignes De Sécurité Importantes
été laissé à l’extérieur, il doit être apporté à un Centre de service en usine Hoover ou chez un détaillant de service garanti autorisé Hoover (dépôt). -
Page 21: Présentation De L'aspirateur
Si vous avez besoin d’aide : Visitez notre site Web au www.hoover.com. Cliquez sur le bouton « Service » pour connaître l’adresse du Centre de service le plus près de chez vous OU Composez le 1 (800) 944-9200 pour écouter un message vous indiquant... -
Page 22: Accessoires De Nettoyage
N’utiliser l’aspirateur qu’à la tension spécifiée sur la plaque signalétique située au bas de l’appareil. Connexion du tuyau Le tuyau doit être fixé à la base de l’aspirateur pour nettoyer les planchers. Pour fixer le tuyau, utiliser l’extrémité du tuyau pour enfoncer le couvercle (A) et l’entrer dans l’ouverture. -
Page 23: Entretien
placer sur des meubles, des franges de tapis ou des escaliers recouverts de tapis. 2-12 Choix de l’accessoire approprié F. La brosse à épousseter peut être utilisée pour les boiseries sculptées, dessus de tables, livres, lampes, luminaires, stores vénitiens, plinthes, volets et grilles à... -
Page 24: Nettoyage Des Filtres
Remettre la lentille (L), puis la fixer en place avec les deux vis. Remplacement de la courroie La courroie de votre aspirateur Hoover fait tourner l’agitateur et est essentielle au bon fonctionnement de l’appareil. S’assurer régulièrement du bon état de la courroie située sous le couvercle de... -
Page 25: Dépannage
Le rouleau-brosse agitateur est pourvu de deux roulements à bille qui doivent être lubrifiés périodiquement à un Centre de service en usine Hoover ou à un atelier de service Hoover garanti autorisé (dépôt). Protecteur thermique L’aspirateur est doté... -
Page 26: Déblocage Des Obstructions
Dégager l’obstruction • • Le filtre HEPA est bloqué • Nettoyer le filtre HEPA, tel que décrit dans la section « Assemblage du filtre » • Vide-poussière mal fixé • Placer le vide-poussière correctement (figure 3-4) • Couvercle du vide-poussière mal placé... - Page 28 HOOVER y son marcas registradas HOOVER et sont des marques déposées ® ® HOOVER and are registered trademarks ® 8-04 C1660-900 Printed in Mexico 56511-C31...