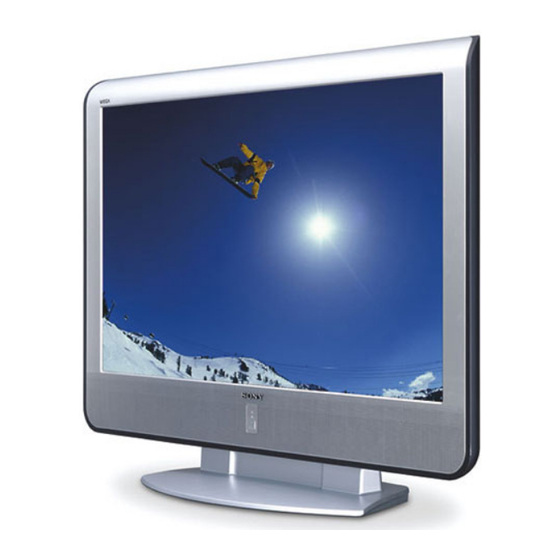
Sony KE-42M1 Service Manual
Flat panel color television
Hide thumbs
Also See for KE-42M1:
- Operating instructions manual (84 pages) ,
- Service manual (52 pages) ,
- Quick setup manual (2 pages)
Table of Contents
Advertisement
Quick Links
HISTORY INFORMATION FOR THE FOLLOWING MANUAL:
SERVICE MANUAL
MODEL NAME
KE-42M1
ORIGINAL MANUAL ISSUE DATE: 6/2004
REVISION DATE
6/2004
9-965-967-01
REMOTE COMMANDER
RM-Y1003
REVISION TYPE
SUBJECT
No revisions or updates are applicable at this time.
DESTINATION
US
FLAT PANEL COLOR TELEVISION
AT-2
CHASSIS
Advertisement
Chapters
Table of Contents

Related Manuals for Sony KE-42M1


Summary of Contents for Sony KE-42M1
-
Page 1: Service Manual
HISTORY INFORMATION FOR THE FOLLOWING MANUAL: AT-2 SERVICE MANUAL CHASSIS MODEL NAME REMOTE COMMANDER DESTINATION KE-42M1 RM-Y1003 ORIGINAL MANUAL ISSUE DATE: 6/2004 REVISION DATE REVISION TYPE SUBJECT 6/2004 No revisions or updates are applicable at this time. FLAT PANEL COLOR TELEVISION... - Page 2 Self Diagnosis Supported model AT-2 SERVICE MANUAL CHASSIS MODEL NAME REMOTE COMMANDER DESTINATION KE-42M1 RM-Y1003 DVD/ SAT/ POWER MUTING CABLE MODE PICTURE WIDE SLEEP DISPLAY FREEZE FAVORITES MENU TOP MENU TV VIDEO 1/2/3 VIDEO 4 VIDEO 5 RESET PIC OFF MTS/SAP...
-
Page 3: Table Of Contents
KE-42M1 TABLE OF CONTENTS SECTION TITLE PAGE SECTION TITLE PAGE P Board Schematic Diagram..........44 Specifi cations ................. 4 H1 Board Schematic Diagram..........45 Warnings and Cautions ..............5 H2 Board Schematic Diagram..........46 Safety Check-Out ................6 H3 Board Schematic Diagram..........47 Self-Diagnostic Function.............. -
Page 4: Specifi Cations
KE-42M1 SPECIFICATIONS Power Requirements 120V AC, 60Hz Power Consumption (W) 370W In Use (Max) In Standby Under 1 W HDMI IN Inputs/Outputs VIDEO HDMI IN Video Video: 1080i, 720p, 480p, 480i 1Vp-p, 75ohms unbalanced, sync negative S Video Audio: Twho channel linear PCM32, 44.1, and 48 kHz... -
Page 5: Warnings And Cautions
Ne les remplacer que par des composants Sony dont le numero de piece est indique dans le present manuel ou dans des supplements publies par Sony. Les reglages de circuit dont l’importance est critique pour la securite du fonctionnement sont identifi... -
Page 6: Safety Check-Out
KE-42M1 SAFETY CHECK-OUT Leakage Test After correcting the original service problem, perform the following The AC leakage from any exposed metal part to earth ground and from safety checks before releasing the set to the customer: all exposed metal parts to any exposed metal part having a return to chassis, must not exceed 0.5 mA (500 microamperes). -
Page 7: Self-Diagnostic Function
KE-42M1 Self Diagnosis SELF-DIAGNOSTIC FUNCTION Supported model The units in this manual contain a self-diagnostic function. If an error occurs, the STANDBY/TIMER LED will automatically begin to fl ash. The number of times the LED fl ashes translates to a probable source of the problem. A defi nition of the STANDBY/TIMER LED fl ash indicators is listed in the instruction manual for the user’s knowledge and reference. -
Page 8: Section 1: Disassembly
KE-42M1 SECTION 1: DISASSEMBLY 1-1. STAND AND REAR COVER REMOVAL Stand Six screws (+PSW 5x16) Twenty-two screws (+BVTP 4x16) Rear cover KE-42M1... -
Page 9: Main Shield Removal
KE-42M1 1-2. MAIN SHIELD REMOVAL Eighteen screws (+BVTP 4x16) Main Shield 1-3. P BOARD AND UPU BOARD REMOVAL Two screws (+PSW 3x8) Three Screws (+BVTP 3x12) P board Two screws (+PSW 3x12) U bracket assy Slide out to disconnect from Tuner... -
Page 10: Au Board And Bp Board Removal
KE-42M1 1-4. AU BOARD AND BP BOARD REMOVAL Four screws (+PSW 3x8) Five screws (+PSW 3x8) AU board BP board PWB bracket assy 1-5. F BOARD AND G2 BOARD REMOVAL Four screws Nine screws (+PSW 3x8) (+BVTP 3x12 ) F board... -
Page 11: G1 Board Removal
KE-42M1 1-6. G1 BOARD REMOVAL Six screws (+BVTP 3x12 ) G1 board Seven screws (+PSW 3x8) Bracket KE-42M1... -
Page 12: Lcd Panel Removal
KE-42M1 1-7. LCD PANEL REMOVAL Two screws (+PSW (M5)) Two screws Two screws (+BVTP 4x16 ) (+BVTP 4x16 ) Bracket Two screws (+PSW (M5)) Bracket Plasma Display panel 3 Two screws (+BVTP 4x16 ) Filter Bracket (H) Assy Filter Bracket (V) -
Page 13: H1 Board And H3 Board Removal
KE-42M1 1-8. H1 BOARD AND H3 BOARD REMOVAL H3 board Two screws Six screws (+BVTP 3x12) (+BVTP 3x12) Front terminal assy Two screws (+BVWHTP 3x12) H1 board 1-9. H2 BOARD REMOVAL Two screws (+BVTP 3x12) H2 board KE-42M1... -
Page 14: Section 2: Adjustments
KE-42M1 SECTION 2: ADJUSTMENTS 2-1. WHITE BALANCE ADJUSTMENTS 2-2. RESETTING DATA 1. Input a grayscale pattern. The TEST RESET resets all the customers adjustable data on the set to the factory defaults. 2. Enter into Service Mode. 3. Select ADJ ITEM from the Service Mode menu. -
Page 15: Panel Voltage Adjustment
KE-42M1 2-4. PANEL VOLTAGE ADJUSTMENT 2-5. REMOTE ADJUSTMENT BUTTONS AND INDICATORS Note: Panel Voltage Adjustment must be performed whenever the panel or the G2 Board is replaced. POWER MUTING DVD/ SAT/ POWER MUTING CABLE (Service Mode) (Enter into 1. Connect All White Video Signal to Video Input. -
Page 16: Section 3: Diagrams
KE-42M1 SECTION 3: DIAGRAMS 3-1. CIRCUIT BOARDS LOCATION G2 Board G1 Board BP Board AU Board F Board P Board H3 Board H1 Board UPU Board H2 Board KE-42M1... - Page 17 KE-42M1 3-2. PRINTED WIRING BOARDS AND The components identifi ed by shading and symbol are critical for safety. Replace SCHEMATIC DIAGRAMS INFORMATION only with part number specifi ed. All capacitors are in µF unless otherwise noted. pF : µµF 50WV or...
-
Page 18: Block Diagrams
KE-42M1 3-3.BLOCK DIAGRAMS BTF-WA421 SP-L NJM4558AV CV/SV_2 TU L/ R TU L/ R TU Video TU Video TC 4052BF HP OUT (HP Amp) Y/C, CV I N (Center/SP SW) Video IN NJW1169 (Audio Pro) L/R I N BA3823 TA8216H Audio IN... -
Page 19: Schematics And Supporting Information
KE-42M1 3-4. SCHEMATICS AND SUPPORTING INFORMATION G1 BOARD SCHEMATIC DIAGRAM [POWER SUPPLY] TO G2 BOARD COMPONENT SIDE CN6101 CN6002 :S-MICRO — D6004 D6208 MA111-TX RM11A L6001 L6201 L6202 :EE40CL010 RY6001 :EE40CL010 — C6009 4700p R6213 C6205 C6207 D6002 420V CN6001... -
Page 20: G2 Board Schematic Diagram
KE-42M1 G2 BOARD SCHEMATIC DIAGRAM CN6104 UNREG 10.5V :S-MICRO POWER TO F BOARD STBY 5V CN604 — TO PANEL R6805 D3V3 D3V3 CN6108 D6311 UNREG 33V 1/4W MA113 D3V3 :FPRD D6309 DINL20U UNREG27.5V PDP UNIT D6401 UNREG 27.5V R6303 C6802... - Page 21 KE-42M1 [POWER SUPPLY] COMPONENT SIDE KE-42M1...
- Page 22 KE-42M1 [POWER SUPPLY] CONDUCTOR SIDE KE-42M1...
-
Page 23: Upu Board Schematic Diagram (1 Of 2)
KE-42M1 UPU BOARD SCHEMATIC DIAGRAM (1 OF 2) AGND HP-DET HP-DET AGND AGND AGND HP-R HP-R — AGND AGND AGND HP-L HP-L R9315 R9326 R9358 TUNER_VID TUNER_VID R9317 1/10W 1/10W 1/10W D9312 1/10W MM3Z10VT1 CHIP CHIP CHIP CHIP R9372 C9315... -
Page 24: Upu Board Schematic Diagram (2 Of 2)
KE-42M1 UPU BOARD SCHEMATIC DIAGRAM (2 OF 2) — R9823 R9825 R9826 1/10W 1/10W 1/10W — CHIP CHIP CHIP C9816 C9815 C9817 0.47 0.47 1608 1608 YUV1 (from 1/2) C9818 C9820 C9819 2012 1608 — R9846 1/10W CHIP R9830 R9831... - Page 25 KE-42M1 [AV SW, TERMINAL BLOCK, COMPONENT SW] COMPONENT SIDE KE-42M1...
- Page 26 KE-42M1 [AV SW, TERMINAL BLOCK, COMPONENT SW] CONDUCTOR SIDE KE-42M1...
-
Page 27: Bp Board Schematic Diagram (1 Of 6)
KE-42M1 BP BOARD SCHEMATIC DIAGRAM (1 OF 6) BP BOARD WAVEFORMS 2.4V (16.384MHz) CN1001 100P R1002 D3.3V D3.3V — C1043 CHIP 0. 1 R1100 STBY3.3V C1042 R1102 R1003 CENT_SP_SW1 6.3V CHIP R1068 R1073 1005 CN1009 CHIP CENT_SP_SW2 CHIP 1/16W 1/16W... -
Page 28: Bp Board Schematic Diagram (2 Of 6)
KE-42M1 BP BOARD SCHEMATIC DIAGRAM (2 OF 6) BP BOARD WAVEFORMS 1.8V C2110 100p 1608 L2010 C2066 1000p R2076 RB2006 10uH CHI P 1608 C2067 FB2001 1000p — X2002 79. 9 9188313MHz 1608 C2068 CONT 6. 3 V R2055 R2077... -
Page 29: Bp Board Schematic Diagram (3 Of 6)
KE-42M1 BP BOARD SCHEMATIC DIAGRAM (3 OF 6) DAC2R-Y DAC2B-Y DAC2Y JL3007 JL3008 JL3009 — JL3006 R3008 R3009 R3011 1/16W 1/16W 1/16W RN-CP RN-CP RN-CP C3057 4700p C3031 1005 0. 1 R3013 FB3003 L3001 1005 1/16W FL3002 10uH RN-CP RB3004 R3010 3. -
Page 30: Bp Board Schematic Diagram (4 Of 6)
KE-42M1 BP BOARD SCHEMATIC DIAGRAM (4 OF 6) I C 4003 PQ070XZ01ZP 3. 3 VREG — P3. 3 V FB4009 I C 4001 JL4003 MX29LV800ATTC-70G-800 TO(1/6) FB4010 C4014 6. 3 V CN4001 PCPU_A16 PCPU_A17 R4071 R4073 P3. 3 V 2012 5. -
Page 31: Bp Board Schematic Diagram (5 Of 6)
KE-42M1 BP BOARD SCHEMATIC DIAGRAM (5 OF 6) C3711 0. 1 C3710 1608 6. 3 V FB3704 TO(1/6) I C 3702 D3. 3 V DS90C385MTDX D3. 3 V LVDSTRANSMI T TER LVDS_I N RB3711 TP3701 TP3702 TO(6/6) TXI N 4 —... -
Page 32: Bp Board Schematic Diagram (6 Of 6)
KE-42M1 BP BOARD SCHEMATIC DIAGRAM (6 OF 6) TO(5/6) LVDS_I N TO(5/6) ORBI T — Q3401 SI 2 301DS-T1 TP3401 3. 3 VSW C3425 C3426 C3420 C3421 C3422 C3423 C3424 C3427 C3428 0. 0 1 0. 0 1 3. 3 V 0. - Page 33 KE-42M1 [MAIN CPU, CHROMA DECODER, 3D COMB FILTER, DRC, SCAN CONVERTER, LVDS TRANSMITTER, LCD DRIVE ] COMPONENT SIDE KE-42M1...
- Page 34 KE-42M1 [MAIN CPU, CHROMA DECODER, 3D COMB FILTER, DRC, SCAN CONVERTER, LVDS TRANSMITTER, LCD DRIVE ] CONDUCTOR SIDE KE-42M1...
-
Page 35: F Board Schematic Diagram
KE-42M1 F BOARD SCHEMATIC DIAGRAM CN605 TAB(CONTACT) C609 CN606 275V TAB(CONTACT) ECQ-UL C611 — F601 To AC INLET T10A RY601 T601 275V FH601 250V ECQ-UL VDR602 ERZV14D621 FH602 TO G1 BOARD T602 CN6001 CN601 R621 CN603 2.2k Q602 T604 R617... - Page 36 KE-42M1 [LINE FILTER] COMPONENT SIDE KE-42M1...
- Page 37 KE-42M1 [LINE FILTER] CONDUCTOR SIDE KE-42M1...
-
Page 38: Au Board Schematic Diagram (1 Of 4)
KE-42M1 AU BOARD SCHEMATIC DIAGRAM (1 OF 4) — TU5500 TO ULU board CN9302 R5549 TO BP board D5501 TO ULU UDZS-TE17-10B R5554 CN1001 — CHIP 1/10W R5552 CHIP CN5504,5505 AGND R5515 R5530 1/10W 1/10W HP-DET-IN VGND R5517 HP-DET CHIP... -
Page 39: Au Board Schematic Diagram (2 Of 4)
KE-42M1 AU BOARD SCHEMATIC DIAGRAM (2 OF 4) — — — L7001 4.7uH (from 1/4) UNREG10.5V C7005 PS7001 C7006 C7022 R7010 6800p 1/10W RN-CP 1608 R7001 R7022 — G_GND 1/10W RN-CP CHIP R7011 R7014 2.4k 1/10W 1/10W RN-CP RN-CP R7006 2.7k... -
Page 40: Au Board Schematic Diagram (3 Of 4)
KE-42M1 AU BOARD SCHEMATIC DIAGRAM (3 OF 4) — R8711 R8708 R8706 CHIP 2.2k 4.7k 1/10W IC8700 1/10W CHIP S-80928CNMC-G8Y-T2 RN-CP UNREG10.5V R8713 D8701 C8702 1PS184-115 1/10W CHIP S_MUTE C8700 1000p R8707 3.9k — 1/10W AGND RN-CP Q8709 1608 Q8708... -
Page 41: Au Board Schematic Diagram (4 Of 4)
KE-42M1 AU BOARD SCHEMATIC DIAGRAM (4 OF 4) C8613 R8627 C8006 100p R8006 Q8601 R8621 R8625 1/10W 1/10W DTC314TK-T-146 2.2k 1/10W 1/10W CHIP — CHIP 2012 CHIP CHIP R8001 1608 4.7k 1/10W R8616 C8617 R8629 CHIP 1/10W CHIP CHIP R8004 4.7k... - Page 42 KE-42M1 [TUNER, POWER SUPPLY, POWER AMP, GRAPHIC EQUALIZER, AUDIO PROCESSOR] COMPONENT SIDE KE-42M1...
-
Page 43: Ke-42M1
KE-42M1 [TUNER, POWER SUPPLY, POWER AMP, GRAPHIC EQUALIZER, AUDIO PROCESSOR] CONDUCTOR SIDE KE-42M1... -
Page 44: P Board Schematic Diagram
KE-42M1 P BOARD SCHEMATIC DIAGRAM P BOARD WAVEFORMS C5001 :AL-CP IC5100 1.3 Vp-p (H) 1.3 Vp-p (H) 1.5 Vp-p (H) — PQ1CZ41H2ZPH 3.3V DD CON L5101 L5100 R5104 3.9k :2.5A :RN-CP D5003 UDZS-10B PROTECT C5100 C5102 C5105 C5000 1000 R5106 6.3V... -
Page 45: H1 Board Schematic Diagram
KE-42M1 H1 BOARD SCHEMATIC DIAGRAM [KEY] COMPONENT SIDE R9001 R9003 R9004 R9002 D9001 2. 7 k 1/10W 1/10W 1/10W 1/10W UDZS-TE17-9. 1 B CHIP CHIP CHIP CHIP CN9001 C9002 0. 1 JL9001 TOBP(1/6) KEY1 BOARD 1608 CN1006 JL9002 ² INPUT... -
Page 46: H2 Board Schematic Diagram
KE-42M1 H2 BOARD SCHEMATIC DIAGRAM [LED, SIRCS] STBY5V COMPONENT SIDE IC9101 R9108 GP1UM27SRK SIRCS 1/10W CHIP R9103 R9101 R9110 1/10W 1/10W R9109 1/10W CHIP CHIP C9103 CHIP 1/10W : C HIP C9102 ² 0. 4 7 R9107 470 1/10W CHIP... -
Page 47: H3 Board Schematic Diagram
KE-42M1 H3 BOARD SCHEMATIC DIAGRAM C9210 CN9201 3216 JL9201 R9217 1/10W R9226 R9201 CHIP JL9202 1/10W CHIP CHIP R9214 JL9203 C9209 1/10W 0.47 C9202 CHIP ² 100p R9205 R9209 R9216 R9207 R9215 1/10W 1/10W 1/10W 1608 1/10W CHIP CHIP 1/10W... - Page 48 KE-42M1 [INPUT TERMINAL] COMPONENT SIDE [INPUT TERMINAL] CONDUCTOR SIDE KE-42M1...
-
Page 49: Semiconductors
KE-42M1 3-5. SEMICONDUCTORS BA033F-E2 BA7078AF-E2 CXD2057M-T6 K4S161622D-TC80 TA78M09F(TE16L) TK11819MTL DTC114WUA-T106 DTZ10B RD10SB1 BR24C02F-WE2 NJM2188M-TE2 TEA6422DT MSM56V16160F-10TS-K DTC144EE MA111-TX BR24C16F-E2 SN74LV123APWR DTC144EKA MA113-(TX) CXA1211M SN74LV4053APWR DTC144EKA-T146 RD10SB1-T1 LM1881M TC7S08FU(TE85R) TOP VIEW DTC144EUA-T106 RD5.6SB-T1 M24C64-WMN6T(B) Z8622912SSC-00T 2SA1037AK-T146-QR UDZSTE-1710B TOP VIEW TOP VIEW... -
Page 50: Section 4: Exploded Views
KE-42M1 SECTION 4: EXPLODED VIEWS Components not identifi ed by a part number or The component parts of an assembly are indicated by the Items marked with an asterisk are not stocked since description are not stocked because they are seldom reference numbers in the far right column of the parts list they are seldom required for routine service. -
Page 51: Chassis
KE-42M1 NOTE: The components identifi ed by shading and mark are critical for safety. NOTE: Les composants identifi es per un trame et une marque sont critiques pour la securite. Ne les remplacer que par une piece portant le numero specifi e. -
Page 52: Front Panel
KE-42M1 NOTE: The components identifi ed by shading and mark are critical for safety. NOTE: Les composants identifi es per un trame et une marque sont critiques pour la securite. Ne les remplacer que par une piece portant le numero specifi e. -
Page 53: Bezel Assembly
KE-42M1 NOTE: The components identifi ed by shading and mark are critical for safety. NOTE: Les composants identifi es per un trame et une marque sont critiques pour la securite. Ne les remplacer que par une piece portant le numero specifi e. -
Page 54: Packing Material
KE-42M1 NOTE: The components identifi ed by shading and mark are critical for safety. NOTE: Les composants identifi es per un trame et une marque sont critiques pour la securite. Ne les remplacer que par une piece portant le numero specifi e. -
Page 55: Section 5: Electrical Parts List
KE-42M1 SECTION 5: ELECTRICAL PARTS LIST NOTE: The components identifi ed by shading RESISTORS The components in this manual identifi ed by the following mark are critical for safety. Replace only symbol: indicate parts that have been carefully factory- • All resistors are in ohms with part number specifi... -
Page 56: Metal Chip
KE-42M1 REF. NO. PART NO. DESCRIPTION VALUES REF. NO. PART NO. DESCRIPTION VALUES D6003 8-719-304-63 DIODE RM11C Q6212 8-729-905-35 TRANSISTOR 2SC4081-R D6004 8-719-404-50 DIODE MA111-TX Q6213 8-729-905-35 TRANSISTOR 2SC4081-R D6201 8-719-041-97 DIODE MA113-(TX) Q6214 8-729-026-53 TRANSISTOR 2SA1576A-T106-QR D6202 8-719-041-97 DIODE... -
Page 57: Metal Chip 120K 0.50% 1/10W
KE-42M1 NOTE: Les composants identifi es per un trame et une NOTE: The components identifi ed by shading marque sont critiques pour la securite. Ne les mark are critical for safety. Replace only remplacer que par une piece portant le numero specifi e. -
Page 58: Description
KE-42M1 REF. NO. PART NO. DESCRIPTION VALUES REF. NO. PART NO. DESCRIPTION VALUES C6506 1-162-970-11 CERAMIC CHIP 0.01µF C6507 1-107-909-11 ELECT 47µF C6508 1-107-906-11 ELECT 10µF A-1068-016-A G2 BOARD, COMPLETE C6509 1-100-831-91 CERAMIC CHIP 0.001µF 2% 4-382-854-11 SCREW (M3X10), P, SW (+) - Page 59 KE-42M1 REF. NO. PART NO. DESCRIPTION VALUES REF. NO. PART NO. DESCRIPTION VALUES C6814 1-137-190-91 FILM 0.22µF CN6102 1-564-507-11 PLUG, CONNECTOR C6815 1-165-726-31 ELECT 56µF CN6103 1-779-658-11 PIN, CONNECTOR (PC BOARD) C6816 1-101-821-00 CERAMIC 0.0022µF 500V CN6104 1-564-506-11 PLUG, CONNECTOR...
- Page 60 KE-42M1 NOTE: Les composants identifi es per un trame et une NOTE: The components identifi ed by shading marque sont critiques pour la securite. Ne les mark are critical for safety. Replace only remplacer que par une piece portant le numero specifi e.
-
Page 61: Metal Chip 1K 5% 1/10W
KE-42M1 NOTE: Les composants identifi es per un trame et une NOTE: The components identifi ed by shading marque sont critiques pour la securite. Ne les mark are critical for safety. Replace only remplacer que par une piece portant le numero specifi e. -
Page 62: Metal Chip 10K 5% 1/10W
KE-42M1 REF. NO. PART NO. DESCRIPTION VALUES REF. NO. PART NO. DESCRIPTION VALUES R6510 1-218-875-11 METAL CHIP 0.50% 1/10W R6803 1-216-825-11 METAL CHIP 2.2K 1/10W R6512 1-211-983-11 METAL CHIP 0.50% 1/10W R6804 1-217-157-00 METAL 0.33 R6513 1-249-393-11 CARBON 1/4W R6805... -
Page 63: Variable Resistor
KE-42M1 NOTE: Les composants identifi es per un trame et une NOTE: The components identifi ed by shading marque sont critiques pour la securite. Ne les mark are critical for safety. Replace only remplacer que par une piece portant le numero specifi e. - Page 64 KE-42M1 NOTE: Les composants identifi es per un trame et une NOTE: The components identifi ed by shading marque sont critiques pour la securite. Ne les mark are critical for safety. Replace only remplacer que par une piece portant le numero specifi e.
- Page 65 KE-42M1 NOTE: Les composants identifi es per un trame et une NOTE: The components identifi ed by shading marque sont critiques pour la securite. Ne les mark are critical for safety. Replace only remplacer que par une piece portant le numero specifi e.
- Page 66 KE-42M1 REF. NO. PART NO. DESCRIPTION VALUES REF. NO. PART NO. DESCRIPTION VALUES C9815 1-126-394-11 ELECT CHIP 10µF FERRITE BEAD C9816 1-125-891-11 CERAMIC CHIP 0.47µF FB9800 1-414-445-11 FERRITE 0µH C9817 1-125-891-11 CERAMIC CHIP 0.47µF FB9801 1-414-445-11 FERRITE 0µH C9818 1-109-982-11 CERAMIC CHIP 1µF...
- Page 67 KE-42M1 REF. NO. PART NO. DESCRIPTION VALUES REF. NO. PART NO. DESCRIPTION VALUES RESISTOR R9350 1-216-813-11 METAL CHIP 1/10W R9351 1-216-813-11 METAL CHIP 1/10W R9300 1-218-867-11 METAL CHIP 6.8K 0.50% 1/10W R9352 1-216-834-11 METAL CHIP 1/10W R9301 1-218-867-11 METAL CHIP 6.8K...
- Page 68 KE-42M1 REF. NO. PART NO. DESCRIPTION VALUES REF. NO. PART NO. DESCRIPTION VALUES R9600 1-216-809-11 METAL CHIP 1/10W R9827 1-216-805-11 METAL CHIP 1/10W R9601 1-216-841-11 METAL CHIP 1/10W R9829 1-216-864-11 SHORT CHIP R9602 1-216-809-11 METAL CHIP 1/10W R9830 1-216-805-11 METAL CHIP...
- Page 69 KE-42M1 UPU BP REF. NO. PART NO. DESCRIPTION VALUES REF. NO. PART NO. DESCRIPTION VALUES VD9305 1-801-925-21 VARISTOR, CHIP (1608) C1025 1-125-777-11 CERAMIC CHIP 0.1µF VD9306 1-801-925-21 VARISTOR, CHIP (1608) C1027 1-125-837-91 CERAMIC CHIP 1µF 6.3V VD9307 1-801-925-21 VARISTOR, CHIP...
- Page 70 KE-42M1 REF. NO. PART NO. DESCRIPTION VALUES REF. NO. PART NO. DESCRIPTION VALUES C2035 1-164-943-11 CERAMIC CHIP 0.01µF C2079 1-164-943-11 CERAMIC CHIP 0.01µF C2036 1-164-943-11 CERAMIC CHIP 0.01µF C2080 1-164-943-11 CERAMIC CHIP 0.01µF C2037 1-126-390-11 ELECT CHIP 22µF 6.3V C2081...
- Page 71 KE-42M1 REF. NO. PART NO. DESCRIPTION VALUES REF. NO. PART NO. DESCRIPTION VALUES C3016 1-107-820-11 CERAMIC CHIP 0.1µF C3404 1-126-246-11 ELECT CHIP 220µF C3017 1-107-820-11 CERAMIC CHIP 0.1µF C3405 1-162-970-11 CERAMIC CHIP 0.01µF C3018 1-107-820-11 CERAMIC CHIP 0.1µF C3406 1-162-970-11 CERAMIC CHIP 0.01µF...
- Page 72 KE-42M1 REF. NO. PART NO. DESCRIPTION VALUES REF. NO. PART NO. DESCRIPTION VALUES C3703 1-107-826-11 CERAMIC CHIP 0.1µF C4036 1-125-777-11 CERAMIC CHIP 0.1µF C3704 1-128-993-21 ELECT CHIP 22µF C4037 1-125-777-11 CERAMIC CHIP 0.1µF C3705 1-107-826-11 CERAMIC CHIP 0.1µF C4038 1-125-777-11 CERAMIC CHIP 0.1µF...
- Page 73 KE-42M1 REF. NO. PART NO. DESCRIPTION VALUES REF. NO. PART NO. DESCRIPTION VALUES FB3401 1-414-864-11 FERRITE 0µH IC2001 6-705-529-01 LMH6658MMX/J5000172 FB3405 1-414-864-11 FERRITE 0µH IC2002 6-705-529-01 LMH6658MMX/J5000172 FB3701 1-414-445-11 FERRITE 0µH IC2003 8-752-937-39 CXP964032-003R FB3702 1-414-445-11 FERRITE 0µH IC2004 8-759-712-65...
- Page 74 KE-42M1 REF. NO. PART NO. DESCRIPTION VALUES REF. NO. PART NO. DESCRIPTION VALUES L3702 1-456-583-11 INDUCTOR 0µH R1009 1-216-821-11 METAL CHIP 1/10W L3703 1-456-583-11 INDUCTOR 0µH R1010 1-218-990-11 SHORT CHIP L3704 1-456-583-11 INDUCTOR 0µH R1011 1-218-961-11 RES-CHIP 4.7K 1/16W L3705...
- Page 75 KE-42M1 REF. NO. PART NO. DESCRIPTION VALUES REF. NO. PART NO. DESCRIPTION VALUES R1057 1-218-945-11 RES-CHIP 1/16W R1109 1-218-990-11 SHORT CHIP R1059 1-218-990-11 SHORT CHIP R1111 1-218-957-11 RES-CHIP 2.2K 1/16W R1060 1-218-990-11 SHORT CHIP R1114 1-218-990-11 SHORT CHIP R1061 1-218-973-11...
- Page 76 KE-42M1 REF. NO. PART NO. DESCRIPTION VALUES REF. NO. PART NO. DESCRIPTION VALUES R2037 1-218-708-11 METAL CHIP 4.7K 0.50% 1/10W R2092 1-216-864-11 SHORT CHIP R2038 1-216-847-11 METAL CHIP 150K 1/10W R2093 1-218-990-11 SHORT CHIP R2041 1-218-668-11 METAL CHIP 0.50% 1/10W...
- Page 77 KE-42M1 REF. NO. PART NO. DESCRIPTION VALUES REF. NO. PART NO. DESCRIPTION VALUES R3024 1-218-941-81 RES-CHIP 1/16W R3703 1-216-864-11 SHORT CHIP R3705 1-216-864-11 SHORT CHIP R3025 1-218-941-81 RES-CHIP 1/16W R3042 1-218-933-11 RES-CHIP 1/16W R3707 1-216-829-11 METAL CHIP 4.7K 1/10W R3043...
- Page 78 KE-42M1 REF. NO. PART NO. DESCRIPTION VALUES REF. NO. PART NO. DESCRIPTION VALUES R4042 1-218-941-81 RES-CHIP 1/16W R4100 1-216-801-11 METAL CHIP 1/10W R4043 1-218-941-81 RES-CHIP 1/16W R4101 1-216-801-11 METAL CHIP 1/10W R4047 1-216-827-11 METAL CHIP 3.3K 1/10W R4102 1-216-864-11 SHORT CHIP...
- Page 79 KE-42M1 BP AU REF. NO. PART NO. DESCRIPTION VALUES REF. NO. PART NO. DESCRIPTION VALUES RB2012 1-234-372-21 RES, NETWORK 100X4 (1005) RB4017 1-234-371-21 RES, NETWORK 47X4 (1005) RB2013 1-234-372-21 RES, NETWORK 100X4 (1005) RB4018 1-234-371-21 RES, NETWORK 47X4 (1005) RB2014...
- Page 80 KE-42M1 REF. NO. PART NO. DESCRIPTION VALUES REF. NO. PART NO. DESCRIPTION VALUES C5510 1-162-964-11 CERAMIC CHIP 0.001µF 10% C6021 1-126-394-11 ELECT CHIP 10µF C6022 1-128-357-11 ELECT CHIP 10µF C5511 1-162-927-11 CERAMIC CHIP 100pF C5512 1-162-968-11 CERAMIC CHIP 0.0047µF 10%...
- Page 81 KE-42M1 REF. NO. PART NO. DESCRIPTION VALUES REF. NO. PART NO. DESCRIPTION VALUES C6141 1-125-779-21 CERAMIC CHIP 0.022µF 5% C6331 1-127-715-91 CERAMIC CHIP 0.22µF C6142 1-107-826-11 CERAMIC CHIP 0.1µF C6332 1-107-826-11 CERAMIC CHIP 0.1µF C6143 1-107-826-11 CERAMIC CHIP 0.1µF C6333...
- Page 82 KE-42M1 REF. NO. PART NO. DESCRIPTION VALUES REF. NO. PART NO. DESCRIPTION VALUES C6611 1-128-357-11 ELECT CHIP 10µF C7020 1-162-967-11 CERAMIC CHIP 0.0033µF 10% C6612 1-126-394-11 ELECT CHIP 10µF C7022 1-162-969-11 CERAMIC CHIP 0.0068µF 10% C6613 1-125-889-91 CERAMIC CHIP 2.2µF...
- Page 83 KE-42M1 REF. NO. PART NO. DESCRIPTION VALUES REF. NO. PART NO. DESCRIPTION VALUES D7001 6-500-579-01 DIODE PTZ-TE25-6.8B L5503 1-412-030-11 INDUCTOR 22µH D7002 6-500-294-01 DIODE PTZ-TE25-3.9B L6000 1-412-058-11 INDUCTOR 10µH D7003 6-500-295-01 DIODE PTZ-TE25-5.6B L6500 1-406-977-21 INDUCTOR 100µH L7001 1-406-657-11 INDUCTOR 4.7µH...
- Page 84 KE-42M1 REF. NO. PART NO. DESCRIPTION VALUES REF. NO. PART NO. DESCRIPTION VALUES Q6102 6-550-076-01 TRANSISTOR MUN5213T1 R5526 1-216-821-11 METAL CHIP 1/10W Q6301 8-729-044-58 TRANSISTOR SI2304DS-T1 R5527 1-216-839-11 METAL CHIP 1/10W Q6501 6-550-586-01 TRANSISTOR 2PA1576R-115 R5528 1-216-833-11 METAL CHIP 1/10W...
- Page 85 KE-42M1 REF. NO. PART NO. DESCRIPTION VALUES REF. NO. PART NO. DESCRIPTION VALUES R5588 1-216-295-91 SHORT CHIP R6109 1-216-843-11 METAL CHIP 1/10W R5590 1-216-295-91 SHORT CHIP R6110 1-216-836-11 METAL CHIP 1/10W R5591 1-216-295-91 SHORT CHIP R6111 1-216-830-11 METAL CHIP 5.6K...
- Page 86 KE-42M1 REF. NO. PART NO. DESCRIPTION VALUES REF. NO. PART NO. DESCRIPTION VALUES R6329 1-216-864-11 SHORT CHIP R6602 1-216-841-11 METAL CHIP 1/10W R6330 1-216-838-11 METAL CHIP 1/10W R6603 1-216-841-11 METAL CHIP 1/10W R6331 1-216-838-11 METAL CHIP 1/10W R6604 1-216-841-11 METAL CHIP...
- Page 87 KE-42M1 REF. NO. PART NO. DESCRIPTION VALUES REF. NO. PART NO. DESCRIPTION VALUES R6646 1-216-821-11 METAL CHIP 1/10W R7005 1-216-821-11 METAL CHIP 1/10W R7006 1-218-857-11 METAL CHIP 2.7K 0.50% 1/10W R6647 1-216-845-11 METAL CHIP 100K 1/10W R6648 1-216-813-11 METAL CHIP...
- Page 88 KE-42M1 AU P REF. NO. PART NO. DESCRIPTION VALUES REF. NO. PART NO. DESCRIPTION VALUES VARISTOR C5102 1-137-897-21 ELECT CHIP 150µF C5103 1-107-826-11 CERAMIC CHIP 0.1µF VD5500 1-803-974-21 VARISTOR, CHIP (1608) C5104 1-124-779-00 ELECT CHIP 10µF VD5501 1-803-974-21 VARISTOR, CHIP...
- Page 89 KE-42M1 REF. NO. PART NO. DESCRIPTION VALUES REF. NO. PART NO. DESCRIPTION VALUES C5303 1-162-916-11 CERAMIC CHIP 12pF IC5203 6-703-042-01 CD4052BNSR C5304 1-162-916-11 CERAMIC CHIP 12pF IC5301 6-804-248-01 HD64F3694FXV-DA4 CONNECTOR JACK CN5000 1-818-400-11 HDMI CONNECTOR J5000 1-794-623-21 JACK, PIN 2P...
- Page 90 KE-42M1 REF. NO. PART NO. DESCRIPTION VALUES REF. NO. PART NO. DESCRIPTION VALUES R5019 1-216-816-11 METAL CHIP 1/10W R5242 1-218-665-11 METAL CHIP 0.50% 1/10W R5020 1-216-829-11 METAL CHIP 4.7K 1/10W R5243 1-218-665-11 METAL CHIP 0.50% 1/10W R5021 1-218-854-11 METAL CHIP 0.50% 1/10W...
- Page 91 KE-42M1 REF. NO. PART NO. DESCRIPTION VALUES REF. NO. PART NO. DESCRIPTION VALUES RESISTOR BRIDGE D9106 8-719-421-59 DIODE MA3130WA-TX D9107 6-500-530-01 DIODE SML-311BBTT86 RB5000 1-233-574-11 RES, CHIP NETWORK 10 (3216) D9108 8-719-421-59 DIODE MA3130WA-TX RB5001 1-233-574-11 RES, CHIP NETWORK 10 (3216)
- Page 92 KE-42M1 H1 H3 REF. NO. PART NO. DESCRIPTION VALUES REF. NO. PART NO. DESCRIPTION VALUES RESISTOR DIODE R9001 1-216-826-11 METAL CHIP 2.7K 1/10W D9201 8-719-069-60 DIODE UDZSTE-179.1B R9002 1-218-457-11 METAL CHIP 1/10W D9204 8-719-069-60 DIODE UDZSTE-179.1B R9003 1-216-817-11 METAL CHIP...
- Page 93 SCREW (+B), FIXED 3-704-359-01 SCREW (M3X10), SW (+) P 7-682-948-09 SCREW +PSW 3X8 7-682-968-01 SCREW +PSW 4X30 REMOTE COMMANDER 1-478-772-12 REMOTE COMMANDER (RM-Y1003) Sony Corporation English Sony Technology Center 2004FJ74WEB-1 Technical Services Printed in USA 9-965-967-01 Service Promotion Department © 2004.6 KE-42M1...
- Page 94 In an effort to reduce the size of this pdf fi le the tiled schematics are not attached to this Service Manual. To receive a complete set of the tiled schematics for this manual please submit a request to Nita Wardlaw at nita.wardlaw@am.sony.com.
- Page 95 2-178-457-11 (1) Flat Panel Color TV Operating Instructions KE-42M1 © 2004 Sony Corporation...
-
Page 96: Contacting Sony
Serial No. Contacting Sony If, after reading the following instructions, you have additional questions related to the use of your Sony TV, please call one of the following numbers. Customers in the continental United States contact the Direct Response Center at:... -
Page 97: Important Notice
WARNING NOTIFICATION Installing s To prevent internal heat buildup, do not To reduce the risk of fire or shock hazard, do This equipment has been tested and found to not expose the TV to rain or moisture. comply with the limits for a Class B digital block the ventilation openings. -
Page 98: Important Safeguards
Sufficient expertise is required for installing the specified product. Be WARNING sure to subcontract the installation to Sony dealers or contractors and pay To guard against injury, the following basic safety precautions should be adequate attention to safety during the installation. -
Page 99: Ac Power Cord
Use only a cart or stand recommended by Sony for s Do not convert or damage the AC power cord or display interface the specific model of TV. No part of the TV unit cable. -
Page 100: Optional Accessories
s Do not install the unit turned backward or Installation and moving sideways. s Do not install the unit turned over or upside Carry the TV in the specified manner down. s Never cover the slots and openings with a Carrying the TV requires at least two people. - Page 101 Outdoor use Antennas Do not install this unit outdoors. If the unit is exposed to rain, it may result in fire or electric Outdoor Antenna Grounding shock. If the unit is exposed to direct sunlight, the unit may heat up and it may damage the If an outdoor antenna is installed, follow the precautions below.
-
Page 102: Important Safety Instructions
Important Safety Instructions Service 1) Read these instructions. Damage Requiring Service 2) Keep these instructions. Unplug the unit from the wall outlet and refer servicing to qualified 3) Heed all warnings. service personnel under the following conditions: 4) Follow all instructions. s When the power cord or plug is 5) Do not use this apparatus near water. - Page 103 Table of Contents Connecting a Digital Satellite Receiver Installing the TV with HDMI Connector......31 Unpacking ..........11 Connecting a DVD Player or Digital Satellite Receiver via AV Receiver with Overview of the Remote Control .... 11 CENTER SPEAKER IN terminals ..33 Remote Control Descriptions ...
- Page 104 Using Advanced Features Adjusting the Picture Position Vertically ..........57 Adjusting the Picture Position Horizontally ......... 58 Adjusting the Picture Quality ....59 Adjusting the Sound Quality ....61 Selecting Stereo or Bilingual Programs ..........63 Selecting stereo or bilingual programs using the menu ....
-
Page 105: Installing The Tv
Installing the TV Overview of the Remote Control Insert two size AA batteries (supplied) by matching the e and E on the batteries to the diagram inside the remote control’s battery compartment. Unpacking When you unpack this unit, make sure it includes the following: Remote control (1) and AC power cord (1) -
Page 106: Remote Control Descriptions
Button Description Remote Control Descriptions 1 DVD/VCR, SAT/ Press to turn on and off the equipment CABLE Power you have programmed into the remote control. For details, see “Programming Buttons the Remote Control” on page 14. DVD/VCR: Press to turn on and off the DVD/ SAT/ POWER... - Page 107 Button Description Button Description Press to select the video equipment Press to select the sound effect modes: 0 Input Select connected to the TV’s video inputs. TruSurround, Off. The sound effect Buttons modes can be also accessed in the TV: Press to select the TV to watch the Audio menu.
-
Page 108: Programming The Remote Control
• If you enter a new code number, the code number you previously entered at that setting is erased. • In some rare cases, you may not be able to operate your equipment with the Sony remote control. In this case, use the equipment’s own remote control unit. -
Page 109: Cable Box
327, 328 Fisher 330, 335 * If an Aiwa VCR does not work even Signature 2000 (M.Ward) 338, 327 Funai though you enter the code for Aiwa, SV 2000 General Electronics 329, 304, 309 enter the code for Sony instead. -
Page 110: Operating A Cable Box
Operating a Cable Box Using your Remote Controls with Other Equipment Press Turn on/off SAT/CABLE (POWER) POWER buttons Control a cable box SAT/CABLE (FUNCTION) (DVD/VCR, Select a channel 0 - 9 buttons, ENT (enter) SAT/CABLE) Change channels CH +/– DVD/ SAT/ POWER MUTING... -
Page 111: Operating A Dvd Player Or Dvd Changer
Display the menu (Setup) MENU Display the top menu TOP MENU V, v, B, b, Operate the DVD menu Operating a 5.1 DVD AV System (Sony DAV) Press Turn on/off DVD/VCR (POWER) Select other equipment connected to the DAV Skip a disk... -
Page 112: Overview Of The Tv Controls And Connectors
Overview of the TV Controls and Connectors Front Panel Controls and Connectors To open the drop-down panel To open the drop-down panel of your TV, push up the panel door just under the v mark until you hear a click, then the panel door will open. -
Page 113: Rear Panel Connectors
Rear Panel Connectors AC IN AUDIO IN VHF/UHF VIDEO IN HD/DVD IN S VIDEO CENTER SPEAKER 180W (6 ) MAX VIDEO AUDIO OUT L(MONO) L(MONO) (VAR/FIX) AUDIO AUDIO AUDIO Jack Description 1 HDMI 5 IN HDMI (High-Definition Multimedia Interface) provides an uncompressed, all-digital audio/video HDMI/L-AUDIO-R interface between this TV and any HDMI-equipped audio/video component, such as a digital satellite receiver, digital cable box, DVD player, and AV receiver. -
Page 114: Preventing The Tv From Falling Down
Preventing the TV from Falling Down After connections with antennas and other equipment are completed, be sure to attach the supplied clamp screws to the rear of the TV, and pass a sturdy cord or chain and attach it to a wall or pillar. Remove one of the two screws at the rear of the TV, then attach the supplied clamp screw to the screw hole. -
Page 115: Connecting And Setting The Tv
Connecting and Connecting directly to cable or an antenna Setting the TV VHF only or VHF/UHF or cable 75-ohm coaxial Rear of TV cable (supplied) VHF/UHF jack Basic Connections Note It is strongly recommended to connect the antenna using a 75- (Connecting Cable or an ohm coaxial cable to get optimum picture quality. -
Page 116: Connecting Optional Equipment
Connecting Optional Equipment Use the instructions in this section to connect the following optional equipment: If you are connecting See page VCR and Cable TV 23 page Satellite Receiver 24 page Satellite Receiver and VCR 25 page AV Receiver 26 page DVD Player with Component Video Connectors 27 page DVD Player with S Video and Audio Connectors... -
Page 117: Connecting A Vcr And Cable Tv
Connecting a VCR and Cable TV Use this hookup if: • You subscribe to a cable TV system that does not require a cable box. Disconnect all power sources before making any connections. Connect the CATV cable to the VCR’s IN jack. Using the supplied 75-ohm coaxial cable, connect the VCR’s OUT jack to the TV’s VHF/UHF jack. -
Page 118: Connecting A Satellite Receiver
Connecting a Satellite Receiver Disconnect all power sources before making any connections. Connect the satellite antenna cable to the satellite receiver’s SATELLITE IN jack. Using A/V and S VIDEO cables, connect the satellite receiver’s AUDIO and S VIDEO OUT jacks to the TV’s AUDIO and S VIDEO IN jacks (VIDEO 1 IN or VIDEO 3 IN). -
Page 119: Connecting A Satellite Receiver And A Vcr
Connecting a Satellite Receiver and a VCR Disconnect all power sources before making any connections. Connect the satellite antenna cable to the satellite receiver’s SATELLITE IN jack. Connect the CATV cable to the VCR’s VHF/UHF IN jack. Using the supplied 75-ohm coaxial cable, connect the VCR’s OUT jack to the TV’s VHF/UHF jack. -
Page 120: Connecting An Av Receiver
Connecting an AV Receiver Disconnect all power sources before making any connections. Using an AUDIO cable, connect the TV’s AUDIO OUT jacks to the AV receiver’s AUDIO IN jacks. Rear of TV VIDEO IN HD/DVD IN S VIDEO CENTER SPEAKER AUDIO-L (white) 180W (6 ) MAX VIDEO... -
Page 121: Connecting A Dvd Player With Component Video Connectors
Connecting a DVD Player with Component Video Connectors Use this hookup if: • Your DVD player has component (Y, P ) jacks. Tips • The Y, P and P jacks on your DVD player are sometimes labeled as Y, C and C , or Y, B-Y and R-Y. -
Page 122: Connecting A Dvd Player With S Video And Audio Connectors
Connecting a DVD Player with S Video and Audio Connectors Use this hookup if: • Your DVD player does not have component (Y, P ) jacks. Tips • If your DVD player has component video output connectors, for best picture quality, use the connection described on page 27. -
Page 123: Connecting A Digital Cable Box
Connecting a Digital Cable Box Disconnect all power sources before making any connections. Using a component video cable, connect the Digital Cable Box’s Y, P and P jacks to the Y, P and P jacks on the TV. Use the HD/DVD 4 IN connections. -
Page 124: Connecting A Digital Satellite Receiver
Connecting a Digital Satellite Receiver Disconnect all power sources before making any connections. Using a component video cable, connect the Digital Satellite Receiver’s Y, P and P jacks to the Y, P and P jacks on the TV. Use the HD/DVD 4 IN connections. -
Page 125: Connecting A Digital Satellite Receiver With Hdmi Connector
Connecting a Digital Satellite Receiver with HDMI Connector Use this hookup if: • Your Digital Satellite Receiver has a High-Definition Multimedia Interface (HDMI). Disconnect all power sources before making any connections. Using an HDMI cable (not supplied), connect the Digital Satellite Receiver’s HDMI OUT connector to the TV’s HDMI IN connector. - Page 126 When connecting to the Digital Satellite Receiver’s DVI-HDTV connector If the Digital Satellite Receiver does not have an HDMI connector, you can connect the TV’s HDMI IN connector to the Digital Satellite Receiver’s DVI-HDTV OUT connector using the HDMI cable (not supplied). Using a HDMI cable (not supplied), connect the Digital Satellite Receiver’s DVI-HDTV OUT connector to the TV’s HDMI IN connector.
-
Page 127: Connecting A Dvd Player Or Digital Satellite Receiver Via Av Receiver With Center Speaker In Terminals
Connecting a DVD Player or Digital Satellite Receiver via AV Receiver with CENTER SPEAKER IN terminals Use this hookup if: • You have an audio equipment that has multi-channel speaker outputs, such as an AV Receiver with a Dolby Digital (AC-3) dcoder. Disconnect all power sources before making any connections. -
Page 128: Connecting A Camcorder
Connecting a Camcorder Disconnect all power sources before making any connections. Using an A/V cable, connect the Camcorder’s A/V OUT jack to the TV’s AUDIO IN jacks and VIDEO IN jack (VIDEO 2 IN). Tips • You can also use the VIDEO 1 IN and VIDEO 3 IN jacks located on the rear of the TV to connect your camcorder. -
Page 129: Setting The Tv
Press 1 (Power) on the TV. Setting the TV The Auto Setup menu automatically appears on the screen when you turn on the TV for the first time. Setting the Channels After you finish connecting your TV, you can run Auto Program to set up your channels. - Page 130 To watch VHF/UHF channels with an antenna To skip channels Press MENU. You can skip unnecessary channels when selecting channels using the CH +/– buttons. Press V/v to select (Channel), then press Press MENU. Press V/v to select “Cable,” then press Press V/v to select (Channel), then press Press V/v to select “Off,”...
- Page 131 To fix in a TV channel If you have connected a cable box or satellite receiver to your TV, and do not intend to connect any other audio or video equipment, it is recommended that you fix a TV channel. Doing so will ensure no accidental channel switch when using your TV.
-
Page 132: Using The Menu
To open the menu screen and select the Using the Menu option Menu category Menu option Most of advanced settings and adjustments are Video performed using the menu screen. Return Mode: Vivid Basic operations to navigate through menus are Picture: Brightness: described below. -
Page 133: Selecting The On-Screen Menu Language
Press MENU. Selecting the On-screen Video Menu Language Return Mode: Vivid Picture: Brightness: Color: Hue: You can select the language to be displayed in all Sharpness: Color Temp.: Cool menus. Mild Mode: Select: Set: Exit: DVD/ SAT/ POWER Press V/v to select (Setup), then press MUTING CABLE... -
Page 134: Watching The Tv
Watching the TV Press POWER on the remote control. When the 1 (Power on/Stand by) LED goes off, press 1 Watching the TV (Power) on the TV. Select the desired channel using the 0-9 and ENT (enter) buttons. Press 0-9 to select a channel. The channel changes after 2 seconds. -
Page 135: Watching With Closed Caption
Watching with closed caption Press V/v to select (Setup), then press You can display Caption Vision if the broadcaster Setup Return offers this service. Caption Vision: Video Label Language: English Auto YC: DVD/ SAT/ POWER MUTING CABLE Select: Back: Set: Exit: MODE PICTURE WIDE... -
Page 136: Selecting The Picture Mode
Press PICTURE repeatedly until the desired mode Selecting the Picture appears. Mode Each time you press the button, the Picture Mode changes as follows: You can select one of three different Picture Modes MODE that best suits the program you are watching. PICTURE Furthermore, you can adjust the picture quality for each Picture Mode (see pages 59, 60). -
Page 137: Selecting The Effect Mode
Notes Selecting the Effect • You cannot select the Effect mode if “Speaker” in the (Audio) menu is set to “Off.” Mode • The Effect mode is valid only on the TV’s speakers and on headphones. So you cannot enjoy sound effects of TruSurround when you listen to a program through the “TruSurround*”... -
Page 138: Using The Wide Screen Mode
Press WIDE repeatedly until the desired Wide Using the Wide Screen Screen Mode appears. Mode Each time you press the button, the Wide Screen Mode changes as follows: The Wide Screen Mode lets you watch any signals or MODE other picture sizes such as Letterbox in several Wide WIDE Screen Modes (16:9 aspect ratio). - Page 139 Changing the Wide Screen Mode Original source Original source 4:3 source 16:9 source (Standard definition source) (High definition source) MODE MODE WIDE WIDE Wide Zoom Wide Zoom enlarge to fill the screen with enlarge to fill the screen with minimum distortion minimum distortion MODE MODE...
-
Page 140: Changing The Wide Screen Mode
Changing the Wide Screen Mode Press MENU. using the menu Video Return Mode: Vivid Picture: Brightness: DVD/ SAT/ POWER Color: MUTING CABLE Hue: Sharpness: Color Temp.: Cool MODE Mild Mode: PICTURE WIDE SLEEP DISPLAY Select: Set: Exit: Press V/v to select (Screen), then press Screen Return... - Page 141 The Wide Screen Mode options available in the (Screen) menu Option Description Wide Mode Select to enlarge to fill the screen with minimum distortion. Wide Zoom Select a Wide Mode to use for 4:3 sources. Normal Select to display 4:3 picture in original size when the original source is 4:3 (Standard definition source).
-
Page 142: Using The Freeze Function
Using the Freeze Using the Picture Off Function Function You can use this feature to write down information The Picture Off function lets you enjoy music from such as phone numbers, recipes, etc. radio programs of digital broadcasts or DVDs with the TV screen turned off. -
Page 143: Using The Center Speaker Feature
Press V/v to select (Audio), then press Using the Center Speaker Feature Audio Return Treble: Bass: Balance: You can use the TV’s speakers as the center speaker Steady Sound: Auto Effect: of your audio system and control its sound volume MTS: Stereo Speaker:... -
Page 144: Listening To The Center Speaker Sound From The Tv's Speakers
Listening to the center speaker Press the Input Select buttons (VIDEO 1/2/3, VIDEO 4 or VIDEO 5) to select the video input sound from the TV’s speakers selecting “Center Speaker Mode.” TV VIDEO 1/2/3 VIDEO 4 VIDEO 5 DVD/ SAT/ POWER MUTING CABLE... -
Page 145: Adjusting The Phase Of The Sound
Adjusting the phase of the sound Press V/v to select (Audio), then press You can adjust the phase of sound when using the Audio Video 1 Return TV’s speakers as the center speaker. If sound from Treble: Bass: the TV’s speakers (as the center speaker) sound Balance: Steady Sound: unnatural, select “Reverse.”... -
Page 146: Setting The Video Inputs
For video input 1, 2 and 3 Setting the Video Inputs Press VIDEO 1/2/3 repeatedly until the desired video input appears. You can enjoy images (and sound) from optional Each time you press VIDEO 1/2/3, the input video equipment connected to this unit by selecting changes as follows. -
Page 147: Using The Video Label And Skip Feature
Press V/v to select “Video Label,” then press Using the Video Label and Skip Feature Setup Video Label Return You can make settings for each video input by Video 1 : Video 1 Video 2 : Video 2 choosing the label displayed on the screen. Video 3 : Video 3 Video 4 :... -
Page 148: Using Favorite Channels
Press V/v to select (Channel), then press Using Favorite Channels Channel You can select program channels from a list of Return Favorite Channels favorite channels that you preset. Cable: Channel Fix: Auto Program Channel Skip/Add Channel Label Setting your favorite channels Select: Back: Set:... -
Page 149: Watching Favorite Channels
Watching favorite channels Using the Channel Label Feature DVD/ SAT/ POWER MUTING CABLE If you have set an optional label for the channel display or for Favorite Channels, you can have that MODE PICTURE WIDE SLEEP DISPLAY label displayed on the screen. DVD/ SAT/ POWER... - Page 150 Press V/v to select Press V/v to scroll through the label characters (Channel), then press (A-Z, 0-9, etc.), then press You can add up to 5 characters to the label. Channel Return Favorite Channels Cable: Channel Channel Fix: Channel Label Auto Program Return Channel Skip/Add...
-
Page 151: Using Advanced Features
Using Advanced Receive the picture you want to adjust, then press MENU. Features Video Return Mode: Vivid Picture: Brightness: Color: Hue: Sharpness: Color Temp.: Cool Mild Mode: Adjusting the Picture Select: Set: Exit: Position Vertically Press V/v to select (Screen), then press Screen You can move the position of the picture up and down Return... -
Page 152: Adjusting The Picture Position Horizontally
Receive the picture you want to adjust, then Adjusting the Picture press MENU. Position Horizontally Video Return Mode: Vivid Picture: You can move the position of the picture left and right Brightness: Color: in the window. This function allows for horizontal Hue: Sharpness: Color Temp.:... -
Page 153: Adjusting The Picture Quality
Press MENU. Adjusting the Picture Quality Video Return Mode: Vivid Picture: Brightness: You can adjust the picture quality for each Picture Color: Hue: Mode (“Vivid,” “Standard,” or “Pro”). Sharpness: Color Temp.: Cool You can adjust the picture quality for each video Mild Mode: input selected using the Input Select buttons, and Select:... - Page 154 Press V/v/B/b to make the desired adjustment, Selective options then press Option Description Setting Video Color Temp. Select to give the white Cool/ Return (Color colors a blue tint (Cool) Neutral/ Mode: Vivid Picture: Temperature) or a red tint (Warm). Warm Brightness: Color:...
-
Page 155: Adjusting The Sound Quality
Press MENU. Adjusting the Sound Quality Video Return Mode: Vivid Picture: Brightness: Color: You can adjust the sound quality for each video Hue: Sharpness: input selected using the Input Select buttons, and Color Temp.: Cool Mild Mode: store these adjustments in memory. Select: Set: Exit:... - Page 156 Adjustable options Press v/B Press V/b Option To decrease higher- To increase higher- Treble* pitched sounds. pitched sounds. Bass* To decrease lower- To increase lower- pitched sounds. pitched sounds. Balance* To emphasize the To emphasize the left speaker. right speaker. Selective options Option Description...
-
Page 157: Selecting Stereo Or Bilingual Programs
Selecting stereo or bilingual Selecting Stereo or programs using the menu Bilingual Programs Press MENU. You can enjoy stereo, bilingual and mono programs. Video Return Mode: Vivid FREEZE FAVORITES MENU Picture: 1, 5 Brightness: Color: Hue: TOP MENU Sharpness: Color Temp.: Cool Mild Mode: 2 - 4... -
Page 158: Selecting The Tv Speakers Or An External
Press MENU. Selecting the TV Video Speakers or an External Return Mode: Vivid Picture: Brightness: Amplifier to Listen to Color: Hue: Sharpness: Color Temp.: Cool the TV Mild Mode: Select: Set: Exit: You can select if you want to listen to the TV from Press V/v to select (Audio), then press the TV speakers or from an external amplifier... -
Page 159: Selecting How To Control The Volume Of The Tv's Speakers
Press MENU. Selecting How to Video Control the Volume of Return Mode: Vivid Picture: Brightness: the TV’s Speakers Color: Hue: Sharpness: Color Temp.: Cool Mild Mode: You can select how to control the volume of the Select: Set: Exit: TV’s speakers when an external amplifier is Press V/v to select (Audio), then press connected to the TV’s audio outputs. -
Page 160: Using The Parental Control Feature
To block programs you feel unsuitable for your children, you need to set the TV for the desired 4 - 8 rating systems. Sony’s predetermined ratings are also available. See page 71 for a description of the ratings. The TV’s Parental Control feature functions by receiving the rating signal from your local broadcasting station or cable service provider. - Page 161 Enter a four-digit password using the 0-9 Press V/v to select your country/region (U.S.A. buttons, then, press or Canada), then press Parent Parent Return Lock: Select Country: U.S.A. Enter password Change Password using 0-9 buttons - - - - Back: Exit: Select: Back:...
-
Page 162: Selecting A Custom Rating
To view blocked programs Selecting a Custom Rating You can view blocked programs by entering the password. If you want to select the ratings to be blocked from “Custom” once you have activated the Parental Press ENT (enter) when tuned to a blocked Control feature (page 66), follow the procedure program. - Page 163 Press V/v to select “Movie Rating,” then press To select a TV rating in U.S.A.: Press V/v to select “TV Rating,” then press Parent Movie Rating Return – – Parent PG-13: – TV Rating – Return NC-17: – Rating Content –...
- Page 164 Press V/v to select the TV rating to be blocked, Repeat step 8 for other extenders. then press All programs that match the ratings you select indication automatically appears beside and higher, except for the extenders that were the selected rating and all ratings below it, canceled, will be blocked.
-
Page 165: What The Ratings Mean
In G-rated films, no strong words are used, the violence is All Ages Admitted) These are original ratings that Sony has at a minimum, nudity and sex predetermined according to the viewer’s age. Each scenes are not present, nor is rating allows for viewing of certain programs, as there any drug use. - Page 166 U.S. TV ratings About the extenders of U.S. TV ratings U.S. TV ratings are for TV programs rated according TV-Y7, TV-PG, TV-14 and TV-MA ratings have to the U.S. Television Parental Guidelines. additional content ratings called “extenders” to define additional viewing limits. The extenders are defined as follows: Description Option...
-
Page 167: Ratings In Canada
Ratings in Canada The Canadian English Language ratings are for TV programs in English broadcast in Canada. Sony’s predetermined ratings These are original ratings that Sony has predetermined Option Description according to the viewer’s age. Each rating allows you C (Programming intended for... -
Page 168: Using The Screen Saver Function
Canadian French Language ratings Using the Screen Saver The Canadian French Language ratings are for TV programs in French broadcast in Canada. Function Option Description If you continue to display the same image on the G (General) Programming intended for screen for a long period of time, part of that image audience of all ages. -
Page 169: Image Retention Recovery
Press MENU. Image Retention Video Recovery* Return Mode: Vivid Picture: Brightness: Color: To reduce the appearance of image retention that Hue: Sharpness: Color Temp.: Cool may have occurred, select “All White” option under Mild Mode: “Screen Saver” function in the (Screen) menu. -
Page 170: Turning Off The Tv Automatically
Press SLEEP repeatedly until the desired period of Turning Off the TV time appears. Automatically Each time you press the button, the period of time changes as follows: You can set the TV to turn off automatically after a predetermined period of time (15, 30, 45, 60, or 90 minutes). -
Page 171: Additional Information
Sony personnel of the TV’s condition. Press 1 (Power) on the TV to turn it off, and disconnect the power cord, then inform qualified Sony personnel or the Direct Response Center/ 1 (Power on/ Customer Relations Center of how the indicator Stand by) LED flashes (duration and interval). - Page 172 Problem Possible remedies Poor picture. • Check antenna/cable connections. • Check the antenna location and direction. Double images or ghosts. Only snow and noise appear • Check if the antenna is broken or bent. on the screen. • Check if the antenna has reached the end of its serviceable life. (3-5 years in normal use, 1-2 years at the seaside.) Dotted lines or stripes.
-
Page 173: Specifications
AUDIO OUT: Specifications 500 mVrms (100% modulation) More than 1 Vrms at the maximum volume setting (Variable) Television system: More than 500 mVrms (Fixed) American TV standard Headphones: Channel coverage: Stereo mini jack VHF: 2-13/UHF: 14-69/CATV: 1-125 Impedance: 16 ohms Antenna: Speaker: 75-ohm external terminal for VHF/UHF... -
Page 174: Index
Index 4:3 Default ..........47 Favorite channels ........54 Remote control ........11 Front and rear connectors ..... 18 battery installation ......11 Adjusting Full ............45 programming ........14 picture position ......57, 58 using with other equipment ....16 picture quality ........ - Page 178 Printed in U.S.A.