Table of Contents
Advertisement
SERVICE MANUAL
Ver. 1.0 2007.01
Revision History
Revision History
Link
Link
SPECIFICATIONS
MODEL INFORMATION TABLE
The components identified by
mark 0 or dotted line with
mark 0 are critical for safety.
Replace only with part num-
ber specified.
DCR-DVD106E/DVD108/DVD108E/DVD109E/DVD608/DVD608E_L1
9-852-173-41
DCR-DVD106E/DVD108/DVD108E/
DVD109E/DVD608/DVD608E
Les composants identifiés par une
marque 0 sont critiques pour la
sécurité.
Ne les remplacer que par une pièce
portant le numéro spécifié.
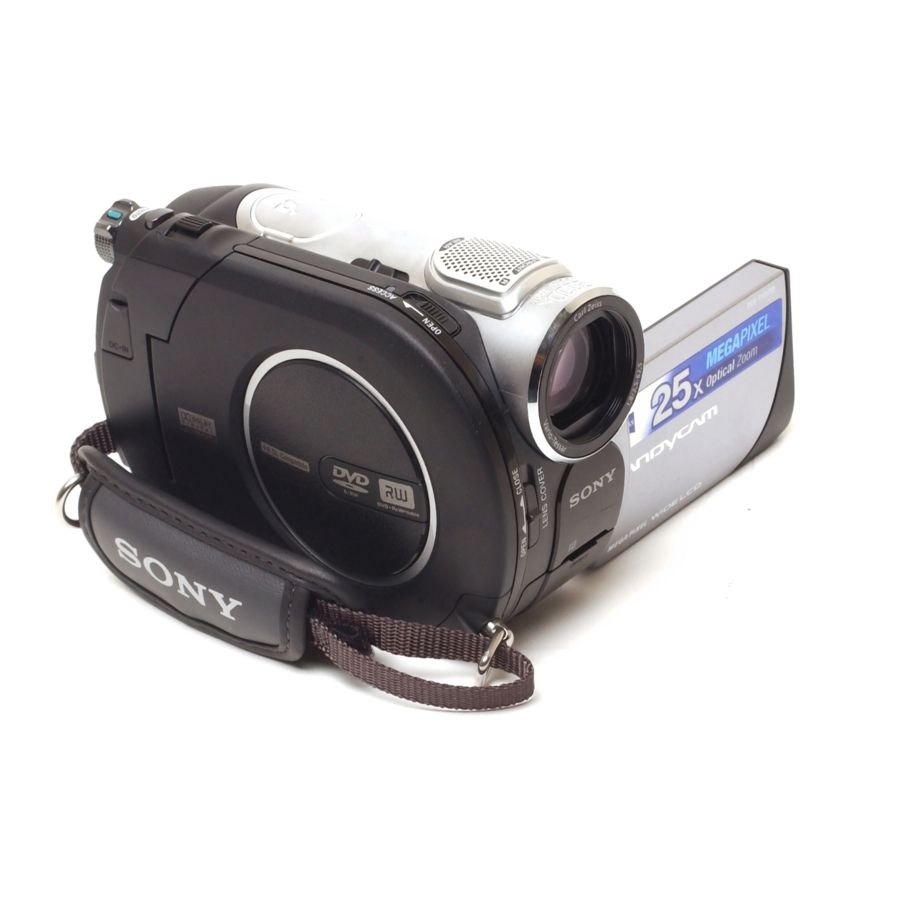
Photo: DCR-DVD108
SELF DIAGNOSIS FUNCTION
ACCESSORIES
DIGITAL VIDEO CAMERA RECORDER
Sony EMCS Co.
LEVEL
US Model
Canadian Model
AEP Model
UK Model
East European Model
North European Model
E Model
Australian Model
Hong Kong Model
Chinese Model
Argentine Model
Brazilian Model
INSTRUCTION MANUAL
Published by Kohda TEC
1
2007A0500-1
© 2007.1
Advertisement
Table of Contents

Related Manuals for Sony Handycam DCR-DVD106E


Summary of Contents for Sony Handycam DCR-DVD106E
- Page 1 0 are critical for safety. sécurité. Replace only with part num- Ne les remplacer que par une pièce ber specified. portant le numéro spécifié. DIGITAL VIDEO CAMERA RECORDER 2007A0500-1 DCR-DVD106E/DVD108/DVD108E/DVD109E/DVD608/DVD608E_L1 © 2007.1 Sony EMCS Co. 9-852-173-41 Published by Kohda TEC...
-
Page 2: Specifications
Recording time USB jack 0°C to +40°C (32°F to 104°F) DVD-RW/DVD+RW/DVD-R mini-B Storage temperature HQ: Approx. 20 min (DCR-DVD106E/DVD109E: output only) -20°C to +60°C (-4°F to +140°F) SP: Approx. 30 min Dimensions (Approx.) LP: Approx. 60 min LCD screen DVD+R DL 48 ×... -
Page 3: Model Information Table
Model information table Model DCR-DVD106E DCR-DVD108 DCR-DVD108E Destination AEP, UK, EE, NE US, CND, E, AR, BR Color system NTSC × × × 5.1ch recording Data CAM → PC copy PC → CAM × Model DCR-DVD109E DCR-DVD608 DCR-DVD608E Destination AEP, UK, EE, NE... - Page 4 CRITIQUES POUR LA SÉCURITÉ DE FONCTIONNEMENT. NE COMPONENTS WITH SONY PARTS WHOSE PART NUMBERS REMPLACER CES COMPOSANTS QUE PAR DES PIÈSES SONY APPEAR AS SHOWN IN THIS MANUAL OR IN SUPPLEMENTS DONT LES NUMÉROS SONT DONNÉS DANS CE MANUEL OU PUBLISHED BY SONY.
-
Page 5: Self-Diagnosis Function
“Memory Stick Duo” is unformatted. Format the “Memory Stick Duo”. “Memory Stick Duo” is broken. Insert a new “Memory Stick Duo”. Clean the disc with the supplied cleaning cloth. Disc access error Use a compatible disc with the camcorder. DCR-DVD106E/DVD108/DVD108E/DVD109E/DVD608/DVD608E_L1 — 5 —... -
Page 6: Checking Supplied Accessories
3-093-691-61 (E, HK, AUS, CH) ENGLISH / FRENCH / SIMPLIFIED CHINESE for CHINA / TRADITIONAL CHINESE for HONG KONG 3-093-691-71 (E) ENGLISH / TRADITIONAL CHINESE for TAIWAN / SPANISH / PORTUGUESE • Refer to the cover for mark 0. DCR-DVD106E/DVD108/DVD108E/DVD109E/DVD608/DVD608E_L1 — 6 —... - Page 7 Additional information on this product and answers to frequently asked questions can be found at our Customer Support Website. http://www.sony.net/ Printed on 70% or more recycled paper using VOC (Volatile Organic Compound) -free vegetable oil based ink. Printed in China © 2007 Sony Corporation...
-
Page 8: Read This Before Operating Your Camcorder
Civic plug without the fuse cover. If you should lose the Office, your household waste disposal service or fuse cover, please contact your nearest Sony the shop where you purchased the product. service station. -
Page 9: Regulatory Information
If you have any questions about this product, you uses, and can radiate radio frequency energy and, may call: if not installed and used in accordance with the Sony Customer Information Center instructions, may cause harmful interference to radio communications. 1-800-222-SONY (7669). - Page 10 Be sure to insert the “Memory Stick Duo” For reliability durability of recording / into the Memory Stick Duo Adaptor. playback, we recommend that you use Sony discs or discs with an (for Memory Stick Duo Adaptor VIDEO CAMERA) mark for your camcorder.
- Page 11 Take images of the sun only in low light Your camcorder is equipped with a Carl conditions, such as at dusk. Zeiss lens, which was developed jointly by Carl Zeiss, in Germany, and Sony On recording Corporation, and produces superior images. • Before starting to record, test the...
- Page 12 Read this before operating your camcorder (Continued) MTF= Modulation Transfer Function. The number value indicates the amount of light from a subject coming into the lens. About the marks used in this manual • The operations available depend on the disc used.
-
Page 13: Table Of Contents
Table of Contents Read this before operating your Selecting the aspect ratio (16:9 or 4:3) (DCR-DVD306E/DVD308E/DVD708E) camcorder ........2 ............35 Subject examples and solutions Playback ........37 ............9 Using PB zoom ......39 Playing back a series of still images Enjoying with your camcorder (Slide show) ........ - Page 14 Table of Contents (Continued) List of the (SETTINGS) category Troubleshooting items ..........61 MOVIE SETTINGS ....62 Troubleshooting ......83 (Items for recording movies) Warning indicators and messages PHOTO SETTINGS ....64 ............ 92 (Items for recording still images) Additional Information VIEW IMAGES SET ....
-
Page 15: Subject Examples And Solutions
Subject examples and solutions Shooting A child on the stage Flowers in close-up under a spot light B PORTRAIT ........75 B SPOTLIGHT........75 B FOCUS..........73 B TELE MACRO ......... 73 Focusing on the Fireworks with all dog on the left side its splendor of the screen B FOCUS.......... -
Page 16: Enjoying With Your Camcorder
Enjoying with your camcorder What you can do with your camcorder Your camcorder records image data on 8cm DVD*. It is more convenient than video tape and far more versatile. Taking beautiful shots easily No rewinding to start recording (p.29, 32) Recorded images are stored in empty areas on the disc so there is no risk that valuable recordings are accidentally overwritten. - Page 17 A recorded disc can be played back on a variety of devices Playback on a DVD device or DVD drive (p.42) You can play back recorded and finalized** discs on a home DVD device, DVD recorder or DVD drive of a computer that supports 8cm disc.
-
Page 18: Choosing A Disc
Choosing a disc Your camcorder is compatible with 8cm DVD-RW, DVD+RW, DVD-R and DVD+R DL. It does not support 12cm discs. Recording time Expected recordable time on one side of the disc. The recordable time varies depending on type of discs or recording mode. Apporoximate recordable time ( ) : the minimum recording time Recording mode... - Page 19 Disc format features Figures in parentheses ( ) indicate page numbers. DVD-RW DVD+RW DVD-R DVD+R DL Disc types and symbols Symbols used in this manual Both 16:9 (wide) and 4:3 movie can be recorded – on the same disc (35) Deleting the most recent recording (47) –...
-
Page 20: Using Your Camcorder
Using your camcorder 1Preparing (See page 19 to 28.) Select the disc that best suits your needs. Do you want to delete or edit images on your camcorder? Do you want to delete images and reuse the disc? For long recording * Select the recording format and format the disc on your camcorder (p.26). -
Page 21: Viewing On Another Dvd Device
4Viewing on another DVD device (See pages 42, 55.) To view a disc recorded on your camcorder on other DVD devices, you need to finalize it first. Finalize Finalize Finalize DVD device / DVD drive DVD recorder b Notes • The less the recording volume of the disc is, the more it takes time to finalize the disc. The features of a finalized disc depend on disc type. -
Page 22: Home" And " - Taking Advantage Of Two Types Of Menus
“ HOME” and “ OPTION” - Taking advantage of two types of menus “ HOME MENU” - the starting point for operations with your camcorder (HELP) Displays a description of the item (p. 17) Category Categories and items of the HOME MENU (CAMERA) category (MANAGE DISC/MEMORY) category... - Page 23 Example: [EDIT] Using the HOME MENU Turn the POWER switch to turn on your camcorder. Continue operation by following the guidance on the screen. To hide the HOME MENU screen Touch When you want to know something (HOME) A (or B). Press about the function of each item on the HOME MENU - HELP...
- Page 24 “ HOME” and “ OPTION” (Continued) 3 Touch the item you want to know the content. MOVIE Records a movie. Activate? When you touch an item, its explanation appears on the screen. To apply the option, touch [YES], otherwise, touch [NO]. To deactivate the HELP Touch (HELP) again in step 2.
-
Page 25: Getting Started
Getting Started Step 1: Checking supplied items Make sure that you have the following Rechargeable battery pack NP-FH40 (1) (p. 20) items supplied with your camcorder. The number in the parentheses indicates the number of that item supplied. AC Adaptor (1) (p. 20) CD-ROM “Handycam Application Software”... -
Page 26: Step 2: Charging The Battery Pack
Step 2: Charging the battery pack POWER switch DC IN jack Jack cover Battery DC plug (charge) lamp Mains lead AC Adaptor To the wall socket You can charge the “InfoLITHIUM” Connect the mains lead to the AC battery pack (H series) (p. 101) after Adaptor and the wall socket. - Page 27 Recording time To check the remaining battery Approximate time (min.) available when (Battery Info) you use a fully charged battery pack. Set the POWER switch to OFF (CHG), then press DISP/BATT INFO. DCR-DVD106E/DVD108E/DVD608E Continuous Typical Battery pack recording recording time...
- Page 28 Step 2: Charging the battery pack (Continued) Playing time DCR-DVD109E Approximate time (min.) available when Continuous Typical you use a fully charged battery pack. Battery pack recording recording time time* DCR-DVD106E/DVD108E/DVD608E NP-FH40 (supplied) LCD panel LCD panel Battery pack opened closed NP-FH50 NP-FH40 (supplied) NP-FH70...
-
Page 29: Step 3: Turning The Power On, And Setting The Date And Time
Step 3: Turning the power on, and setting the date and time • The power will not be supplied from the battery as long as the AC Adaptor is connected to the Set the date and time when using this DC IN jack of your camcorder, even when the camcorder for the first time. -
Page 30: Changing The Language Setting
Step 3: Turning the power on, and setting the date and time (Continued) camcorder without any operation attempted for approximately 5 minutes, to save battery power Set [Y] (year) with v/V. ([A.SHUT OFF], p. 70). z Tips • The date and time does not appear during recording, but they are automatically recorded on the disc, and can be displayed during playback (see page 65 for [DATA CODE]). -
Page 31: Step 4: Preparing For Recording
Step 4: Preparing for recording BATT INFO for a few seconds until Opening the lens cover disappears. Slide the LENS COVER switch to OPEN. b Notes • Do not press the buttons on the LCD frame when you open or adjust the LCD panel. z Tips •... -
Page 32: Step 5: Inserting A Disc Or A "Memory Stick Duo
Step 5: Inserting a disc or a “Memory Stick Duo” Disc A new 8 cm DVD-RW, DVD+RW, DVD- R, or DVD+R DL is required for recording (p. 12). b Notes • Remove dust or fingerprints from the disc beforehand, using a soft cloth (p.99). Check that the power of your camcorder is on. - Page 33 x DVD+RW • If you catch the belt when closing the disc cover, it may cause your camcorder to Select the aspect ratio of the movie, malfunction. [16:9 WIDE] or [4:3], then touch • Do not touch the disc with the recording side or pickup lens (p.104).
- Page 34 Step 5: Inserting a disc or a “Memory Stick Duo” (Continued) Open the LCD panel. Insert the “Memory Stick Duo” into the “Memory Stick Duo” slot in the right direction until it clicks. Access lamp (“Memory Stick Duo”) To eject a “Memory Stick Duo” Lightly push the "Memory Stick Duo"...
-
Page 35: Recording/Playback
Open the lens cover (p. 25) If the POWER switch is set to OFF (CHG), turn it while pressing the green button. * DCR-DVD106E/DVD108E/DVD109E/DVD608E ** DCR-DVD306E/DVD308E/DVD708E Movies Still Images Turn the POWER Turn the POWER switch A until the... - Page 36 Recording and playing back with ease (Easy Handycam) (Continued) Viewing recorded movies/still images Turn the POWER switch A to turn on your camcorder. Press (VIEW IMAGES) F (or G). The VISUAL INDEX screen appears on the LCD screen. (It may take some time to display the VISUAL INDEX screen.) Returns to the recording screen...
- Page 37 Still images: Touch , then touch the still image you want to view. Return (to the VISUAL INDEX screen) Slide show button (page 39) 1 1 2007 11:23:45 Go to the VISUAL INDEX screen Previous/Next * [DATA CODE] is fixed to [DATE/TIME] (p. 65). Invalid buttons during Easy Handycam z Tips operation...
-
Page 38: Recording
Recording POWER switch A DCR-DVD106E/DVD108E/ Open the DVD109E/DVD608E Lens cover (HOME) E PHOTO F (p. 25) (HOME) D START/STOP DCR-DVD306E/DVD308E/ DVD708E (HOME) D START/STOP START/STOP B b Notes Adjusting the grip belt • If the access lamps (page 26, 27) is on after... - Page 39 Movies Still Images Movies are recorded on the disc. For Still images are recorded on the “Memory recordable time, see page 12. Stick Duo.” For the number of recordable still images, see page 64. Turn the POWER Turn the POWER switch until switch A until the...
-
Page 40: Zooming
Wider range of view: (Wide angle) Close view: (Telephoto) Your camcorder has Dolby Digital 5.1 Creator installed for recording 5.1ch * DCR-DVD106E/DVD108E/DVD109E/ surround sound. Enjoy realistic sound when DVD608E playing the disc on devices that support 5.1ch ** DCR-DVD306E/DVD308E/DVD708E surround sound. -
Page 41: Recording In Dark Places (Nightshot Plus)
Recording in dark places Recording in mirror mode (NightShot plus) Infrared port Open the LCD panel 90 degrees to the camcorder (1), then rotate it 180 degrees Set the NIGHTSHOT PLUS switch to ON. to the lens side (2). appears.) z Tips b Notes •... - Page 42 [1.0M] (4:3) at the maximum. z Tips • See page 64 for the number of recordable still images. • With the DCR-DVD106E/DVD108E/ DVD109E/DVD608E, you can change the aspect ratio of movies in the HOME MENU. For details, see page 62.
-
Page 43: Playback
Playback Zoom lever F DCR-DVD106E/DVD108E/ DVD109E/DVD608E POWER switch A (HOME) (HOME) E (VIEW IMAGES) C (VIEW IMAGES) B DCR-DVD306E/ DVD308E/ (HOME) D DVD708E Turn the POWER switch A to turn on your camcorder. Press VIEW IMAGES) B (or C). The VISUAL INDEX screen appears on the LCD screen. (It may take some time to display the VISUAL INDEX screen.) -
Page 44: Still Images
Start playing back Movies Touch tab and the movie to be played back. The VISUAL INDEX screen reappears when playback from the selected movie until the last movie is completed. Return (to the VISUAL INDEX screen) Toggles Play or Pause as you touch Beginning of the scene/ Next scene previous scene... -
Page 45: Using Pb Zoom
LCD frame. Touch on the still image playback screen. The slide show begins from the selected image. * DCR-DVD106E/DVD108E/DVD109E/ Touch to stop the slide show. To DVD608E restart, touch again. ** DCR-DVD306E/DVD308E/DVD708E... -
Page 46: Playing The Picture On A Tv
Playing the picture on a TV Connect your camcorder to the input jack of TV or VCR using A/V connecting cable 1 or A/V connecting cable with S VIDEO 2. Connect your camcorder to the wall socket using the supplied AC Adaptor for this operation (p.20). Refer also to the instruction manuals supplied with the devices to be connected. - Page 47 • When you play back a picture recorded in 16:9 (wide) aspect ratio on a 4:3 TV not compatible with the 16:9 (wide) signal, set [TV TYPE] to [4:3]. When your TV is monaural (When your TV has only one audio input jack) Connect the yellow plug of the A/V connecting cable to the video input jack and connect the white (left channel) or the red...
-
Page 48: Operation Flow
Making the disc compatible with playback on other devices or DVD drives (Finalizing) Finalizing makes the recorded disc compatible for playback with other devices and DVD drives of computers. Before finalizing, you can select the style of the DVD menu which displays the image list (p. - Page 49 To add recordings to a finalized disc (p.58) Recordings cannot be Make a new added. recording Unfinalize the disc. Recordings can be added as usual. When the DVD menu has been created, a confirmation screen prompts you to confirm that you wish to add a recording.
-
Page 50: Playback On Other Devices Or Dvd Drives (Finalizing)
Making the disc compatible with playback on other devices or DVD drives (Finalizing) (Continued) Finalizing a disc Touch [YES] t [YES]. b Notes Finalizing starts. • It takes from a minute to a maximum of several hours to finalize a disc. The shorter the amount of material recorded on the disc, the longer it When [Completed.] appears, takes for finalizing. -
Page 51: To Select A Dvd Menu Style
To select a DVD menu style (OPTION) t 1 In step 4, touch [DVD MENU]. 2 Select the desired style from 4 types of pattern with [T]/[t]. Select [NO MENU] if you do not create a DVD menu. 3 Touch b Notes •... -
Page 52: Editing
Editing (OTHERS) category Deleting images You can delete the images recorded on a This category enables you to edit or print disc or a “Memory Stick Duo” using your images on a disc or "Memory Stick Duo," camcorder. or copy them onto your computer for Insert a recorded disc or “Memory Stick viewing, editing or creating an original Duo”... - Page 53 Touch to return to the previous Deleting the still images in the screen. “Memory Stick Duo” Touch t [YES] t Touch (OTHERS) of the (HOME) menu t [DELETE]. To delete all movies on the disc at one time Touch [ DELETE].
-
Page 54: Dividing The Image
Deleting images (Continued) Dividing the image – write-protection is set to the still images by the other device. b Notes z Tips • You cannot divide movies during Easy • To delete all images recorded on the “Memory Handycam operation. Cancel the Easy Stick Duo,”... -
Page 55: Creating The Playlist
Creating the Playlist b Notes • Movies cannot be restored once they are A Playlist is a list showing thumbnails of divided. the movies that you have selected. The • Do not remove the battery pack or the AC original scenes are not changed even Adaptor from your camcorder while editing images. -
Page 56: Playing The Playlist
Creating the Playlist (Continued) To add all the movies on the disc in 2 Touch [ERASE]. To erase all images at a time, touch the Playlist [ERASE ALL] t [YES] t [YES] t In step 2, touch [ ADD ALL] t [YES] t [YES] t 3 Touch the image that you want to erase from the Playlist. - Page 57 z Tips 5 Select the destination with [T]/[t]. • The original movies are not changed even if you divide the movie in the Playlist. Destination bar Press and hold the image on the LCD screen to confirm the image. t [YES] t 6 Touch z Tips •...
-
Page 58: Dubbing To Vcr Or Dvd/Hdd Recorders
Dubbing to VCR or DVD/HDD recorders You can dub images played back on your camcorder to other recording devices, such as VCRs or DVD/HDD recorders. Connect the device in either of the following ways. Connect your camcorder to the wall socket using the supplied AC Adaptor for this operation (p. -
Page 59: Printing Recorded Images (Pictbridge Compliant Printer)
Dubbing to VCR or DVD/HDD Printing recorded recorders (Continued) images (PictBridge compliant printer) Insert the recorded disc into your You can print out still images using a camcorder. PictBridge compliant printer, without connecting the camcorder to a computer. Turn on your camcorder, and press (VIEW IMAGES). -
Page 60: Pictbridge Compliant Printer
Printing recorded images (PictBridge compliant printer) (Continued) b Notes Printing • Refer also to the instruction manual of the printer to be used. • Do not attempt the following operations when Touch the still image to be is on the screen. The operations may not be printed. -
Page 61: Utilizing Recording Media
Playing a disc on Utilizing recording media (MANAGE DISC/ other devices MEMORY) category Playing a disc on other devices This category enables you to use a disc or a “Memory Stick Duo” for various purposes. Finalizing a disc (p. 42) let you view movies recorded by your camcorder on other DVD devices. -
Page 62: Finding The Right Disc (Disc Select Guide)
Playing a disc on other devices Finding the right disc (Continued) (DISC SELECT GUIDE) • Movies stored on a disc cannot be copied Select the option that is right for you on the directly onto a computer to be played back or screen, then you will be informed of the edited. -
Page 63: Deleting All Scenes On The Disc (Formatting)
Deleting all scenes on the disc (Formatting) Formatting the disc Touch (MANAGE DISC/ MEMORY) of the (HOME) t FORMAT]. Formatting makes the recorded disc new • Perform the following steps if your disc is and reusable by deleting all the data DVD-RW or DVD+RW. -
Page 64: Recording Additional Scenes After Finalizing
Deleting all scenes on the disc Recording additional (Formatting) (Continued) scenes after finalizing Formatting the “Memory Stick Duo” You can record additional movies on the Formatting deletes all images on a finalized DVD-RWs/DVD+RWs after the “Memory Stick Duo.” following steps, if the disc has free space. When using the finalized DVD-RW (VR mode), you can record Turn on your camcorder. - Page 65 • You cannot record additional material on the disc during the Easy Handycam operation. Connect the AC Adaptor to the Cancel the Easy Handycam operation. DC IN jack on your camcorder, then connect the mains lead to the wall socket. Turn the POWER switch to turn on the (Movie) lamp.
-
Page 66: Customizing Your Camcorder
Customizing your camcorder What you can do with the (SETTINGS) category of the HOME MENU You can change the recording functions and the operating settings for your convenience. Touch the desired setup item. If the item is not on the screen, touch v/ Using the HOME MENU V to change the page. -
Page 67: List Of The (Settings) Category Items
PHOTO SETTINGS (p. 64) DEMO MODE Items Page CALIBRATION IMAGE SIZE A.SHUT OFF QUALITY REMOTE CTRL FILE NO. DCR-DVD106E/DVD108E/DVD109E/ NIGHTSHOT LIGHT DVD608E FLASH LEVEL DCR-DVD306E/DVD308E/DVD708E Also available during Easy Handycam REDEYE REDUC operation. Only [SOUND SETTINGS] is available VIEW IMAGES SET (p. 65) during Easy Handycam operation. -
Page 68: Movie Settings
MOVIE SETTINGS (Items for recording movies) NIGHTSHOT LIGHT When using the NightShot plus (p. 35) or [S. NIGHTSHOT PLS] (p. 76) function to record, you can record clearer images by setting [NIGHTSHOT LIGHT], which emits infrared light (invisible), to [ON] (the Touch 1, then 2. - Page 69 The right side of the bar shows the digital zooming factor. The zooming zone appears reduced to 1/25 second when recording in when you select the zooming level. dark conditions. For DCR-DVD106E/DVD108E/DVD109E/ REMAINING DVD608E B AUTO B OFF Displays the remaining disc indicator for Up to 40 ×...
-
Page 70: (Items For Recording Movies)
Bottom: [STANDARD] is selected for image quality. IMAGE SIZE (DCR- • When using the “Memory Stick Duo” made by DVD306E/DVD308E/ Sony Corporation. The number of recordable still DVD708E) images varies depending on the recording environment. B 1.0M ( Records still images clearly. -
Page 71: (Items For Recording Still Images)
VIEW IMAGES SET (Items to customize the display) FLASH LEVEL (DCR- DVD306E/DVD308E/ DVD708E) You can set this function when you use an external flash (optional) that is compatible with your camcorder. Touch 1, then 2. HIGH( If the item is not on the screen, touch v/V Makes the flash level higher. - Page 72 VIEW IMAGES SET (Continued) CAMERADATA DISPLAY Movie You can select the number of thumbnails that appear on the VISUAL INDEX screen. B ZOOM LINK Change the number of thumbnails (6 or 12) with the zoom lever on your camcorder.* 6IMAGES Displays thumbnails of 6 images.
-
Page 73: (Items To Customize The Display) Sound/Disp Set
SOUND/DISP SET (Items to adjust beep and the screen) B NORMAL Standard brightness. BRIGHT Brightens the LCD screen. b Notes • When you connect your camcorder to outside Touch 1, then 2. power sources, [BRIGHT] is automatically If the item is not on the screen, touch v/V selected for the setting. -
Page 74: (Items To Adjust Beep And The Screen) Output Settings
(Default setting for DCR-DVD306E/ DVD308E/DVD708E) Select to view your images on a 16:9 (wide) TV. Wide (16:9) 4:3 images images (Default setting for DCR-DVD106E/ DVD108E/DVD109E/DVD608E) Select to view your images on a 4:3 standard TV. Wide (16:9) 4:3 images images... -
Page 75: (Items For When Connecting Other Devices) Clock/ Lang
CLOCK/ LANG (Items to set clock and language) DISP OUTPUT B LCD PANEL Shows displays such as the time code on the LCD screen and in the viewfinder. V-OUT/PANEL Shows displays such as the time code on Touch 1, then 2. the TV screen, LCD screen, and in the If the item is not on the screen, touch v/V viewfinder. -
Page 76: (Items To Set Clock And Language) General Set
GENERAL SET (Other setup items) A.SHUT OFF (Auto shut off) B 5min The camcorder is automatically turned off when you do not operate your camcorder for more than approximately 5 minutes. Touch 1, then 2. NEVER If the item is not on the screen, touch v/V The camcorder is not automatically turned to change the page. -
Page 77: Activating Functions Using The
Activating functions using the OPTION MENU When the item you want is not on the The OPTION MENU appears just like the pop-up window that appears when you screen right-click the mouse on a computer. Touch another tab. If you cannot find the Various functions are displayed in the item anywhere, the function does not work context of the operation. -
Page 78: Recording Items On The Option Menu
Activating functions using the OPTION MENU (Continued) Recording items on the OPTION Viewing items on the OPTION MENU MENU See page 71 for setting operation. See page 71 for setting operation. Items Page Items Page FOCUS DELETE SPOT FOCUS DELETE ALL TELE MACRO EXPOSURE SPOT METER... -
Page 79: Functions Set In The Option Menu
Tips as follows; • It is easier to focus on the subject by moving the DCR-DVD106E/DVD108E/DVD109E/ power zoom lever towards T (telephoto) to DVD608E adjust the focus, then towards W (wide angle) to down to about 43 cm (17 in.) -
Page 80: Functions Set In The Option Menu
Functions set in the OPTION MENU (Continued) To cancel, touch [OFF], or zoom to wide- appears. angle (W side). 2 Touch [END]. To return the setting to automatic exposure, b Notes touch [AUTO] t [ ] in step 1. • When recording a distant subject, focusing may b Notes be difficult and can take some time. - Page 81 LANDSCAPE b Notes • The [WHITE BAL. ] setting is cleared when you set [SCENE SELECTION]. Select to shoot distant subjects clearly. WHITE BAL. (White This setting also prevents your camcorder balance) from focusing on glass or metal mesh in windows that comes in between the You can adjust the color balance to the camcorder and the subject.
-
Page 82: Functions Set In The Option Menu
Functions set in the OPTION MENU (Continued) b Notes to [ON] while the NIGHTSHOT PLUS switch (p. 35) is also set to ON. • Set [WHITE BAL. ] to [AUTO] or adjust the appears on the screen. color in [ONE PUSH] under white or cool white fluorescent lamps. - Page 83 Press PHOTO to record still images when D.EFFECT (Digital effect) [SELF-TIMER] is set to [ON] and appears. When [OLD MOVIE] is selected, To cancel the count down, touch [RESET]. appears on the screen and you can record To cancel the self-timer, select [OFF]. with an old movie-type atmosphere to your movies.
-
Page 84: Using A Computer
Using a Computer What you can do with Windows computer When you install the “Picture Motion About “First Step Guide” Browser” on a Windows computer from the supplied CD-ROM, you can enjoy the The “First Step Guide” is an instruction following operations. -
Page 85: Installing The "First Step Guide" And Software
Installing the “First Step Guide” and software Hard disk: Disc volume required for installation: Approximately 600 MB (5 GB or more You need to install the “First Step Guide” may be necessary when creating DVD and software to your Windows computer videos.) before connecting your camcorder Display: DirectX 7 or later-compatible video... - Page 86 Installing the “First Step Guide” and software (Continued) Click [FirstStepGuide]. Check your area and country/ region, then click [Next]. The software is set up for your selected Select the desired language and country/region. the model name of your camcorder from the pull-down menu.
-
Page 87: Viewing "First Step Guide
• You can also start this program by selecting desktop. [Start] t [Programs] ([All Programs] for Windows XP) t [Sony Picture Utility] t [First Step Guide] t folder with model name of your camcorder t HTML version of “First Step Guide.”... -
Page 88: Using A Macintosh Computer
Using a Macintosh computer You can copy the still images from the “Memory Stick Duo” to the Macintosh. Install “First Step Guide” in the supplied CD-ROM. b Notes • The supplied software “Picture Motion Browser” does not operate on Mac OS. •... -
Page 89: Troubleshooting
• During Easy Handycam operation, the troubleshoot the problem. If the problem following buttons/functions are not persists, disconnect the power source and available. contact your Sony dealer. – BACK LIGHT button (p.35) • Overall operations/Easy Handycam operation/ – Playback zoom (p.39) Remote Commander ........83 –... - Page 90 Remote – [FLASH MODE]** Commander (DCR-DVD306E/ – [ LANGUAGE SET] DVD308E/DVD708E). * DCR-DVD106E/DVD108E/DVD109E/ • Select a commander mode other than DVD 2 DVD608E for your DVD device, or cover the sensor of ** DCR-DVD306E/DVD308E/DVD708E your DVD device with black paper.
- Page 91 (p. 20). If the problem persists, • Some functions cannot be used disconnect the AC Adaptor from the wall simultaneously (p. 90). socket and contact your Sony dealer. The battery pack may be damaged. The image in the viewfinder is not clear.
- Page 92 Troubleshooting (Continued) Recording Remaining disc space indicator is not displayed. Refer also to “Discs/"Memory Stick Duo"” • Set [ REMAINING] to [ON] to always (p. 85). display the remaining disc space indicator (p. 63). Pressing START/STOP does not record movies on the disc. The indicators of the disc type and the recording format on the LCD •...
- Page 93 The recording angle looks different [STEADYSHOT] does not function. (DCR-DVD306E/DVD308E/DVD708E). • Set [STEADYSHOT] to [ON] (p. 63). • The recording angle may look different • [STEADYSHOT] may not be able to depending on the mode of your camcorder. compensate for excessive vibrations. This is not a malfunction.
- Page 94 Duo” a couple of times. Adaptor. • This may appear on still images recorded on other devices, edited on a computer, etc. You cannot use [WIDE SELECT] (DCR-DVD106E/DVD108E/DVD109E/ DVD608E). • You cannot use [WIDE SELECT] if your disc is DVD+RW.
- Page 95 No sound or only a quiet sound is Playback does not move to the heard when playing back a disc. previous scene when you press • Turn up the volume (p. 38). • If playback crosses 2 titles made • Sound is not output when the LCD screen is automatically by your camcorder when .
- Page 96 Troubleshooting (Continued) Unable to copy the images from a You cannot dub correctly. disc to a “Memory Stick Duo.” • The A/V connecting cable is not connected properly. Make sure that the A/V connecting • You cannot copy a movie from a disc to a cable is connected to the proper jack, i.e.
- Page 97 [S. NIGHTSHOT PLS], [COLOR SLOW SHTR], [FADER] [OLD MOVIE] [SCENE SELECTION], [PICT.EFFECT] [PICT.EFFECT] [OLD MOVIE] [TELE MACRO] [SCENE SELECTION] [AUTO SLW [S. NIGHTSHOT PLS], SHUTTR] [SCENE SELECTION], [COLOR SLOW SHTR], [D.EFFECT] [WIDE [OLD MOVIE] SELECT]** * DCR-DVD306E/DVD308E/DVD708E ** DCR-DVD106E/DVD108E/DVD109E/ DVD608E...
-
Page 98: Warning Indicators And Messages
Inform them of the 5-digit code, which Some symptoms you can fix by yourself. If starts from “E.” the problem persists even after you have tried a couple of times, contact your Sony dealer 101-0001 (Warning indicator or local authorized Sony service facility. pertaining to files) - Page 99 E (Battery level warning) (Warning indicator pertaining to the flash) Slow flashing Fast flashing • The battery pack is nearly used up. • There is something wrong with the • Depending on the operating, flash. environment, or battery conditions, E may flash, even if there are approximately 20 minutes remaining.
-
Page 100: Warning Indicators And Messages
Warning indicators and messages (Continued) x PictBridge compliant printer Z Need to unfinalize disc. • To record on the finalized DVD-RW Not connected to PictBridge (VIDEO mode), unfinalize it (p. 58). compatible printer. • Switch off the printer and switch it on Disc error. - Page 101 Please wait. • This is displayed if the disc removal process takes time. Turn on the camcorder and leave it for about 10 minutes, preventing vibration.
-
Page 102: Additional Information
Additional Information Using your camcorder abroad Power supply System Used in You can use your camcorder in any Australia, Austria, Belgium, countries/regions using the AC Adaptor China, Czech Republic, supplied with your camcorder within the Denmark, Finland, Germany, AC 100 V to 240 V, 50/60 Hz range. Holland, Hong Kong, Hungary, To view images, you need a PAL-system- Italy, Kuwait, Malaysia, New... -
Page 103: Using Your Camcorder Abroad
Setting to the local time You can easily set the clock to the local time by setting a time difference when using your (SETTINGS) t [CLOCK/ LANG] t [AREA SET] and camcorder abroad. Set [SUMMERTIME] on the HOME MENU (p. 69). World time difference Time-zone Time-zone... -
Page 104: Maintenance And Precautions
Maintenance and precautions About the Disc symbol See page 12 for the details of discs which you can use with your camcorder. Notes on use • Hold the disc by its edge while supporting the center hole lightly. Do not touch the recording side (the opposite of the printed side when using a single-sided disc). - Page 105 Care and storage of the discs About the “Memory Stick” • Keep the disc clean, or the image quality of the audio and video output may A "Memory Stick" is a compact, portable IC recording medium with a large data deteriorate.
-
Page 106: Maintenance And Precautions
Maintenance and precautions (Continued) • Data read/write speed may vary depending on • Do not insert anything other than a “Memory the combination of the “Memory Stick” and Stick Duo” into the “Memory Stick Duo” slot. “Memory Stick” compliant product you use. Doing so may cause a malfunction. - Page 107 To use the battery pack effectively • If you cannot use a “Memory Stick Duo” that has been used with another device, format it • Battery pack performance decreases when the with your camcorder (p. 58). Note that surrounding temperature is 10 °C (50 °F) or formatting erases all information on the below, and the length of time you can use the “Memory Stick Duo.”...
-
Page 108: Maintenance And Precautions
• If any solid object or liquid gets inside the place. casing, unplug your camcorder and have it • To discharge the battery pack on your checked by a Sony dealer before operating it camcorder completely, touch (SETTINGS) any further. - Page 109 Moisture condensation To clean the LCD screen If fingerprints or dust make the LCD screen If your camcorder is brought directly from a dirty, it is recommended you use a soft cold place to a warm place, moisture may cloth to clean it. When you use the LCD condense inside your camcorder, on the Cleaning Kit (optional), do not apply the surface of the disc, or on the pickup lens.
- Page 110 Maintenance and precautions (Continued) On handling the casing operate your camcorder about once a month to keep it in optimum state for a long time. • If the casing is soiled, clean the camcorder body with a soft cloth lightly moistened with water, Cleaning inside the viewfinder and then wipe the casing with a dry soft cloth.
- Page 111 On charging the pre-installed 6 Attach the eyecup block to the viewfinder, pushing it straight on until it clicks. rechargeable battery Your camcorder has a pre-installed rechargeable battery to retain the date, time, and other settings even when the POWER switch is set to OFF (CHG).
-
Page 112: Specifications
Approx. 1 000 000 pixels Video compression format Effective (Still, 16:9) MPEG2/JPEG (Still images) Approx. 750 000 pixels Audio compression format Lens DCR-DVD106E/DVD108E/DVD608E Carl Zeiss Vario-Tessar Dolby Digital 2ch DCR-DVD106E/DVD108E/DVD109E/ Dolby Digital Stereo Creator DVD608E DCR-DVD109E/DVD306E/DVD308E/ Optical:40×, Digital:80×, 2 000×... - Page 113 (w × h × d) including the projecting parts Laboratories. with supplied battery pack NP-FH40 attached Input/Output connectors Mass (Approx.) DCR-DVD106E/DVD108E/DVD109E/ Audio/Video output DVD608E 10 pin connector 390 g (13 oz) main unit only Video signal: 1 Vp-p, 75 Ω (ohms) 440 g (15 oz) including the NP-FH40 Luminance signal: 1 Vp-p, 75 Ω...
- Page 114 Specifications (Continued) Operating temperature 0°C to +40°C (32°F to 104°F) Type Li-ion Design and specifications are subject to change without notice.
- Page 115 ,” PATENTS IN THE MPEG-2 PATENT “MagicGate Memory Stick” and “MagicGate PORTFOLIO, WHICH LICENSE IS Memory Stick Duo” are trademarks of Sony AVAILABLE FROM MPEG LA, L.L.C., 250 Corporation. STEELE STREET, SUITE 300, DENVER, • “InfoLITHIUM” is a trademark of Sony COLORADO 80206.
-
Page 116: Quick Reference
Quick Reference Identifying parts and controls The numbers in ( ) are reference pages. A Power zoom lever (34, 39) N Tripod receptacle Attach the tripod (optional: the length of B PHOTO button (29, 33) the screw must be less than 5.5 mm C POWER switch (23) (7/32 in.)) to the tripod receptacle using D Viewfinder lens adjustment lever (25) - Page 117 A Active Interface Shoe EInternal microphone (34) The Active Interface Shoe supplies An Active Interface Shoe compatible power to optional accessories such as a microphone (optional) will take video light, a flash, or a microphone. precedence when connected (DCR- The accessory can be turned on or off as DVD306E/DVD308E/DVD708E).
-
Page 118: Identifying Parts And Controls
M DISP/BATT INFO button (21) B LCD screen/touch panel (17, 25) N WIDE SELECT button (35) (HOME) button (17, 60) * DCR-DVD106E/DVD108E/DVD109E/ D Zoom buttons (34, 39) DVD608E ** DCR-DVD306E/DVD308E/DVD708E E START/STOP button (29, 33) (VIEW IMAGES) button (30, 37) - Page 119 In this case, replace the battery with a Sony CR2025 lithium battery. M b / B / v / V / ENTER buttons Use of another battery may present a risk of fire When you press any button on the VISUAL or explosion.
-
Page 120: Indicators Displayed During Recording/Playback
Indicators displayed during recording/playback Recording movies Recording still images A Recording mode (HQ/SP/LP) (62) K Quality ([FINE] / [STD]) (64) B HOME button (17, 60) L Image size (64) C Remaining battery (approx.) (21) M Appears while a still image is being saved. - Page 121 Viewing movies Viewing still images A Recording mode (HQ/SP/LP) (62) L Image size (64) B Return button M Current still image number /Total number of recorded still images C Remaining battery (approx.) (21) N Slide show button (39) D Playback mode O Previous/Next button (31, 38) E Counter (hour/minute/second) P Data file name...
- Page 122 Indicators displayed during recording/playback (Continued) Indicator Meaning Indicators when you made changes PictBridge connecting (53) Following indicators appear during Warning (92) recording/playback to indicate the settings of your camcorder. Bottom Upper left Upper right Indicator Meaning Picture effect (77) Digital effect (77) Manual focus (73) SCENE SELECTION (74)
-
Page 123: Glossary
Glossary x 5.1ch surround sound x VR mode A system that plays back sound on 6 speakers, 3 at One of the recording formats you can select when the front (left, right and center) and 2 at the rear using a DVD-RW. VR mode enables editing (right and left) with an additional low-pass (deleting or sequence rearrangement) with your subwoofer counted as a 0.1 channel for... -
Page 124: Index
Index Numeric Computer ......78 Copyright ....... 5, 109 16:9.........35, 68 FADER......76, 91 16:9 WIDE ......62 FILE NO. (File number)..64 21-pin adaptor.......41 Finalize ......... 42 DATA CODE ...... 65 4:3......35, 62, 68 FIREWORKS....... 74 DATE/TIME..24, 65, 116 5.1 ch surround recording..34 First Step Guide..78, 81, 82 DC IN jack ...... - Page 125 SELF-TIMER .......77 SEPIA ........77 LANDSCAPE.......75 PAL ........96 SETTINGS category ....60 LANGUAGE SET ....69 PASTEL ....... 77 Slide show ......39 LCD backlight ......25 PHOTO SETTINGS .... 64 SNOW ........75 LCD BL LEVEL (LCD back Pickup lens ......104 Software........79 light level).......67, 88 PictBridge......
- Page 126 Index (Continued) VCR or DVD/HDD recorders ..........52 VF B.LIGHT (Viewfinder brightness) ......67 VIDEO mode....12, 117 VIEW IMAGES SET ...65 Viewfinder......25 Viewing ........30 VISUAL INDEX ..30, 37, 117 VOLUME.......38, 67 Volume label ......56 VR mode.......12, 117 Warning indicators ....92 Warning messages....93 WHITE BAL.
-
Page 127: Revision History
Reverse 985217341.pdf Revision History S.M. Rev. Ver. Date History Contents issued 2007.01 Official Release — — DCR-DVD106E/DVD108/DVD108E/DVD109E/DVD608/DVD608E_L1...