Table of Contents
Advertisement
Specifications
Power Source
Power Consumption
Receiving System
Function
Reception of broadcast
transmissions and Playback
from Video Cassette Tape
Recorders
Playback from special
VCRs
Playback from Special Disc
Players and Special VCRs
AC Auto 110-240 V, 50/60 Hz
197 W
Standby condition: 11 W
21 Systems
PAL B, G, H
PAL I
PAL D, K
SECAM B, G
SECAM D, K
SECAM K1
NTSC M (NTSC 3.58/4.5 MHz
NTSC 4.43/5.5 MHz
NTSC 4.43/6.0 MHz
NTSC 4.43/6.5 MHz
NTSC 3.58/5.5 MHz
NTSC 3.58/6.0 MHz
NTSC 3.58/6.5 MHz)
SECAM I
PAL 60 Hz/5.5 MHz
PAL 60 Hz/6.0 MHz
PAL 60 Hz/6.5 MHz
SECAM 60 Hz/5.5 MHz
SECAM 60 Hz/6.0 MHz
SECAM 60 Hz/6.5 MHz
NTSC 50 Hz/4.5 MHz
TX-29P180T
MD3N Chassis
Receiving Channels
VHF BAND
UHF BAND
CATV
Receiving Stereo System
Tuning System
High Voltage
Picture Tube
© 2003 Matsushita Electric Industrial Co., Ltd. All
rights
reserved.
distribution is a violation of law.
Order No. MTV0308225C3
Colour Television
Regular TV
2-12 (PAL/SECAM B, K1)
0-12 (PAL B AUST.)
1-9 (PAL B N.Z.)
1-12 (PAL/SECAM D)
1-12 (NTSC M Japan)
2-13 (NTSC M U.S.A.)
21-69 (PAL G,H,I/SECAM G,K,K1)
28-69 (PAL B AUST.)
13-57 (PAL D,K)
13-62 (NTSC M Japan)
14-69 (NTSC M U.S.A.)
S1-S20 (OSCAR)
1-125 (U.S.A. CATV)
C13-C49 (JAPAN)
S21-S41 (HYPER)
Z1-Z37 (CHINA)
5A, 9A (AUST.)
NICAM I, NICAM B/G, NICAM D, A2
(German)
Frequency synthesizer
Auto Search Tuning
POSITION: 100 Position
DIRECT: 125 Position
31.0 ± 1.0 kV at zero beam current
Overall Picture tube measured
Unauthorized
copying
and
Advertisement
Table of Contents

Related Manuals for Panasonic TX-29P180T


Summary of Contents for Panasonic TX-29P180T
-
Page 1: Specifications
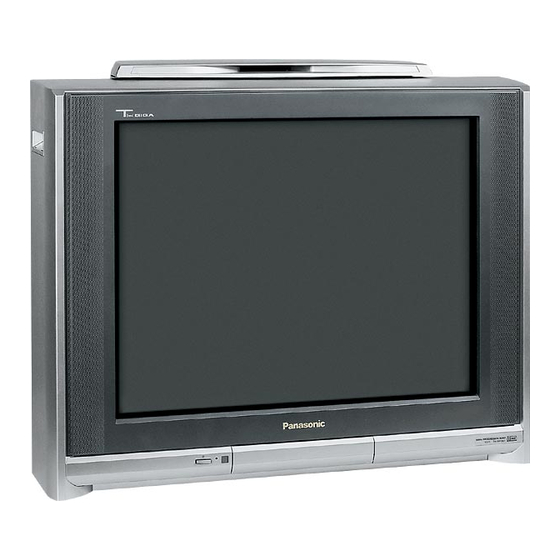
Order No. MTV0308225C3 Colour Television TX-29P180T MD3N Chassis Specifications Power Source AC Auto 110-240 V, 50/60 Hz Receiving Channels Regular TV Power Consumption 197 W VHF BAND 2-12 (PAL/SECAM B, K1) Standby condition: 11 W 0-12 (PAL B AUST.) Receiving System 1-9 (PAL B N.Z.) -
Page 2: Table Of Contents
TX-29P180T diagonally: 73 cm Video, Audio L/R terminals Viewable Picture tube measured AV2 IN (Front): S-Video, diagonally: 68 cm Video, Audio L/R RGB CRT Deflection: 104° Terminals Audio Output 8W x 2 (Speaker) 14W (Woofer) AV3 IN (Rear): Video, Audio Headphones 3.5 mm Plug... - Page 3 TX-29P180T 8.5. DG2 BOARD 9 PARTS LOCATION 8.6. L BOARD 10 Replacement Parts List 8.7. P BOARD 10.1. Replacement Parts List Notes 8.8. H BOARD 10.2. Replacement Part List 8.9. A BOARD...
-
Page 4: Safety Precautions
TX-29P180T 1 Safety Precautions 1.1. General Guide 1. It is advisable to insert an isolation transformer in the AC supply before servicing a hot chassis. 3. Measure the resistance value, with an ohmmeter, between the jumper AC plug and each exposed metallic cabinet part on the receiver, such as screw heads, aerials, connectors, control shafts, etc. -
Page 5: X-Radiation
TX-29P180T 1.4. X-Radiation Warning: 1. The potential sources of X-Radiation in TV sets are the EHT section and the picture tube. 2. When using a picture tube test rig for service, ensure that the rig is capable of handling 32.0 kV without causing X- Radiation. -
Page 6: Service Hints
TX-29P180T 2 SERVICE HINTS 2.1. HOW TO REMOVE THE REAR COVER 1. Remove the 9 screws as shown in Fig. 1. 2.3. HOTEL MODE Purpose 1. At Hotels, this Mode prevents the customer from changing the TV preset data such as Channel preset data. -
Page 7: Self Check
TX-29P180T 3 SELF CHECK 1. Self-Check is used to automatically check the bus lines and hexadecimal code of the TV set. 2. To get into the Self-Check mode, press the down n [-/ ] button on the customer controls at the front of the set, at the same... -
Page 8: Service Mode Function
TX-29P180T 4 SERVICE MODE FUNCTION MPU controls the functions switching for each IIC through IIC bus in this chassis. The following setting and adjustment can be adjusted by remote control in Service Mode. 4.1. HOW TO ENTER SERVICE 1 1. In sound menu, set BASS to MAX and set TREBLE to MINIMUM. - Page 9 TX-29P180T Options Description Model option1 Colour system (TV) PAL(1) SECAM(1) NTSC(1) M.NTSC(1) Colour system (AV) PAL(1) SECAM(1) NTSC(1) M.NTSC(1) option2 CH Plan ASIA/M.E/HK/UK/CHINA(1) NZ/INDNES(1) AUSTRALIA(1) E.EUROPE(1) SPECIAL(1) AMERICA(1) CATV(1) JAPAN(1) option3 A2 enable 4.5(1) 5.5(1) 6.0(1) NICAM enable 6.5(1) 4.5(1) 5.5(1)
- Page 10 TX-29P180T Options Description Model option6 Reserved Geomagnetic Enable (1) Geomagnetic Sensor Geomagnetic sensor enable (1) Geomagnetic Polarity Geomagnetic polarity Plus+(0), Minus-(1) P.NR. Enable(1) SASO enable SASO enable(1) Search speed Slow(1) Fast(0) VCR/GAME in search On(0) Off(1) Tuner MACO tuner (0), ALPS tuner (1)
- Page 11 TX-29P180T Options Description Model option11 Shop mode enable(1) Full/16.9 display Reserved Sub Headphone enable(1) Scan mode Blanking Blanking enable(1) User aspect 14:9 enable(1) NICAM C4 bit enable(1) ID-1 enable(1) 1080i enable(1) option12 Asia Asia(1), Europe(0) Ireland not use not use (Reserved for 29 inch etc.)
-
Page 12: Adjustment Procedure
TX-29P180T 5 ADJUSTMENT PROCEDURE 5.1. VOLTAGE CONFIRMATION Item/Preparation Adjustment Procedure 1. +B voltage 1. TPA55: 144.8 ± 1V 2. TPA56: 12 ± 1V 3. TPA57: 9 ± 1V 4. TPA: 2.5 ± 0.25V 5.2. E.H.T CHECK Item/Preparation Adjustment Procedure 1. Receive an RF signal, window or crosshatch pattern. -
Page 13: Sub Tint
TX-29P180T 5.4. SUB TINT Item/Preparation Adjustment Procedure 1. Receive a 3.58 MHz NTSC rainbow pattern 1. Adjust Sub NTSC Tint so that the peak of level of waveform is similar to Fig. 3 2. Connect oscilloscope to A51 pin 50. -
Page 14: Vrs Adjustment
TX-29P180T 5.6. VRS ADJUSTMENT 1. PREPARATION a. Set DY to CRT not to tilt up and down and left and right deflection. (Fig. 1) b. Set CY to CRT and set CY magnet primarily. Pur Mg: Set Pur Mg that 2 magnets are vertical position. -
Page 15: Colour Purity
TX-29P180T d. Set DY to CRT not to tilt (up and down and left and 5.7. COLOUR PURITY right). 1. Operate the TV set for over 60 minutes. 3. ADJUSTMENT 2. Receive a purity pattern signal. (white pattern) a. Static convergence Adjustment 3. -
Page 16: Cut Off
TX-29P180T 5.9. CUT OFF Preparation 1. Receive a colour bar signal with colour “OFF” and operate 7. Confirm correct B/W rendition and greyscale tracking or the TV set more than 15 minutes. repeat CUTOFF and drive control setup. 2. Set the picture menu to “DYNAMIC NORMAL” and the AI to Note: off. -
Page 17: White Balance
TX-29P180T 5.10. WHITE BALANCE Item/Preparation Adjustment Procedure 1. Select Service Mode 1. 1. Adjustment of Low Light 2. Aging should have been performed over 30 minutes a. Adjustment SUB BRIGHT, so that “Y” axis indicates 6.5 3. Receive the white balance pattern. -
Page 18: Deflection Adjustment
TX-29P180T 6 DEFLECTION ADJUSTMENT 6.1. V-ADJUSTMENT/ 6.1.2.3. 50p V-AMP ADJUSTMENT CONFIRMATION (4:3 MODE) 1. Receive PAL monoscope pattern. 2. Set scan mode to progressive by remote control key. 6.1.1. V-CENTER ADJUSTMENT (4:3 3. Adjust V-AMP (50p / 4:3) so that B, D (Fig. 2) is 2.1 ± 0.1. -
Page 19: Ew Adjustment/Confirmation (4:3 Mode)
TX-29P180T 6.2.2.2. 120i H-AMP ADJUSTMENT 1. Receive NTSC monoscope pattern. 2. Set scan mode to 100 Hz by remote control key. 3. Adjust H-AMP (120i / 4:3) so that both of the edges are within A, B = 2.5 ± 0.2. -
Page 20: Liniality Adjustment / Confirmation
TX-29P180T 6.4. V LINIALITY ADJUSTMENT / 6.5.2. V-AMP (16:9) ADJUSTMENT CONFIRMATION (4:3 MODE) 1. Receive PAL monoscope pattern. 2. Set the aspect to 16:9 6.4.1. 100i V-Linear ADJUSTMENT 3. Set scan mode to 100 Hz 1. Receive PAL monoscope pattern. -
Page 21: Vga480 / 60 Hz Deflection Adjustment
TX-29P180T 6.8. VGA480 / 60 Hz DEFLECTION 6.8.5. EW ADJUSTMENT ADJUSTMENT / 1. Adjust the vertical line to straight line by Parabola (VGA). CONFIRMATION 2. Adjust the vertical line to straight line of both side vertical line in Fig. 9 by Trapezoid (VGA). -
Page 22: Table
TX-29P180T 6.10. TABLE 1 mode 100i 100i 120i 120i 525p 525p 625p 625p (PAL) (PAL) (NTSC) (NTSC) (PAL) (PAL) (NTSC) (NTSC) (YUV) (YUV) (YUV) (YUV) 480/60H 400/7 (4:3) (16:9) (4:3) (16:9) (4:3) (16:9) (4:3) (16:9) 16:9 16:9 H-POS COPY V-POS... -
Page 23: Schematic Diagrams
TX-29P180T 8 SCHEMATIC DIAGRAMS 8.1. SCHEMATIC DIAGRAM NOTES... - Page 24 TX-29P180T...
-
Page 25: G Board
TX-29P180T 8.2. G BOARD 8.2.1. G BOARD 1/2 <1A> <2A> <3A> <4A> <5A> <6A> <7A> <8A> <9A> <10A> <11A> <12A> <13A> <14A> <15A> <16A> <17A> <18A> <19A> <20A> <21A>... - Page 26 TX-29P180T 8.2.2. G BOARD 2/2 <1A> <2A> <3A> <4A> <5A> <6A> <7A> <8A> <9A> <10A> <11A> <12A> <13A> <14A> <15A> <16A> <17A> <18A> <19A> <20A> <21A>...
-
Page 27: Board
TX-29P180T 8.3. X BOARD 8.3.1. X BOARD 1/2 <1A> <2A> <3A> <4A> <5A>... - Page 28 TX-29P180T 8.3.2. X BOARD 2/2 <1A> <2A> <3A> <4A> <5A>...
-
Page 29: Dg Board
TX-29P180T 8.4. DG BOARD 8.4.1. DG BOARD 1/4 <1A> <2A> <3A> <4A> <5A> <6A> <7A> <8A> <9A> <10A> <11A> <12A> <13A> <14A> <15A> <16A> <17A> <18A> <19A> <20A> <21A> <22A> <23A> <24A> <25A> <26A> <27A> <28A> <29A> <30A> <31A>... - Page 30 TX-29P180T 8.4.2. DG BOARD 2/4 <1A> <1B> <2B> <2A> <3B> <3A> <4B> <4A> <5B> <6B> <7B> <5A> <8B> <9B> <10B> <11B> <12B> <13B> <14B> <15B> <16B> <6A> <17B> <18B> <19B> <20B> <21B> <7A> <22B> <8A> <23B> <9A> <24B> <25B> <10A>...
- Page 31 TX-29P180T 8.4.3. DG BOARD 3/4 <1B> <1C> <2B> <2C> <3B> <4B> <3C> <4C> <5C> <5B> <6B> <7B> <8B> <9B> <10B> <6C> <11B> <12B> <13B> <14B> <15B> <16B> <17B> <7C> <18B> <19B> <20B> <21B> <22B> <23B> <24B> <25B> <26B> <27B> <28B>...
- Page 32 TX-29P180T 8.4.4. DG BOARD 4/4 <1C> <2C> <3C> <4C> <5C> <6C> <7C> <8C> <9C> <10C> <11C> <12C> <13C> <14C> <15C> <16C> <17C> <18C> <19C>...
-
Page 33: Dg2 Board
TX-29P180T 8.5. DG2 BOARD 8.5.1. DG2 BOARD 1/2 <1A> <2A> <3A> <4A> <5A> <6A> <7A> <8A> <9A> <10A> <11A> <12A> <13A>... - Page 34 TX-29P180T 8.5.2. DG2 BOARD 2/2 <1A> <2A> <3A> <4A> <5A> <6A> <7A> <8A> <9A> <10A> <11A> <12A> <13A>...
-
Page 35: L Board
TX-29P180T 8.6. L BOARD 8.6.1. L BOARD 1/2 <1A> <2A> <3A> <4A> <5A> <6A> <7A> <8A> <9A>... - Page 36 TX-29P180T 8.6.2. L BOARD 2/2 <1A> <2A> <3A> <4A> <5A> <6A> <7A> <8A> <9A>...
-
Page 37: P Board
TX-29P180T 8.7. P BOARD 8.7.1. P BOARD 1/1... -
Page 38: H Board
TX-29P180T 8.8. H BOARD 8.8.1. H BOARD 1/2 <1A> <2A> <3A> <4A> <5A> <6A> <7A> <8A> <9A> <10A> <11A> <12A> <13A> <14A> <15A> <16A> <17A> <18A> <19A> <20A> <21A> <22A> <23A>... - Page 39 TX-29P180T 8.8.2. H BOARD 2/2 <1A> <2A> <3A> <4A> <5A> <6A> <7A> <8A> <9A> <10A> <11A> <12A> <13A> <14A> <15A> <16A> <17A> <18A> <19A> <20A> <21A> <22A> <23A>...
-
Page 40: A Board
TX-29P180T 8.9. A BOARD 8.9.1. A BOARD 1/4 <1A> <2A> <3A> <4A> <5A> <6A> <7A> <8A> <9A> <10A> <11A> <12A> <13A> <14A> <15A> <16A> <17A> <18A> <19A> <20A> <21A> <22A> <23A> <24A> <25A> <26A> <27A> <28A> <29A> <30A> <31A> <32A>... - Page 41 TX-29P180T 8.9.2. A BOARD 2/4 <1A> <1B> <2B> <2A> <3A> <4A> <5A> <3B> <6A> <7A> <8A> <9A> <3B> <4B> <5B> <10A> <6B> <11A> <7B> <8B> <12A> <9B> <10B> <13A> <14A> <11B> <15A> <16A> <12B> <17A> <18A> <19A> <13B> <20A> <21A>...
- Page 42 TX-29P180T 8.9.3. A BOARD 3/4 <1B> <1C> <2C> <2B> <3C> <3B> <4C> <5C> <6C> <7C> <3B> <8C> <4B> <5B> <9C> <6B> <7B> <10C> <8B> <11C> <9B> <10B> <11B> <12C> <12B> <13B> <14B> <13C> <15B> <14C> <16B> <15C> <17B> <16C> <17C>...
- Page 43 TX-29P180T 8.9.4. A BOARD 4/4 <1C> <2C> <3C> <4C> <5C> <6C> <7C> <8C> <9C> <10C> <11C> <12C> <13C> <14C> <15C> <16C> <17C> <18C> <19C> <20C>...
-
Page 44: Parts Location
TX-29P180T 9 PARTS LOCATION... -
Page 45: Replacement Parts List Notes
TX-29P180T 10 Replacement Parts List 10.1. Replacement Parts List Notes... -
Page 46: Replacement Part List
TX-29P180T 10.2. Replacement Part List Ref. No. Part No. Part Name & Description Remarks Ref. No. Part No. Part Name & Description Remarks EASG15S509A2 SPEAKER R532 ERDS2TJ222 C 2.2KOHM,J, 1/4W EUR511048 REMOTE CONTROL R533 ERDS2TJ153 C 15KOHM,J, 1/4W J0KG00000088 CORE CLAMPER... - Page 47 TX-29P180T Ref. No. Part No. Part Name & Description Remarks Ref. No. Part No. Part Name & Description Remarks R1125 ERJ3GEYJ103 M 10KOHM,J,1/16W R1362 ERJ3GEYJ102 M 1KOHM,J,1/16W R1126 ERJ3GEYJ391 M 390OHM,J,1/16W R1364 ERJ3GEYJ221 M 220OHM,J,1/16W R1127 ERJ3GEYJ471 M 470OHM,J,1/16W R1365...
- Page 48 TX-29P180T Ref. No. Part No. Part Name & Description Remarks Ref. No. Part No. Part Name & Description Remarks R2302 ERX3FJS4R7D M 4.7OHM,J, 3W C111 ECJ1VF1C104Z C 0.1UF, Z, 16V R2303 ERG1SJ102P M 1KOHM,J, 1W C115 ECA1CM221B E 220UF, 16V...
- Page 49 TX-29P180T Ref. No. Part No. Part Name & Description Remarks Ref. No. Part No. Part Name & Description Remarks C974 ECA1VM101B E 100UF, 35V C1392 ECJ1VB1C223K C 0.022UF, K, 16V C1051 ECJ1VC1H101J C 100PF, J, 50V C1394 ECJ1VB0J105K C 1UF, K,6.3V...
- Page 50 TX-29P180T Ref. No. Part No. Part Name & Description Remarks Ref. No. Part No. Part Name & Description Remarks C2801 ECA1HM010B E 1UF, 50V L893 EXCELDR25V CORE C2802 ECJ1VF1C224Z C 0.22UF, Z, 16V L904 TLTACT560J PEAKING COIL C2803 ECJ1VF1H103Z C 0.01UF, Z, 50V...
- Page 51 TX-29P180T Ref. No. Part No. Part Name & Description Remarks Ref. No. Part No. Part Name & Description Remarks D832 MTZJ5.6A ZENER DIODE Q1380 2SA1037AKT TRANSISTOR D833 MTZJ51 ZENER DIODE Q1381 B1ABCF000078 TRANSISTOR D850 FMGG2CSLF665 DIODE Q1390 B1ABCF000078 TRANSISTOR D851...
- Page 52 TX-29P180T Ref. No. Part No. Part Name & Description Remarks Ref. No. Part No. Part Name & Description Remarks TJS4G8010 16P CONNECTOR R871 ERJ3GEYJ103 M 10KOHM,J,1/16W X1150 H0J600400006 CRYSTAL OSCILATOR R878 ERJ3GEYJ103 M 10KOHM,J,1/16W X1301 TSSA171 CRYSTAL OSCILATOR R879 D0AE302JA046...
- Page 53 TX-29P180T Ref. No. Part No. Part Name & Description Remarks Ref. No. Part No. Part Name & Description Remarks R1216 ERDS2TJ472 C 4.7KOHM,J, 1/4W R1464 ERJ3GEYJ333 M 33KOHM,J,1/16W R1217 ERDS2TJ332 C 3.3KOHM,J, 1/4W R1465 ERJ3GEYJ333 M 33KOHM,J,1/16W R1218 ERJ3GEYJ102...
- Page 54 TX-29P180T Ref. No. Part No. Part Name & Description Remarks Ref. No. Part No. Part Name & Description Remarks R3060 ERJ3GEYJ102 M 1KOHM,J,1/16W C583 ECWF2274JB P 0.27UF, J,250V R3070 ERJ3GEYJ331 M 330OHM,J,1/16W C584 ECWF2334JB P 0.33UF, J,250V R3075 ERJ3GEY0R00 M 0OHM,J,1/16W...
- Page 55 TX-29P180T Ref. No. Part No. Part Name & Description Remarks Ref. No. Part No. Part Name & Description Remarks C1311 ECJ1VB0J105K C 1UF, K,6.3V C1491 ECJ1VB1H103K C 0.01UF, K, 50V C1312 ECJ1VB0J105K C 1UF, K,6.3V C1492 ECJ1VB1C223K C 0.022UF, K, 16V...
- Page 56 TX-29P180T Ref. No. Part No. Part Name & Description Remarks Ref. No. Part No. Part Name & Description Remarks C3083 ECA1HM2R2B E 2.2UF, 50V L2821 TLTACT100K PEAKING COIL 10U C3084 ECJ1VB1H682K C 6800PF, K, 50V L2830 EXCELSA35T BEAD CORE C3085...
- Page 57 TX-29P180T Ref. No. Part No. Part Name & Description Remarks Ref. No. Part No. Part Name & Description Remarks IC1303 NJM2904M LINEAR IC JS109 ERJ3GEY0R00 M 0OHM,J,1/16W IC1305 PQ1X251M2ZP JS114 ERJ3GEY0R00 M 0OHM,J,1/16W IC1354 C0DBZFC00048 JS540 ERJ3GEY0R00 M 0OHM,J,1/16W IC1403...
Need help?
Do you have a question about the TX-29P180T and is the answer not in the manual?
Questions and answers