
Related Manuals for Cisco Small Business WAP44


Summary of Contents for Cisco Small Business WAP44
- Page 1 ADMINISTRATION GUIDE Cisco Small Business WAP4410N Wireless-N Access Point with Power Over Ethernet...
- Page 2 Cisco and the Cisco logo are trademarks or registered trademarks of Cisco and/or its affiliates in the U.S. and other countries. To view a list of Cisco trademarks, go to this URL: www.cisco.com/go/trademarks. Third-party trademarks mentioned are the property of their respective owners. The use of the word partner does not imply a partnership relationship between Cisco and any other company.
-
Page 3: Table Of Contents
Connecting the Cisco WAP4410N Access Point to the Network Using a PoE Switch or Router Using a Standard Switch or Router Chapter 5: Setting Up the Cisco WAP4410N Wireless-N Access Point Launching the Web-Based Configuration Utility Navigating the Utility Setup... - Page 4 Contents Administration Status Chapter 6: Configuring the Cisco WAP4410N Wireless-N Access Point Setup Basic Setup Time Advanced Wireless Basic Settings Security Connection Control Wi-Fi Protected Setup VLAN and QoS Advanced Settings AP Mode Administration Management Diagnostics Factory Default Firmware Upgrade...
- Page 5 Contents Appendix B: Where to Go From Here WAP4410N Wireless-N Access Point with Power Over Internet Administration Guide...
-
Page 6: Chapter 1: Introduction
12VDC power adaptor, so it can receive data and power over a single Ethernet network cable. The Cisco WAP4410N supports the 802. 1 1n Draft 2.0 Specification by IEEE. It also supports 802. 1 1g and 802. 1 1b clients in a mixed environment. In addition, this access point provides longer coverage by using multiple antennas to transmit and receive data streams in different directions. -
Page 7: Organization
“Connecting the Cisco Explains how to place and connect the access point. WAP4410N Access Point” on page 15 “Setting Up the Cisco Explains how to use the web-based utility to WAP4410N Wireless-N configure the basic settings of the access point Access Point”... -
Page 8: Chapter 2: Planning Your Wireless Network
Cisco also provides products to allow wireless adaptors to access wired network through a bridge such as the wireless access point, or wireless router. An integrated wireless and wired network is called an infrastructure network. -
Page 9: Network Layout
Ethernet network port to any switch or router that uses Power over Ethernet (PoE). It can also connect to a non-PoE switch or router by using the access point’s power adaptor. With these, and many other, Cisco products, your networking options are limitless. Go to the Cisco website at www.cisco.com for more information about wireless products. -
Page 10: Example Of A Simple Wireless Network
The wireless access points connect to a Cisco switch that provides them with power. Each access point connects multiple wireless devices to the network. -
Page 11: Protecting Your Network
Planning Your Wireless Network Protecting Your Network Protecting Your Network Wireless networks are easy to find. Hackers know that to join a wireless network, wireless networking products first listen for “beacon messages.” These messages can be easily decrypted and contain much of the network’s information, such as the network’s SSID (Service Set Identifier). - Page 12 Planning Your Wireless Network Protecting Your Network Use “Shared Key” authentication. Change your WEP key regularly. • WPA/WPA2 Personal—The WPA-Personal and WPA2-Personal methods offer two encryption methods, TKIP and AES, with dynamic encryption keys. • WPA /WPA2 Enterprise—The WPA-Enterprise and WPA2-Enterprise option requires that your network has a RADIUS server for authentication.
-
Page 13: Chapter 3: Getting To Know The Wireless-N Access Point
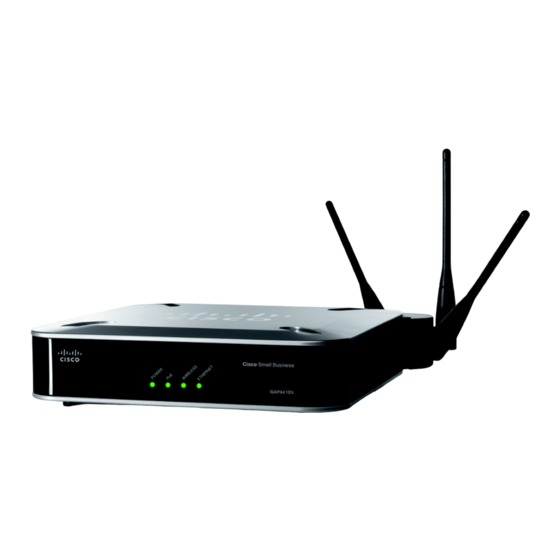
Getting to Know the Wireless-N Access Point This chapter describes the external features of the Cisco WAP4410N Access Point. Front Panel The access point’s front panel lights display information about network activity. • POWER Light—(Green) Lights up and remains lit when the device is powered on. -
Page 14: Back Panel
12VDC power adapter. Use if your switch or router does not support PoE. Antennas and Positions The Cisco WAP4410N Access Point has three detachable 2dBi omni-directional antennas. These antennas are located on the back of the device. The three antennas have a base that can rotate 90 degrees when in the standing position. -
Page 15: Chapter 4: Connecting The Cisco Wap4410N Access Point
Depending on your application, you might want to set up the device first before mounting it. Placement Options You can place the Cisco WAP4410N horizontally on its rubber feet, vertically in a stand, or mount it on the wall. Desktop Option For desktop mounting, place the access point horizontally on a surface so it sits on its four rubber feet. -
Page 16: Wall-Mount Option
Connecting the Cisco WAP4410N Access Point Placement Options Wall-Mount Option To mount the Cisco WAP4410N access point on a wall, follow these steps. Determine where you want to mount the device and install two screws (not STEP 1 supplied) that are 2-15/16 inches apart (approximately 7.46 cm.). -
Page 17: Connecting The Cisco Wap4410N Access Point To The Network
Connecting the Cisco WAP4410N Access Point to the Network Connecting the Cisco WAP4410N Access Point to the Network You can connect the Cisco WAP4410N access point to your network in one of the following ways: • Using a PoE Switch or Router •... -
Page 18: Using A Standard Switch Or Router
Connecting the Cisco WAP4410N Access Point Connecting the Cisco WAP4410N Access Point to the Network The lights on the front panel light up as soon as the Cisco WAP4410N Access Point powers on. Using a Standard Switch or Router To connect the Cisco WAP4410N to your network using a standard switch or router, follow these steps. -
Page 19: Chapter 5: Setting Up The Cisco Wap4410N Wireless-N Access Point
IP addresses from the DHCP server. If the Cisco WAP4410N access point does not receive a DHCP response after 60 seconds, it falls back to the following default static IP address: 192. 1 68. 1 .245 and a default mask of 255.255.255.0. -
Page 20: Navigating The Utility
Setting Up the Cisco WAP4410N Wireless-N Access Point Navigating the Utility c. The wireless access points can be accessed and managed by Cisco Small Business network tools and services including the Cisco FindIT Network Discovery Utility that enables you to automatically discover all supported Cisco Small Business devices in the same local network segment as your computer. -
Page 21: Setup
Setting Up the Cisco WAP4410N Wireless-N Access Point Navigating the Utility Setup This page allows you to configure the host name and IP address settings and to set the time. • Basic Setup—Configures the host name and IP address settings for this access point. -
Page 22: Status
Setting Up the Cisco WAP4410N Wireless-N Access Point Navigating the Utility • Log—Configures the log settings. • Diagnostics—Allows you to perform diagnostic activities, which can be useful in solving network problems. • Factory Default—Resets the access point to its factory default settings. -
Page 23: Chapter 6: Configuring The Cisco Wap4410N Wireless-N Access Point
Configuring the Cisco WAP4410N Wireless-N Access Point This chapter describes how to configure your Cisco WAP4410N access point using the web-based configuration utility. The web-based configuration utility contains the following topics which are described in this chapter. • Setup •... -
Page 24: Basic Setup
Configuring the Cisco WAP4410N Wireless-N Access Point Setup Basic Setup The Setup > Basic Setup page displays the general settings of the access point. You can configure the following basic setup settings: • “Configuring Device Setup Settings” on page 24 •... - Page 25 Configuring the Cisco WAP4410N Wireless-N Access Point Setup Click Setup > Basic Setup. STEP 1 From the IP Settings drop-down menu, select one of the following options: STEP 2 • Static IP Address—Select this option to assign a static or fixed IP address to the access point.
-
Page 26: Time
Configuring the Cisco WAP4410N Wireless-N Access Point Setup Time The Setup > Time page displays the time settings of the access point. By setting up the correct time, you can help your network administrator search the system log to identify problems. By default, the WAP is configured to obtain its time from a predefined list of NTP servers. -
Page 27: Advanced
Configuring the Cisco WAP4410N Wireless-N Access Point Setup Advanced The Setup > Advanced page displays advanced settings. To configure the advanced setup settings of the access point, follow these steps: Click Setup > Advanced. STEP 1 The LAN Port Speed Settings configure settings for the port that physically STEP 2 connects the WAP device to a local area network. -
Page 28: Wireless
Configuring the Cisco WAP4410N Wireless-N Access Point Wireless c. To use a name and password for authentication, click Authentication via Name and Password and enter the name and password in the corresponding fields. Click Save. STEP 6 Wireless The Wireless section describes how to configure the wireless settings of the access point. - Page 29 Configuring the Cisco WAP4410N Wireless-N Access Point Wireless You can also select Auto from the Wireless Channel drop-down menu so that your access point selects the channel with the lowest amount of wireless interference while the system is powering up. Automatic channel selection starts when you click Save.
-
Page 30: Security
Configuring the Cisco WAP4410N Wireless-N Access Point Wireless Security The Wireless > Security page displays the wireless security settings of the access point. To configure the wireless security settings of the access point, follow these steps: Click Wireless > Security. - Page 31 Configuring the Cisco WAP4410N Wireless-N Access Point Wireless Configuring WPA-Personal Wi-Fi Protected Access (WPA) Personal (WPA-Personal) is a security standard stronger than WEP encryption and forward compatible with IEEE 802. 1 1e. WPA- Personal is also known as WPA-PSK. To enable wireless WPA-Personal security, follow these steps: Click Wireless >...
- Page 32 Configuring the Cisco WAP4410N Wireless-N Access Point Wireless • Key Renewal—Enter a key renewal timeout period, which instructs the access point how often it should change the encryption keys. The default is 3600 seconds. Click Save. STEP 5 Configuring WPA2-Personal Mixed This security mode supports the transition from WPA-Personal to WPA2-Personal.
- Page 33 Configuring the Cisco WAP4410N Wireless-N Access Point Wireless Configuring WPA-Enterprise The WPA-Enterprise mode features WPA used in coordination with a RADIUS server for client authentication. Use this mode only when a RADIUS server is connected to the access point. CAUTION To enable wireless WPA-Enterprise security, follow these steps: Click Wireless >...
- Page 34 Configuring the Cisco WAP4410N Wireless-N Access Point Wireless Configuring WPA2-Enterprise The WPA2-Enterprise mode features WPA2 used in coordination with a RADIUS server for client authentication. Use this mode only when a RADIUS server is connected to the access point. CAUTION To enable wireless WPA2-Enterprise security, follow these steps: Click Wireless >...
- Page 35 Configuring the Cisco WAP4410N Wireless-N Access Point Wireless Configuring WPA2-Enterprise Mixed This security mode supports the transition from WPA-Enterprise to WPA2- Enterprise. You can have client devices that use either WPA-Enterprise or WPA2- Enterprise. The access point will automatically choose the encryption algorithm used by each client device.
- Page 36 Configuring the Cisco WAP4410N Wireless-N Access Point Wireless Configuring RADIUS This option features a RADIUS server for client authentication. CAUTION Use this mode only when a RADIUS server is connected to the access point. To enable wireless Remote Authentication Dial-In User Service (RADIUS) security, follow these steps: Click Wireless >...
-
Page 37: Connection Control
Configuring the Cisco WAP4410N Wireless-N Access Point Wireless To enable wireless Wired Equivalent Privacy (WEP) security, follow these steps: Click Wireless > Security. STEP 1 From the Security Mode drop-down menu, select WEP. STEP 2 To enable wireless isolation within the SSID, click Enabled. - Page 38 Configuring the Cisco WAP4410N Wireless-N Access Point Wireless There are two ways to control the connection (association) of wireless client devices. You can either prevent specific devices from connecting to the access point, or you can allow only specific client devices to connect to the access point.
-
Page 39: Wi-Fi Protected Setup
Cisco WAP4410N. The user also needs to click the WPS software button on their wireless device (the client side) at the same time as the WPS button is clicked on the Cisco WAP4410N. The connection is automatically set up. - Page 40 Configuring the Cisco WAP4410N Wireless-N Access Point Wireless The Quality of Service (QoS) feature allows you to specify priorities for different types of traffic. Lower priority traffic is slowed to allow greater throughput or less delay for high priority traffic. The 802. 1 Q VLAN feature allows traffic from different sources to be segmented.
-
Page 41: Advanced Settings
Delivery Traffic Indicator Maps, and the Traffic Indicator Message (TIM). • DTIM Interval—Enter a Delivery Traffic Indication Message (DTIM) interval (1–255). The default is 1 beacon interval. This means that the Cisco WAP4410N Wireless-N Access Point with Power Over Internet Administration Guide... - Page 42 Configuring the Cisco WAP4410N Wireless-N Access Point Wireless WAP4410N sends multicast and broadcast messages every 1 beacon interval, if the Beacon Interval field is set with the default of 100ms. Lower settings result in more efficient networking, while preventing your computer from dropping into power-saving sleep mode.
-
Page 43: Ap Mode
Configuring the Cisco WAP4410N Wireless-N Access Point AP Mode AP Mode The AP Mode page displays the AP mode settings for the access point. To configure the AP mode of the access point, follow these steps: Click AP Mode > AP Mode. -
Page 44: Administration
Configuring the Cisco WAP4410N Wireless-N Access Point Administration Not in Legal AP List—Check to flag any access point not listed in the Legal AP List as a rouge access point. If you check this check box, you must maintain the Legal AP List. - Page 45 Configuring the Cisco WAP4410N Wireless-N Access Point Administration Web HTTPS Access—Enable HTTPS if needed. The default is Disabled. Wireless Web Access—Allow or deny wireless clients to access web- based utility. The default is Disabled. • Remote Console—Enable Secure Shell (SSH) to exchange data over a secure channel between two computers.
-
Page 46: Log
Configuring the Cisco WAP4410N Wireless-N Access Point Administration The Administration > Log page allows you to have logs that keep track of the access point’s activities. Click Administration > Log. STEP 1 Configure the log settings. STEP 2 • Email Alert E-Mail Alert—If you want the access point to send e-mail alerts in the... -
Page 47: Diagnostics
Configuring the Cisco WAP4410N Wireless-N Access Point Administration Click Save. STEP 3 Diagnostics The Administration > Diagnostics page allows you to use the access point to perform a ping. The activity can be useful in solving network problems. To perform a ping test to help diagnose problems with the access point, follow these steps: Click Administration >... -
Page 48: Factory Default
Configuring the Cisco WAP4410N Wireless-N Access Point Administration Factory Default The Administration > Factory Default page allows you to restore the access point’s factory default settings. Note any custom settings before you restore the factory defaults. Once the access point is reset, you will have to re-enter all of your configuration settings. -
Page 49: Reboot
Configuring the Cisco WAP4410N Wireless-N Access Point Administration d. In the File field, enter the location of the firmware upgrade file or click the Browse button to locate the file. Click Upgrade and follow the on-screen instructions Re-enter all of your custom configuration settings. -
Page 50: Ssl Certification Management
Configuring the Cisco WAP4410N Wireless-N Access Point Status SSL Certification Management To generate the certificate with the WAP device, click Export Certificate. Generating a new SSL certificate restarts the secure Web server. The secure connection will not work until the new certificate is accepted on the browser. -
Page 51: Wireless
Configuring the Cisco WAP4410N Wireless-N Access Point Status Primary DNS—The IP address of your primary DNS server. Secondary DNS—The IP address of your secondary DNS server. To update the status information, click Refresh. STEP 2 Wireless The Status > Wireless page displays the access point’s current status information for the wireless network. -
Page 52: System Performance
Configuring the Cisco WAP4410N Wireless-N Access Point Status System Performance The Status > System Performance page displays the access point’s status information for its current settings and data transmissions. To check system performance of the access point, follow these steps: Click Status >... - Page 53 Configuring the Cisco WAP4410N Wireless-N Access Point Status Bytes Sent—The number of bytes sent for each wireless network. Error Packets Received—The number of error packets received for each wireless network. Drop Received Packets—The number of packets being dropped after they were received.
-
Page 54: Appendix A: Troubleshooting
Troubleshooting This appendix provides solutions to problems that might occur during the installation and operation of the Cisco WAP4410N Access Point. Read the descriptions below to help solve your problems. If you can't find an answer here, check the Cisco.com website at www.cisco.com/en/US/support/... - Page 55 802. 1 1n standard. The 802. 1 1n standard states a maximum data transfer rate of 600Mbps and an operating frequency of either 2.4GHz or 5 GHz. What IPv6 features are supported? The Cisco WAP4410N Access Point supports the following IPv6 functions: Path MTU discovery (RFC1981) Internet Protocol v6 -IPv6 (RFC2460)
- Page 56 Troubleshooting The Cisco WAP4410N Access Point supports the following IPv6 Applications: WEB/SSL SNTP PING6 TRACE Route What is roaming? Roaming is the ability of a portable computer user to communicate continuously while moving freely throughout an area greater than that covered by a single access point.
- Page 57 Troubleshooting What is the ISM band? The FCC and their counterparts outside of the U.S. have set aside bandwidth for unlicensed use in the ISM (Industrial, Scientific and Medical) band. Spectrum in the vicinity of 2.4 GHz, in particular, is being made available worldwide.
- Page 58 Users can set it up depending upon their needs. Can Cisco wireless products support file and printer sharing? Cisco wireless products perform the same function as LAN products. Therefore, Cisco wireless products can work with NetWare, Windows NT/ 2000, or other LAN operating systems to support printer or file sharing.
-
Page 59: Windows Help
No more than 63, but this depends on the volume of data and may be fewer if many users create a large amount of network traffic. How do I configure multiple Cisco WAP4410N access points with the same configuration? Configure one access point and then save the configuration file through its web STEP 1 page. -
Page 60: Shared Resources
Troubleshooting TCP/IP Before a computer can communicate with the access point, TCP/IP must be enabled. TCP/IP is a set of instructions, or protocol, all computers follow to communicate over a network. This is true for wireless networks as well. Your computers will not be able to utilize wireless networking without having TCP/IP enabled. -
Page 61: Where To Go From Here
Where to Go From Here Cisco provides a wide range of resources to help you and your customer obtain the full benefits of the Cisco WAP4410N Wireless-N Access Point with Power over Ethernet. Support Cisco Small Business www.cisco.com/go/smallbizsupport Support Community Cisco Small Business www.cisco.com/go/smallbizhelp... - Page 62 Where to Go From Here Cisco Small Business Cisco Partner Central for www.cisco.com/web/partners/sell/smb Small Business (Partner Login Required) Cisco Small Business Home www.cisco.com/smb WAP4410N Wireless-N Access Point with Power Over Internet Administration Guide...