Siemens HiPath 3000 User Manual
Gigaset s4 professional on hipath cordless office
Hide thumbs
Also See for HiPath 3000:
- Service manual (1144 pages) ,
- Operating instruction (176 pages) ,
- User manual (165 pages)

Related Manuals for Siemens HiPath 3000


Summary of Contents for Siemens HiPath 3000
- Page 1 Documentation HiPath 3000/HiPath500 Gigaset S4 professional on HiPath Cordless Office User Guide Communication for the open minded V1 R3.x V1 R4.x Siemens Enterprise Communications www.siemens.com/open...
-
Page 2: Safety Notes
Safety notes Safety notes Handset Danger: • Do not use the handset in potentially explosive atmospheres. • To avoid mutual interference, do not operate the handset in the vicinity of electronic equipment. • Do not use the handset in wet rooms! Devices are not splash- proof. -
Page 3: Weee Mark
• The function is not configured for you or your handset - please contact your system administrator. • Your communications platform does not feature this function - please contact your Siemens contract partner to upgrade. -
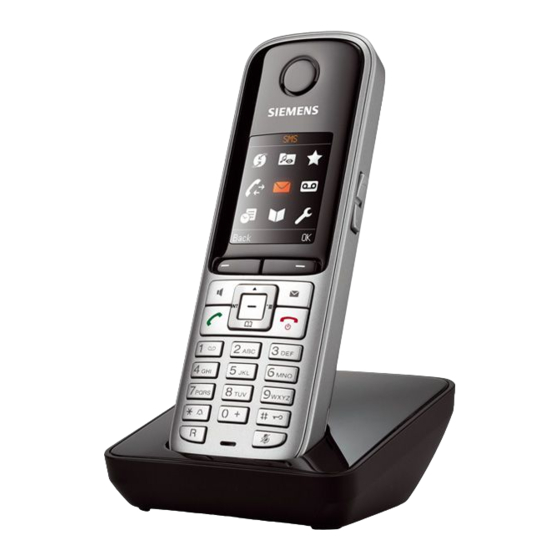
Page 4: Overview Of Handset
Overview of handset Overview of handset Earpiece inset 10 Microphone Display Mute key Display keys 12 Hash key Control key 13 Number keys Speakerphone key 14 On-hook and on/off key Talk key 15 Message key Headset connection 16 Volume key Star key R key How to use the keys:... -
Page 5: Table Of Contents
Inhaltsverzeichnis Contents Safety notes ........2 Handset ..........2 Batteries . - Page 6 Inhaltsverzeichnis Checking the available memory ......28 Activating or deactivating the ringer ......29 Activating or deactivating the warning tone .
- Page 7 Inhaltsverzeichnis Send an entry or phonebook to a handset or system ... 66 Directed assignment of an MSN (multiple subscriber number) ..68 Making calls using identification codes ......68 Using the handset as a second line.
- Page 8 Inhaltsverzeichnis Additional functions ......113 Handset alarm clock ........113 Headset appointment function .
-
Page 9: Description Of Controls
Description of controls Description of controls Function keys The following function keys are available: Name On-hook and • End a call on/off key • Cancel functions • Go back to the next menu level up • Turn the handset on or off Talk key •... -
Page 10: R Key
Description of controls R key Briefly pressing the R key enables the following functions in the different operating states: • When dialing: Insert a pause (for example, between the prefix and the phone number, or when checking a mailbox) • During a call: End a call •... -
Page 11: Display Keys
Description of controls Display keys The handset has two display keys, each with one or two functions. When the key is allocated two functions, press the right or left side of the key to select the corresponding function. Display key assignment depends on the operating status. -
Page 12: Menu Icons In The Main Menu
Description of controls Menu icons in the main menu The main menu of the handset is opened by pressing the right key on the control key. u v t s The menu icons are selected by pressing the top, bottom, right or left of the control key. -
Page 13: Handset Volume
Description of controls Icon Name Ï Settings Configure handset: • Date/Time • Audio Settings – Handset Volume • – Advisory Tones – Ringtones(Handset) • Display – Screensaver – Large Font – Colour Schemes • – Backlight • Language • Registration –... -
Page 14: Putting The Handset Into Operation
Putting the Handset into Operation Putting the Handset into Operation Removing the protective cover Remove the protective cover from the display before putting the handset into service. Inserting the batteries The handset is supplied with two approved batteries. The batteries are supplied uncharged. - Page 15 Putting the Handset into Operation 2. Opening the battery compartment Press your index finger into the recess and pull the battery cover upward. 3. Inserting the batteries Insert the batteries making sure the poles are facing the correct direction (see schematic diagram). The poles are indicated in or on the battery com- partment.
-
Page 16: Charging And Using The Batteries
Putting the Handset into Operation Charging and using the batteries To charge the batteries, insert the handset into the charging shell with the keypad facing forwards. Attention: Only use the relevant approved power supply units for operating the charging shell (for order numbers see Page 139). -
Page 17: Operating And Charging Times Of The Batteries
Putting the Handset into Operation Operating and charging times of the batteries The operating times are only achieved after several charging and discharg- ing cycles and are dependent on • the battery capacity, • the age of the batteries, • the settings made, •... -
Page 18: Assembling Plastic Cover
Putting the Handset into Operation Assembling plastic cover Use the supplied plastic cover for the headset port to achieve optimum sound in speakerphone mode. Connecting a headset Once the plastic cover has been removed, you can connect a headset to the left side of the handset using a 2.5 mm jack. -
Page 19: Setting The Handset Display Language
Putting the Handset into Operation Step by Step Setting the handset display language If your preferred language for the handset’s display texts is not set by default, then you can set it yourself. The language of the communication system’s display texts can only be set by the administrator. -
Page 20: Setting The System Display Language
Putting the Handset into Operation Step by Step Setting the system display language If you wish to change the language of the display texts, then you must also change the system language on the handset. A different language can be set for every hand- set on the system. -
Page 21: Setting Up The Handset
Setting up the handset Step by Step Setting up the handset You can change the standard settings of the handset if you are not happy with them. Setting the volume During the call You can set the volume of the earpiece or when in speakerphone mode during a call by pressing the side volume keys. -
Page 22: In Idle Status
Setting up the handset Step by Step In idle status In idle mode you can adjust the call volume via the menu. Open the handset’s main menu. Ï Settings Select the menu icon and confirm. Audio Settings Select the menu item and confirm. Handset Volume Select the menu item and confirm. -
Page 23: Advisory Tones
Setting up the handset Step by Step Advisory tones Note: Can be set only when the menu item is visible. To change see Page 35. The advisory tones have the following meaning: Advisory Meaning Key Tones Every keystroke is confirmed Confirmation •... -
Page 24: Setting The Ringer
Setting up the handset Step by Step Setting the ringer Tones and melodies are saved on your handset. When you select the Volume and Melodies menu item, the respective ringtone in the current setting rings. Open the handset’s main menu. Ï... - Page 25 Setting up the handset Step by Step Setting melodies You can activate ringtones for different calls on your handset to help you differentiate between calls and ap- pointments. Melodies Select the menu item and confirm. For internal calls Select the required menu item. For external calls Define settings.
-
Page 26: Setting Ringing Tones And Pictures With Resource Directory
Setting up the handset Step by Step Setting ringing tones and pictures with resource directory Your handset’s resource directory is used to manage sounds that you can use as ringtones and pictures that you can use as screensavers. The resource directory can manage the following media types: Type Format... -
Page 27: Renaming/Deleting Screensaver/Clip Images/Sounds
Setting up the handset Step by Step Screensaver/CLIP images Press the display key. Show Switching between the images. If you have saved an image in an invalid format, you get an error message when you select the file. Sounds The sound marked is played immediately. Switching between the sounds. -
Page 28: Checking The Available Memory
Setting up the handset Step by Step Checking the available memory You can view the remaining memory available. Open the handset’s main menu. · Resource Di- Select the menu icon and confirm. rectory Available Memory Select the menu item and confirm. -
Page 29: Activating Or Deactivating The Ringer
Setting up the handset Step by Step Activating or deactivating the ringer Deactivating the ringer Hold down the key until a confirmation tone is emitted. The Ø icon appears on the display. Activating the ringer Hold down the key until a confirmation tone is emitted. Activating or deactivating the warning tone Instead of a ringtone you can activate a warning tone. -
Page 30: Activating/Deactivating Automatic Call Answering
Setting up the handset Step by Step Activating/deactivating automatic call answering Note: Can be set only when the menu item is visible. To change see Page 35. This function allows you to accept calls by removing the handset from the charging shell. Open the handset’s main menu. -
Page 31: Setting The Date And Time
Setting up the handset Step by Step Setting the date and time Set the time and date so that the correct time and date are assigned to incoming calls and to use the alarm clock. The handset date and time are automatically set when you set up a call to another station. -
Page 32: Display Settings
Setting up the handset Step by Step Display settings A number of options are available for setting the display. You can set the screensaver (screen picture), the color scheme, the font size and the display lighting. You can also change the name displayed for the base station. Screensaver In idle mode you can view an image from the resource directory... - Page 33 Setting up the handset Step by Step Color scheme Four color schemes are saved on your handset. By se- lecting a color scheme you define the colors to be used for the font, menu items and background. If you change to a different color scheme during a set- ting, it is immediately previewed to show how it will ap- pear later for all menus.
-
Page 34: Setting The Conversion List For Vcard Transfer
Setting up the handset Step by Step Out of Charger: Move the cursor down one line. Activating or deactivating. Save setting. Save Setting the conversion list for vCard transfer Note: Can be set only when the menu item is visible. To change see Page 35. -
Page 35: Setting The Menu View
Setting up the handset Step by Step Setting the menu view You can define whether to display a selection of or all menu items in the menus. Open the handset’s main menu. Ï Settings Select the menu icon and confirm. Menu View Select the menu item and confirm. -
Page 36: Resetting The Defaults
Setting up the handset Step by Step Resetting the defaults Note: Can be set only when the menu item is visible. To change see Page 35. This function allows you to reset your handset to the de- faults, e.g. if you want to pass it on to someone else or reset it. - Page 37 Setting up the handset Default settings Setting Explanation/notes Levels Default state Tones and Ringer volume signals Ringer melody, external "Bass me" Ringer melody, internal "Classic Ring" Warning tone Handset volume Volume in speakerphone mode 5 Appoint. Melody Volume Key tones, audible each time a key is pressed.
-
Page 38: Making Calls - The Basic Functions
Making calls – the basic functions Step by Step Making calls – the basic functions You can use your handset to make both internal and ex- ternal calls. Internal calls are calls that • you make within the range of a communication sys- tem, forexample, within your company, •... -
Page 39: Activating/Deactivating The Handset
Making calls – the basic functions Step by Step Activating/deactivating the handset a Press the on-hook key until the activation or deactiva- tion is confirmed by a signal. If the default PIN has not been changed (0000), the handset is ready for operation as soon as it is switched on. -
Page 40: First Seize The Line, Then Dial
Making calls – the basic functions Step by Step Language If your preferred language for the display texts is not set, you can set this yourself Page 19. First seize the line, then dial c or d Handset in idle status: Press and hold down the Talk key or press the Speakerphone key. -
Page 41: Dial First, Then Seize The Line
Making calls – the basic functions Step by Step Dial first, then seize the line Dialing:preparation and if necessary. Enter the required phone no. and correct individual char- acters as necessary using the "Delete" Display key. S Press for 2 seconds Insert a dial pause. A "P" appears between the digits en- tered. -
Page 42: Manual Number Redial
Making calls – the basic functions Step by Step Manual number redial The last 20 phone numbers dialed are saved in the redial list. A phone number that was dialed several times is only saved once. c Handset in idle status: Press the Talk key briefly. The re- dial list is displayed. -
Page 43: Callback
Making calls – the basic functions Step by Step Callback This function enables you to call a user who does not answer or whose line is busy. The Callback function en- ables you to contact him as soon as he hangs up or re- uses his telephone. -
Page 44: Enquiry
Making calls – the basic functions Step by Step Deleting a callback request c or d Press and hold down the Talk key or press the Speaker- phone key. Call the system menu. Menu > < Service? Select the menu item and confirm. >... -
Page 45: Answering Or Rejecting A Call
Making calls – the basic functions Step by Step The consultation is ended and you return to the waiting call either: The second station hangs up. You are reconnected to the first partner. Call the system menu. Menu > < Quit and return? Select the menu item and confirm. -
Page 46: Picking Up A Call In A Call Pickup Group
Making calls – the basic functions Step by Step Rejecting a call If you do not wish to be disturbed, you can reject the call. Confirm the message displayed with one of the two dis- Reject call play keys. The call is rejected and the caller hears the busy tone. -
Page 47: Forwarding Calls
Making calls – the basic functions Step by Step Forwarding calls This function is for when you leave your desk for a while and want certain calls to be forwarded to your new lo- cation. The forwarding destination for internal calls can be any internal or external phone number. -
Page 48: Activating Or Deactivating The Keypad Lock
Making calls – the basic functions Step by Step Deactivating call forwarding Prerequisite: The room monitor function is activated. c or d Press and hold down the Talk key or press the Speaker- phone key. Call the system menu. Menu >... -
Page 49: Making Calls - Enhanced Functions
Making calls – enhanced functions Step by Step Making calls – enhanced functions Speakerphone mode Features Speakerphone mode offers you the following advantages: • Other persons can listen to and participate in the call. • Your hands are free. • When dialing, you can hear the ringtone, for exam- ple, without having to lift the handset to your ear. -
Page 50: Conducting Calls With The Headset
Making calls – enhanced functions Step by Step Setting the speakerphone volume The volume can be set during a call Page 21 Page 21. Conducting calls with the headset The handset can be used with a corded and cordless headset. Corded headset You can connect a corded headset to the port on the side. - Page 51 Making calls – enhanced functions Step by Step Registering a Bluetooth headset on the handset Set the headset to login mode (see the user manual supplied with your headset). Open the handset’s main menu. ò Bluetooth Select the menu icon and confirm. Search for Headset Select the menu item and confirm.
- Page 52 Making calls – enhanced functions Step by Step Accepting a call on the Bluetooth headset The headset uses a call tone to signal an incoming call. Press the Talk key on the Bluetooth headset (see the user manual supplied with your headset). Deactivating the Bluetooth headset during a call You are conducting a call via the Bluetooth headset.
-
Page 53: Number Redial
Making calls – enhanced functions Step by Step Number redial The last 20 phone numbers dialed are saved in the redial list. A phone number that was dialed several times is only saved once. If you tried to call a party from the handset’s telephone directory, the name of the party is displayed in case of number redial. -
Page 54: Adding A Telephone Number To The Redial List
Making calls – enhanced functions Step by Step either: Delete Entry Select the menu item and confirm. The telephone num- ber is deleted. Delete All Select the menu item and confirm. The redial list is de- leted. a Press the on-hook key several times to end the opera- tion. -
Page 55: System Speed Dialing
Making calls – enhanced functions Step by Step System speed dialing Your system administrator can save up to 1000 external phone numbers as system speed dialing destinations in your communication system. You can dial these speed dialing destinations with a three-digit code (000 - 999). Dialing a system speed dialing destination c or d Press and hold down the Talk key or press the Speaker- phone key. -
Page 56: System Speed Dialing, Individual
Making calls – enhanced functions Step by Step > < * 7=Use speed Select the menu item and confirm. dialing? Enter the required code (3 digits, 000 - 999). Within five seconds: Enter the suffix-dialing or DID num- ber. System speed dialing, individual You can save up to ten external phone numbers as speed dialing destinations for your handset in your com- munication system. -
Page 57: System Telephone Directory
Making calls – enhanced functions Step by Step Dialing an individual speed dialing destination c or d Press and hold down the Talk key or press the Speaker- phone key. Call the system menu. Menu > < Service? Select the menu item and confirm. >... -
Page 58: Telephone Database (Ldap)
Making calls – enhanced functions Step by Step Quitting the redial list Press the display key. Note: Phone numbers dialed from the "System tele- phone directory" are not stored in the redial list. Telephone database (LDAP) If your company has an LDAP telephone database and access to it is configured in your communication sys- tem, you can query it with your handset. - Page 59 Making calls – enhanced functions Step by Step If configured, you can search for first and last names. First and last names must be separated by a space. Do this by pressing the "0" key. Partial entries are accepted, forexample, "mei P" for "Meier Peter". If applicable: >...
- Page 60 Making calls – enhanced functions Step by Step If too many entries were found The hit list is not displayed in full if more than 50 entries matching your search query were found. We recom- mend narrowing down the search by entering more characters.
-
Page 61: Handset Phonebook
Making calls – enhanced functions Step by Step Handset phonebook You can save contact information for frequent call part- ners in the phonebook. Once a phone number has been saved in this way you no longer have to enter it in full when you want to call someone. -
Page 62: Saving An Entry
Making calls – enhanced functions Step by Step Saving an entry Open the phonebook. New Entry Select the menu item and confirm. The input window opens. Enter the relevant information, see above. Jump to the next line..etc. Functions for text input: Switches mode from abc to Abc, from Abc to 123 and from 123 to abc If predictive text is off:... -
Page 63: Finding And Dialing An Entry
Making calls – enhanced functions Step by Step Changing the sequence of entries: The phonebook entries are generally sorted in alphabet- ical order by surname. Spaces and digits have first pri- ority here. If the phonebook only contains a subscriber’s first name, this is listed instead of the surname in the sequence. -
Page 64: Dialing An Entry With The Speed Dialing Digit
Making calls – enhanced functions Step by Step Dialing an entry with the speed dialing digit You can call up an entry, to which you assigned a speed- dial number by pressing the speed-dial number, and dial the assigned number Page 122 Page 122. -
Page 65: Deleting An Entry Or Phonebook
Making calls – enhanced functions Step by Step a Press the on-hook key several times to end the opera- tion. Deleting an entry or phonebook Open the phonebook. Select the required entry. Press the display key. Options either: Delete Entry Select the menu item and confirm. -
Page 66: Send An Entry Or Phonebook To A Handset Or System
Making calls – enhanced functions Step by Step Send an entry or phonebook to a handset or system You can send individual entries or the entire phonebook to other handsets or to the communications system. To transfer the phonebook in vCard format via Bluetooth Page 125 Page 125. - Page 67 Making calls – enhanced functions Step by Step • 99 – The list or entry is sent to the communication system and can then can only be downloaded by your handset. Confirm your entry. The list or entry is sent. If a phone number from 1 to 98 was dialed, the list or the entry is automatically received by the recipient’s handset.
-
Page 68: Directed Assignment Of An Msn (Multiple Subscriber Number)
Making calls – enhanced functions Step by Step Directed assignment of an MSN (multi- ple subscriber number) Multiple subscriber numbers are numbers of an ISDN multi-device connection. They are used for specific ad- dressing of terminals, so for example a fax machine has it’s own number. -
Page 69: Using The Handset As A Second Line
Making calls – enhanced functions Step by Step > < * 60= Select the menu item and confirm. Account code? Project Code: Enter the required account code (optional). Save the settings. Save Please dial. Enter an external phone number. The phone number is dialed. -
Page 70: Deactivating The Phone Number Display
Making calls – enhanced functions Step by Step Deactivating the phone number display Your service engineer can deactivate the display of your phone number and name on the called party’s display for external outgoing calls. You can also activate and de- activate the phone number display on your own hand- set yourself. -
Page 71: Activating/Deactivating Do Not Disturb
Making calls – enhanced functions Step by Step > < * 59=Pickup - Select the menu item and confirm. The called user is directed? displayed. Call the additional menu. either: > < Accept call? Select the menu item and confirm. Note: If several users are called simultaneously, only the first user called is displayed. -
Page 72: Call Charge Display
Making calls – enhanced functions Step by Step > < Do Not Disturb OFF? Select the menu item and confirm. a Press the on-hook key several times to end the opera- tion. Call charge display After a call has ended, the display shows the connec- tion charges for the current call as standard. -
Page 73: Call Trace
Making calls – enhanced functions Step by Step Call trace You can apply to your carrier for "call tracing" on mali- cious calls. An authorized extension is then in a position to request the identification of the phone number. This also works for 30 seconds after the malicious caller has hung up. - Page 74 Making calls – enhanced functions Step by Step Enter the internal phone number for the door opener. You are connected to the door opener. Using the handset to open the door opener during a call > < Open door? Select the menu item and confirm. Using the handset to open the door opener without holding a conversation c or d Press and hold down the Talk key or press the Speaker-...
- Page 75 Making calls – enhanced functions Step by Step Note: Default code 00000. To change the code, con- firm the "3=change password" option. Follow the user guidance system. Deactivating the door release c or d Press and hold down the Talk key or press the Speaker- phone key.
-
Page 76: Tds Telephone Data Service
Making calls – enhanced functions Step by Step TDS telephone data service You can use your handset to operate connected com- puters and their programs, forexample, access hotel services or information systems. This function can also be called by entering the code Page 132 Page 132. -
Page 77: Activating Control Relays
Making calls – enhanced functions Step by Step Activating control relays The service engineer can set up a maximum of 4 control relays that enable various equipment (forexample, door opener) to be activated and deactivated. It is possible to access a specific control relay. Depend- ing on the configuration, the control relays can be •... -
Page 78: Sending A Signal To The Network
Making calls – enhanced functions Step by Step Sending a signal to the network To enable ISDN-type services/ features to be started via analog lines (forexample, call waiting when a line is busy, three-way conference calls, etc.), you must send a signal to the network before dialing the service code and/or phone number. - Page 79 Making calls – enhanced functions Step by Step either: > < 1=immediate? Select the menu item and confirm. > < 2=on no answer? Select the menu item and confirm. > < 3=on busy? Select the menu item and confirm. then: Enter the phone number of the destination (without ex- ternal code).
-
Page 80: Using Night Service
Making calls – enhanced functions Step by Step Using night service In night service mode, forexample, during lunch breaks or after office hours, all external calls are forwarded to a particular internal telephone (night station). The night station can be defined by the service engineer (= stan- dard night service) or by you (= temporary night ser- vice). -
Page 81: Using Dual-Tone Multifrequency Signaling
Making calls – enhanced functions Step by Step Using dual-tone multifrequency signaling Your handset operates on the basis of digital informa- tion transmission. However, certain applications, forexample, answering machines, can only be operated using analog technology. For this you must send signals using the dual-tone multifrequency signaling (DTMF) process. -
Page 82: Parking/Activating Calls
Making calls – enhanced functions Step by Step Parking/activating calls You can park up to ten calls (i.e. place them on hold) and then reactivate them at other telephones in your com- munication system. Park call You are on a call you wish to park. Call the system menu. -
Page 83: Conducting Calls - With Multiple Users
Step by Step Conducting calls – with multiple users Call waiting You need to speak to a user in your communication sys- tem urgently, even though his line is busy. You can send a call waiting signal during his call to let him know you want to talk to him. -
Page 84: Call Waiting Tone Off/On
Step by Step Ending the second call either: Call the system menu. Menu > < Quit and return? Select the menu item and confirm. a Press the On-hook key. The following message appears on the display: "Recalling". Your handset rings. c Press the Talk key to talk to the first caller again. -
Page 85: Disabling/Enabling Automatic Call Waiting
Step by Step Disabling/enabling automatic call waiting You can disable/ enable automatic call waiting signaling for a second call during a telephone conversation. Disabling the call waiting tone c or d Press and hold down the Talk key or press the Speaker- phone key. -
Page 86: Transferring A Call
Step by Step Override Enter the phone number of the busy user. <Name> The override is established. The user name or phone number, to whom/which the call has been transferred, is displayed. Override is ended when you hang up the handset. Note: During override •... - Page 87 Step by Step a Press the On-hook key. The target user’s phone rings. He picks up the call by lifting the handset. You receive a recall: • immediately if you have made a mistake, • 45 seconds after the transfer if the required user does not answer.
-
Page 88: Placing A Call On Hold
Step by Step Placing a call on hold You can interrupt a call temporarily if, forexample, you want to talk to someone else in the room. The line is placed "on hold" . You are on a call. S or Press the R key or Display key. -
Page 89: Conducting A Conference
Step by Step Conducting a conference You can connect up to 5 internal or external partners with each other in a telephone conference. You can in- clude up to 4 external users in the conference. For information purposes, you will hear a warning tone every 30 seconds during a conference call (can be dis- abled - ask your service engineer). - Page 90 Step by Step Expanding a conference You can expand an existing conference to include up to five users. You are connected with two or more partners in a con- ference call. Call the system menu. Menu > < Add party? Select the menu item and confirm.
- Page 91 Step by Step > View other parties. Closing the conference party list Call the additional menu. > < Exit list? Select the menu item and confirm. The conference par- ty list is closed. Disconnecting a party from the conference As the convener of the conference, you can disconnect users from the conference.
-
Page 92: Using The Second Call Function
Step by Step Using the second call function The second call is an incoming call that is signaled on your handset during a call and can be queried by you (forexample, Page 83). A second call can be answered in the following call states: •... -
Page 93: Group Functions
Group functions Step by Step Group functions Activating/deactivating group calls If this has been configured by the service engineer, you belong to one or more groups of internal users who can be reached by means of a hunt group or group call pho- ne number. - Page 94 Group functions Step by Step You are a member of several groups Leaving and re-joining individual groups c or d Press and hold down the Talk key or press the Speaker- phone key. Call the system menu. Menu either: Leave hunt group? Select the menu item and confirm.
- Page 95 Group functions Step by Step # Press the hash key. You have now left all groups. * Press the star key. You have now joined all groups. then: a Press the on-hook key several times to end the operati-...
-
Page 96: Ringing Group On
Group functions Step by Step Ringing group on You can have calls to your handset signaled acoustically on up to five other telephones. The call is received by the person who answers the call first. Adding users to a group First user c or d Press and hold down the Talk key or press the Speaker- phone key. - Page 97 Group functions Step by Step <x> in group The number of parties added is displayed. Call the additional menu. > < Display/Clear? Select the menu item and confirm. The first user added is displayed. > Scroll to the required user. Call the additional menu.
-
Page 98: Ucd (Universal Call Distribution)
Group functions Step by Step UCD (Universal Call Distribution) This function enables calls to be distributed in a team. An incoming call is always delivered to the team mem- ber who has been idle longest. Team members can also work in separate rooms, forexample, on the company’s premises and at a teleworking station. - Page 99 Group functions Step by Step Logging on/off temporarily You can log on or off at the system temporarily, forexample, during break times. Logging on c or d Press and hold down the Talk key or press the Speaker- phone key. Call the system menu.
- Page 100 Group functions Step by Step Wrap-up time If you need more time than the actual call lasts, you can request/activate a wrap-up time for the last call. This can be a fixed length of time or, alternatively, you must deactivate the wrap-up time yourself (log back on). Requesting time c or d Press and hold down the Talk key or press the Speaker- phone key.
- Page 101 Group functions Step by Step UCD night service UCD night service is a separate night service for call dis- tribution. It is not affected by the system night service. All incoming calls are forwarded to a special call distri- bution destination. Night destination on c or d Press and hold down the Talk key or press the Speaker- phone key.
- Page 102 Group functions Step by Step > < UCD Menu? Select the menu item and confirm. > < * 405=Calls in Select the menu item and confirm. queue? a Press the on-hook key several times to end the operati-...
-
Page 103: Mulap Group (Multiple Line Application)
Group functions Step by Step Mulap group (Multiple Line Application) If your handset’s line belongs to a Mulap group (Multiple Line Application), then you can • answer calls for the group (press the Talk key in group calls) • make external telephone calls under the group pho- ne number (the group phone number is stored in the called party’s caller list, forexample) •... - Page 104 Group functions Step by Step Forwarding on c or d Press and hold down the Talk key or press the Speakerphone key. Call the system menu. Menu > < Service? Select the menu item and confirm. > < More functions: Select the menu item and confirm.
-
Page 105: Message Functions
Message functions Step by Step Message functions The message functions enable you to react to voice mail/ call back services of the communication system or of other users or to initiate information features your- self. Leaving a message/advisory message A number of advisory messages are stored in your com- munication system that can be automatically sent to the caller when an internal call is not answered (in the case of handsets and telephones with display). - Page 106 Message functions Step by Step Enter the required advisory message. Typing errors can be corrected: activate delete mode by double-clicking the hash key and then use the hash key to delete a character. Note: Forexample, if you want to enter the third char- acter on a key: press the relevant key three times in succession.
-
Page 107: Sending/Calling Text Messages
Message functions Step by Step Sending/calling text messages You can send short messages to individual internal us- ers or to groups of internal users. These must have a handset or telephone with display. These text messages can be selected and supplement- ed in part by you: 0 = Please callback 1 = Someone is waiting... - Page 108 Message functions Step by Step Note: Forexample, if you want to enter the third char- acter on a key: press the relevant key three times in succession. then: Press the display key. Send a Press the on-hook key several times to end the opera- tion.
-
Page 109: Answering A Message Or Voice-Mail Message
Message functions Step by Step Answering a message or voice-mail message An advisory message appears and the message key flashes when one or more information messages or voice mails have been received for you. Viewing a new message either: f Press the message key. c or d Press and hold down the Talk key or press the Speaker- phone key. - Page 110 Message functions Step by Step Checking for a new voice-mail message either: f Press the message key. c or d Press and hold down the Talk key or press the Speaker- phone key. Call the system menu. Menu > < Display Messages? Select the menu item and confirm.
-
Page 111: Caller List
Message functions Step by Step > < Delete? Select the menu item and confirm. The entry is deleted. then: a Press the on-hook key several times to end the opera- tion. Caller list If you are unable to answer an external and/or internal call, this call request is stored in a caller list. - Page 112 Message functions Step by Step Note: If a connection is established, the user is auto- matically deleted from the caller list. Call re- quests for groups (hunt group/group call) are also deleted if a member of the group has set up the connection.
-
Page 113: Additional Functions
Additional functions Step by Step Additional functions Handset alarm clock When the alarm clock is activated, it rings every day or every day from Monday to Friday at the set time. The alarm clock is deactivated during automatic number re- dial. - Page 114 Additional functions Step by Step a Press the on-hook key several times to end the opera- tion. Deactivating an alarm/repeating after a pause The alarm rings for 60 seconds. The following appears ì on the display: . If you do not press anything, the alarm repeats after five minutes and then deactivates.
-
Page 115: Headset Appointment Function
Additional functions Step by Step Headset appointment function You can arrange your handset to remind you up to five appointments. The handset must be in idle status at the time of the appointment reminder. The appoint- ment reminder function is deactivated during automatic number redial. - Page 116 Additional functions Step by Step a Press the on-hook key several times to end the opera- tion. Confirming an appointment reminder call An appointment reminder call is signaled in the same way as an incoming call. Press the display key during the appointment reminder call.
- Page 117 Additional functions Step by Step Deleting an appointment The handset is in idle status. Open the handset’s main menu. á Organizer Select the menu icon and confirm. Calendar Select the menu item and confirm. The calendar for the current month is displayed. Select and confirm the required day.
-
Page 118: System Appointment Function
Additional functions Step by Step System appointment function You can use your handset to enter a single appointment for the next 24 hours or an appointment that recurs on a daily basis. When the appointment is due, your handset rings for approx. - Page 119 Additional functions Step by Step Deleting/ checking entered appointments c or d Press and hold down the Talk key or press the Speaker- phone key. Call the system menu. Menu > < Service? Select the menu item and confirm. > < #46=Timed reminder Select the menu item and confirm.
-
Page 120: Selecting A Base
Additional functions Step by Step Selecting a base If your handset is registered at multiple bases, then you can set a specific base or the base with the best recep- tion as the base to be used. The handset then switches automatically to this base. -
Page 121: Setting The Base
Additional functions Step by Step The cordless system overwrites the "base name" dis- play info as soon as an incoming or outgoing call is made. In this case, the name of the base station only re- appears after the handset has been switched off and back on again. -
Page 122: Speed Dialing
Additional functions Step by Step Speed dialing As number can be assigned to the number keys . The number is then dialed by press- ing the key. Configuring speed dialing Press the required number key briefly. If a function has not already been assigned to the key, a new number can be assigned to the key. -
Page 123: Speed Access To Functions
Additional functions Step by Step Speed access to functions You can program both display keys with functions. The function is launched by pressing the key. Configuring speed access Press and hold down the required display key. A list of functions that can be programmed on the key is displayed. -
Page 124: Data Communication With The Pc
Additional functions Step by Step Data communication with the PC So that your handset can communicate with your PC, you must install the "Gigaset QuickSync" application on your PC (download for free at www.gigaset.com/ gigasets790). Once you have installed "Gigaset Quick-Sync" you can connect the handset to your PC via Bluetooth Page 125 or a USB data cable Page 18. -
Page 125: Bluetooth Interface
Additional functions Step by Step Bluetooth interface If you have installed a Bluetooth interface on your PC, you can also communicate with the PC application via the Bluetooth interface on your handset. Attention: A Bluetooth connection can be tapped. To transfer phonebook data between handsets or to the system without Bluetooth, see Page 66. - Page 126 Additional functions Step by Step On the other device agreed PIN: Enter and confirm the same Bluetooth PIN within a few seconds (default: 0000). If you were not fast enough, repeat the previous steps. Add to Confirm the prompt. Known Device list? The Bluetooth connection is set up.
- Page 127 Additional functions Step by Step Deactivating the Bluetooth interface If you are not using the Bluetooth interface for an ex- tended period, deactivate it. This increases your hand- set’s standby time. Open the handset’s main menu. ò Bluetooth Select the menu icon and confirm. Activation ³...
-
Page 128: Telephone Blocking
Enter the value "0000" again to deactivate the PIN. Attention: If you have forgotten your PIN, please contact Siemens Service. The PIN will be reset at your own expense. Entering a new PIN Open the handset’s main menu. -
Page 129: Telephone Lock Code Programming
Telephone blocking Step by Step Battery charging when PIN lock active If the handset has deactivated because the batteries are flat, it automatically activates when you place it in the charging shell. The charging operation starts. If you have already set a PIN, you must enter it so that the handset can receive calls. -
Page 130: Locking/Unlocking Handset
Telephone blocking Step by Step Locking/unlocking handset You can lock your handset to prevent external dialing and programming, thereby preventing unauthorized use in your absence, forexample. Prerequisite: You have defined a personal code or use the default code "00000". Lock handset c or d Press and hold down the Talk key or press the Speaker- phone key. -
Page 131: Central Telephone Lock/Locking/Unlocking Other Handsets
Telephone blocking Step by Step Central telephone lock/locking/ unlocking other handsets If you have the appropriate authorization, you can lock and unlock other handsets to prevent unauthorized use. If the user has locked his handset and has forgotten the individual password he has set, you can unlock the phone again using this function. -
Page 132: System Functions
System functions Step by Step System functions The system functions can be called up via the menu or directly by entering codes. Calling functions via the menu Press and hold down the Talk key or press the Speaker- phone key. Call the system menu. -
Page 133: Functions And Codes
System functions Functions and codes Functions Codes Automatic call wait.term.on Automatic call wait.trm.off Waiting tone off Waiting tone on Call waiting Caller list - Call - Save phone number Advisory msg. on Advisory msg. off DND on DND off UCD: - Log on - Log off - Work on... -
Page 134: Off
System functions Functions Codes Flex Call Messages - Send - View sent message Conference: - on - off Call Charge Display Use speed dialing Change Speed Dial Toggle Tone dialing Night Service ON Night Service OFF Park – Park call –... - Page 135 System functions Functions Codes Change PIN Recall to Network (flash) Language selection Changeover on Changeover off Directory (system, LDAP) Tel. data service Timed reminder on Timed reminder off Door release ON Door release OFF Door opener Pickup group Pickup, directed Forwarding on Forwarding off Trunk FWD on...
-
Page 136: Appendix
Appendix Appendix Troubleshooting Some malfunctions can be resolved without outside intervention. The fol- lowing table provides a list of such malfunctions. All other malfunctions should be reported to the relevant service personnel. Error Possible cause Remedy No display. Handset is not Press the On-hook key switched on. - Page 137 Appendix Error Possible cause Remedy The following appears Communication sys- Repeat call later. immediately after the tem is being used by Talk key is pressed: other users. Connect. No dial tone available; no calls can be made. The following, Handset is blocked. Remove the batteries forexample, appears: from the handset and...
-
Page 138: Taking Care Of The Handset
Appendix Error Possible cause Remedy The following appears: Phone number was not Enter the phone number Not available fully entered, the star or correctly or as pre- hash key was not scribed. pressed. The following appears: Data transfer is active. Wait and try again later. Do not disturb Taking care of the handset Removing everyday dirt... -
Page 139: Documentation
Documentation These operating instructions can be found in PDF format at the following URL: http://www.siemens.com/open To view or print the operating manual in PDF format, you need a computer on which the free Adobe Acrobat Reader program is installed. To view the operating manual in HTML format, you need a computer with a Web browser, forexample, Microsoft Internet Explorer. -
Page 140: Accessories
Source To purchase accessories (such as headsets, protective covers), contact the following address: Siemens AG, I&S IS SC S RC, Tübingerstrasse 1-5, 80686 Munich Mr. Jens Schwabe Tel.: +49 89 9221 - 3174 Fax: +49 89 9221 - 6603 E-mail: jens.schwabe@siemens.com... -
Page 141: Declaration Of Conformity
The device complies with the basic requirements of the R&TTE Directive and therefore displays the CE symbol. Extract from original declaration "We, Siemens Enterprise Communications GmbH & Co KG Hofmannstr. 51, D-80200 Munich/Germany declare that the product Gigaset S4 profes- sional S30852-H2156-R*-* to which this declaration relates, conforms to the following European Directives and European standards: Directive 99/5/EEC: Radio and Telecommunication Terminal Equipment."... -
Page 142: Index
Index unction ............. 37 Index Bluetooth ............. 50 Bluetooth interface ........125 Accessories ..........140 Activating ............. 39 Call answering group ......... 46 Advisory message ........105 Call charge display ........72 Advisory tones ..........23 Call charges ..........72 Alarm ............ - Page 143 Index Consultation (second line) saving ......44 ............62 Control key searching for ..........4, 10 ........... 64 Control relay Viewing ..........77 ............ 64 Copying the phonebook Entry, sending ......66 ..........66 EU directives ..........140 Everyday dirt ..........
- Page 144 Index Language setting On hold ............88 system On/off key ............. 20 ..........4, 9 LDAP telephone database On-hook key ......58 ..........4, 9 Leaving the radio network/re-registering Opening/closing battery compartment .. 15 Override ............85 Line seizure ........... 40, 41 Liquids ............
- Page 145 Index Toggle ............88 Tone dialing ..........81 Saving a phone number ......62 Tones ............. 23, 24 Second call ..........92 Transfer ............86 Second line ..........69 Transfering ..........86 Second line (consultation) ......44 Transfering a call ........
- Page 146 Hofmannstr. 51 80200 München Deutschland Siemens Enterprise Communications GmbH & Co. KG is a Trademark Licensee of Siemens AG Reference No: A31003-G2100-U113-1-7619 The information provided in this document contains merely general descriptions or char- acteristics of performance which in case of...