Linksys WPS54GU2 User Manual
Wireless-g printserver for usb 2.0
Hide thumbs
Also See for WPS54GU2:
- User manual (76 pages) ,
- Quick installation manual (48 pages) ,
- Product data (2 pages)

Related Manuals for Linksys WPS54GU2


Summary of Contents for Linksys WPS54GU2
- Page 1 ® A Division of Cisco Systems, Inc. Wireless-G 802.11g User Guide PrintServer for USB 2.0 WIRELESS WPS54GU2 Model No.
- Page 2 Specifications are subject to change without notice. Linksys is a registered trademark or trademark of Cisco Systems, Inc. and/or its affiliates in the U.S. and certain other countries. Copyright © 2003 Cisco Systems, Inc. All rights reserved. Other brands and product names are trademarks or registered trademarks of their respective holders.
-
Page 3: Table Of Contents
Wireless-G PrintServer for USB 2.0 Table of Contents Chapter 1: Introduction Welcome What’s in this Guide? Chapter 2: Getting to Know the PrintServer The Back Panel The Front Panel Chapter 3: Connecting the PrintServer Overview Connecting the PrintServer to Your Network Chapter 4: Configuring the PrintServer Using the Setup Wizard Installation Chapter 5: Windows Driver Installation... - Page 4 Wireless-G PrintServer for USB 2.0 Starting the Bi-Admin Management Utility The Bi-Admin Management Utility Chapter 8: Internet Printing Protocol (IPP) Overview Windows IPP Client Setup Appendix A: Troubleshooting Common Problems and Solutions Appendix B: Wireless Security Security Precautions Security Threats Facing Wireless Networks Appendix C: About Bi-Directional Printing Appendix D: Upgrading Firmware Appendix E: Windows Help...
- Page 5 Wireless-G PrintServer for USB 2.0 List of Figures Figure 2-1: PrintServer’s Back Panel Figure 2-2: PrintServer’s Front Panel Figure 3-1: Connecting to the LAN Port Figure 3-2: Connecting to the USB Port Figure 3-3: Connecting to the Parallel Port Figure 3-4: Connecting to the Power Port Figure 4-1: Welcome Figure 4-2: Wireless-G PrintServer Setup Figure 4-3: Password...
- Page 6 Wireless-G PrintServer for USB 2.0 Figure 6-6: Protocol Tab - SNMP Figure 6-7: Wireless Tab - Basic Figure 6-8: Wireless Tab - Security Figure 6-9: Printer - Internet Printing Figure 6-10: Printer - Logical Port Figure 6-11: Status Tab - Device Figure 6-12: Status Tab - Printer Figure 6-13: Status Tab - Wireless Figure 6-14: Exit...
- Page 7 Wireless-G PrintServer for USB 2.0 Figure 8-2: Output Select Figure 8-3: AddPort Figure 8-4: Configure IPP Port Figure 8-5: Locate Your Printer Figure 8-6: Connect to Printer Figure D-1: Upgrade Firmware Figure D-2: Detected LAN Cards Figure D-3: BIN File Information...
-
Page 8: Chapter 1: Introduction
Wireless-G PrintServer for USB 2.0 Chapter 1: Introduction Welcome Thank you for choosing the Linksys Wireless-G PrintServer for USB 2.0. The Linksys Wireless-G PrintServer for USB 2.0 lets you connect a USB or parallel printer (or both) directly to your network, eliminating the need to dedicate a PC to print sharing chores. - Page 9 Wireless-G PrintServer for USB 2.0 • Chapter 5: Windows Driver Installation This chapter explains how to install the Windows driver for the PrintServer. • Chapter 6: Configuring the PrintServer Using the Web-based Utility This chapter explains how to configure the PrintServer using the web-based utility. •...
-
Page 10: Chapter 2: Getting To Know The Printserver
Wireless-G PrintServer for USB 2.0 Chapter 2: Getting to Know the PrintServer The Back Panel The PrintServer’s ports are located on the back panel. Important: Resetting the PrintServer will erase all of your settings and replace them with the factory defaults. Do not reset the Figure 2-1: PrintServer’s Back Panel PrintServer if you want to retain the settings. -
Page 11: The Front Panel
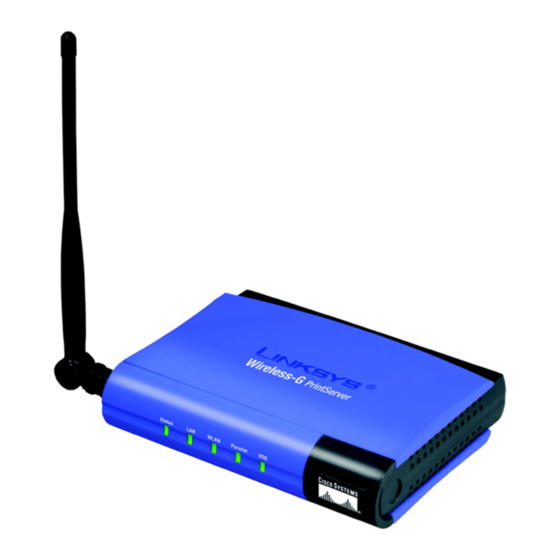
Wireless-G PrintServer for USB 2.0 The Front Panel The PrintServer’s LEDs are located on the front panel. Figure 2-2: PrintServer’s Front Panel Status Green/Orange. If the Status LED is continuously lit green, then the PrintServer is ready for use. The LED flashes green when the PrintServer is booting up, a system self-test is running, or the firmware is being upgraded. -
Page 12: Chapter 3: Connecting The Printserver
Wireless-G PrintServer for USB 2.0 Chapter 3: Connecting the PrintServer Overview NOTE: The PrintServer does not have an on/off power switch. Whenever its power adapter is Before starting the physical installation, make a note of the PrintServer’s Default Name, which is located on the plugged into a power supply, the PrintServer is bottom of the PrintServer. -
Page 13: Chapter 4: Configuring The Printserver Using The Setup Wizard
Wireless-G PrintServer for USB 2.0 Chapter 4: Configuring the PrintServer Using the Setup Wizard Installation To install the PrintServer, you will use the Setup CD-ROM to run the Setup Wizard. It is highly recommended that you use a computer on the wired network to set up the PrintServer. However, if you only have a wireless network, then you can use a computer on the wireless network to set up the PrintServer. -
Page 14: Figure 4-3: Password
Wireless-G PrintServer for USB 2.0 4. The Password screen, Figure 4-3, will appear next. Enter the default password admin in the field provided. Click Enter. 5. The Basic Settings screen, shown in Figure 4-4, will appear. If you want to change the Device Name or Domain Name, enter the Device Name and Domain Name in the respective fields. -
Page 15: Figure 4-5: Ip Settings
Wireless-G PrintServer for USB 2.0 6. The IP Settings screen, Figure 4-5, will appear. If your network uses a router with a DHCP setting that automatically assigns IP addresses, select Automatically obtain an IP address (DHCP). If your network uses a static IP address, select Set IP configuration manually, and enter the IP Address, Subnet Mask, and Gateway in the fields provided. -
Page 16: Figure 4-7: Wireless Settings
Wireless-G PrintServer for USB 2.0 8. The Wireless Settings screen will appear. In the SSID field, enter your wireless network’s SSID or name. This is the unique name shared by all devices in a wireless network. The SSID is case-sensitive and should have 32 characters or fewer. -
Page 17: Figure 4-8: Wireless Security Settings
Wireless-G PrintServer for USB 2.0 9. The Wireless Security Settings screen, shown in Figure 4-8, will appear. If you want to enable WEP encryption for greater wireless security, select the level of WEP encryption, 64 Bit Keys or 128 Bit Keys, and then enter a Passphrase. -
Page 18: Figure 4-9: Wireless Security Settings - Wep Key
Wireless-G PrintServer for USB 2.0 10. If you entered a Passphrase, you will see the automatically generated WEP key on the following screen, as shown in Figure 4-9. Otherwise, enter the WEP key manually in the field provided. If you are using 64-bit WEP encryption, then the key must consist of exactly 10 hexadecimal characters. -
Page 19: Figure 4-11: Congratulations
Wireless-G PrintServer for USB 2.0 12. The Congratulations screen, shown in Figure 4-11, will appear. The setup is complete. You will need to install the driver next. Click User Install at the bottom of the Congratulations screen, and go to “Chapter 5: Windows Driver Installation.” Figure 4-11: Congratulations Chapter 4: Configuring the PrintServer Using the Setup Wizard Installation... -
Page 20: Chapter 5: Windows Driver Installation
Wireless-G PrintServer for USB 2.0 Chapter 5: Windows Driver Installation Overview This section installs the PrintServer’s software on your Windows 98, Me, 2000, or XP computers so they can use the PrintServer for print jobs. (The PrintServer is fully compatible with Windows 98, Me, 2000, and XP.) At this point, you must have the following: HAVE YOU: already set up your printer? Linksys •... -
Page 21: Figure 5-2: Driver Setup Welcome
Wireless-G PrintServer for USB 2.0 4. The Welcome screen of the driver installation program, Figure 5-2, will appear first. Click Cancel to quit the setup program and then close the open programs. Click Next to continue with the driver installation. 5. -
Page 22: Figure 5-4: Select Program Folder
Wireless-G PrintServer for USB 2.0 6. The Select Program Folder screen will appear, as shown in Figure 5-4. An icon will be added to the program folder listed. You may change the name for the program folder, if you wish. Click Next. Click Back to return to the previous screen. -
Page 23: Starting The Print Driver Utility
Wireless-G PrintServer for USB 2.0 Starting the Print Driver Utility 1. Click Start, Programs, Print Server Utility, and then Print Driver Setup. If the Print Driver Setup icon has been created, you can double-click it instead. 2. The Information screen will appear; see Figure 5-6. Read the on-screen information, and then click OK. 3. -
Page 24: Figure 5-8: Configure Printer Port
Wireless-G PrintServer for USB 2.0 5. The Configure Printer Port screen will appear, as shown in Figure 5-8. Your installed printer(s) will appear in the field. Select the printer you want, and click the Connect button to associate the printer with your selected printer port. -
Page 25: Chapter 6: Configuring The Printserver Using The Web-Based Utility
Wireless-G PrintServer for USB 2.0 Chapter 6: Configuring the PrintServer Using the Web-based Utility Overview After setting up the PrintServer with the Setup Wizard, the PrintServer will be ready for use. However, if you’d like to change its advanced settings, use the PrintServer’s web-based utility. This chapter will describe each web page of the utility and each page’s key functions. -
Page 26: The Protocol Tab - Tcp/Ip
Wireless-G PrintServer for USB 2.0 The Protocol Tab - TCP/IP Click the TCP/IP tab to view or change the TCP/IP values of the PrintServer. (See Figure 6-3.) IP Address. If your network router is using DHCP to assign IP addresses, select Obtain an IP Address Automatically. -
Page 27: The Protocol Tab - Netbeui
Wireless-G PrintServer for USB 2.0 The Protocol Tab - NetBEUI NetBEUI connection settings of the PrintServer are available on this tab. (See Figure 6-5.) Domain Name. Enter the name of the domain that you want the PrintServer associated with in the Domain Name field. -
Page 28: The Protocol Tab - Snmp
Wireless-G PrintServer for USB 2.0 The Protocol Tab - SNMP Use the screen shown in Figure 6-6 to view or change the PrintServer’s SNMP (Simple Network Management Protocol) settings. The PrintServer supports SNMP, which allows network administrators to monitor and control the PrintServer through the use of network management platforms, such as HP OpenView. -
Page 29: The Wireless Tab - Basic
Wireless-G PrintServer for USB 2.0 The Wireless Tab - Basic This screen allows you to change the PrintServer’s basic wireless settings. Configuration. From the Regulatory Domain drop-down menu, select the name of your geographic region. The PrintServer’s MAC Address is listed and cannot be changed. In the SSID field, enter the name of your wireless network. -
Page 30: The Wireless Tab - Security
Wireless-G PrintServer for USB 2.0 The Wireless Tab - Security Configure or alter the PrintServer’s wireless security settings on this screen. Wireless Security • WEP Encryption. If you want to enable WEP encryption for greater wireless security, select the level of WEP encryption, 64 Bit Keys (10 Hex chars) or 128 Bit Keys (26 Hex chars) from the drop-down menu. -
Page 31: The Printer Tab - Internet Printing
Wireless-G PrintServer for USB 2.0 The Printer Tab - Internet Printing Internet Printing allows you to automatically print any e-mails that are sent to a specific e-mail account on your network. This is especially useful for printing information when you are not connected to the network. You can print from any location where you can access e-mail. -
Page 32: The Printer Tab - Logical Port
Wireless-G PrintServer for USB 2.0 The Printer Tab - Logical Port The Logical Printers tab contains the logical printer settings of the PrintServer. Configure them for each Logical Printer. (See Figure 6-10.) The PrintServer has six logical or virtual printer ports. For example, you can have three different configurations for your parallel printer: Logical Printer 1 for landscape orientation, Logical Printer 2 for double-sided copies, and Logical Printer 3 for manual feed. -
Page 33: The Status Tab - Device
Wireless-G PrintServer for USB 2.0 The Status Tab - Device The Device tab allows you to view information about the PrintServer. No values can be changed on this screen. This screen is for information only. (See Figure 6-11.) Clicking the Refresh button causes the PrintServer to retrieve this information again. Figure 6-11: Status Tab - Device The Status Tab - Printer The Printer tab allows you to view information about the Printers. -
Page 34: The Status Tab - Wireless
Wireless-G PrintServer for USB 2.0 The Status Tab - Wireless The Wireless tab allows you to view information about the PrintServer’s wireless connection. No values can be changed on this screen. This screen is for information only. (See Figure 6-13.) Clicking the Refresh button causes the PrintServer to retrieve information about the wireless connection again. -
Page 35: Chapter 7: Bi-Admin Management
Wireless-G PrintServer for USB 2.0 Chapter 7: Bi-Admin Management Overview If you use Windows, then you can manage the PrintServer using its web-based utility (see “Chapter 6: Configuring the PrintServer Using the Web-based Utility”) or a utility program called Bi-Admin, which is provided on the PrintServer’s Setup CD-ROM. -
Page 36: Figure 7-3: Choose Destination Location
Wireless-G PrintServer for USB 2.0 5. The Choose Destination Location screen will appear, as shown in Figure 7-3. Choose the location where the B-Admin folder will be installed. To install the driver in the default location, click Next. If you want the folder to be installed in a different location, click the Browse button and select the location. -
Page 37: Starting The Bi-Admin Management Utility
Wireless-G PrintServer for USB 2.0 Starting the Bi-Admin Management Utility 1. To start the Bi-Admin program, click Start, Programs, Print Server Utility, and then Bi-Admin Management Utility. If the Bi-Admin Management Utility icon has been created, you can just double-click it instead. -
Page 38: The Bi-Admin Management Utility
Wireless-G PrintServer for USB 2.0 The Bi-Admin Management Utility The Bi-Admin Management Utility screen will appear next. Any hardware found on the network will appear on the left-hand side of the screen, as shown in Figure 7-7. The Utility can be managed from this screen. The menu and icon options will be explained in this section. -
Page 39: Figure 7-9: Verify Password
Wireless-G PrintServer for USB 2.0 • Printer Status. This option allows you to view the printer status, as well as set port and printer parameters. If you click this option, a Verify Password screen will appear. Make sure that you enter the password in the field before you click OK, or else an Incorrect Password message will appear. -
Page 40: Figure 7-11: Verify Password
Wireless-G PrintServer for USB 2.0 • Configure. You may configure the PrintServer with this option. If you click this option, a Verify Password screen will appear. Make sure that you enter the password in the field before you click OK, or else an Incorrect Password message will appear. -
Page 41: Figure 7-13: Configuration - Tcp/Ip
Wireless-G PrintServer for USB 2.0 TCP/IP (Figure 7-13) • Dynamic IP Address (DHCP). If your network router is using DHCP to assign IP addresses, select Dynamic IP Address (DHCP). By default, Dynamic IP Address (DHCP) is enabled. • Fixed IP Address. If you need to assign the PrintServer a fixed IP address (also known as static IP address), select Fixed IP Address, and enter the appropriate values under IP Address, Subnet Mask, and Gateway. -
Page 42: Figure 7-14: Configuration - Appletalk
Wireless-G PrintServer for USB 2.0 Apple Talk (Figure 7-14) • Zone Name. Typically only Macintoshes use AppleTalk, although other platforms can use it if they have the necessary, third-party software installed. Enter the Zone Name in the field provided. • Port Setting. Select the port number from the drop-down menu. The Printer Type can be obtained from the manufacturer of the printer. -
Page 43: Figure 7-15: Configuration - Netbeui
Wireless-G PrintServer for USB 2.0 NetBEUI (Figure 7-15) • Domain Name. Enter the name of the domain that you want the PrintServer associated with in the Domain Name field. If you are unsure of the Domain Name, you can find it out by looking on any computer already on the network. -
Page 44: Figure 7-16: Configuration - Internet Printing
Wireless-G PrintServer for USB 2.0 Internet Printing (Figure 7-16) • Mail Server. Enter the address of your mail server in the Mail Server IP Address fields. (This value must be a fixed IP address.) Enter the Mail Account name and Password next. Enter the password again in the Confirm Password field. -
Page 45: Figure 7-17: Configuration - Port
Wireless-G PrintServer for USB 2.0 Port (Figure 7-17) • Physical Port. Select the number of the Selected Physical Port from the drop-down menu. Select the Handshake Signal, Busy Only or Busy & Ack. Select the Printer Type, High Speed or Low Speed. •... -
Page 46: Figure 7-18: Configuration - Wireless
Wireless-G PrintServer for USB 2.0 Wireless (Figure 7-18) • SSID (Service Set Identifier). In the SSID field, enter the name of your wireless network. This is the unique name shared by all devices in a wireless network. The SSID is case-sensitive and should have 32 characters or fewer. -
Page 47: Figure 7-19: Configuration - Snmp
Wireless-G PrintServer for USB 2.0 SNMP (Figure 7-19) • SysContact. Enter the name of the contact person in the SysContact field. • SysLocation. Enter the location of the contact person in the SysLocation field. • Configuration Item. From the Configuration Item box, select the number of the management station (M1- M4) or trap receiver (T1-T4). -
Page 48: Figure 7-20: Upgrade
Wireless-G PrintServer for USB 2.0 • Upgrade. You may use this option to upgrade the firmware of the PrintServer. Follow these instructions: 1 On the Upgrade screen shown in Figure 7-20, click the Files button. 2 The Detected LAN Cards screen will appear, as shown in Figure 7-21. Select the LAN card the PrintServer is connected to, and then click the OK button. -
Page 49: Chapter 8: Internet Printing Protocol (Ipp)
Wireless-G PrintServer for USB 2.0 Chapter 8: Internet Printing Protocol (IPP) Overview Internet Printing Protocol (IPP) is a standards-based system that allows remote printing from a PC to any accessible printer. Normally, the printer will be attached to a computer or other device that functions as an IPP Server. -
Page 50: Figure 8-2: Output Select
Wireless-G PrintServer for USB 2.0 2. Enter the IP Address or URL of the IPP Server. 3. If Internet access from your location is via a Proxy Server, check Access IPP Server via Proxy Server, and enter details of your Proxy Server. (This will be the same as your browser configuration.) 4. -
Page 51: Figure 8-4: Configure Ipp Port
Wireless-G PrintServer for USB 2.0 Changing the IPP Port Settings After the IPP port is created, you can reach the Configure IPP Port screen by performing these steps: 1. Open the Printers folder (Start => Settings => Printers). 2. Right-click IPP Printer and select Properties. 3. -
Page 52: Figure 8-6: Connect To Printer
Wireless-G PrintServer for USB 2.0 4. If the connection can be established, and the printer on that port is online, the dialog box shown in Figure 8-6 will be displayed. This screen notifies you that the printer driver is not installed. Click the OK button. 5. -
Page 53: Appendix A: Troubleshooting
Wireless-G PrintServer for USB 2.0 Appendix A: Troubleshooting This appendix consists of “Common Problems and Solutions”. Provided are possible solutions to problems that may occur during the installation and operation of the PrintServer. Read the descriptions below to help you solve your problems. - Page 54 Wireless-G PrintServer for USB 2.0 7. To start over, I need to set the PrintServer to its factory default settings. Unplug the PrintServer’s power adapter. Press the Reset button while you plug in the PrintServer’s power adapter. Continue to hold the Reset button for 10 seconds and then release it. This will reset the password, wireless, and other settings on the PrintServer to the factory defaults.
-
Page 55: Appendix B: Wireless Security
Wireless-G PrintServer for USB 2.0 Appendix B: Wireless Security Linksys wants to make wireless networking as safe and easy for you as possible. The current generation of Linksys products provide several network security features, but they require specific action on your part for implementation. - Page 56 Wireless-G PrintServer for USB 2.0 SSID. There are several things to keep in mind about the SSID: 1. Disable Broadcast 2. Make it unique 3. Change it often Most wireless networking devices will give you the option of broadcasting the SSID. While this option may be more convenient, it allows anyone to log into your wireless network.
-
Page 57: Appendix C: About Bi-Directional Printing
Wireless-G PrintServer for USB 2.0 Appendix C: About Bi-Directional Printing Normal printing only sends print signals from a PC to a printer. Bi-directional printing, also called bitronic printing, refers to a printer’s ability to do just the opposite—talk back to a PC to notify it of a print job status, paper jams, etc. This two-way communication technology can be found in HP, IBM, Panasonic, and other laser or color printers where close contact between the PC and printer is key. -
Page 58: Appendix D: Upgrading Firmware
Wireless-G PrintServer for USB 2.0 Appendix D: Upgrading Firmware The PrintServer’s firmware is upgraded through the Bi-Admin Management utility. Follow these instructions: 1. Download the firmware from Linksys’s website at www.linksys.com/international. 2. Open the Bi-Admin Management utility. 3. Click Main => Upgrade Firmware. 4. -
Page 59: Appendix E: Windows Help
Wireless-G PrintServer for USB 2.0 Appendix E: Windows Help All Linksys wireless products require Microsoft Windows. Windows is the most used operating system in the world and comes with many features that help make networking easier. These features can be accessed through Windows Help and are described in this appendix. -
Page 60: Appendix F: Glossary
Wireless-G PrintServer for USB 2.0 Appendix F: Glossary 802.11a - An IEEE wireless networking standard that specifies a maximum data transfer rate of 54Mbps and an operating frequency of 5GHz. 802.11b - An IEEE wireless networking standard that specifies a maximum data transfer rate of 11Mbps and an operating frequency of 2.4GHz. - Page 61 Wireless-G PrintServer for USB 2.0 Buffer - A block of memory that temporarily holds data to be worked on later when a device is currently too busy to accept the data. Cable Modem - A device that connects a computer to the cable television network, which in turn connects to the Internet.
- Page 62 Wireless-G PrintServer for USB 2.0 Dynamic IP Address - A temporary IP address assigned by a DHCP server. Encryption - Encoding data to prevent it from being read by unauthorized people. Ethernet - An IEEE standard network protocol that specifies how data is placed on and retrieved from a common transmission medium.
- Page 63 Wireless-G PrintServer for USB 2.0 IPCONFIG - A Windows 2000 and XP utility that displays the IP address for a particular networking device. IPSec (Internet Protocol Security) - A VPN protocol used to implement secure exchange of packets at the IP layer. ISM band - Radio band used in wireless networking transmissions.
- Page 64 Wireless-G PrintServer for USB 2.0 PPPoE (Point to Point Protocol over Ethernet) - A type of broadband connection that provides authentication (username and password) in addition to data transport. PPTP (Point-to-Point Tunneling Protocol) - A VPN protocol that allows the Point to Point Protocol (PPP) to be tunneled through an IP network.
- Page 65 Wireless-G PrintServer for USB 2.0 TCP/IP (Transmission Control Protocol/Internet Protocol) - A network protocol for transmitting data that requires acknowledgement from the recipient of data sent. Telnet - A user command and TCP/IP protocol used for accessing remote PCs. TFTP (Trivial File Transfer Protocol) - A version of the TCP/IP FTP protocol that uses UDP and has no directory or password capability.
-
Page 66: Appendix G: Specifications
Wireless-G PrintServer for USB 2.0 Appendix G: Specifications Model WPS54GU2 Standards IEEE 802.11g, IEEE 802.11b, IEEE 802.3, IEEE 802.3u, IEEE 1284, USB 2.0 Ports Power, USB, Parallel, LAN Button Reset Cabling Type USB 2.0, UTP CAT5, DB25 Parallel LEDs Status, LAN, WLAN, Parallel, USB... -
Page 67: Appendix H: Warranty Information
Wireless-G PrintServer for USB 2.0 Appendix H: Warranty Information Linksys warrants to You that, for a period of three years (the “Warranty Period”), your Linksys Product will be substantially free of defects in materials and workmanship under normal use. Your exclusive remedy and Linksys' entire liability under this warranty will be for Linksys at its option to repair or replace the Product or refund Your purchase price less any rebates. -
Page 68: Appendix I: Regulatory Information
Wireless-G PrintServer for USB 2.0 Appendix I: Regulatory Information FCC STATEMENT This product has been tested and complies with the specifications for a Class B digital device, pursuant to Part 15 of the FCC Rules. These limits are designed to provide reasonable protection against harmful interference in a residential installation. - Page 69 Wireless-G PrintServer for USB 2.0 Caution: This equipment is intended to be used in all EU and EFTA countries. Outdoor use may be restricted to certain frequencies and/or may require a license for operation. Contact local Authority for procedure to follow. Note: Combinations of power levels and antennas resulting in a radiated power level of above 100 mW equivalent isotropic radiated power (EIRP) are considered as not compliant with the above mentioned directive and are not allowed for use within the European community and countries that have adopted the European R&TTE directive...
-
Page 70: Appendix J: Contact Information
Wireless-G PrintServer for USB 2.0 Chapter J: Contact Information Need to contact Linksys? Visit us online for information on the latest products and updates to your existing products at: http://www.linksys.com/international If you experience problems with any Linksys product, you can e-mail us at: In Europe E-mail Address Austria...