Table of Contents
Advertisement
Owner's Manual & Safety Instructions
Save This Manual
inspection, maintenance and cleaning procedures. Write the product's serial number in the back of the manual
near the assembly diagram (or month and year of purchase if product has no number). Keep this manual and
the receipt in a safe and dry place for future reference.
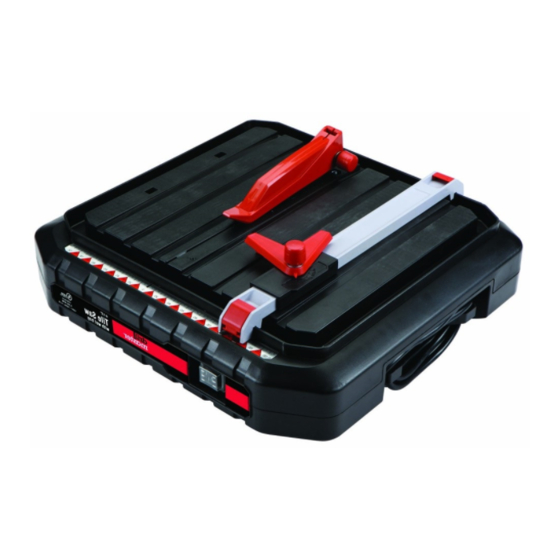
4-1/2"
Tile Saw
with wet tray
REV 11l
When unpacking, make sure that the product is intact
and undamaged. If any parts are missing or broken,
please call 1-800-444-3353 as soon as possible.
©
Copyright
2011 by Harbor Freight Tools
No portion of this manual or any artwork contained herein may be reproduced in
any shape or form without the express written consent of Harbor Freight Tools.
Diagrams within this manual may not be drawn proportionally. Due to continuing
improvements, actual product may differ slightly from the product described herein.
Tools required for assembly and service may not be included.
Keep this manual for the safety warnings and precautions, assembly, operating,
Visit our website at: http://www.harborfreight.com
Email our technical support at: tech@harborfreight.com
®
. All rights reserved.
Read this material before using this product.
Failure to do so can result in serious injury.
SAVE THIS MANUAL.
ITEM 69230
Advertisement
Table of Contents

Related Manuals for Drill Master 69230


Summary of Contents for Drill Master 69230
- Page 1 No portion of this manual or any artwork contained herein may be reproduced in Failure to do so can result in serious injury. any shape or form without the express written consent of Harbor Freight Tools. Diagrams within this manual may not be drawn proportionally. Due to continuing SAVE THIS MANUAL.
-
Page 2: Important Safety Information
8. USE RIGHT TOOL. Don’t force tool or attachment Don’t use power tools in damp or wet locations, to do a job for which it was not designed. or expose them to rain. Keep work area well lighted. Page 2 For technical questions, please call 1-800-444-3353. Item 69230... - Page 3 It’s safer than using your 21. NEVER LEAVE TOOL RUNNING UNATTENDED. hand and it frees both hands to operate tool. TURN POWER OFF. Don’t leave tool until it comes to a complete stop. Item 69230 For technical questions, please call 1-800-444-3353. Page 3...
-
Page 4: Grounding Instructions
It provides a safe distance between the hands and the cutting tool. Must be narrower than 8. Never reach around or over saw blade. the cut width to prevent contact with the blade. Page 4 For technical questions, please call 1-800-444-3353. Item 69230... - Page 5 • Before continuing an unfinished cut, center If unreadable or missing, contact the blade in the pre-cut kerf and check that Harbor Freight Tools for a replacement. the saw teeth are not engaged into the workpiece before turning on the saw.
-
Page 6: Position Of Tile Saw
27. If an extension cord is used, the drip loop must be before the cord connection and the extension cord connection must be placed on an elevated surface. Page 6 For technical questions, please call 1-800-444-3353. Item 69230... -
Page 7: Vibration Safety
If you feel any medical or vibration occurs, stop use immediately. physical symptoms related to vibration (such as tingling, numbness, and white or blue fingers), seek medical advice as soon as possible. SAVE THESE INSTRUCTIONS. Item 69230 For technical questions, please call 1-800-444-3353. Page 7... -
Page 8: Specifications
1. The Riving Knife which holds the Upper Blade Guard is installed through a slot from beneath the Table Insert. Unthread the three screws holding the Table Insert in place and remove the Table Insert. Figure 1 Page 8 For technical questions, please call 1-800-444-3353. Item 69230... - Page 9 Table Leaf) Upper Blade Guard (35) Miter Gauge (29/30) Removable Table Leaf (40) Power Switch (5) Water Tank Drain Plug (48) (I) = ON (O) = OFF Base (2) Figure 4 Item 69230 For technical questions, please call 1-800-444-3353. Page 9...
-
Page 10: Tool Set Up
Figure 5 2. Flip open the Upper Blade Guard. Unthread and remove the Screw and Washer holding the Lower Blade Guard. Remove Lower Blade the Lower Blade Guard. Guard Figure 6 Page 10 For technical questions, please call 1-800-444-3353. Item 69230... - Page 11 Blade. 6. Secure in place at the rear upper corner with the Washer and Screw. Figure 8 Item 69230 For technical questions, please call 1-800-444-3353. Page 11...
-
Page 12: Work Piece And Work Area Set Up
Water Tank. Keep the water level between the minimum Maximum fill line and maximum level markings on the inside of the Water Tank. Minimum fill line Figure 11 Page 12 For technical questions, please call 1-800-444-3353. Item 69230... - Page 13 Drain Plug hold the water. Pull out the Drain Plug and drain the water out of the Water Tank. Clean, then store the tool indoors out of children’s reach. Figure 15 Item 69230 For technical questions, please call 1-800-444-3353. Page 13...
-
Page 14: Cleaning, Maintenance, And Lubrication
See Table A on page 3. Follow all safety precautions whenever diagnosing or servicing the tool. Disconnect power supply before service. Page 14 For technical questions, please call 1-800-444-3353. Item 69230... - Page 15 Cross Head Screw Rubber Pad,B O Type Ring Ø22.4×2.65 Insert Plate Table Top Inner Wire Label Pin Wrench Lock Handle Wrench Rip Fence Switch Bracket Miter Gauge,A Terminal Miter Gauge,B Item 69230 For technical questions, please call 1-800-444-3353. Page 15...
-
Page 16: Please Read The Following Carefully
Limited 90 Day Warranty Harbor Freight Tools Co. makes every effort to assure that its products meet high quality and durability standards, and warrants to the original purchaser that this product is free from defects in materials and workmanship for the period of 90 days from the date of purchase.