
Subscribe to Our Youtube Channel
Related Manuals for Henny Penny HUMIDIFIED COUNTER WARMER HCS-2


Summary of Contents for Henny Penny HUMIDIFIED COUNTER WARMER HCS-2
- Page 1 Henny Penny Humidified Counter Warmer Model HCW-2 Model HCS-2 Model HCW-3 Model HCW-5 Model HCS-5 Model HCW-8 OPERATOR’S MANUAL...
- Page 3 During this time, any frypot that fails due to manufacturing or workmanship issues will be replaced at no charge for parts, labor, or freight. Henny Penny will either install a new frypot at no cost or provide a new or reconditioned replacement fryer at no cost.
-
Page 4: Table Of Contents
Section Section 1. INTRODUCTION ... 1-1 1-1. Heated Display Cabinet ... 1-1 1-2. Features ... 1-1 1-3. Proper Care ... 1-1 1-4. Assistance ... 1-1 1-5. Safety ... 1-2 Section 2. INSTALLATION ... 2-1 2-1. Introduction ... 2-1 2-2. Unpacking ... 2-1 2-3. -
Page 5: Section 1. Introduction
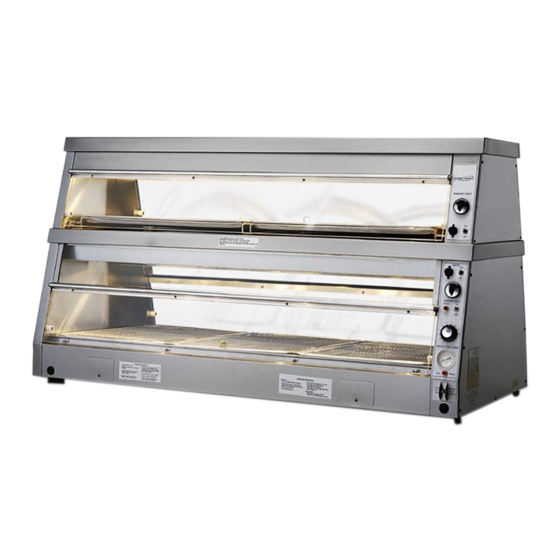
1-3. PROPER CARE 1-4. ASSISTANCE SECTION 1. INTRODUCTION The Henny Penny Heated Display Cabinet is a basic unit of food processing equipment used to display the food product and maintain the temperature of hot foods in the commercial food service operation. This highly efficient, quality-built cabinet will keep hot foods at proper holding temperatures with controlled humidity. -
Page 6: Safety
1-5. SAFETY Model HCS-2/HCW-3/HCW-5/HCW-8 The only way to ensure safe operation of the Henny Penny Heated Display Cabinet is to fully understand the proper installation, operation, and maintenance procedures. The instructions in this manual have been prepared to aid you in learning the proper procedures. -
Page 7: Section 2. Installation
Any shipping damages should be noted in the presence of the delivery agent and signed prior to his or her departure. To remove the Henny Penny Heated Display Cabinet from the carton, you should: 1. Carefully cut banding straps. - Page 8 2-2. UNPACKING (Continued) 2. Open top flaps and remove packing. Step 2 3. Lift carton off skid. Step 3 4. Remove four bolts from under skid. Step 4 The unit is now ready for location and set-up. Model HCS-2/HCW-3/HCW-5/HCW-8...
-
Page 9: Location
Place the unit on a table, preferably with a cut-out opening below the cabinet to allow easy service connections and serviceability. When setting up the Henny Penny Heated Display Cabinet, be sure to level the table. The unit has built-in draining capabilities, but this becomes ineffective when set on an unlevel table. -
Page 10: Drain Connection
2-5. DRAIN CONNECTION 2-6. ELECTRIC CONNECTION Model HCS-2/HCW-3/HCW-5/HCW-8 The drain can be connected to a 1 inch N.P.T. directly below the water well or to a 3/4 inch N.P.T. from the operator’s side. We recommend the 1 inch N.P.T. connection as this will allow straight down draining of the water. -
Page 11: Electrical Connection
2-6. ELECTRICAL CONNECTION (Continued) 2-7. ELECTRIC DATA TABLE 2-8. WATER SUPPLY CONNECTION 1006 Model HCS-2/HCW-3/HCW-5/HCW-8 The electrical power can be connected from the bottom or from the operator’s side. There is a 1-3/32 inch diameter hole for either connection. Again, we recommend the bottom connection as this will give a cleaner appearance to the unit. -
Page 12: Light Bulbs And Glass Panels
2-8. WATER SUPPLY CONNECTION (Continued) 2-9. LIGHT BULBS AND GLASS PANELS Step 1 Step 2 Model HCS-2/HCW-3/HCW-5/HCW-8 This unit as manufactured requires the installation of an appropriate back-siphoning device (as per National Plumbing Code ASA-A40.8-1955) to be connected to the water inlet line. -
Page 13: Model Hcw
Model HCS-2/HCW-3/HCW-5/HCW-8 2-10. CABINET DIMENSIONS Model HCS-2 Model HCW-3 1006... -
Page 14: Model Hcw
Model HCS-2/HCW-3/HCW-5/HCW-8 2-10. CABINET DIMENSIONS (Continued) Model HCW-5 1006... -
Page 15: Section 3. Operation
SECTION 3. OPERATING INSTRUCTIONS 3-1. INTRODUCTION 3-2. OPERATING CONTROLS Model HCS-2/HCW-3/HCW-5/HCW-8 This section provides operating procedures for the heated display cabinets. The Introduction, Installation and Operation sections should be read, and all instructions should be followed before operating the cabinet. Figures 3-1 through 3-12 identify and describe the function of all the operating controls and the major components of the cabinet. -
Page 16: Model Hcs
Model HCS-2/HCW-3/HCW-5/HCW-8 3-2. OPERATING CONTROLS (Continued) Figure 3-2 Figure 3-1 Figure 3-3 Figure 3-4 Figure 3-5 Figure 3-6... - Page 17 Model HCS-2/HCW-3/HCW-5/HCW-8 3-2. OPERATING CONTROLS (Continued) Figure 3-8 Figure 3-7 Figure 3-9 Figure 3-10 Figure 3-11 Figure 3-12...
- Page 18 3-2. OPERATING CONTROLS (Continued) Fig. Item Description Water Valve Water Strainer Contactor Relay Radiant Heater High Temperature Limit Perforated Bun Pan Water Pan Grid Pan Support - Light Bulb Lamp Socket Tinted Glass Model HCS-2/HCW-3/HCW-5/HCW-8 Function An electrical solenoid valve energized by the float switch or the water control switch (in manual position) that allows water to flow into the water pan A filter to prevent particles plugging the water valve...
- Page 19 3-2. OPERATING CONTROLS (Continued) Fig. Item Description 3-10 13 Water Control Switch 3-10 14 Water Light 3-10 Thermometer 3-10 Water Thermostat 3-10 Power Switch 3-10 Power Light 3-10 Radiant Heat Infinite Regulator 3-10 Light Switch 3-10 Light Fuse Holder Model HCS-2/HCW-3/HCW-5/HCW-8 Function A three-position switch with center position being OFF;...
-
Page 20: Start-Up
3” wide by 25” long, and are rated at 1020 watts each Before using, the Henny Penny Heated Display Cabinet should be thoroughly cleaned as indicated in the Shut-Down and Cleanup section of this manual. -
Page 21: Operation With Product
3-3. START-UP (Continued) 3-4. OPERATION WITH PRODUCT 1105 4. Install the perforated bun pans over the water well. This will help in a more rapid heat up of the water. 5. Close the doors. 6. Turn the power switch to the ON position. 7. -
Page 22: Shut-Down And Cleanup
3-5. SHUT-DOWN AND CLEANUP 1. Turn the water thermostat to OFF. 2. Turn the radiant heat to OFF. 3. Turn the water control switch to OFF. 4. Open the doors. 5. Remove all the pans. 6. Remove the drain standpipe. 7. -
Page 23: Section 4. Troubleshooting
SECTION 4. TROUBLESHOOTING 4-1. TROUBLESHOOTING GUIDE PROBLEM Product not holding temperature Doors are fogging Water will not fill Lights will not turn on Not all lights Water will not reach desired temperature More detailed troubleshooting information is available in the Technical Manual, available at www.hennypenny.com, CAUSE Doors are not kept closed •... -
Page 24: Glossary
G L O S S A R Y HENNY PENNY HOLDING CABINETS a round device located inside the cabinet that measures the inside air temperature and sends that information to the control panel a metal assembly located in the water pan in the bottom of the unit that... - Page 25 probe clip product load capacity proof function relative humidity setpoint system initialization temperature setting vent activation switch vented panels water fill line water heater sensor water jet water pan a metal holder that attaches to the outside of the control panel to hold the food probe when not in use;...
- Page 26 Henny Penny Corporation P.O.Box 60 Eaton,OH 45320 1-937-456-8400 1-937-456-8402 Fax Toll free in USA 1-800-417-8417 1-800-417-8434 Fax *FM05-019-F* www.hennypenny.com Henny Penny Corp., Eaton, Ohio 45320, Revised 02-14-07...
Need help?
Do you have a question about the HUMIDIFIED COUNTER WARMER HCS-2 and is the answer not in the manual?
Questions and answers