
Related Manuals for allen Hovertrim 184E XR44


Summary of Contents for allen Hovertrim 184E XR44
- Page 1 Manufactured by Hayter Limited Hovertrim OWNER'S HANDBOOK MODELS 184E XR44 Hovertrim 185E XR16 Hovertrim (English Version) ISSUE 28.01.08 PART NUMBER: 111-1519 (A)
-
Page 3: Specifications
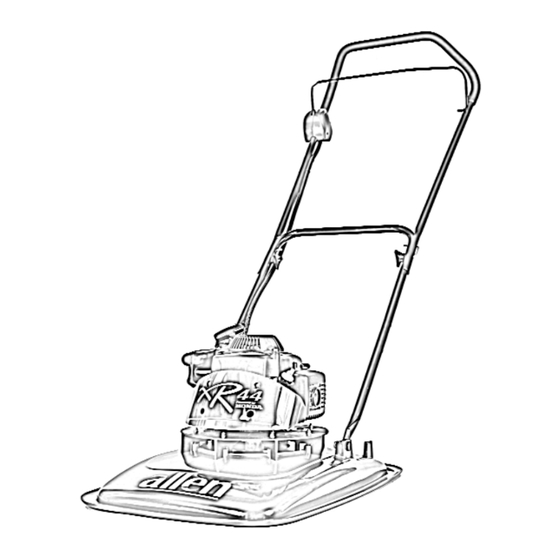
FEATURES MAIN Main Features Footstop Air Cleaner Serial No. Label Choke Lever Spark Plug / Lead Exhaust Guard Handlebar Securing Knob Handlebar Engine Stop Lever OPC Switch Oil Dipstick Engine Cover Engine Start Grip Fuel Cap Vent Knob Fuel Cap Fuel Valve Lever Specifications Code... -
Page 5: Table Of Contents
1.3 Main Features / Specifications 1.5 Contents 1.6 Introduction 1.7 Warranty 1.8 - 1.11 Safety Precautions - Training 1.8 - 1.9 - Preparation 1.9 - 1.10 - Operation 1.10 - 1.11 - Maintenance and Storage 1.11 - Safety Symbols 1.11 - Decal Symbols 1.12 Assembling the Mower 1.12... -
Page 6: Introduction
INTRODUCTION Thank you for purchasing an Allen machine. The following pages are designed to help you gain safe and efficient service from your machine. IMPORTANT: This ‘Owners Handbook’ should be regarded as part of the mower as it gives essential information regarding mower safety, operation, maintenance and specifications. Read and understand this handbook prior to operating your machine for the first time. -
Page 7: Warranty
WARRANTY LIMITED WARRANTY Allen mower’s are manufactured by Hayter Limited. The manufacturer warrants to the original user/purchaser that this unit shall be free from defects in material and workmanship under normal use and service for a period of one year from the date of purchase. -
Page 8: 1.11 Safety Precautions
SAFETY PRECAUTIONS Safety Alert Symbol This safety alert symbol indicates important safety messages. When you see this symbol be alert to the possibility of injury. Carefully read the following and inform others. Your machine is perfectly safe if used correctly. Failure to observe the following precautions may result in serious injury. -
Page 9: Operation
SAFETY PRECAUTIONS Preparation - Always use fresh fuel. Stale fuel can block the carburettor and cause leakage. - Replace fuel tank and oil tank caps securely. A damaged cutter device or impeller or both must be replaced. Before use, always visually inspect the cutting mechanism to ensure that it is in good condition. -
Page 10: 1.11 - Maintenance And Storage
SAFETY PRECAUTIONS Operation Do not put hands or feet near or under rotating parts. Never pick up or carry the machine while the engine is running. Never touch the exhaust/exhaust guard or cooling fins when the engine is hot. Stop the engine and disconnect the spark plug lead: Stop the engine: Maintenance &... -
Page 11: Safety Symbols
Maintenance & Storage If the fuel tank has to be drained, this should be done outdoors and when the engine is cool. Wear strong work gloves when removing and reassembling the cutting device. Always replace worn or faulty parts with genuine Allen parts. Safety Alert - Be aware to the possibility of injury. -
Page 12: Assembling The Mower
ASSEMBLING THE MOWER Delivery Checklist Remove the machine from the packaging and check that the following items have been supplied correctly. If any items are missing contact, your local dealer. Main deck, lower and upper handlebars. 1. Handlebar bolt x 2 HAY-G00116-A 2. -
Page 13: Before Starting The Mower
BEFORE STARTING THE MOWER Prevent Engine Damage To prevent engine damage the engine is shipped without oil or petrol. The engine must be filled with the correct grade of oil and petrol before starting. Always use high quality detergent oil classified SAE 10W-30. Never use additives with recommended oil. -
Page 14: Starting - Step
OPERATING THE MOWER Controls Check that the engine stop lever moves freely and returns to it’s rest position when released. Starting - Step 1 FUEL CAP VENT 1. Open the fuel tank vent by turning the vent knob at least 2 or 3 turns OPEN 2. -
Page 15: Cutting Grass
OPERATING Continued 4. Hold the handlebar together with the engine stop lever, place your foot on the deck and tilt the mower towards you. This will take the load off the engine making it easier to start. Pull the starter grip lightly until you feel resistance, then pull briskly. -
Page 16: Adjusting The Cutting Height
OPERATING THE MOWER Adjusting the Cutting Height HAY-G00143-A 305113 If using spare reel of flexiblade, cut to the length of 200mm and fit as above. Flexiblade Replacement Drain the fuel by running the engine until the fuel tank is empty and the engine stops. -
Page 17: Mower Maintenance
To prevent accidents stop the engine disconnect the spark plug lead before attempting to carry out maintenance procedures on the mower. 1. Spark Plug / Lead 2. Exhaust Guard 3. Exhaust 4. Oil filler Cap/ Dipstick 5. Finger Guard 6. Start Grip 7. -
Page 18: Air Cleaner Service
MOWER Air Cleaner Service HAY-G00145-A AIR CLEANER BODY FILTER ELEMENT AIR CLEANER COVER UPPER TABS LOWER TABS Spark Plug Service Use only an approved spark tester (1) to check for a spark as shown in the diagram. Replace the spark plug every 100 hours or every season, whichever occurs first. -
Page 19: Keeping Engine Clean
MAINTENANCE MOWER Keeping Engine Clean Remove all grass and debris from the engine including the exhaust/exhaust guard, the air ways in the top cowl and the surround- ing deck areas on a daily basis after use. Never spray the engine with water during cleaning. -
Page 20: Storage
MOWER Oil Service Change the engine oil after the first 5 hours of operation and thereafter according to the ‘Maintenance Schedule’:- 1. Drain fuel by running the engine until the fuel tank is empty. 2. Remove the spark plug lead. 3. - Page 21 DECLARATION EC DECLARATION OF CONFORMITY Manufacturer: HAYTER LIMITED, Address: Spellbrook, Bishop’s Stortford, Herts. CM23 4BU. ENGLAND declare that the trimmer: Model name: Model No: Cutting width: Speed of rotation of the cutting device: Engine Manufacturer: Speed of rotation of engine: Complies with the provisions of Directive: 98/37/EC Essential Health &...
- Page 22 TROUBLE PROBLEM Engine will not turn over Engine smokes Engine runs then stops Engine will not start Engine runs rough 1.22 SHOOTING POSSIBLE FAULT Engine stop lever released. Incorrect oil level. Obstruction under deck. Excess oil level. Air cleaner cartridge oil soaked or blocked.
- Page 23 PROBLEM Engine vibrates excessively Uneven cut Poor hovering TROUBLE POSSIBLE FAULT Mounting bolts loose. Cutter disc bolt loose. Bent crankshaft. Damaged impeller or cutter disc Consult your dealer Flexiblade out of balance Engine running slow Impeller air vents blocked Underdeck not clean Cutter disc loose SHOOTING REMEDY...
-
Page 24: Notes
MAINFRAME PARTS LIST Item No. Description ALLEN XR44 DECAL ALLEN XR16 DECAL ONLY WASHER 1/4*7/8*.08" THK NUT M6 NYLOC 'T' TYPE CABLE TIE BOLT M6*45 SCREW PLASTITE DIA 5*22 PAN POZI SCREW SOC HD BUTTON M6*16 DECAL - SAFETY PETROL OPC WIRE LOOM ASSEMBLY LOGO ALLEN BOLT M6X55 HEXBZP-TUF... - Page 25 MAINFRAME PARTS LIST 1.25...
- Page 26 NOTES 1.26...
-
Page 27: Customer Information
CUSTOMER INFORMATION Serial No: Engine Type:- GXV57 Engine Type:- GXV57 Date of Sale:- Your Local Dealer:- Engine:- Honda Engine:- Honda 1.27... - Page 28 YOUR HAYTER DEALER IS: Manufactured by Hayter Limited Hayter Limited Spellbrook, Bishop’s Stortford, Herts, CM23 4BU, England. Tel: +44 (0) 1279 723444 Fax: +44 (0) 1279 600338 e-mail: sales@hayter.co.uk www.hayter.co.uk...
Need help?
Do you have a question about the Hovertrim 184E XR44 and is the answer not in the manual?
Questions and answers