Table of Contents
Advertisement
Advertisement
Table of Contents

Related Manuals for Harman Kardon AVR 146


Summary of Contents for Harman Kardon AVR 146
- Page 1 AVR 146 AUDIO/VIDEO RECEIVER OWNER’S MANUAL...
-
Page 2: Safety Information
SAFETY INFORMATION 1. Read Instructions. All the safety and operating instruc- tions should be read before the product is operated. 2. Retain Instructions. The safety and operating instruc- tions should be retained for future reference. 3. Heed Warnings. All warnings on the product and in the operating instructions should be adhered to. -
Page 3: Important Safety Information
• Do not obstruct the ventilation slots on the top of the unit, or place objects directly over them. • Due to the weight of the AVR 146 and the heat generated by the amplifiers, there is the remote possibility that the rubber padding on the bottom of the SAFETY INFORMATION unit’s feet may leave marks on certain wood or veneer materials. - Page 4 STAPLE INVOICE HERE...
-
Page 5: Table Of Contents
Step Six – Plug in AC Power Step Seven – Insert Batteries in Remote Step Eight – Program Sources Into the Remote Step Nine – Turn On the AVR 146 INITIAL SETUP Using the On-Screen Menu System Step One – Determine Speaker Size Step Two –... -
Page 6: Introduction
In the years since our first single-channel component was introduced, Harman Kardon has offered a number of receiver models, each an improvement upon its predecessors, leading to the AVR 146, a 5.1- channel digital audio/video receiver that offers a wealth of listening and viewing options, all in an elegant package. -
Page 7: Audio Inputs
The AVR 146 is Simplay HD via the HDMI connection with other Simplay HD-verified products. Supplied Accessories The following accessory items are supplied with the AVR 146. If any of these items are missing, please contact Harman Kardon customer service at www.harmankardon.com. -
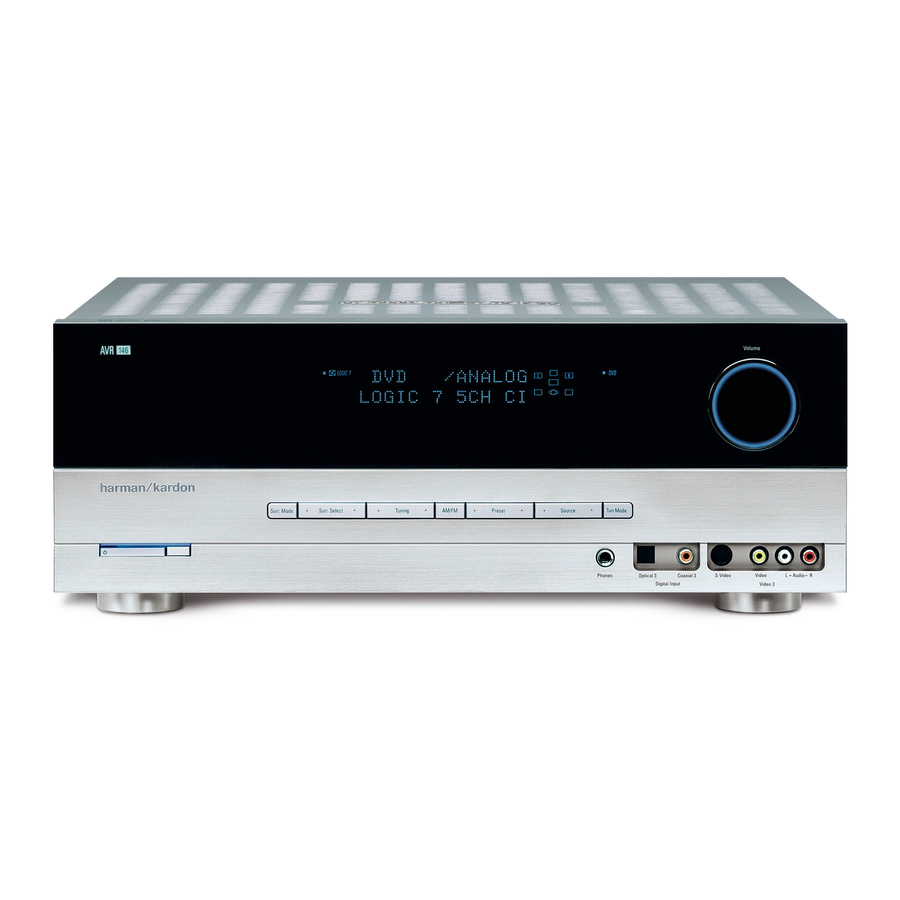
Page 8: Front-Panel Controls
FRONT-PANEL CONTROLS Main Power Switch: This mechanical switch turns the power supply on or off. It is usually left pressed in (On position), and cannot be turned on using the remote control. Standby/On Switch: This electrical switch turns the receiver on for playback, or leaves it in Standby mode for quick turn-on using this switch or the remote control. -
Page 10: Rear-Panel Connections
HDMI connection with other products If your source has that also bear the SimPlay HD logo. NOTE: The AVR 146 will not convert other types of video to HDMI, and you will not be able to view the on-screen displays using the HDMI connection. -
Page 12: Remote Control Functions
REMOTE CONTROL FUNCTIONS The AVR 146 remote is capable of controlling up to ten devices, including the AVR itself and an iPod docked in the optional The Bridge accessory. During the installation process, you may program the codes for each of your source components into the remote. - Page 13 IR Transmitter Lens Power On Program Indicator AVR Selector AM/FM Test Tone Sleep DSP Surround On-Screen Display Channel Level Digital Input Tuning Mode Direct Station Entry Tuning Tone Mode Night Mode Track Skip Transport Controls Mute Power Off Input Selectors 6-Channel Input Selector TV/Video Volume Controls...
- Page 14 REMOTE CONTROL FUNCTIONS Speaker Setup: Press this button to configure speaker sizes, that is, the low-frequency capability of each speaker. Usually this is done using the on-screen menu system, as described in the Initial Setup section. Navigation ( /‹/›) and Set Buttons: ⁄...
-
Page 15: Introduction To Home Theater
Surround sound immerses you in the musical or film presentation for increased realism. The AVR 146 may have up to five speakers connected directly to it (plus a subwoofer). Each speaker is powered by its own amplifier channel inside the receiver. When more than two speakers are used, it is called a multichannel system. -
Page 16: Connections
Figure 3 – Subwoofer Connecting Source Devices to the AVR The AVR 146 is designed to process audio and video input signals, playing back the audio and displaying the video on a television or monitor connected to the AVR. These signals originate in what are known as “source devices,”... -
Page 17: Audio Connections
In addition, receivers and processors such as the AVR 146 may handle the incoming signal in several different ways, depending on their capability as well. The AVR 146 is only capable of switching the HDMI data. That is, the incoming audio and video data, including 1080i and 1080p video,... -
Page 18: Analog Video
HDMI-capable source device and video display, it requires a separate audio connection for each source since the AVR 146 doesn’t have access to the audio data in the HDMI stream. The AVR 146 has been tested and is Simplay HD guarantees compatibility via the HDMI connection with other products that also bear the Simplay HD logo. -
Page 19: Speaker Placement
Before you begin to connect cables, it is important to place your speakers in their correct locations in the room. Optimally, the speakers should be placed in a circle with the listening position at its center. The distance from the listening position to the video display forms the radius of the circle. -
Page 20: Installation
AVR 146 Figure 16 – Speaker Connections Step Two – Connect the Subwoofer Connect the Subwoofer Output on the AVR 146 to the line-level input on your subwoofer. See Figure 17. Consult the manufacturer’s guide for the subwoofer for additional information. - Page 21 Tape cassette NOTE: The AVR 146 is equipped with a total of six digital audio inputs, four on the rear panel (Coaxial 1 and 2, Optical 1 and 2) and two on the front panel (Coaxial 3 and Optical 3), which may be assigned to any of the eight source inputs (DVD, Video 1 through 3, HDMI 1 and 2, CD and Tape).
- Page 22 Video 2 Source The Video 2 source is used only for playback. The AVR 146 remote control is programmed to operate many brands and models of cable and satellite television devices, and we recommend connecting your cable or satellite set-top box to this source.
-
Page 23: Step Five - Connect The Video Display
Blu-ray Disc player or HDTV tuner. The HDMI 1 source is not used with any of the 2-channel analog audio or video inputs on the AVR 146. Since the AVR 146 is not capable of processing either the audio or video signal transmitted via the HDMI connection, you will need to connect the source’s coaxial digital audio output to the Coaxial 2 digital audio input... -
Page 24: Step Six - Plug In Ac Power
See Figure 29. As mentioned previously, you will need to make a separate digital audio connection from each source device to the AVR 146, and you will also need to consult the owner’s guide for your television to learn the proper procedure for disabling or muting the audio. - Page 25 If you are unable to locate a code set that correctly operates your source device, it will not be possible to use the AVR remote to control that device. However, you may still connect the source to the AVR 146 and operate it using the device’s original remote control. Alternatively, you may wish to consider purchasing Harman Kardon’s optional TC 30...
-
Page 26: Step Nine - Turn On The Avr 146
Master Power Switch in the ON position, even when the receiver is not being used. Figure 34 – Power Switches 2. There are several ways in which the AVR 146 may be turned on from Standby mode. a) Press the Standby/On Switch on the front panel. See Figure 34. -
Page 27: Initial Setup
Before you begin enjoying your new receiver, a few adjustments should be made to configure the AVR 146 to match your actual system. Make sure that you have connected a video display to either the S-video or composite video monitor output on the receiver. When you turn on your display and the AVR, you should see a blue screen. -
Page 28: Step Two - Measure Speaker Distances
150Hz. In this case, the higher number is most important and should be noted in the worksheet. The purpose of programming this information into the AVR 146 is to program the receiver’s bass management, which determines which speakers the receiver will use to play back the low-frequency (bass) portion of the source program. -
Page 29: Speaker Crossover Menu
LEFT/RIGHT: This line tells the AVR 146 the capabilities of your front left and right speakers. Use the ‹/› Buttons to select either SMALL or LARGE for these speakers. CENTER: Move the cursor to the line for the center speaker, and use the ‹/›... -
Page 30: Delay Adjust Menu
INITIAL SETUP Setting the Speaker Crossover menu correctly ensures that your speakers sound their best. Although you could skip this step the first time you use the receiver, we recommend that you take the few extra minutes to enter the correct crossover settings. You may select from seven possible settings: 40Hz, 60Hz, 80Hz, 100Hz, 120Hz, 150Hz or 200Hz. - Page 31 Buttons to adjust the level navigate to each channel and use the level as desired. If you would like to set your levels using the AVR 146’s internal test tone, you will need to adjust the TEST TONE SEQ and TEST TONE lines as follows.
-
Page 32: Step Five - Configure Sources
INITIAL SETUP TEST TONE SEQ: When this setting reads AUTO, the test tone will auto- matically circulate to all channels, pausing for a few moments at each channel and then moving to the next channel several seconds later, as indicated by the blinking cursor. You may adjust the level for any channel when the test tone is paused there by using the ‹... - Page 33 AUTO POLL: The Auto Poll feature is used when both an analog audio and digital audio connection have been made for one source device. If for some reason no digital signal is available, the AVR 146 will switch to the analog inputs for the source. This situation can occur with some cable or satellite television broadcasts, where some channels are broadcast with digital audio and others with analog audio.
-
Page 34: Operation
ON position, even when the receiver is not being used. See Figure 50. Figure 50 – Power Switches There are several ways in which the AVR 146 may be turned on: a) Press the Standby/On Switch on the front panel. See Figure 50. -
Page 35: Mute Function
The AVR 146 will switch to the audio and video inputs assigned to the source. If you set the BASS MGR setting in the Speaker X-over menu to INDEPENDENT, the AVR 146 will change the speaker size configuration to the one you programmed for the source. -
Page 36: Audio Input Selection
If a signal is present, the AVR 146 will select the digital audio input. If no signal is present, the AVR 146 will switch to the analog audio inputs for the source. -
Page 37: Using The Tuner
Setup. Consult the owner’s guide for your multichannel player for more information. Using the Tuner The AVR 146’s built-in tuner may be selected in one of three ways (see Figure 62): 1. Press the Source Selector Button on the front panel repeatedly until the tuner is selected. -
Page 38: Recording
The Bridge is an optional dock that may be used with a compatible iPod (not included). When The Bridge is connected to its proprietary input on the AVR 146 and the iPod is docked, you may play the audio, video and image materials on your iPod through your high-quality system, operate the iPod using the AVR remote or the AVR’s front-panel controls,... -
Page 39: Selecting A Surround Mode
Surround mode selection can be as simple or sophisticated as your individual system and tastes. Feel free to experiment with the many available surround modes on the AVR 146, and you may find a few that become your favorites for certain sources or program types. Although... -
Page 40: Advanced Functions
ADVANCED FUNCTIONS Much of the AVR 146’s performance is handled automatically, with little intervention required on your part. However, the AVR 146 is a sophisticated component, and is capable of being customized to suit your particular system and your tastes. In this section we describe some of the more advanced adjustments available on the AVR 146. -
Page 41: Surround Modes
There is no harm in experimenting with all of the modes available with any given source material. Table 5 offers a brief description of each mode the AVR 146 is capable of using, and also indicates the types of incoming signals or digital bitstreams the mode may be used with. -
Page 42: Dolby Surround Settings
MODE setting in the System Setup menu has been changed to OFF. Table 5 reflects that other surround modes are available for use with the multichannel digital bitstreams. If you would prefer the AVR 146 to use one of those alternate modes any time the same digital signal is detected, then select that mode while the multichannel bitstream is present, and then change the DEFAULT SURR MODE setting in the System Setup menu to OFF. - Page 43 Table 5 – Surround Modes Surround Mode Description Dolby Digital Provides up to five separate main audio channels and a dedicated low-frequency effects (LFE) channel. May be encoded for Night mode, which allows the user to apply a compression setting that maintains intelligibility of softer passages while reducing the loudness of dynamic passages to avoid disturbing others.
- Page 44 Cinema matrix encoding, Logic 7 Cinema mode increases center channel intelligibility. Logic 7 The AVR 146 is programmed at the factory to default to this mode for Music 2-channel signals. Logic 7 Music mode is well suited to conventional 2-channel music recordings.
-
Page 45: System Settings
System Settings The AVR 146 offers several system settings that allow you to make the receiver easier to use rather than directly affecting performance. Most of these settings may be accessed from the SYSTEM SETUP menu, which is selected by pressing the OSD Button and navigating to the SYSTEM SETUP line of the MASTER MENU. -
Page 46: Macros
ADVANCED FUNCTIONS certain groups of controls to operate another component. For example, while using the AVR to control surround modes and other audio functions, you may operate the transport controls of your DVD player. Or while using the remote to control video functions on your TV, you may use your cable box to change channels and the AVR to control the volume. -
Page 47: Resetting The Remote
Processor Reset There may be instances when you wish to fully reset the AVR 146 to its factory defaults, or the unit may behave erratically after a power surge. To correct erratic behavior, first try turning the Master Power Switch off and unplugging the AC Power Cord for at least 3 minutes. -
Page 48: Troubleshooting Guide
In addition to the items shown above, additional information on troubleshooting possible problems with your AVR 146, or installation-related issues, may be found in the list of "Frequently Asked Questions" which is located in the Product Support section of our Web site at www.harmankardon.com. -
Page 49: Technical Specifications
HDMI connection with other Simplay HD-verified products. Please register your AVR 146 on our Web site at www.harmankardon.com. Note: You’ll need the product’s serial number. At the same time, you can choose to be notified about our new products and/or special promotions. -
Page 50: Appendix
APPENDIX Appendix – Default settings, worksheets, remote product codes Table A1 – Source Input Setting Defaults Source HDMI 1 HDMI 2 Title Component Comp V 1 Comp V 1 Comp V 2 Video Input Audio Input Coax 1 Coax 2 Optical 2 Auto Poll Surround... - Page 51 Table A4 – Source Input Settings Source HDMI 1 Title Video Input Component Video Input Audio Input Auto Poll Surround Mode Table A5 – Speaker/Channel Settings Source HDMI 1 Bass Manager: Global/Independent Left/Right Speaker Size Center Speaker Size Surround Speaker Size Subwoofer Left/Right Speaker Crossover Center Speaker Crossover...
- Page 52 APPENDIX Table A6 – Remote Control Codes Source Input Product Type (circle one) Video 1 VCR, PVR Video 2 Cable, Satellite Video 3 HDMI 1 DVD, VCR/PVR, Cable/Satellite HDMI 2 DVD, VCR/PVR, Cable/Satellite CD, CDR Tape Cassette Table A7 – System Settings Feature Default Setting VFD Fade Time-Out...
- Page 53 Table A8 – Remote Control Function List No. Button Name AVR Function 1 Power On Power On Power On 2 Power Off Power Off Power Off 3 Mute Mute Mute 4 AVR AVR Select AVR Select 5 DVD/CD DVD Select DVD Select CD Select CD Select...
- Page 54 APPENDIX Table A8 – Remote Control Function List – continued No. Button Name AVR Function 41 Memory Memory Audio or Playlist Time 42 Tuning Up Tuning Up Next Chapter 43 Direct Direct Tuner Entry Angle 44 Clear Clear Clear 45 Preset Up Preset Tune Up Slow Forward 46 Tuning Down...
- Page 55 Refer to Tables A9 through A16 when programming the codes for your components into the remote. Table A9 – Remote Control Product Codes – TV TV Manufacturer/Brand Setup Code Number AIWA A MARK 122 132 ADMIRAL AKAI 123 160 AMPRO ANAM 045 106 109 112 122 122 123 128...
- Page 56 APPENDIX Table A9 – continued TV Manufacturer/Brand Setup Code Number TECHWOOD TEKNIKA 045 069 115 123 128 132 TELERENT TERA THOMSON 190 191 TOSHIBA 063 129 202 TOTEVISION VIDEO CONCEPTS VIDTECH WARDS 069 128 132 148 YAMAHA 123 128 YORK YUPITERU ZENITH 069 090...
- Page 57 Table A11 – Remote Control Product Codes – CD CD Manufacturer/Brand Setup Code Number ADCOM 063 069 AIWA 072 111 118 156 170 AKAI 050 177 184 AUDIO TECHNICA AUDIOACCESS AUDIOFILE CALIFORNIA AUDIO CAPETRONIC CARRERA CARVER 136 140 141 143 144 146 185 186 CASIO 117 166 CLARINETTE...
- Page 58 APPENDIX Table A13 – Remote Control Product Codes – SAT SAT Manufacturer/Brand Setup Code Number ALPHASTAR ALPHASTAR DBS ALPHASTAR DSR BIRDVIEW CHANNEL MASTER 320 321 325 361 CHAPARRAL 315 316 451 CITOH DRAKE 313 317 318 413 481 DX ANTENNA 331 352 379 483 ECHOSTAR 395 397 452 453 463 477 478 484 485...
- Page 59 Table A15 – continued CBL Manufacturer/Brand Setup Code Number SIGNATURE 001 188 SPRUCER 053 081 177 189 STARCOM 002 011 163 STARGATE TANDY TELECAPATION TEXSCAN TIMELESS TOCOM 170 205 UNITED CABLE UNIVERSAL 033 034 039 042 113 VIDEOWAY 124 211 VIEWSTAR 019 025 086 089 190 ZENITH...
- Page 60 250 Crossways Park Drive, Woodbury, New York 11797 www.harmankardon.com © 2007 Harman International Industries, Incorporated. All rights reserved. Part No. CQX1A1182Z...