
Related Manuals for Harman Kardon DVD 506


Summary of Contents for Harman Kardon DVD 506
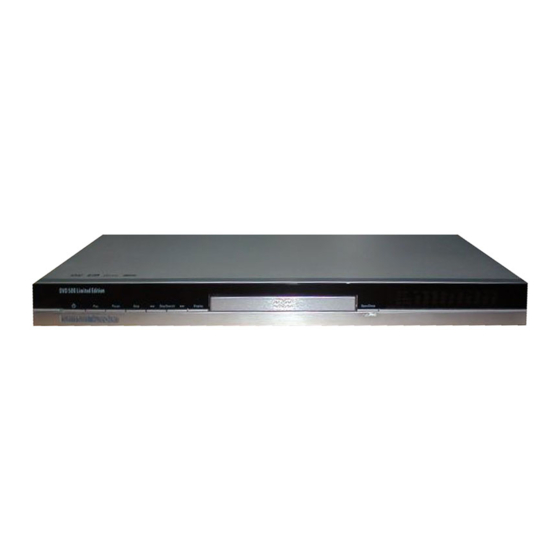
- Page 1 DVD 506 Limited Edition Digital Versatile Disc Player OWNER’S MANUAL ® Power for the Digital Revolution ®...
-
Page 2: Table Of Contents
Table of Contents Introduction Terminology Features, Packing List Front Panel Controls Front Panel Information Display Remote Control Rear Panel Connections Setup and Connections to a Stereo TV and Stereo or Pro Logic Amplifier/Receiver to a Dolby Digital/DTS Amplifier/Receiver to a TV or monitor with SCART or Component Connectors Remote Control Digital Audio Connections... -
Page 3: Introduction
Introduction Thank you for choosing the Harman Kardon DVD. The DVD is a multipurpose DVD player, capable of playing both DVD-Video discs and conventional CD audio discs with the highest fidelity and access to future software upgrades via the Internet. Along with conventional DVD- Video and CD audio discs, the DVD is also com- patible with MP3, WMA, JPEG and most record- able CD and DVD formats as well as VCD discs. -
Page 4: Terminology
Laser Disc. However, if this is your first DVD product, some of the terms used to describe the features of a DVD player may be unfamiliar. The following explanations should solve some of the mysteries of DVD, and help you to enjoy all the power and flexibility of the DVD format and the DVD. -
Page 5: Upgradeability Via Internet
All you have to do is create a CD-R with the data and insert it in the DVD for an automatic upgrade. Packing List 1 Harman Kardon DVD Player 1 Remote control 2 AA batteries 1 A/V cable for stereo analog audio and... -
Page 6: Front Panel Controls
DVD player. Power On/Off (Standby): Press the button once to turn the DVD player on, press it again to put the unit in the Standby mode. Eject: Press this button to open or close the Disc Tray. -
Page 7: Front Panel Information Display
Front Panel Information Display JPEG MP3 PROG RANDOM A Disc Type Indicators B Playback-Mode Indicators C Progressive Scan Indicator D Parental Lock Indicator E Time Indicators A Disc Type Indicators: The DVD, CD, VCD, MP3, WMA or JPEG indicator will illuminate to show the type of disc currently being played. -
Page 8: Remote Control
Remote Control Functions POWER ON POWER OFF SUBTITLE TITLE ANGLE AUDIO ENTER OPEN/CLOSE ARROWS INFO MENU PAUSE STATUS SKIP/STEP (PREVIOUS) SKIP/STEP (NEXT) PLAY SEARCH/SLOW REVERSE STOP SEARCH/SLOW FORWARD DISPLAY PIC +/PIC - ZOOM PLAYLIST RANDOM A-B Repeat V.OFF LIGHT NUMERIC KEYS REPEAT CLEAR 8 REMOTE CONTROL FUNCTIONS... -
Page 9: Remote Control Functions
Remote Control Functions 0 POWER ON: Turns on the player when it is in standby mode (Harman Kardon logo appears on screen). 1 POWER OFF: Turns off the player to stand- by mode. 2 SUBTITLE: When a DVD is playing, press to select a subtitle language or to turn subtitles off. -
Page 10: Rear Panel Connections
¶ SCART OUT (TV): If your TV has a SCART socket, you can connect a SCART cable to your TV and to your DVD Player for improved video quality. The SCART cable carries both audio and video. You can select Composite Video or RGB video for that SCART connector’s video output... -
Page 11: Setup And Connections
Setup and Connections I Ensure that the power switch of this unit and other equipment to be connected is set to off before commencing connection. I Do not block ventilation holes of any of the equipment and arrange them so that air can circulate freely. -
Page 12: Dolby Digital Or Dts Decoder
Normally you´ll hear the sound from your AV-system´s speakers, so the TV volume should be completely turned down. If you plan to use your DVD player also without having to turn on your complete system, this connection must exist, then you can turn up the TV´s volume as needed. -
Page 13: Amplifier/Receiver
DVD to the corresponding input jacks on your television. If you are using a progressive scan television or projector, you must also change the Scan Type in the DVD player's Video Set-Up Menu from ”Interlaced” to ”Progressive”. To power outlet... -
Page 14: Remote Control
Remote Control Battery installation Insert the batteries supplied while observing the correct (+) and (–) polarities. Service life of batteries I The batteries normally last for about one year, although this depends on how often, and for what operations, the remote control is used. I If the remote control unit fails to work even when it is operated near the player, replace the batteries. -
Page 15: Digital Audio Connections
Remember, that Dolby Digital or DTS will only play 5.1-channel sound if you’ve connected the optical or coaxial output of the DVD player to a DTS or Dolby Digital receiver or decoder and if the disc was recorded in the Dolby Digital or DTS format. -
Page 16: Playback Basics
Playback Basics Basic Play Preparation 1. Switch the TV ON and select its video input connected to the DVD. 2. Press POWER to turn on the unit, the DVD harman/kardon logo should appear now on the screen. If that logo appears distorted on the screen or without any color, change the appropriate settings at the Video Setting Submenu according to your TV set and to the... -
Page 17: System Setup
Screen Save: Activates a Screen Saver to pre- vent an image to “burn” into a video display device. If you connect the DVD 506 to a LCD or plasma screen or video projector, we recommend you activate the screen saver at all times. -
Page 18: Audio Settings
PCM. Then all audio signals will be output in PCM format only (DTS will output no signal). PCM Limit: The DVD 506 is compatible with both 48 kHz and 96 kHz sampling, but some early A/V receivers and surround processors are not. -
Page 19: Using The Status Bar
PLAYER Menu Once all the settings have been made, you are ready to enjoy your DVD 506. Once you have inserted a disc into the drawer you can explore the other Main Menu, that is the PLAYER Menu. -
Page 20: Dvd Language Codes
DVD Language Codes The availability of specific languages for the main audio track or subtitles is dependent on the choices made by a disc’s producer. You should always consult the disc’s jacket for information on languages for any disc. In the case of some languages, you may be required to enter a code from the list below to access that language. -
Page 21: Specifications
Technical Specifications Applicable Disc: Disc formats: 5 inch (12 cm) or 3 inch (8 cm) DVD Video, Standard conforming DVD+RW, DVD+R, DVD-R and DVD-RW, VCD, CD, CD-R, MP3, WMA, JPEG or CD-RW discs, Regio code: DVD Video disc with Code 2 or 0 only. DVD-Layers: Single Side/Single Layer, Single Side/Dual Layer, Dual Side/Single Layer, Dual Side/Dual Layer Audio formats: Linear PCM, MPEG, MLP/CPPM, Dolby Digital or DTS Video Signal System:... - Page 22 250 Crossways Park Drive, Woodbury, New York 11797 www.harmankardon.com Harman Consumer International: 2, Route de Tours, 72500 Château-du-Loir, France © 2003 Harman Kardon, Incorporated Partnumber: 312-AB506000-000...