Table of Contents
Advertisement
Quick Links
d
OPERATING INSTRUCTIONS
MANUAL DE INSTRUCCIONES
MODE D'EMPLOI
BEDIENUNGSANLEITUNG
ISTRUZIONI PER L'USO
GEBRUIKSAANWIJZING
INSTRUKCJA OBSŁUGI
KEZELÉSI ÚTMUTATÓ
NÁVOD K OBSLUZE
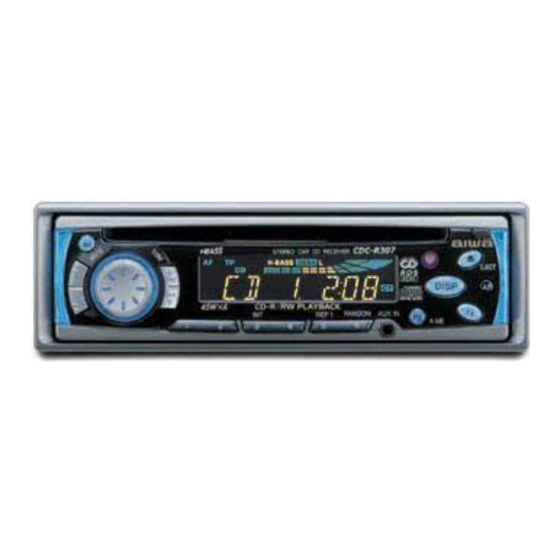
CDC-R307
CDC-RV407
STEREO CAR CD RECEIVER
RADIO-TOCADISCOS DE CD ESTEREOFONICO PARA
AUTOMOVIL
c
YZ
YZ
ENGLISH
ESPAÑOL
FRANÇAIS
DEUTSCH
ITALIANO
NEDERLANDS
POLSKI
MAGYAR
ČESKY
Advertisement
Table of Contents

Related Manuals for Aiwa CD-CRV407


Summary of Contents for Aiwa CD-CRV407
- Page 1 CDC-R307 OPERATING INSTRUCTIONS MANUAL DE INSTRUCCIONES MODE D’EMPLOI CDC-RV407 BEDIENUNGSANLEITUNG ISTRUZIONI PER L’USO GEBRUIKSAANWIJZING STEREO CAR CD RECEIVER INSTRUKCJA OBSŁUGI RADIO-TOCADISCOS DE CD ESTEREOFONICO PARA KEZELÉSI ÚTMUTATÓ AUTOMOVIL NÁVOD K OBSLUZE ENGLISH ESPAÑOL FRANÇAIS DEUTSCH ITALIANO NEDERLANDS POLSKI MAGYAR ČESKY...
- Page 2 Welcome • Do NOT expose the CD to direct sunlight or excessive Thank you for your purchasing this AIWA product. heat. To optimize the performance of this unit, please read through this manual carefully. In addition to this operating instructions manual, •...
-
Page 3: Table Of Contents
TABLE OF CONTENTS PARTS AND CONTROLS ........................3 DETACHING AND ATTACHING THE FRONT PANEL ..............4 SETTING THE CLOCK ........................5 RADIO OPERATION .......................... 5 PRESETTING STATIONS ........................6 USING RDS FEATURES ........................8 CD PLAY ............................11 SOUND ADJUSTMENTS ......................... 12 CONNECTING A PORTABLE CASSETTE/MD/MP3 PLAYER OR OTHER EQUIPMENT .... -
Page 4: Parts And Controls
PARTS AND CONTROLS Front panel Rear panel Display window Front panel Display window 1 FUNC (function) button ) AF (Alternative Frequency) indicator 2 PWR (power on/off)/MUTE button - TA (Traffic Announcement) indicator 3 Jog Dial = TP (Traffic Program) indicator 4 TUNE i/t (forward skip) button q ST (stereo) indicator 5 TUNE k/r (back skip) button... -
Page 5: Detaching And Attaching The Front Panel
Attaching the front panel DETACHING AND ATTACHING THE FRONT PANEL Security Lamp When the front panel is detached, you can find an You can detach the front panel from the unit and LED lamp on the front side of the unit. This lamp carry it with you when you leave your car is designed to deter theft, and continues to flash unattended. -
Page 6: Setting The Clock
SETTING THE CLOCK RADIO OPERATION To turn the unit on Press FUNC repeatedly to select the You can turn the unit on by pressing any band from among F1 (FM1), F2 (FM2), button on the front panel except %, z and the F3 (FM3), MW and LW. -
Page 7: Presetting Stations
PRESETTING STATIONS To preset stations automatically (Auto Memory) To turn the unit off Press and hold PWR for more than 2 seconds. If you press this button for less than 2 seconds, it functions as MUTE. Note The unit turns on in the last mode selected when you turned off the unit. - Page 8 To tune in a preset station PRESETTING STATIONS To preset stations manually You can manually preset stations that have not been selected by an auto memory operation. Press FUNC repeatedly to select a desired band from among F1 (FM1), F2 (FM2), F3 (FM3), MW and LW.
-
Page 9: Using Rds Features
USING RDS FEATURES What’s RDS? Developed by the European Broadcasting Union (EBU), the Radio Data System (RDS) offers listeners various information services, such as station name display and traffic announcements through FM broadcasting. Since the RDS signals are in digital data form, Station name you cannot hear them. - Page 10 2. Press SEL to store the adjusted volume in USING RDS FEATURES memory. The volume will not be stored in memory if SEL is not pressed. Receiving traffic announcements • When receiving traffic announcements, you Once the unit is set to TA (Traffic Announcement) can increase the volume manually, but you Standby mode, you can hear traffic cannot decrease it, even though the...
- Page 11 Selecting FM by program type Changing the program type assignment This feature may not yet be available in your area. You can reassign a desired program type to one 1. During FM reception, press and hold TA for of the preset station buttons (1 to 6). more than 2 seconds.
-
Page 12: Cd Play
CD PLAY You can play a CD, CD-R, or CD-RW by following the procedure below. Button operations in CD Play mode Press Eject a CD. Skip to the next track with a short press (for less than 0.5 second). Each extra press skips forward one extra track. -
Page 13: Sound Adjustments
Intro play SOUND ADJUSTMENTS Press INT during CD play. The “SCAN” indication lights up, and the first 10 seconds of all the tracks on the CD are played in order. When the desired track is found, press INT again. The unit returns to normal CD play. Repeat play Press REP1 during CD play. - Page 14 DSSA (Drivers Sound Stage SOUND ADJUSTMENTS Adjustment) You can adjust sound stage and tone balance to MUTE button best serve a particular seat in the car. Press this button to temporarily lower the volume. Press it again to restore the previous volume. The “MT”...
-
Page 15: Connecting A Portable Cassette/Md/Mp3 Player Or Other Equipment
Source Level Adjuster CONNECTING A You can adjust the output level in each mode to PORTABLE CASSETTE/ equalize the volume level. MD/MP3 PLAYER OR OTHER EQUIPMENT This unit is equipped with a line-level input (AUX IN) jack, delivering high sound quality. Press FUNC repeatedly to select the desired mode. -
Page 16: Setting The Beep Tone
SETTING THE BEEP TONE SETTING THE CONTRAST CONTROL The unit is preset at the factory to beep each time you press any button on the front panel except % You can change the contrast of the display. (no beep with the Jog Dial). You can mute this beeping by following the procedure below. -
Page 17: Steering-Wheel-Mounted Remote Control Unit
• There may be cases in which the infrared signal STEERING-WHEEL- does not reach the infrared receptor on the main unit, depending on the installation location. MOUNTED REMOTE • Do NOT install the remote control unit on the outer rim of the steering wheel. Doing so may CONTROL UNIT hinder steering and cause a traffic accident. - Page 18 Installing the remote control unit STEERING-WHEEL-MOUNTED REMOTE CONTROL UNIT Installation in a vehicle with left-hand drive Attach the belt d to the inner belt Setting up the remote control unit holder e. Replacing the battery Pull out the battery holder, gripping the claw B while pressing the groove A to the right to remove the lithium battery.
- Page 19 Wind the belt d around the rim of the Attach the remote control unit to the steering wheel and fit the holder’s claws belt holder. Align the claws of the inner into the holes of the belt to secure the belt holder with the grooves of the holder.
-
Page 20: Troubleshooting
STEERING-WHEEL-MOUNTED REMOTE TROUBLESHOOTING CONTROL UNIT Error codes Remote control button In the following case the corresponding error code indication appears. Follow the suggestions below to solve the problem. If the error code indication does not disappear, consult an AIWA service center. ERROR03 Focus error. -
Page 21: Maintenance
CD SECTION MAINTENANCE Frequency Response: 17 Hz – 20 kHz +0/–3 dB Dynamic Range: More than 80 dB Channel Separation: More than 65 dB S/N Ratio: More than 85 dB Wow/Flutter: Unmeasurable Cleaning the front panel When the front panel is soiled, wipe the surface of the panel with a soft, dry cloth. - Page 22 8A-KC4-901-01 000302BTM-OX...