Table of Contents
Advertisement
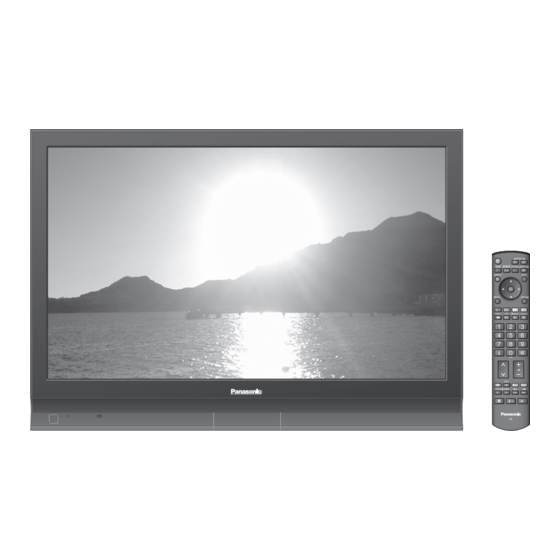
Operating Instructions
Plasma Television
TH-37PV70FA
Model No.
TH-42PV70FA
TH-50PV70FA
INPUT
OPTION DIRECT TV REC
EXIT
RETURN
F.P.
TV
English
Please read these instructions before operating your set and retain them for future reference.
The images shown in this manual are for illustrative purposes only.
Advertisement
Table of Contents

Related Manuals for Panasonic TH-37PV70FA


Summary of Contents for Panasonic TH-37PV70FA
-
Page 1: Operating Instructions
Operating Instructions Plasma Television TH-37PV70FA Model No. TH-42PV70FA TH-50PV70FA INPUT OPTION DIRECT TV REC EXIT RETURN F.P. English Please read these instructions before operating your set and retain them for future reference. The images shown in this manual are for illustrative purposes only. - Page 2 Turn your own living room into a movie theatre! Experience an amazing level of multi-...
-
Page 3: Table Of Contents
media excitement Contents Be Sure to Read • Safety Precautions ······································ 4 • (Warning / Caution) Enjoy rich multi-media • Notes ··························································· 5 Maintenance ··············································· 5 Quick Start Guide Accessories / Options ·········· 6 Installation of the pedestal ··· 7 Camcorder Identifying Controls ···············... -
Page 4: Safety Precautions
TV shaky, risking injury. Be sure to ask Avoid exposing the TV to direct sunlight and other your local Panasonic dealer to perform setup. sources of heat. To prevent fi re never place any Use optional stands / mounts (p. 6). -
Page 5: Notes
Notes Caution Do not display a still picture for a long time This causes the image to remain on the plasma When cleaning the TV, remove the screen (“image retention”). mains plug This is not considered a malfunction and is not covered by the warranty. -
Page 6: Accessories / Options
Optional accessories Pedestal Plasma TV stand Wall-hanging TY-ST42D1-WG TY-S37PX70WK bracket TY-ST42D1-WK ( TH-37PV70FA) (vertical) TY-ST42D2-WG TY-WK42PV3W TY-S42PX70WK ( TH-37PV70FA, TH-42PV70FA) ( TH-42PV70FA) TY-ST50D1-WG TY-S50PX70WK (angle) TY-ST50D1-WK ( TH-50PV70FA) TY-WK42PR2W TY-ST50D2-WG TY-WK42PR3W (TH-50PV70FA) Caution • In order to maintain the unit’s performance and safety, be absolutely sure to ask your dealer or a licenced contractor to secure the wall-hanging brackets. -
Page 7: Installation Of The Pedestal
Do not use the pedestal if it becomes warped or physically damaged. • If you use the pedestal while it is physically damaged, personal injury may result. Contact your nearest Panasonic dealer immediately. During set-up, make sure that all screws are securely tightened. •... - Page 8 Installation of the pedestal ■ Attaching the bands for fixing cables Insert the spigot on the two To tighten: bands into the pedestal. To loosen: Keep the knob pressed Preventing the TV from falling over The TV could fall over during an earthquake, etc. We recommend that measures are taken to prevent the TV from falling over in such an event.
-
Page 9: Identifying Controls
Identifying Controls Changes the input mode Function select • Volume / Contrast / Brightness / Colour / Sharpness / Tint (NTSC mode) / Bass / Increases or decreases Treble / Balance / Auto Setup the programme position (p. 24) by one. When a function is already displayed, press to increase or decrease the selected... -
Page 10: Basic Connection
Basic Connection External equipment and cables shown are not supplied with this TV. Please ensure that the unit is disconnected from the mains socket before attaching or disconnecting any leads. When disconnecting the mains lead, be absolutely sure to disconnect the mains plug at the socket outlet fi rst. Example 1 Example 2 Connecting aerial... - Page 11 Example 3 Connecting DVD Recorder / VCR and Set top box TV, DVD Recorder / VCR and Set top box Rear of the TV Clamper Aerial • To unfasten RF cable COMPONENT VIDEO HDMI 1 HDMI 2 AV 1 AV 2 AC 220-240 V 50 / 60 Hz AUDIO...
-
Page 12: Auto Setup
Auto Setup Search and store TV channels automatically. These steps are not necessary if the setup has been completed by your local dealer. Plug the TV into mains socket and switch On (Takes a few seconds to be displayed) • You can now use the remote control to turn On the TV or turn the TV to standby mode. - Page 13 Many features available on this TV can be accessed via the On Screen Display menu. ■ How to use remote control Open the main menu Move the cursor / select the menu Move the cursor / adjust levels / select from a range of options Access the menu / store settings after adjustments have been made or options have been set RETURN...
-
Page 14: Watching Tv
Watching TV Turn power on (Press for about 1 second) Mains power On / Off switch should be On. INPUT OPTION DIRECT TV REC EXIT 1 BBS CH05 Corontation Street Information banner RETURN Select a channel down • To select the two-digit programme number, e.g. 39 (in a short time) Volume... - Page 15 ■ Other useful functions (Operate after Hold Freeze / unfreeze picture Check or change the current OPTION programme status instantly • change To change select Display the Teletext Language current Selects teletext language programme status Sound Menu (p. 22) Volume Correction Adjusts volume of individual channel or input mode Note •...
-
Page 16: Watching Videos And Dvds
Connect the external equipment (VCRs, DVD equipment, etc.) and you can watch the input. To connect the equipment (p. 10 and p. 11) The Remote Control is capable of operating some functions of selected Panasonic external equipment. Turn the TV on ■... - Page 17 Panasonic equipment connected to the TV can be directly operated with the remote control. ∗ VCR / DVD selection buttons Select VCR to operate Panasonic VCR or DVD equipment Select DVD to operate Panasonic DVD equipment or Player home theatre...
-
Page 18: Viewing Teletext
Viewing Teletext You can enjoy teletext broadcasting, including news, weather forecasts and subtitles, if this service is provided by the broadcasters. What is FLOF (FASTEXT) mode? In FLOF mode, four differently coloured subjects are situated at the bottom of the screen. To access more information about one of these subjects, press the appropriately coloured button. - Page 19 If you wish to hold the current page without updating Stop or resume automatic updating HOLD ■ To resume Return to the main index page INDEX • Call up a Call up the page stored in “blue”. F.P. • favourite Factory setting is “P103”.
-
Page 20: How To Use Menu Functions
How to Use Menu Functions Various menus allow you to make settings for the picture, sound, and other functions. Display the menu • Displays the functions that can be set (varies according to the input signal) INPUT OPTION DIRECT TV REC Select the menu EXIT access... -
Page 21: Viera Link
■ Overview Main Menu VIERA Link VIERA Link Menu The menu of the accessed VIERA Link Control Recorder equipment Speaker Selection Home Cinema Picture (p. 33) Sound Setup Picture Menu Viewing Mode Dynamic Contrast Brightness Colour Sharpness Tint Colour Balance Warm Colour Management P-NR... - Page 22 ■ Menu list Item Adjustments / Confi gurations (alternatives) Menu Controls the connected Panasonic equipment VIERA Link Control “Easy control only with VIERA remote control” (p. 33) “Speaker control” (p. 33) • You can also access VIERA Link Menu directly using the VIERA Link button on the Speaker Selection remote control.
- Page 23 ■ Menu list Menu Item Adjustments / Confi gurations (alternatives) Selects optional colour system based on video signals in AV mode AV Colour System (Auto / PAL / SECAM / M.NTSC / NTSC) Selects which AV terminal is to be used for data communication between this TV and a Q-Link compatible recording equipment (AV1 / AV2) (p.
-
Page 24: Editing And Setting Channels
Editing and Setting Channels The current channel settings can be changed according to your needs and reception conditions. Display the menu INPUT OPTION DIRECT TV REC EXIT Select “Setup” access Main Menu VIERA Link RETURN Picture select Sound Setup Select “Tuning Menu” access Setup Menu Q-Link Settings... -
Page 25: Fine Tuning
• Edit the programme position settings To change channel number “Manual Tuning” Select the channel to edit Programme Edit Prog. Chan. Name Sound Sys. Colour Sys. CH33 1 2 3 Auto CH21 X Y Z Auto select Name CH21 F T P Auto CH60 Auto... -
Page 26: Control Channel Audience
Control Channel Audience You can lock specifi c channels and control who watches them. (When a channel is selected, a message appears; by entering the PIN number, you can watch the channel.) Display the menu INPUT OPTION DIRECT TV REC EXIT Select “Setup”... -
Page 27: Restore Settings
Restore Settings Resets the TV to its original condition, i.e. no channels tuned in. All settings (channels, picture, sound quality, etc.) are reset. Display the menu INPUT OPTION DIRECT TV REC EXIT Select “Setup” access Main Menu VIERA Link RETURN Picture select Sound... -
Page 28: Input Labels
Input Labels For easier identifi cation and selection of the input mode, you can label each input terminals or skip terminal that is not connected to any equipment. (To select the input mode p. 16) Display the menu INPUT OPTION DIRECT TV REC EXIT Select “Setup”... -
Page 29: Displaying Pc Screen On Tv
Displaying PC Screen on TV The screen of the PC connected to the TV can be displayed on the TV. You can also listen to PC sound with the audio cable connected. To connect PC (p. 34) Select the external input INPUT OPTION DIRECT TV REC EXIT... -
Page 30: Q-Link Functions
Q-Link Functions Q-Link connects the TV and VCR / DVD recorder, enables easy recording and playback. ■ Condition • Use the VCR / DVD recorder with the following logos: “Q-Link”, “NEXTVIEWLINK”, “DATA LOGIC”, “Easy Link”, “Megalogic”, or “SMARTLINK” • Connect the equipment to this TV’s AV1 or AV2 terminal via a “fully-wired” SCART cable. (p. 34) •... -
Page 31: Hdmi Functions
(∗2): Enquire at your local digital equipment retailer shop. ■ Summary of Control functions Connecting with an HDMI cable to Panasonic equipment with VIERA Link function, you can control the equipment (p. 32). You can use VIERA Link and Q-Link functions together. Connection... - Page 32 ” ∗ VIERA Link “ Control ∗ Enjoy additional HDMI Inter-Operability with Panasonic products which have “HDAVI Control” function. This TV supports “HDAVI Control 2” function. Connections to some Panasonic equipment (DVD Recorder DIGA, HD Video Camera, Player theatre, Amplifi er, etc.) with HDMI cables allow you to interface them automatically.
- Page 33 TV is automatically turned on. link (Only when TV is in Standby mode.) When TV is set to Standby mode, the connected Panasonic equipment is also Power off automatically set to Standby.
-
Page 34: External Equipment
These diagrams show our recommendations for how to connect the TV to your various equipment. For other connections, consult the instructions for each piece of equipment, the table below, and the specifi cations (p. 42). This slot is for services by the Panasonic dealer. COMPONENT VIDEO HDMI 1... - Page 35 Use fully wired HDMI compliant cable. • Amplifi er Read the manuals of the equipment too. ■ Easy playback, Easy control only with VIERA remote control HD Video Camera Panasonic DVD Recorder Speaker system Panasonic Player theatre Panasonic DVD Recorder, HD Video Camera, etc.
-
Page 36: Technical Information
Technical Information Aspect Ratio The optimum size and aspect can be chosen, and you can enjoy fi ner images. (p. 15) ■ Auto: Auto aspect determines the best aspect ratio to use to fi ll your screen. It does this using a four step process to determine if the picture being viewed is a widescreen picture. - Page 37 VIERA Link is available for the terminal with the smaller number. • “HDAVI Control 2” is the newest standard (current as of February, 2007) for Panasonic’s HDAVI Control compatible equipment. This standard is compatible with Panasonic’s conventional HDAVI equipment. SCART and HDMI terminal information ■...
- Page 38 When using PC, set the colour display quality of PC to the highest position. • For details of the applicable PC signals, see below. • Max. display resolution Model No. TH-37PV70FA TH-42PV70FA TH-50PV70FA Aspect 768 × 720 pixels 768 × 768 pixels 1,024 ×...
-
Page 39: Faqs
FAQs Before requesting service or assistance, please follow these simple guides to resolve the problem. If problem still persists, please contact your local Panasonic dealer for assistance. White spots or shadow images (noise) • Check the position, direction, and connection of the aerial. - Page 40 FAQs Problem Actions • Set “P-NR” in the Picture Menu (to remove noise). (p. 22) • Chaotic image, noisy Check nearby electrical products (car, motorcycle, fl uorescent lamp). • Is “Colour” or “Contrast” in the Picture Menu set to the minimum? No image can be (p.
-
Page 41: Licence
Licence Trademark Credits • VGA is a trademark of International Business Machines Corporation. • Macintosh is a registered trademark of Apple Computer, USA. • S-VGA is a registered trademark of the Video Electronics Standard Association. Even if no special notation has been made of company or product trademarks, these trademarks have been fully respected. -
Page 42: Specifi Cations
Specifi cations TH-37PV70FA TH-42PV70FA TH-50PV70FA Power Source AC 220-240 V, 50 / 60 Hz Average use 241 W 261 W 364 W Standby condition 0.7 W 0.5 W Aspect Ratio 16:9 94 cm (diagonal) 106 cm (diagonal) 127 cm (diagonal) Visible screen size 819 mm (W) ×... - Page 43 MEMO...
- Page 44 Warranty Service purposes. Model Number Serial Number Matsushita Electric Industrial Co., Ltd. Web Site : http://www.panasonic-europe.com © 2007 Matsushita Electric Industrial Co., Ltd. All Rights Reserved. Printed in Czech Republic...