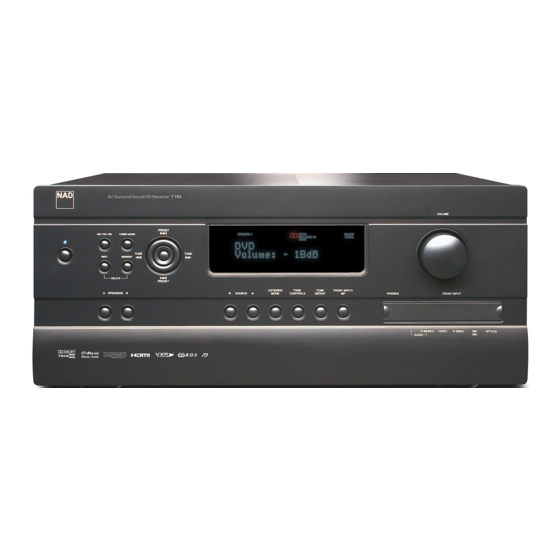
NAD T 785 Owner's Manual
Av surround sound receiver
Hide thumbs
Also See for T 785:
- Service manual (130 pages) ,
- Owner's manual (46 pages) ,
- Specifications (5 pages)
Table of Contents
Advertisement
Quick Links
Advertisement
Table of Contents

Subscribe to Our Youtube Channel
Related Manuals for NAD T 785


Summary of Contents for NAD T 785
- Page 1 ® T 785 AV Surround Sound Receiver Owner’s Manual...
-
Page 2: Important Safety Instructions
IMPORTANT SAFETY INSTRUCTIONS 1. Read instructions - All the safety and operating instructions should be NOTE TO CATV SYSTEM INSTALLER read before the product is operated. This reminder is provided to call the CATV system installer’ s attention to Section 820-40 of 2. - Page 3 RECORD YOUR MODEL NUMBER (NOW, WHILE YOU CAN SEE IT) CAUTION REGARDING PLACEMENT The model and serial number of your new T 785 are located on the back of To maintain proper ventilation, be sure to leave a space around the unit the cabinet.
-
Page 4: Table Of Contents
USING THE T 785 – SETUP MENU ....... . . -
Page 5: Introduction
DSP power to route the ambient content that is “encrypted” in web site, via e-mail and installing them by connecting the T 785 to a PC. virtually all natural-acoustic recordings to the appropriate main, center and... -
Page 6: Getting Started
Please save the box and all of the packaging in which your T 785 arrived. Should you move or otherwise need to transport your T 785, this is by far the safest container in which to do so. We’ve seen... -
Page 7: Dealing With Hum And Noise
INTRODUCTION GETTING STARTED DEALING WITH HUM AND NOISE Hum and noise may sometimes prove a challenge in complex, multi-channel audio systems. Note these considerations to help prevent hum and noise problems: • Power all your system's audio component from AC outlets originating from the same circuit of your house wiring. -
Page 8: Identification Of Controls
3 INFO : Repeatedly toggle this button (press/hold first if in Tuner mode and press the buttons. Do not expose the remote sensor of the T 785 to a and then toggle) to display both at the Vacuum Fluorescent Display strong light source such as direct sunlight or illumination. - Page 9 If your source has a single audio out jack only or is marked ‘mono output’ , plug this into the T 785’s Front ‘R (Mono)’ input. On the SOURCE : Press these buttons to toggle through the input other hand, if your source has two output jacks indicative of stereo selections –...
-
Page 10: Rear Panel
REAR PANEL ATTENTION! Please make sure that the T 785 is powered off or unplugged before making any connections. It is also advisable to power-down or unplug all associated components while making or breaking any signal or AC power connections. - Page 11 IDENTIFICATION OF CONTROLS REAR PANEL 5 AUDIO 3-4 OUT/VIDEO 3-4 OUT/S-VIDEO 3-4 OUT: Connect the T 785’ s 9 XM MODULE INPUT (120V version only): Connect XM radio cable AUDIO 3 OUT/VIDEO 3 OUT/S-VIDEO 3 OUT or AUDIO 4 OUT/VIDEO 4 to this socket.
- Page 12 Speaker A and Speaker B (SPEAKERS A + B) will also result to the source being downmixed to stereo. IR IN and IR OUT 3. Connect the T 785’s IR IN to the IR OUT of an ancillary equipment. Connect also the T 785’s IR OUT 3 to another The T 785 is designed to produce optimum sound quality when equipment with IR IN feature.
-
Page 13: Operation
Press either or ENTER buttons of the HTRC 1 remote control or front panel to display the T 785’s Main Menu on your video monitor/TV. If the OSD does not appear, check your MONITOR OUT connections. NAVIGATING THE OSD AND MAKING CHANGES... -
Page 14: Adjusting Listening Modes
The following chart shows the channels available assuming they are enabled in the ‘Speaker Configuration’ menu: Several of the T 785’s listening modes have one or more selectable variations and adjustable parameters that you can modify to suit you system or personal preferences. At Listening Mode menu, use a... -
Page 15: Dsp Options
Setup Menu). Refer also to Audyssey Auto Calibration segment of the in real time. Audyssey Dynamic Volume monitors the volume of program Speaker Setup under Operation – Using the T 785 – Setup Menu. material moment-by-moment, maintaining the desired listening level for all content while optimizing the dynamic range to preserve the impact. -
Page 16: Tone Controls
‘Tone Defeat’ gives one the choice of varying or completely bypassing the IMPORTANT NOTICE tone control section of the T 785. If ‘Off’ (‘Tone Active’ in the VFD) is selected, the Tone Control circuits are active. Select ‘On’ (‘Tone Defeat’ in the VFD) to bypass the Tone Controls effectively defeating the effect of the tone control circuits. -
Page 17: Zone Controls
OPERATION USING THE T 785 – MAIN MENU ZONE CONTROLS Depending on the settings made at the separate ‘Zone Setup’ menu under the ‘Setup Menu’ section discussion, the applicable Zone can be configured and managed via this ‘Zone Controls’ window. -
Page 18: Using The T 785 - Setup Menu
] to apply the new resolution or [ ] to return to the current The Setup Menu allows one to customize the operation of the T 785 to the ancillary resolution. If [ ] is selected, you will be prompted again to another OSD equipment used in one’... -
Page 19: Source Setup
ANALOG AUDIO The Source Setup (Normal View) menu makes it possible to set, allocate or The T 785 has nine analog audio inputs including 7.1 input. These analog change the following settings. inputs - Audio 1, Audio 2, Audio 3, Audio 4, Audio 5, Audio 6, Audio Front, Audio MP and 7.1 Input can be variably assigned to each Source. - Page 20 There are three types of Digital Audio input for the T 785. These are HDMI, Once in digital format, the video input signal could also be available at Optical and Coaxial digital inputs.
-
Page 21: Source Setup (Table View)
Auto Connect : Select ‘Yes’ to automatically enable and connect the iPod player docked in the linked NAD iPod docking station when Source 5 (the default iPod source allocation in the T 785) is selected. Select ‘No’ if you do not want for the iPod connection automatically connected. -
Page 22: Audyssey Auto Calibration
T 785, to automatically setup and calibrate the T 785 to the exact speakers Connect the Audyssey microphone jack into the front panel’s MP/MIC input and speaker placement of your own unique Home Theatre. - Page 23 EQ as the two best choices. The response curves shown below typify NAD EQ room correction process. It is recommended that you take full advantage of the T 785’s Audyssey Auto Calibration feature for your speaker setup. However, if you desire to...
-
Page 24: Speaker Configuration
SMALL USING AN SPL METER SMALL SMALL It is quite practical to perform the T 785 level setup routines “by ear, ” and careful work will produce acceptably accurate results. However, the use SMALL SMALL of an inexpensive sound-pressure level (SPL) meter, such as Radio Shack... -
Page 25: Speaker Distance
While at ‘Speaker Levels’ menu, press the HTRC 1 remote’s ‘Test’ key optimizing imaging, intelligibility and surround-sound ambience. Enter your activating the T 785’s Speaker Levels balancing test signal . You will hear a dimensions with precision within about 1 foot (30 cm). -
Page 26: Adjusting Channel Levels 'On The Fly
Sources as well as from Front Input, Media Player and Tuner. The T 785 has three configurable Zones – Zone 2, Zone 3 and Zone 4. Use a combination of... -
Page 27: Trigger Setup
– Main, Zone 2, Zone 3, Zone 4, Zone 2+3+4 and Source Setup. Dolby laboratories. Discs bearing the Dolby Digital (double-D symbol) logo Main : +12V DC is available at the assigned Trigger Out when the T 785 were recorded with up to 5.1 channels of digital signals, reproducing a is at powered state. - Page 28 – Pro Logic, PLIIx Movie, PLIIx Music, NEO: 6 channels to eight, whereas Dolby Digital Plus and Dolby TrueHD support Cinema, NEO: 6 Music, EARS, Enhanced Stereo, Analog Bypass and None. more than eight audio channels. Note that the T 785 only supports 7.1 channel. NOTE...
-
Page 29: Dolby Setup
Dolby Pro Logic IIx Music : Please refer to the same description of signal recording, as follows: ‘PLIIx Music’ under the ‘ADJUSTING LISTENING MODES’ segment of the ‘OPERATION - USING THE T 785 - MAIN MENU’ . DTS-ES™ DISCRETE 6.1 Since the signals of the 6.1 Surround channels (including the back channel) -
Page 30: Enhanced Stereo
Please refer to the same description of ‘ENHANCED STEREO’ under the Main Source : Shows the active Source. ‘LISTENING MODES’ segment of the ‘OPERATION - USING THE T 785 - MAIN Volume : Current Volume level is shown. MENU’ . -
Page 31: A/V Presets
Listening Mode: Stereo The T 785’s simple but powerfully flexible system of ‘Presets’ allows you to customize virtually every aspect of your audio-video playback, and recall them with a single key-press. The parameters ‘Listening Mode’ , ‘DSP Options’ , ‘Tone Controls’... - Page 32 OPERATION USING THE T 785 – SETUP MENU Picture Controls: Aspect Mode – Letterbox 3 At “A/V Presets” page, set “Preset: 1” to the following conditions - use [ to select “Yes” or “No” and press [ENTER] to confirm selection and move on to the next setting Speaker Setup: from the Speaker Setup menu, go to “Speaker...
- Page 33 OPERATION USING THE T 785 – SETUP MENU Tone Controls: Tone Defeat: Off 6 At “A/V Presets” page, set “Preset: 2” to the following conditions - use [ to select “Yes” or “No” and press [ENTER] to confirm selection and move to the next setting Display Setup: Set “Line 2”...
-
Page 34: Using The T 785 - Am/Fm/Db/Ipod
However, an exterior AM antenna can be used to improve reception. Consult an antenna professional for more information. SETTING RADIO PRESETS The T 785 can store a mix of your 40 favorite AM, FM and XM (or DAB) radio IMPORTANT NOTICE stations for immediate recall. -
Page 35: About User Names
The front-panel ‘TUNER MODE’ key is a dual-purpose control. In the normal The T 785 is “XM Ready” which means that with the addition of separately sold position, FM Mute FM Stereo icons on the VFD are illuminated, only the... -
Page 36: Listening To Dab Radio
Adaptor DB 1) from the DAB module’s output port into the corresponding the channel. DAB module input socket on the rear panel of the T 785. Select DAB mode on the T 785 by toggling the [AM/FM/DB] button in the front panel. -
Page 37: Service List
OPERATION USING THE T 785 – AM/FM/DB/iPod 4 The strength of the incoming signal can be shown on the VFD by pressing the [ENTER] button. The more segments visible in the lower The level of compression of stations can be set to eliminate the differences display line, the stronger the signal. -
Page 38: Reset
USING THE T 785 – AM/FM/DB/iPod RESET INFORMATION SETTINGS The “Reset” option allows the connected (and separately sold) NAD DAB While listening to a DAB broadcast, the type of information displayed in the Adaptor DB1 to be reset to its factory default settings. -
Page 39: Listening To Your Ipod Player
LISTENING TO YOUR iPod PLAYER ENTER The T 785 is equipped with a data port in the rear panel where an optional Press [ENTER] to go “iPod Settings’ menu where you can setup the following “NAD IPD Dock for iPod” (NAD IPD) can be plugged in. With the NAD IPD... -
Page 40: Nad Ipd 2
TO VIEW VIDEOS OR PHOTOS LOADED IN YOUR iPod The NAD IPD 2 has its own remote control - the DR 1. For you to control the Videos or photos uploaded in your iPod can be viewed directly via the NAD IPD 2 using the DR 1, you have to go to “iPod Setup”... -
Page 41: Using The Htrc 1 Remote Control
HTRC 1 will command; with factory defaults, it does not perform any function on the T 785. The DEVICE SELECTOR keys are organized into three vertical rows of 3 buttons each; the row on the left are all Audio devices, the row in the center are all Video devices. -
Page 42: Navigation Of The Htrc 1 Controls
OPERATION USING THE HTRC 1 REMOTE CONTROL HTRC 1 SETUP MENU For example, the grey AMP DEVICE SELECTOR key label corresponds to the grey input-select labeling adjacent to the numeric keys: When the HTRC GENERAL MENU OPERATION 1’s AMP DEVICE SELECTOR page is active, these keys select the amplifier •... -
Page 43: Library
LIBRARY 5170, 5240, 5340 L70, L73 DVD The HTRC 1 can store a different library of default NAD codes for each of 5325 its DEVICE SELECTOR “pages. ” If the original default library does not control T513, T514, T515, T517, T524,... -
Page 44: Punch-Through (Pun Thr)
OPERATION USING THE HTRC 1 REMOTE CONTROL 3 Press [ENTER]. At “2 Pass” mode, step 5 and onwards of the above example would be as follows (the same Steps 1 – 4 of the above example applies) 5 Press and hold the corresponding [MENU] button of the TV remote control. -
Page 45: Copy
OPERATION USING THE HTRC 1 REMOTE CONTROL COPY 5 Press the [AMP] button in the DEVICE SELECTOR page. This function allows you to copy functions from one key to another. Example: Copy “PAUSE” [ ] command from DVD page to the AMP [ ] button. -
Page 46: Delete
] to select between “No” (desired function key will not be deleted) and “Yes” (desired function key is deleted and process is Example: Record a Macro to the [0] key to turn ON the NAD T 785, Select completed). [Input 1], turn ON the NAD T515 DVD Player, and commence disc playback... -
Page 47: Reset
To execute the above macro example, press [MACRO] and then [0]. The HTRC 1 allows one to upload and download the configuration through a Windows® PC and NAD’s Proprietary HTRC 1 programming software. Use a USB A male to mini USB B male 5-pin cable (not supplied) between your Windows®... -
Page 48: Using The Zr 4 Remote Control
15 to 90 minutes. To cancel the sleep mode, continue pressing the HTRC 1’s SLEEP button until “SLEEP OFF” displays on the VFD. Switching the T 785 to standby from either the HTRC 1’s OFF or the T 785’s STANDBY button will also cancel the sleep mode... -
Page 49: Reference
+ Front Input/MP Factory defaults for 230V version only : Press simultaneously Source + Front Input/MP Audyssey Auto Calibration settings along with other stored presets and settings will all be deleted upon restoring your T 785 to its factory defaults. -
Page 50: Specifications
Specifications are subject to change without notice. For updated documentation and features, please log onto www.NADelectronics.com for the latest information about T 785. Manufactured under license under U.S. Patent #’s: 5,451,942; 5,956,674; 5,974,380;5,978,762; 6,226,616; 6,487,535; 7,212,872; 7,333,929; 7,392,195; 7,272,567 & other U.S. and worldwide patents issued & pending. DTS is a registered trademark and the DTS logos, Symbol, DTS-HD and DTS-HD Master Audio are trademarks of DTS, Inc. - Page 52 All rights reserved. NAD and the NAD logo are trademarks of NAD Electronics International, a division of Lenbrook Industries Limited. No part of this publication may be reproduced, stored or transmitted in any form without the written permission of NAD Electronics International.
- Page 55 Nous assumons tous les frais de main-d'oeuvre et de materiaux des articles garantis, mais ne payons pas les frais d'expedition se vous devez faire parvenir Ie produit NAD/Lenbrook ou centre de reparation NAD agree. Si les reparations sont couvertes par la garantie, NAD/Lenbrook ou Ie centre de reparation assumeront les frais de transport pour Ie retour de votre produit. Etendue de la garantie : La presentegarantie ne couvre par les composantes : 1.
- Page 56 How to obtain service: To obtain warranty service, please bring your unit along with the original invoice or bill of sale to your NAD dealer. If he is not an authorized NAD service center he will direct you to the nearest one or you may call 1-800-263-4641 for the location of the nearest NAD service center.
Need help?
Do you have a question about the T 785 and is the answer not in the manual?
Questions and answers