Nortel i2004 User Manual
Internet telephone
Hide thumbs
Also See for i2004:
- User manual (111 pages) ,
- Manual utilisateur (29 pages) ,
- Installation manual (10 pages)

Related Manuals for Nortel i2004


Summary of Contents for Nortel i2004
- Page 1 Meridian 1 and Succession Communication Server for Enterprise 1000 i2004 Internet Telephone User Guide...
- Page 2 Revision History November 2002 Standard 2.00. This document is up-issued to support Meridian 1 Release 25.40 and Succession Communication Server for Enterprise 1000, Release 2.0. June 2001 Standard 1.00.
-
Page 3: Table Of Contents
Contents i2004 Internet Telephone i2004 Internet Telephone features ............6 Telephone Controls i2004 Internet Telephone display Install your i2004 Internet Telephone Your i2004 Telephone Option Menu Adjust volume ..................15 Adjust Screen contrast................17 Select a language ................18 Select Date/Time format............... 18 Display diagnostics ................ - Page 4 Contents Make an Intercom call................34 Answer a call While on an active call Place a call on hold ................36 Transfer a call ..................36 Use Timed Reminder Recall..............37 Use Attendant Recall ................38 Use Call Park..................38 Record a Calling Party Number ............
- Page 5 Contents Additional Call Features Auto Dial Transfer Feature..............55 Use the Buzz signal ................55 Use Call Page Connect to make an announcement ......... 56 Use Centrex/Exchange Switchhook Flash ..........56 Charge a call or Charge a Forced call ..........57 Use Enhanced Override Feature ............
-
Page 6: I2004 Internet Telephone
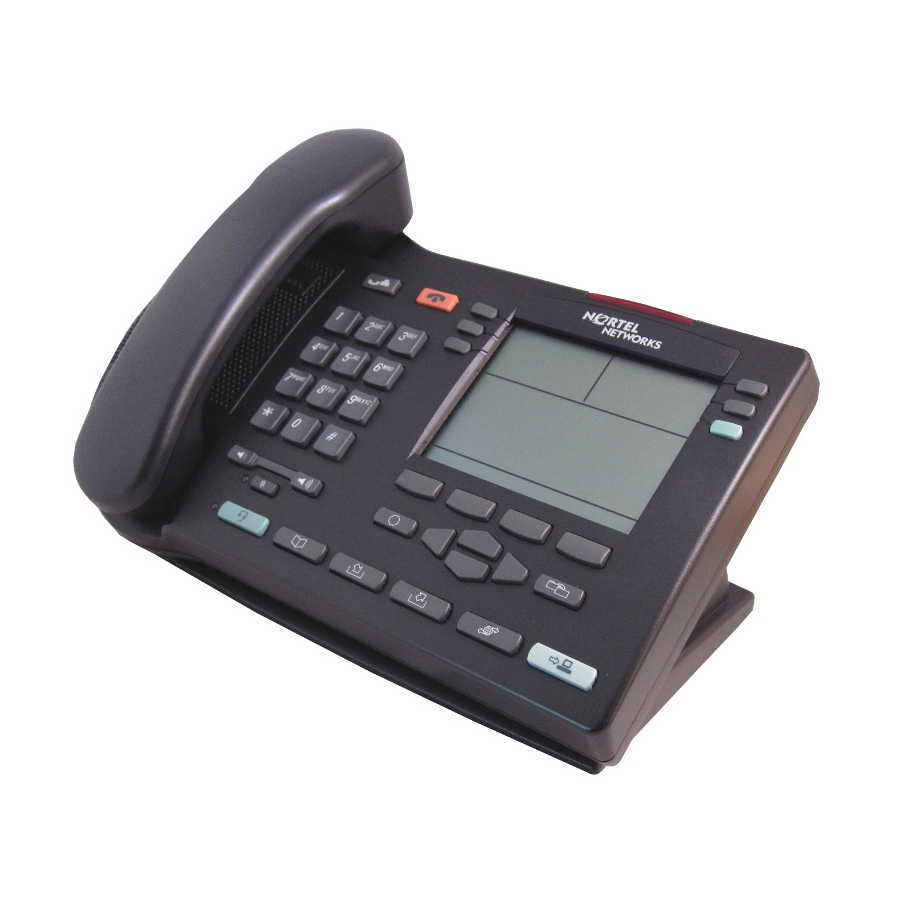
Internet Telephone i2004 Internet Telephone This document describes i2004 features and how to use the i2004 Internet Telephone. The i2004 Internet Telephone brings voice and data to the desktop by connecting directly to a LAN through an Ethernet connection. -
Page 7: Telephone Controls
Navigation Keys Directory Control Bar Shift Handsfree Key Quit Inbox (Message) 553-i2004 Telephone Controls Use the Volume Control to adjust the volume of the Handset, Headset, Speaker, Ringer, and Handsfree features. Press the right side of the rocker bar to increase volume, the left side to decrease volume. - Page 8 Telephone Controls Press the Hold key to put an active call on hold. Press the Line (DN) key beside the flashing to return to the caller on hold. Press the Speaker key to activate handsfree. The speaker LED lights to indicate when handsfree is active.
- Page 9 Telephone Controls Press the Services key to access the following items: • Telephone Option: - Volume Adjustment - Contrast Adjustment - Language - Date/Time Format - Display diagnostics - Local Dialpad Tone - Ring type - Call timer - OnHook Default Path - Change Feature key Label - Set Information •...
- Page 10 Telephone Controls...
-
Page 11: I2004 Internet Telephone Display
Internet Telephone display i2004 Internet Telephone display This section summarizes the display features of the i2004 Internet Telephone. The Idle display is shown in the figure below. The i2004 telephone has three display areas: The upper display area is used for line and feature key status. -
Page 12: Install Your I2004 Internet Telephone
10/100BaseT Ethernet jack. The i2004 can connect directly to a network or share access to a LAN with a PC. Two ports, the Network Ethernet and the PC Ethernet, are located on the back of the telephone and enable connections to a LAN and a PC. - Page 13 Install your i2004 Internet Telephone Secure the telephone footstand to the telephone base. Use the angle grip on the top back of the telephone to change position. Rear view of i2004 Internet Telephone...
-
Page 14: Your I2004 Telephone Option Menu
Administrator to configure telephone preferences. The Virtual Office Login and Test Local Mode (for Branch Office) • menus are listed when an i2004 Internet Telephone class of service is set for Virtual Office and Branch Office. The Telephone Option menu offers the following options: Volume adjustment... -
Page 15: Adjust Volume
Your i2004 Telephone Option Menu Select Press the Select key. The display provides information required to adjust your selection. Select Choose one of the following: Press the Select key to save changes and return to the Telephone Option menu. Quit... - Page 16 Your i2004 Telephone Option Menu To adjust Handset listen volume: Select Handset listen from the Volume Handset listen menu. Press Lower to decrease volume, Lower Higher to increase volume. Choose one of the following: Higher Press the Select key to save the...
-
Page 17: Adjust Screen Contrast
Your i2004 Telephone Option Menu Press the Quit key to keep existing settings. To adjust the Buzzer volume: Select Buzzer from the Volume menu. Buzzer Press Lower to decrease volume, Lower Higher to increase volume. Choose one of the following:... -
Page 18: Select A Language
Your i2004 Telephone Option Menu Select a language The display is available in multiple languages. After selecting Language... from the Telephone Option menu: Using the Navigation keys, highlight the desired language (for example, German [Deutsche]). Deutsche Select Choose one of the following:... -
Page 19: Display Diagnostics
Your i2004 Telephone Option Menu Display diagnostics The Display diagnostics option tests the telephone’s display screen and indicator lights. After selecting Display Diagnostics from the Telephone Option menu: Using the Navigation keys, scroll through the list to view display capabilities. -
Page 20: Choose Ring Type
Your i2004 Telephone Option Menu Choose Ring type The Ring type option sets the telephone’s ring tone. After selecting Ring Type... from Telephone Option menu: Using the Navigation keys, highlight one of the ring types. Ring type 3 Press the... -
Page 21: Enable Onhook Default Path
Your i2004 Telephone Option Menu Enable OnHook Default Path When the set is on-hook, the OnHook Default Path option enables a Headset or a Handsfree connection. After selecting the OnHook Default Path from the Telephone Option menu: handsfree enable From the... - Page 22 Your i2004 Telephone Option Menu To restore the default labels: Choose one of the following: To restore all default labels: Restore all key labels From the Change Feature Key Label screen, press Restore all key labels key. Press to change all feature keys to default values.
-
Page 23: Set Information
Your i2004 Telephone Option Menu Set Information The Set Information option displays the following set-specific information: IP address • Hardware ID of the Internet Telephone • Current firmware version • TN programmed on set • Node ID and IP address •... -
Page 24: Call Features
Call features Call features Contact your system System administration is required for Call features. administrator to configure these features and codes on your telephone. The Call features and Flexible Feature Codes (FFC) described in the following sections must be assigned to your telephone and supported by system software. To access a feature, press a Feature key or enter a... -
Page 25: Make A Call
Make a call Make a call This section describes features associated with making a call. There are several ways to make a call from an i2004 telephone. To make a call: Do one of the following: Press the Line (DN) key. -
Page 26: Use Handsfree Calling
Make a call Use Handsfree calling Handsfree calling enables you to use the built-in microphone and speaker instead of the handset. While on an active call, you can switch between Handset Handsfree mode. To answer a call in Handsfree mode: Press the Handsfree key. -
Page 27: Use The Corporate Directory
Headset to the headset jack or the handset jack . Press the Headset key. Note: Amplified and unamplified headsets are compatible with the i2004 Internet Telephone. Adjust your Headset volume by using Volume adjustment... in the Telephone Option menu. - Page 28 Make a call To search for a specific number: When prompted, use the keypad to enter the desired name in the format, “Last, First”. To edit the entry, select from the following: To toggle letters, use the 1-9 num- CASE ber keys.
-
Page 29: Use Predial
Make a call Press the Dial key to dial the resulting Dial number. Note: If no DN number is associated with the directory entry, the message “No number in directory”displays. If there is no available DN key, a “No available line”message is displayed. After the message displays, select Done return to List View or Card View. -
Page 30: Use Auto Dial
Make a call Use Auto Dial The Auto Dial feature displays, stores, and automatically dials telephone numbers. To use Auto Dial: Lift the Handset. Selecting an associated Auto Dial AutoDial from the upper display area, press to dial the number. To display Auto Dial number: Press the Display... -
Page 31: Activate Ring Again
Make a call Activate Ring Again Use the Ring Again feature if a busy tone sounds or when there is no answer after placing a call. Ring Again activates an audible tone notification that you receive when the person you tried calling is available or has used their telephone. Ring Again also automatically redials the number. -
Page 32: Redial Last Number Called
Make a call Redial last number called The Last Number Redial feature automatically redials the last dialed number. To use Last Number Redial: Choose one of the following To redial using the Handset: Lift the Handset. 2498 Press the Line (DN) key. -
Page 33: Make A System Speed Call
Make a call To make a Speed Call: Lift the Handset. Press the Speed Call Controller key. SpcCtlr Dial the Speed Call code to automatically dial the number. Make a System Speed Call Use the System Speed Call feature to dial Speed Call codes that override all restrictions on a call. -
Page 34: Make An Intercom Call
Make a call Make an Intercom call Use the Intercom feature to call a member of your intercom group by pressing the code assigned to each member. To make an Intercom call: Lift the Handset. Press the Intercom key. Intercom Dial the one-digit or two-digit code for the desired intercom group member. -
Page 35: Answer A Call
Answer a call Answer a call Each incoming call causes the telephone to ring and the LCD indicator to flash. To answer a call: Choose one of the following: Lift the Handset. Press the Handfree button located on the left side of the handset. Note: The Handsfree feature may not... -
Page 36: While On An Active Call
While on an active call While on an active call This section describes features available during an active call. Place a call on hold Use the Hold feature when talking on one line and another call arrives on a second line. -
Page 37: Use Timed Reminder Recall
While on an active call To go back to the original call, if the transfer is incomplete: If the person called is not available, press the 2498 Line (DN) key (next to the LCD indicator) to reconnect to the original call. Use Timed Reminder Recall Use the Timed Reminder Recall feature to receive a reminder tone when a transferred call is not answered. -
Page 38: Use Attendant Recall
While on an active call Use Attendant Recall Use the Attendant Recall feature to contact an attendant during a call and to connect the call to the attendant. To contact the attendant while on a call: Press the Attendant Recall key and stay AttRcal on the line until the attendant answers. - Page 39 While on an active call To park a call using the SPRE code or FFC: Press the Transfer key or the TRANSFER Conf Conference key. Dial the Call Park FFC. To use an alternate DN from the System Park DN or your own DN, dial the DN where you want to park the call.
-
Page 40: Record A Calling Party Number
While on an active call Record a Calling Party Number Use the Calling Party Number feature to record a caller’s number or charge a call to an account number for accounting purposes during an established call. To record a caller’s number for accounting purposes: Press the Call Party... -
Page 41: Trace A Malicious Call
While on an active call Trace a Malicious call Use the Malicious Call Trace feature to trace nuisance calls within your system. To use Call Trace while on a call: Press the Call Trace key. CallTrace To use Call Trace without a Call Trace key: Press the Transfer... -
Page 42: Incoming Calls
Incoming calls Incoming calls This section describes features that are used with incoming calls. Activate Automatic Answerback When the Automatic Answerback feature is active, your set automatically answers in handsfree mode after one ring; however, calls are not forwarded to the voice message service. -
Page 43: Use Call Waiting
Incoming calls Dial the pickup group number of the ringing telephone. To answer a call at a specific extension in any pickup group: Lift the Handset. Press the DN Pickup key, or enter the DNPickup Pickup Directory Number FFC. Dial the DN of the telephone that is ringing (in your call pickup group). - Page 44 Incoming calls Press the Line (DN) key associated with 2498 the first call. If you do not have a Call Waiting key: Press the Goodbye key to end the current call and answer the incoming call. Press the Line (DN) key beside the 2498 flashing status icon to answer the incoming call.
-
Page 45: While You Are Away From Your Desk
While you are away from your desk While you are away from your desk This section describes features that are used when you are away from your desk. Use Call Forward Use the Call Forward feature to direct incoming calls to ring at another Line (DN). -
Page 46: Use Internal Call Forward
While you are away from your desk Use Internal Call Forward Use the Internal Call Forward to accept only calls originating at internal DNs to ring at another DN. Calls originating outside your telephone system still ring at your telephone. Current incoming calls cannot be forwarded. To forward internal calls: Press the Internal Call Forward... -
Page 47: Use Remote Call Forward
While you are away from your desk Use Remote Call Forward Use the Remote Call Forward feature to forward calls (from any telephone other than your own) to any telephone. To activate Remote Call Forward: Lift the Handset. If calling from a telephone outside the system, dial your direct system access number and wait for dial tone. -
Page 48: Secure Your Telephone
While you are away from your desk To Quit Remote Call Forward: Lift the Handset. If calling from a telephone outside the system, dial the direct system access number and wait for the dial tone. Dial the Remote Call Forward Deactivate FFC. - Page 49 While you are away from your desk To unlock your telephone: Lift the Handset. Dial the Electronic Lock Deactivate FFC. Dial your Station Control Password. Choose one of the following: If dialing locally, press the Good- key. If dialing FFC remotely, dial your To change your password (must be done from your telephone): Lift the Handset.
-
Page 50: Talk With More Than One Person
Talk with more than one person Talk with more than one person This section describes features that enable conversations between more than two people. Use the Call Join feature Use the Call Join feature to connect calls to the current active call. This creates a conference between the two callers and yourself. -
Page 51: Use The Conferee Selectable Display And Disconnect Feature
Talk with more than one person If the person you attempt to add to the conference is unavailable: Press the Goodbye key. Press the Line (DN) key with the 2498 flashing icon to return to your original call Use the Conferee selectable display and disconnect feature Use the Conferee Selectable Display feature to list active conferees and disconnect a conferee from the conference call. -
Page 52: Use Group Call
Talk with more than one person The LCD indicator turns off. For multiple conferees, repeat steps 1 and 2 until all conferees are disconnected then press the Goodbye key. Use Group Call Use the Group Call feature to automatically call members of a predefined group, one at a time, until they all answer. - Page 53 Talk with more than one person To answer a Group Call: Lift the Handset. Note: About Notification Tones: If you are on a call and receive three 10-second tones, this is the notifica- tion of a group call on your current extension.
-
Page 54: Work Without Interruption
Work without interruption Work without interruption This section describes features that provide uninterrupted work time. Activate Make Set Busy Use the Make Set Busy feature to make your telephone appear busy to all callers. To activate Make Set Busy Press the Make Set Busy key or lift the MakeSetBsy... -
Page 55: Additional Call Features
Additional Call Features Additional Call Features Auto Dial Transfer Feature Use the Auto Dial Transfer feature to transmit digits through your Auto Dial key to the central office after a Trunk Switchhook Flash. You must be on a Central Office/Exchange (CO) trunk call from or to a CO that offers Centrex or exchange line-type features. -
Page 56: Use Call Page Connect To Make An Announcement
Additional Call Features Use Call Page Connect to make an announcement Use the Call Page Connect feature to make an announcement over a paging system. Note: A Page key on an attendant console overrides and disconnects the telephones. The telephones must re-access the page trunk. To connect to Call Page: Lift the Handset. -
Page 57: Charge A Call Or Charge A Forced Call
Additional Call Features Charge a call or Charge a Forced call Use the Call Charge feature to charge a call to a specific account. The Forced Charge feature charges long-distance calls from a telephone restricted to local calls. To charge a local or long-distance call to an account before you dial: Lift the Handset. - Page 58 Additional Call Features To charge a call to an account when you transfer a call: Press the Transfer key. The call is on TRANSFER hold. Press the Charge key or dial the Charge Call Detail Recording FFC. Dial the charge account number. After the dial tone, dial the number to where the call is to be transferred.
-
Page 59: Use Enhanced Override Feature
Additional Call Features Use Enhanced Override Feature Use the Enhanced Override feature to override an active call after you have attempted a Forced Camp-on. Use Enhanced Override to make a simple call or a consultation call (such as, placing a call on hold and calling another party). To use Enhanced Override: You are receiving a busy signal after dialing a telephone number. -
Page 60: Override A Busy Signal
Additional Call Features Note: The person you called receives a tone, and you receive a ring/ringback signal or busy/engaged signal, depending on the options chosen. You are now camped-on to the number you dialed. When the person you called finishes their call, your telephone automatically dials the number. -
Page 61: Use Privacy Release
Additional Call Features Use Privacy Release Use the Privacy Release feature to enable one or more people who share your DN to join a call. To use Privacy Goodbye in an established state: Press the Privacy Release key during a call. PrivRls A person joins the call by pressing the shared number (DN) key on their telephone... - Page 62 Additional Call Features To use Automatic Post selection: The called party is either busy on the telephone or away from the desk. To page the called party, there is no need to redial the number of the called party. Press the Radio Page key.
-
Page 63: Use Voice Call
Additional Call Features Use Voice Call Use the Voice Call feature to page another person or make an announcement through someone else’s telephone speaker. To make a voice call: Lift the Handset. Press the Voice Call key and make the VoiceCall announcement. -
Page 64: Additional Features
When designated as the office telephone, the i2004 can be activated for Virtual Office by a i2050 or another i2004. When used as the remote telephone, the i2004 can activate an i2002 or i2004 for Virtual Office. - Page 65 A successful login transfers all the features, time, date and tones to your remote telephone from your office telephone. Logged on to i2004 Figure 1: Logged in using a i2004 Figure 2: Logged in using a i2050 A User information line displays the number on your i2004 or i2050 telephone.
- Page 66 Additional Features Virtual Office on your Office Telephone When activated for Virtual Office by a remote telephone, your office telephone is logged out and is no longer operational. A Logged Out screen is displayed on your telephone alerting you that it is being used for Virtual Office.
- Page 67 Additional Features Troubleshoot Virtual Office When using Virtual Office you may encounter error messages displayed on your screen. The following table lists error messages and actions to correct the causes. Table 1: Troubleshoot Virtual Office Displayed Message Probable Cause Actions Busy, try again.
- Page 68 Actions Permission Denied (4) Incorrect User ID Retry with correct User entered. Attempt to Login to a Go to an i2004 or i2050 remote i2004 or i2050 telephone and try again. telephone from an i2002 telephone. Permission Denied (5) Incorrect User ID Retry with correct User entered.
-
Page 69: Succession Branch Office
Additional Features Succession Branch Office The Branch Office telephone can operate in Normal Mode or Local mode. Normal Mode The telephone registers with the Main Office and receives telephone services from the Main Office. At any time during Normal Mode you can check local mode functionality (make and receive calls) by enabling Local Mode and returning to Normal Mode. - Page 70 Additional Features Resume Normal Mode Use the Resume Normal Mode command to return to Normal Mode after testing survival functionality. Note: If the Resume Normal Mode command is not performed after testing , the telephone automatically returns to Normal Mode in ten minutes. Press the Services key to access the...
-
Page 71: Hospitality Features
Hospitality features Hospitality features The hospitality features in this section are intended for hotel operations. Set Automatic Wake-Up Use the Automatic Wake-Up feature to receive a timed reminder call. From your telephone, you can program the Meridian 1 to automatically place a call to yourself at a predetermined time. - Page 72 Hospitality features To verify the time for the Automatic Wake-Up call: Lift the Handset. Dial the Automatic Wake-Up Verify FFC. Dial the Automatic Wake-Up time in a 24-hour time format (hhmm). If your query matches the preset time, a confirmation tone sounds. Note: In a 24-hour time format, 7:30 a.m.
-
Page 73: Activate Message Registration
Hospitality features Activate Message Registration Use the Message Registration feature to read, change, or reset meters that log your hotel telephone calls. To read meters: Press the Message Registration key. MsgReg Dial the room Directory Number (DN). Press the Message Registration MsgReg again. -
Page 74: Use Maid Identification
Hospitality features Use Maid Identification Use the Maid Identification feature to track the cleaning status of rooms. The maid enters the information from the telephone in each room. To enter cleaning status: Press the Room Status key. RoomStatus Dial the Directory Number (DN) for the room for which the cleaning status is being changed. -
Page 75: Display Room Status
Hospitality features Display Room Status The Room Status feature prints the status of a room using the Display Module. To read the status of a room: Press the Room Status key. RoomStatus Dial the Directory Number (DN) for the room. The DN displays followed by a two-digit code. - Page 76 Hospitality features To change the status of a room: Press the Room Status key. RoomStatus Dial the Directory Number (DN) for the room. The DN displays followed by a two-digit code. The first digit indicates the occupancy status: = Room vacant = Room occupied The next digit indicates the cleaning status of the room:...
-
Page 77: Flexible Feature Codes (Ffcs)
Flexible Feature Codes (FFCs) Flexible Feature Codes (FFCs) Use this table to keep track of the FFCs assigned by your system administrator. Call Detail Recording Charge Make Set Busy Activate Account Call Forward All Calls Make Set Busy Deactivate Activate Call Forward All Calls Malicious Call Trace Deactivate... -
Page 78: Terms You Should Know
The system must have CPND enabled. Copy key A Fixed key on the i2004 telephone that is reserved for future feature development. An audible non-working tone is generated along with a display message Service not available if this key is pressed. - Page 79 A method of conversing with the party on the other end of the line without lifting your handset. Inbox (Message) A Fixed key on the i2004 telephone that connects to your voice messaging system when the key is pressed. Indicator An LCD or an LED that indicates the status of a feature by the flash, wink, steady on, or off.
- Page 80 Programmable Line (DN) /Feature Keys (self-labeled) The six keys located at the sides of the upper area of the display. Quit key A Fixed key on the i2004 telephone that is used to exit applications.
- Page 81 Terms you should know Ringback/ring tone A sound indicating that a call you have made is ringing at its destination. Secondary Directory Number A second incoming/outgoing line for your telephone. Shared Directory Number A DN (extension) that is shared by two or more persons. Soft Keys (self-labeled) A set of keys programmed by your system administrator.
- Page 82 Terms you should know (when lifted) releases the switchhook and you either answer an incoming call or you receive a dial tone to make a call. User Interface In this User Guide, User Interface refers to the display screen that interacts with the end-user as a result of an action or event.
- Page 83 Terms you should know...
- Page 84 Index Attendant Date/time format 9, 18, 78 Attendant Recall Direct Inward System Access Auto Dial Directory 30, 78 8, 27 Auto Dial Transfer Directory Key 27, 78 Automatic Answerback Directory Number Automatic Wake-Up Display 17, 18 Display Diagnostics 9, 19 Display incoming calls Buzz signal Display Key...
- Page 85 Index Hold Key Hospitality features Navigation Keys 8, 14 Hot Line Off-hook 25, 80 i2004 Telephone display On-hook Inbox (Message) 8, 79 OnHook Default Path Indicator status On-hook dialing Information display Override 59, 60 Information line Intercom call Internal Call Forward...
- Page 86 Index Secondary Directory Number Virtual Office 9, 64 Secure your telephone Voice Call Selectable Conferee display and Volume Adjustment 9, 15 Disconnect Volume Control Bar Services Services key Set Information 9, 23 Shared Directory Numbers Shift Soft Keys (self-labeled) Speaker Key Special dial tone Speed Call Speed Call, System...
- Page 87 Index...
- Page 88 Internet Telephone User Guide Copyright © 2002 Nortel Networks All Rights Reserved Information is subject to change without notice. Nortel Networks reserves the right to make changes in design or components as progress in engineering and manufacturing warrant. This equipment has been tested and found to comply...
Need help?
Do you have a question about the i2004 and is the answer not in the manual?
Questions and answers