
Subscribe to Our Youtube Channel
Related Manuals for Rosewill RSV-SATA-Cage-34


Summary of Contents for Rosewill RSV-SATA-Cage-34
- Page 1 Internal SATA/SAS Hot-Swap Cage 3x 5.25” to 4x 3.5”/2.5” RSV-SATA-Cage-34 USER’S Manual...
-
Page 2: Table Of Contents
Internal SATA/SAS Hot-Swap Cage RSV-SATA-Cage-34 User Manual Contents Product Overview Introduction Specification Accessory Bag Detail Installation Guide Hard Drive Tray Assembly / Disassembly Hard Drive Installation Installing a 3.5” HDD Installing a 2.5” HDD Hot Swap Cage Cable Installation Hot Swap Cage Installation – Case... -
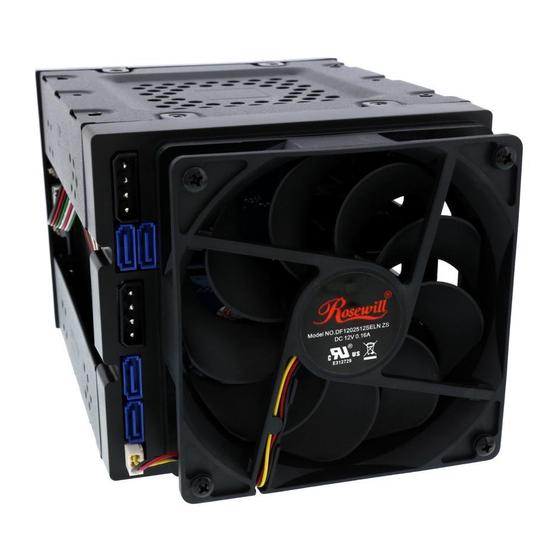
Page 3: Product Overview
Internal SATA/SAS Hot-Swap Cage RSV-SATA-Cage-34 User Manual Product Overview... -
Page 4: Introduction
User Manual Introduction RSV-SATA-Cage-34 is a Hot Swap HDD Cage which converts space of 3x 5.25” CD-rom / DVD-rom to 4x 3.5” or 2.5” SATAI, SATAII, SATAIII, or SAS HDD tray. This cage allows you make better usage of your Server or Case spaces. -
Page 5: Installation Guide
Internal SATA/SAS Hot-Swap Cage RSV-SATA-Cage-34 User Manual Installation Guide • Hard Drive Tray Assembly / Disassembly Each HDD Tray has a press button for releasing the hinge. To remove the HDD Tray; first press the button. • Hard Drive Installation Installing a 3.5”... -
Page 6: Installing A 2.5" Hdd
Internal SATA/SAS Hot-Swap Cage RSV-SATA-Cage-34 User Manual Installing a 2.5” HDD To install a 2.5” HDD, please make sure that the 2.5” HDD is align with the screw holes on the tray. Then you can fasten all the screws onto the HDD. -
Page 7: Hot Swap Cage Installation - Case
Internal SATA/SAS Hot-Swap Cage RSV-SATA-Cage-34 User Manual Hot Swap Cage Installation – Case Remove three 5.25” bay covers from the case. Insert the Cage into the slot. -
Page 8: Hot Swap Cage Installation - Server (Rsv-L4000 As Example)
Internal SATA/SAS Hot-Swap Cage RSV-SATA-Cage-34 User Manual Secure the Cage with Screws Hot Swap Cage Installation – Server (RSV-L4000 as example) Remove the screws from each side of the Chassis. (two on each side) Once the screws removed, push the top cover to... - Page 9 Internal SATA/SAS Hot-Swap Cage RSV-SATA-Cage-34 User Manual To remove the cage; first press the two round shape button using your thumbs, then use your index finger to push the 3.5” module to remove it. Pull the module out from the front.
- Page 10 Slide the Cage into the Server Chassis to complete the installation process. Thank you for purchasing a quality Rosewill Product. Please register your product at: www.rosewill.com for complete warranty information and future support for your product. Support: techsupport@rosewill.com Call Center: (800) 575-9885...
Need help?
Do you have a question about the RSV-SATA-Cage-34 and is the answer not in the manual?
Questions and answers