Advertisement
Quick Links
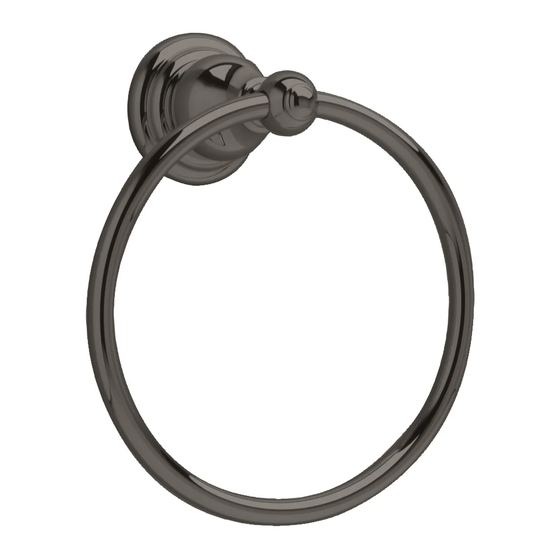
ROBE HOOK/TOWEL RING TOWEL BAR 18"and 24"
GANCHO PARA BATA, TOALLERO DE ANILLO Y TOALLERO
DE BARRA DE 18" (45,7 CM) y 24" (61 CM)
CROCHET DE ROBE DE CHAMBRE - ANNEAU DE SERVIETTE -
PORTE-SERVIETTE 45,7 cm (18 po.) ET 61,0 cm (24 po.)
Thank you for selecting American-Standard...the benchmark of fine
quality for over 100 years. To ensure that your installation proceeds smoothly--
please read these instructions carefully before you begin.
Gracias por seleccionar los productos American Standard, sinónimo de la mejor calidad
durante más de 100 años. Por favor lea estas instrucciones detenidamente antes de
comenzar para que lleve a cabo la instalación sin contratiempos.
Nous vous remercions d'avoir choisi American Standard... synonyme de qualité supérieure
depuis plus de 100 ans. Pour vous assurer que l'installation se déroulera sans difficulté,
veuillez lire attentivement ces instructions avant de commencer.
Recommended Tools & Materials/Herramientas y Materiales Recomendados/Outils et matériaux recommandés
10'
Tape Measure
Flexómetro
Ruban à mesurer
1
TOWEL RING and ROBE HOOK MOUNTING & INSTALLATION
The TOWEL RING (1) and ROBE HOOK (2) works best if secured to a wall stud or cross brace within the wall, using the SCREWS (3) supplied.
If the TOWEL RING (1) and ROBE HOOK (2) are to be installed on a tile or plaster wall, the ANCHORS (4) and SCREWS (3) should be used.
Determine desired height and location (optional) and mark a center line. Using the MOUNTING PLATE (5) as a template mark the two
spots for the mounting holes. If MOUNTING PLATE (5) is secured to a stud or cross brace drill small pilot holes for SCREWS (3).
For installations on drywall, use ANCHORS (4) and SCREWS (3) for securing MOUNTING PLATE (5) to wall. Place #2 Phillips screwdriver
or cordless screwdriver into recess of anchor. Press into drywall while turning the anchor clockwise until it is seated flush with the wall.
Place MOUNTING PLATE (5) over ANCHORS (4) and insert SCREWS (3) provided with #2 Phillips screwdriver. See illustration below.
Secure MOUNTING PLATE (5) to wall with SCREWS (3).
For installations on tiled walls, pre drill a 1/4" hole through the tile only. Do not drill into the drywall. Use ANCHORS (4) and
SCREWS (3) for securing MOUNTING PLATE (5) to tiled wall. Place #2 Phillips screwdriver or cordless screwdriver into recess of anchor.
Press into drywall while turning the anchor clockwise until it is seated flush with the tiled wall. Place MOUNTING PLATE (5) over
ANCHORS (4) and insert SCREWS (3) provided with #2 Phillips screwdriver. See illustration below. Secure MOUNTING PLATE (5) to wall
with SCREWS (3).
Install the WALL ESCUTCHEON (6) onto MOUNTING PLATE (5). Place the BODIES (1,2) on the WALL ESCUTCHEON (6) and secure
with ATTACHMENT SCREW (7). Push in INDEX BUTTON (8) into BODIES (1, 2).
4
5
3
48 TO 72 INCHES FROM FINISHED FLOOR
Instrucciones de instalación
Drill
Taladro
Perceuse
USE MOUNTING PLATE AS TEMPLATE
4
CENTER LINE
Installation Instructions
Mode d'installation
8040.180
8040.240
8040.210
8040.190
Regular Screwdriver
Desarmador plano
Tournevis plat
3
6
5
FINISHED WALL
Certified to comply with ANSI A112.18.1
Certificación de cumplimiento de la norma ANSI A112.18.1
Certifié conforme à ANSI A112.18.1
U.S. Patent No. D403,750
Patente estadounidense D403,750
Brevet U.S.A no. D403.750
Phillips Screwdriver
Desarmador de cruz
Tournevis cruciforme
2
1
M 9 6 8 7 4 1 D
8
7
Advertisement

Summary of Contents for American Standard 18" Towel Bar 8040.180
- Page 1 100 years. To ensure that your installation proceeds smoothly-- please read these instructions carefully before you begin. Gracias por seleccionar los productos American Standard, sinónimo de la mejor calidad durante más de 100 años. Por favor lea estas instrucciones detenidamente antes de comenzar para que lleve a cabo la instalación sin contratiempos.
- Page 2 MONTAJE E INSTALACIÓN DEL TOALLERO DE ANILLO Y EL GANCHO PARA BATA El TOALLERO DE ANILLO (1) y el GANCHO PARA BATA (2) funcionarán mejor si se sujetan a un montante de pared o a un refuerzo transversal de la pared utilizando los TORNILLOS PARA MADERA (3) provistos.
- Page 3 INSTALL TOWEL BAR Install the WALL ESCUTCHEONS (6) on the MOUNTING PLATES (5). Place the BODY (2) over the ESCUTCHEON (6) on one side. Secure with MOUNTING SCREW (7). Do not tighten fully. Fit one end of the TOWEL TUBE (9) into the mounted BODY (2). (The slot at the end of the TUBE (9) should be horizontal). Holding the TOWEL TUBE (9) slide the unmounted BODY (2) on the TOWEL TUBE (9).
- Page 4 Product names listed herein are trademarks of American Standard Inc. Los nombres de los productos presentados en este documento son marcas comerciales de American Standard Inc. Les noms des produits indiqués dans ce document sont des marques de commerce de American Standard Inc. MODEL NUMBERS NÚMEROS DE MODELO...


