Table of Contents
Advertisement
Quick Links
Advertisement
Table of Contents
Troubleshooting

Related Manuals for Farenheit TI-450


Summary of Contents for Farenheit TI-450
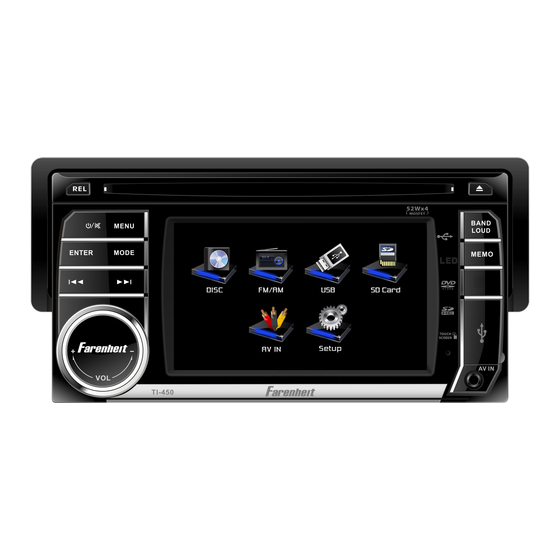
- Page 1 TI-450/TI-450T In-Dash 4.5” Monitor Touch Screen DVD/CD/MP3/MP4 AM/FM Radio Built-in TV tuner Owner’s Manual Take the time to read through this owner’s manual. Familiarity with installation and operation procedures will help you obtain the best Performance from your new DVD-receiver.
-
Page 2: Warning
WARNING! To promote safety, certain functions are disabled unless the parking brake is on. The Unit is designed to detect parked status and must be connected to the power supply side of the parking brake switch. Improper connection or use of his connection may violate applicable law and may result in serious injury or damage. -
Page 3: Table Of Contents
CONTENTS WARNING! ......................... 2 OPERATION PRECAUTIONS ..................2 CONTENTS ........................ 3 Accessories ........................ 4 INSTALLATION / UN-INSTALLATION ................ 5 WIRING CONNECTIONS ................... 6 Front panel ........................8 REMOTE CONTROL ....................10 REMOVE BATTERY ....................12 MAIN MENU ......................13 ◆ RADIO PLAYER ....................13 ◆... -
Page 4: Accessories
Accessories Package contains the following accessories for installation and operation of the unit. (1) Washer, Spring 1 each Washer, M5 Nut (2) Mounting Strap (3) Bolt (4) Screw4*6 (5) Mounting Collar (6) Release Key (7) Screw 5*20 1x AV-IN Cable User Manual Remote Control Warranty card... -
Page 5: Installation / Un-Installation
INSTALLATION / UN-INSTALLATION Note Before starting installation of the unit, make sure the wiring is connected properly. Use only the parts provided with the unit to ensure proper installation. The use of unauthorized parts may cause malfunction. Install the unit where it does not get in the driver’s way and will not injure the passenger in case there is a sudden stop, like an emergency stop. -
Page 6: Wiring Connections
WIRING CONNECTIONS NOTE: Never connect cable to the system while it is connected to the battery power. Whenever the unit is disconnected from the battery, the preset memory will be erased and the unit will go back to its factory defaults. Note: To watch video the parking wire should be connected to break signal. - Page 7 Note: Only use groundless loudspeakers. Use only loudspeakers of minimal 40Watt, using fewer watts may result in damaging your loudspeakers at higher volumes. Use 4~8 Ω (Ohm impedance) loudspeakers only; using higher or lesser impedance may damage the unit. Do not use 3-cable loudspeakers and do not connect the loudspeakers minus to the car body (GND). The is using a BTL circuit and each loudspeaker must be connected with insulated cables according the unit diagram.
-
Page 8: Front Panel
Front panel 1. DISC slot Insert the CD/DVD with the labeled side facing upwards gently into the CD/DVD slot until the device draws in the CD/DVD automatically. 2. Release Button Press it to detach and release the front panel. When the unit was released, it will switch off automatically after a few second. - Page 9 Button In Radio mode, press it to select the next preset stations in current band; press and hold for 2 seconds to start automatic searching. In DVD / SD / USB mode, press button to skip to the next track. Press button and hold for two seconds to activate fast forward (FF) search in a track.
-
Page 10: Remote Control
REMOTE CONTROL 1: MODE 2: POWER 3: BAND/RANDOM 4: ENTER 5: UP/DOWN/LEFT/RIGHT 6: EJECT 7: STEREO/MONO 8: P.SCN/RPT 9: BACKWARD/SEEK- FAST BACKWARD 10:LOUD 11: OSD 12: PBC/STOP 13: Digit numbers 14: Play/Pause 15: MUTE 16: MENU 17: SUBTITLE 18: SETUP 19: ANGLE 20: INT 21: VOLUME PLUS... - Page 11 / seek- buttons In DVD mode, Press button to skip to the previous track. Press and hold button for two seconds to activate fast reverse (REW) search in a track. In RADIO mode, press button to start searching automatic, press and hold for two seconds to start manual searching.
-
Page 12: Remove Battery
26. AUDIO/GOTO button In DVD mode press it to select the audio language. In VCD mode, press it to select the sound track in the sequence of MONO L =>MONO R =>STEREO. Go to: in DVD mode,press and hold for 2 seconds to show TIME SEARCH menu, select number and confirm to go to certain position directly. -
Page 13: Main Menu
MAIN MENU The best way to discover the program is to explore each screen in detail, and to find out how to move from one to another. Read this chapter for a guided tour. Unit starts by displaying the Main menu. This is the root of the screen hierarchy, and you can simply access all features by tapping on the touch screen buttons. -
Page 14: Dvd Player
◆ DVD PLAYER To start DVD Player, tap on DVD button from main menu screen. TOUCH SCREEN MENU You will not see any buttons while DVD is played. Buttons will appear when you tap on TFT screen. Tap the screen again to hide the buttons. Insert DVD disc insert VCD disc NOTE... -
Page 15: Disc/Usb/Sd/Mmc Interface
In DVD mode touch it to enter TITLE MENU (Enable only if the DVD disc with title menu). Touch it to select previous or next track. ◆DISC/USB/SD/MMC interface When a file disc, USB or a memory card is played, the screen will show following interface: Mute the sound. -
Page 16: Av-In Mode
◆AV-IN Mode To start AV-IN Mode, tap on AV-IN button from main menu screen. Connect the external audio/video signal source to this unit. Select AV-IN mode in the main menu or by pressing repeat Mode button on the front panel. Note: If there is no external video input, the TFT displays “NO SIGNAL”. -
Page 17: Display Control
DISPLAY CONTROL Tap DISPLAY button to show DISPLAY menu. SCREEN Screen setting 16:9, 4:3,FULL Backlight Backlight setting LOW, MID, HIGH RADIO CONTROL Tap RADIO button to show RADIO menu. Set AREA:EUROPE-U.S.A-SOUTH AREA AMERICA-RUSSIA STEREO Set STEREO ON or OFF LOCAL Set LOCAL ON or OFF GENERAL CONTROL Tap GENERAL Button to show GENERAL menu. - Page 18 [1]. Subtitle Lang setting: With this option you can select the preferred language for the subtitles. When the selected language is recorded on the disc then this language will automatically be shown. If not, the first language recorded on the disc is displayed. [2].Audio Lang setting: With this option you can select the preferred language for the audio output.
-
Page 19: System Information
[7] NTSC/ PAL: Select this menu item to set up your preferred video output format. PAL is commonly used in Europe, NTSC is commonly used in the USA and Japan. Auto is commonly used. [8] DEFAULT: Factory reset. Set all values to Factory default values including memory and preset stations. -
Page 20: Tv Section (For Ti-450T Only)
TV SECTION (For TI-450T only) To enter TV mode, you can tap TV icon on main menu screen or press mode on front panel or remote. 1. Connect TV antenna to the TV ANT wire in rear unit, and then press MODE button on front panel or remote to select TV mode or Tap TV icon on main menu screen to enter TV mode. -
Page 21: Other Functions
System Select this menu item is to set TV system: NTSC=> PAL=>SECAM ,press NTER button on the remote or tap the screen to select. Audio Select this menu item is to set the TV sound system: When system setting PAL, press ENTER on remote or tap the screen button to select TV sound system: D/K=>M/N=>... -
Page 22: Notes On Disc
NOTES ON DISC Only use groundless loudspeakers. Use only loudspeakers of minimal 40Watt, using fewer watts may result in damaging your loud speakers at higher volumes. Use 4~8 Ω (Ohm impedance) loudspeakers only; using higher or lesser impedance may damage the unit. -
Page 23: Troubleshooting
TROUBLESHOOTING Symptom Cause Remedy Power does not turn Replace with fuse of the same Fuse is blown amperage. If the fuse blows again, (No sound is consult your store of purchase produced.) In correct wiring Consult your local retailer. 1. Turn off the unit. 2. -
Page 24: Troubleshooting
TROUBLESHOOTING SYMPTOM CAUSE SOLUTION IF THE POWER SUPPLY IS PROPERLY THE CAR IGNITION IS CONNECTED TO THE CAR NOT ON. ACCESSORY SWITCH THE IGNITION KEY NO POWER TO “ACC”. THE FUSE IS BLOWN. REPLACE THE FUSE. DISC CANNOT BE PRESENCE OF DISC REMOVE THE DISC IN THE PLAYER LOADED. -
Page 25: Technical Specifications
TECHNICAL SPECIFICATIONS General Power supply: 11~16V DC Current consumption: max. 10 A Maximum power output: 52W x 4 channels (max) DVD/SVCD/VCD/HDCD/MP3/MP4/VIDEO/CDDA/Picture Compatible formats: CDCD-R/-RW/DVD±R/±RW playback Dimensions (W x D x H) / 165*178*50 mm/2 kg weight: Working temperature -10℃ - +60℃ range: ESP function: 10 sec.