
Related Manuals for GiiNii 8" Digital Picture Frame


Summary of Contents for GiiNii 8" Digital Picture Frame
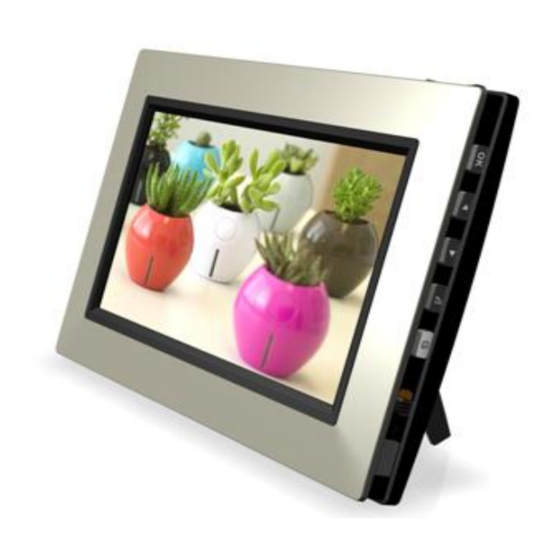
- Page 1 Model: GN-801W GiiNii 8” Digital Picture Frame User Guide Edition Version 3.4 www.giinii.com © 2008 GiiNii International...
-
Page 2: Table Of Contents
GiiNii 8” Digital Picture Frame GN-801W Table Of Content What’s in the box ................6 1. Let’s Get Started!................6 Connecting to Power ....................6 Turning on the Digital Picture Frame ................7 2. Buttons …………………………………………………………………8 Buttons and Menu Operation ..................8 Inserting a memory card or USB Flash Drive .............. - Page 3 3.4.2 Date and Time....................29 3.4.3 Slideshow Setting ....................32 3.4.4 Information ......................34 4. Technical specification .............. 35 Replacement Parts ...................... 35 5. Frequently Asked Questions ............. 36 6. Regulation & Compliance ............37 7. GiiNii 90-Day Limited Warranty ..........38...
- Page 4 GiiNii 8” Digital Picture Frame GN-801W Dear Customer: Thank you for bringing the GiiNii digital photo frame into your home. Now you will be able to view your growing digital picture library and share great memories with friends and your family.
-
Page 5: Key Features
GiiNii 8” Digital Picture Frame GN-801W Key features Auto-Rotation – automatically rotate your picture display according to Digital Photo Frame orientation 8”AW 480x220 widescreen TFT LCD 7 select buttons + 1 power switch Support of multi format memory cards: SD/SDHC/MMC/MS/ xD/MS Duo/MMC+ through a 6-in-1 card socket ... -
Page 6: What's In The Box
GiiNii 8” Digital Picture Frame GN-801W What’s in the box • Digital Photo Frame • User Manual • Quick Start Guide • Registration card • AC Adaptor (5V /1.5 A) 1. Let’s Get Started! Connecting to Power Place your digital picture frame on a flat surface. Insert the small jack into the picture frame (as shown below), then plug the AC cord into an electrical outlet. -
Page 7: Turning On The Digital Picture Frame
GiiNii 8” Digital Picture Frame GN-801W Turning on the Digital Picture Frame Place the Digital Picture Frame on in an upright position on a level surface. The power button is located at the lower right side of the player. Slide the power button to turn on the player. -
Page 8: Buttons
GiiNii 8” Digital Picture Frame GN-801W 2. Buttons Buttons and Menu Operation The buttons used for operating your device are located on the sides. The buttons can be used to drive all functions of the on-screen menu. The G Button is used to navigate between modes and time. -
Page 9: Inserting A Memory Card Or Usb Flash Drive
GiiNii 8” Digital Picture Frame GN-801W Button Function description Power Power on/Power off G button Go to slideshow mode / Navigate between slideshow and clock Exit Return to previous menu Left Previous item Right Next item Previous menu item Down... - Page 10 GiiNii 8” Digital Picture Frame GN-801W Memory Card USB Drive Helpful Tips This device supports following memory cards: SD,SDHC, MMC, MS, xD, MMC+ and MS Duo can be played with an adaptor (not provided). You may also use a USB Flash Drive in this device.
-
Page 11: Menu Options
GiiNii 8” Digital Picture Frame GN-801W 3. Menu Options Slideshow In this mode, press the Up or Down or OK buttons to access the Photo menu; press the Left or Right buttons to select previous or next photo; press the G-Button to show Clock and press it again to return to the slideshow. - Page 12 GiiNii 8” Digital Picture Frame GN-801W Clock Photo Photo View--Slideshow Press G button Setting Slideshow---Clock Press G button...
-
Page 13: Button Functions In Slideshow
GiiNii 8” Digital Picture Frame GN-801W Button functions in slideshow Button Function G-Button Select between Slideshow and Clock Left Show the previous photo OK, Up, Down Access Photo View Right Show the next photo Main Menu In Slideshow, press OK to access Photo... -
Page 14: Clock
GiiNii 8” Digital Picture Frame GN-801W 3.1 Clock In the main menu, use the Up or Down button to select Clock. When in slideshow, press the G-button to access Clock. Press OK, Up, Down to show Clock menu, then press Left and Right buttons to select the clock style: A (Analog Clock) and D (Digital Clock);... -
Page 15: Photo
GiiNii 8” Digital Picture Frame GN-801W Type: D. Digital Clock Month and Date 3.2 Photo 1. In the Main Menu, use the Up and Down buttons to select Photo. Then select the photo source contained in your memory card. SD/SDHC/MMC/MMC+/MMC, MS, MS Duo, XD Card and USB Flash Drive are supported. - Page 16 GiiNii 8” Digital Picture Frame GN-801W Clock Photo Setting Button Function Slideshow → Clock G-Button Access Clock Left Select the left photo Slideshow → Photo Menu (Thumbnail) Play/OK Right Select the right photo Down Access Setting...
- Page 17 GiiNii 8” Digital Picture Frame GN-801W 3.2.1 Color Effects 1. In the Photo Menu, use the Up and Down buttons to select Color Effects. 2. Use the Left and Right buttons to select between Normal, Black and White, Sepia. 3. Press OK to confirm the selection and back to the Thumbnail Mode.
- Page 18 GiiNii 8” Digital Picture Frame GN-801W 3. Press OK to confirm the selection and back to the Thumbnail Mode. Color Effects Contrast Brightness 3.2.3 Brightness 1. In the Photo Menu, use the Up and Down buttons to select Brightness. 2. Use the Left and Right buttons to select the brightness.
- Page 19 GiiNii 8” Digital Picture Frame GN-801W Contrast Brightness Delete 3.2.4 Delete 1. In the Photo Menu, use the Up and Down buttons to select Delete. 2. Use the Left and Right buttons to select Yes or No (Default). Brightness Delete...
- Page 20 GiiNii 8” Digital Picture Frame GN-801W 3. Select Yes and press OK to Delete; otherwise, select No and press OK to return to the thumbnail photos. Brightness Delete Press "OK" key to delete file Rotate 3.2.5 Rotate Manual Rotate in menu mode 1.
- Page 21 Auto Rotate During Slideshow Using the Auto Rotation function for Landscape or Portrait mode You can use your GiiNii picture frame in either landscape or in portrait. The GiiNii picture frame automatically changes how the pictures are displayed. First in a landscape mode when placed sideways;...
- Page 22 GiiNii 8” Digital Picture Frame GN-801W 3.2.6 Ratio 1. In the Photo Menu, use the Up and Down buttons to select Ratio. 2. Use the Left and Right buttons to select Full Screen (Default) or Actual Size. 3. Press OK to confirm the selection and back to the Thumbnail Mode.
-
Page 23: Calendar
GiiNii 8” Digital Picture Frame GN-801W 3.3 Calendar Calendar Clock... -
Page 24: Setting
GiiNii 8” Digital Picture Frame GN-801W In menu mode, press Up to show Calendar in thumbnail. Press OK to browse the calendar in full screen mode. And press OK again to return to thumbnail. Press Left or Right to review previous or next in thumbnail or full screen. -
Page 25: General Setting
GiiNii 8” Digital Picture Frame GN-801W 3.4.1 General Setting 3.4.1.1 Language In General Setting Menu, use the Up or Down buttons to enter Language Menu. Use Left or Right buttons to select language: English / Français / Nederlands / Español / Deutsch / Português / Italiano Press OK to confirm. - Page 26 GiiNii 8” Digital Picture Frame GN-801W 3.4.1.2 Brightness In General Setting Menu, use the Up or Down buttons to access Brightness. Use the Left or Right button to adjust between Darker, Normal and Brighter. Press OK to confirm and back to Setting Menu.
- Page 27 GiiNii 8” Digital Picture Frame GN-801W the time. When EnerGiiNii On is enabled, this unit will automatically operate at low power consumption during nighttime (21:00PM~7:00AM), and will automatically resume normal during daytime (7:00AM ~21:00PM); When you select EnerGiiNii Save 20% or EnerGiiNii Save 50%, it will automatically operate at that power consumption and save the percent power accordingly.
- Page 28 GiiNii 8” Digital Picture Frame GN-801W Language Reset Select Yes, press OK to reset; otherwise, select No and press OK to return to the Setting menu. Language Reset Press "OK" key to reset...
-
Page 29: Date And Time
GiiNii 8” Digital Picture Frame GN-801W 3.4.2 Date and Time Press Left or Right, and enter Date and Time, use Up or Down to select the items you’d like to edit, use adjust Day, Hour, Minute, AM/PM, Month and Year. - Page 30 GiiNii 8” Digital Picture Frame GN-801W Hour Month Minute Hour...
- Page 31 GiiNii 8” Digital Picture Frame GN-801W AM/PM Minute Hour AM/PM Minute...
-
Page 32: Slideshow Setting
GiiNii 8” Digital Picture Frame GN-801W 3.4.3 Slideshow Setting 3.4.3.1 Play Mode In this mode, you may select slideshow play setting: Random, Repeat All and Single. Use Left or Right button to select and press OK to confirm. Interval Time... - Page 33 GiiNii 8” Digital Picture Frame GN-801W 3.4.3.2 Transition In this mode, you may adjust the slideshow transition effects: Random, 3D Circle, 3D Float, Shutter, Boxing Shutter, Insert, Leave, News, Plug Sign, Flabellate, Fade and Shrink. Use the Left or Right button to select and press OK to confirm.
-
Page 34: Information
GiiNii 8” Digital Picture Frame GN-801W Interval Time 3 Seconds 10 Seconds Play Mode 3.4.4 Information Information will show current firmware version. If you have inserted a memory card, memory total and memory free will be calculated for you to know under version. -
Page 35: Technical Specification
JPG, TIFF, GIF Important Notice Specifications may change without notice due to product improvements or upgrades. Replacement Parts If you need a replacement part for your GiiNii Digital Photo Frame, call us at 1-866-909-3550 or write to us at: customerservice@giinii.com. -
Page 36: Frequently Asked Questions
GiiNii 8” Digital Picture Frame GN-801W 5. Frequently Asked Questions This product has been set to its standard mode of operations before shipping. If you encounter any problems while using the Digital Photo Frame, please refer to the following table for problems and solutions. -
Page 37: Regulation & Compliance
GiiNii 8” Digital Picture Frame GN-801W Hold the power button down for 2 seconds. Make sure the power adapter is connected properly on the device and at the electrical wall socket. Device will not Unplug the power adapter from the device, wait 5... -
Page 38: Giinii 90-Day Limited Warranty
7. GiiNii 90-Day Limited Warranty Please read this Limited Warranty carefully. The limited warranty set forth below is given by GiiNii, the maker of your new Digital Photo Frame, when purchased in the United States of America through an authorized retailer and used for non-commercial purposes. - Page 39 GN-801W warranty claim. Returning your product for a warranty claim in best done in the original box or an alternative package that ensure its safe return to GiiNii. Please contact our Customer Service team about the appropriate return-shipping package. (2) GiiNii Customer Service and Technical Support: 1-866-909-3550. Or, on line at: www.GiiNii.com...
- Page 40 If you do not have the original package, please consult with our Customer Service team to determine the best way to return your product to us. GiiNii cannot be responsible for damages incurred during return shipping; insurance is highly recommended.
- Page 41 (6) Warranty Disclaimers GiiNii and its parent company, affiliates or subsidiaries shall not be liable for any incidental or consequential damages for breach of any expressed or implied warranty on this product. Except to the extent prohibited by applicable law, any implied warranty of merchantability or fitness for a particular purpose on this product is limited in duration to the duration of this warranty.
- Page 42 GiiNii 8” Digital Picture Frame GN-801W Warning Changes or modifications to this unit not expressly approved by GiiNii voids this warranty and may result in personal injury and/or property. www.giinii.com © 2008 GiiNii International Printed in China...