Panasonic KX-TD7896 User Manual
Advanced hybrid system wireless proprietary telephone
Hide thumbs
Also See for KX-TD7896:
- Operating instructions manual (46 pages) ,
- User manual (40 pages) ,
- Reference manual (24 pages)
Table of Contents
Advertisement
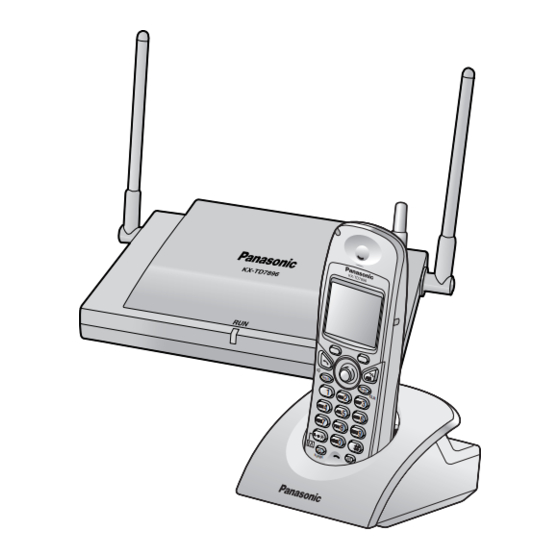
Thank you for purchasing the Panasonic KX-TD7896 Wireless PT (Wireless
Proprietary Telephone). Please read this manual carefully before using this product
and save this manual for future use.
This manual is designed to be used with the KX-TD7896 Wireless PT (Wireless
Proprietary Telephone) and a Panasonic KX-TA series (other than KX-TA1232) PBX
(Business Telephone System).
Please use only the battery provided and charge the battery for about
7 hours before using the handset for the first time.
KX-TA308/KX-TA624/KX-TA824
Model
Advanced Hybrid System
User Guide
for KX-TD7896
Advertisement
Table of Contents

Related Manuals for Panasonic KX-TD7896


Summary of Contents for Panasonic KX-TD7896
- Page 1 Proprietary Telephone). Please read this manual carefully before using this product and save this manual for future use. This manual is designed to be used with the KX-TD7896 Wireless PT (Wireless Proprietary Telephone) and a Panasonic KX-TA series (other than KX-TA1232) PBX (Business Telephone System).
- Page 2 Please read “Important Information” in the Installation Instructions before use. It is important to read and understand all instructions. Accessories (Included) AC Adaptor ....Two Charger....One Battery ....One (PQLV19) (N4HHGMB00005 or HHR-P103) Part no. Charcoal: PSLP1321Z White: PSLP1321ZW Handset Clip ...
-
Page 3: Table Of Contents
Table of Contents Location of Controls ..................4 Before Operating the Handset ..............6 Unsupported PBX Features ..................6 Selecting the Display Language ................6 Setting the Date and Time ..................7 Enabling the Outgoing Call Log ................7 Entering the Standby Display Name .................8 Entering the Names of the Flexible Keys ..............8 Adjusting the Ringer Volume ..................9 Adjusting the Vibrate Setting...................10... -
Page 4: Location Of Controls
Location of Controls Location of Controls Handset Back View Ringing/Charge Indicator Receiver Headset Jack Speaker The headset is an option. Please use only a Panasonic KX-TCA86/KX-TCA88HA/ KX-TCA91/KX-TCA92 headset. Display Open the Power On cover. Press POWER Standby mode for more than Power Off 2 seconds. - Page 5 Location of Controls TALK/SP-PHONE (Speakerphone) Key: Key Lock Used to make or answer calls, or You can lock all keys other than the toggle between the two conversation Joystick while the handset is in standby modes (Receiver/Hands-free*) during mode. a conversation. * You can talk with the other party <Displayed Icon>...
-
Page 6: Before Operating The Handset
Before Operating the Handset Before Operating the Handset Unsupported PBX Features The following PBX features are not supported when using a KX-TD7896: 1) Background Music (BGM) 2) PBX System Programming 3) Operator/Manager Service Features 4) Switching displays between “date and time” and “self extension number”... -
Page 7: Setting The Date And Time
Before Operating the Handset Setting the Date and Time If you selected “PBX Type-Type 2 (KX-TA308)” in the PBX Type setting, you should set a date and time. Press the Select “ Press the Select Press the Setting Joystick. Joystick. “Date&Time”. -
Page 8: Entering The Standby Display Name
Before Operating the Handset Entering the Standby Display Name You can enter the name of the standby mode display of the handset. Press the Select “ Press the Select “Display Press the Setting Joystick. Joystick. Joystick. Handset”. Option”. name Select “Standby Press the Enter a name. -
Page 9: Adjusting The Ringer Volume
Before Operating the Handset Adjusting the Ringer Volume Press the Select “ Press the Select the desired Ringer Joystick. Joystick. setting. (Step Up/ Volume”. Step Down/Level 1-6/Off) Press the Joystick. • For the ringer pattern, see page 32. Adjusting the Ringer Volume or Turning the Ringer Off While Ringing While receiving a call <To adjust the ringer volume>... -
Page 10: Adjusting The Vibrate Setting
Before Operating the Handset Adjusting the Vibrate Setting Press the Select “ Select “Incoming Press the Press the Joystick. Joystick. Joystick. Setting Handset”. Option”. Press the Select the desired setting. Press the Select Joystick. (Vib.& Ring / Vib. Ring / Off) Joystick. -
Page 11: Handset Display
Handset Display Handset Display Icons Anne A.Ans Fwd 25.Jan 21:05 Soft Keys (See page 12.) Ringer Volume OFF Within range of a base unit (See page 9.) Out of range Vibrate (See page 10.) If this icon flashes when making a call, move closer to Call Forwarding the base unit and dial again. -
Page 12: Soft Keys
Handset Display Soft Keys Icons and information shown on the display will vary depending on the state of use. To select an item shown on the display, press the corresponding soft keys. Handset Phonebook PBX Features Opens the Phonebook. Establishes a multiple-party conversation (Conference). -
Page 13: Operation Outline
Handset Display Operation Outline Handset functions are accessed through the display menu, and selected with the joystick and soft keys. The guidance display is shown in standby mode for easy operation. <Outgoing Call Log> <Incoming Call Log> <Phonebook> Outgoing Log Incoming Log Anne Ext108... - Page 14 Handset Display Function Menus Press the joystick to display the main and sub menus. Main Menu—While in Standby Mode Ringer Volume: Accesses the “Ringer Volume” setting. New Phonebook: Stores a new item in the Phonebook. PBX Program: Ringer Volume Enters PBX Personal Programming mode. For PBX Personal Programming, refer to the user documentation for your PBX.
- Page 15 Handset Display PBX Feature Keys PBX functions can be activated through the display key list. Move the joystick left to display the feature key list. 1:Redial: Redials the last dialed number. 1:Redial 2:Auto Dial 2:Auto Dial: 3:Fwd/DND Makes a call through PBX System Speed Dialing. 4:Message 3:Fwd/DND: 5:Auto Answer...
- Page 16 Handset Display PBX Flexible Keys A flexible key can be used either to seize a line in order to make or receive an outside call (F-Key), or used as a function key. Move the Joystick right to display the flexible key list. Here you can access the 12 flexible keys.
-
Page 17: Operation For The Kx-Ta308/624/824
Operation for the KX-TA308/624/824 For further information, refer to the user documentation for your PBX or consult your dealer. Operation for the KX-TA308/624/824 Making Calls Operation Desired Function Making Calls To an extension To an external party extension no. phone no. CO line group no. - Page 18 Operation for the KX-TA308/624/824 Operation Desired Function Making Calls Redial To program idle F-Key (0-9, , #) phone no. One-touch Dialing idle F-Key To dial One-touch Dialing Key (0-9, , #) One-touch Dialing Key Calling an operator To store personal speed desired no.
-
Page 19: Receiving Calls
To stop monitoring LCS Cancel Key FLASH (0-9, , #) LCS Cancel Key This feature is available when the PBX is connected to a Panasonic Voice Processing System (VPS). For setting LCS, refer to the user documentation for your PBX. -
Page 20: When The Dialed Extension Is Busy/No Answer
Operation for the KX-TA308/624/824 When the Dialed Extension is Busy/No Answer Operation Desired Function When the Dialed Extension is Busy/No Answer To set To answer Automatic While hearing a busy tone If you hear callback ringing Callback Busy To leave a notification When the receiver's extension is busy or does not answer Sender To cancel a notification... -
Page 21: During A Conversation
Operation for the KX-TA308/624/824 During a Conversation Useful Features Operation Desired Function During a Conversation extension no. to an extension Transferring a call phone no. to an external party Announce. To hold To retrieve a call at the holding extension flashing F-Key (0-9, , #) flashing F-Key Holding a call... - Page 22 Operation for the KX-TA308/624/824 Operation Desired Function Useful Features Setting Absent message parameter (if required) Message Clearing the extension settings Log-in Log-in/Log-out Log-out Do Not Disturb (DND) Cancel All calls extension no. Busy/No answer extension no. To a CO line phone no.
-
Page 23: Making Use Of The Voice Mail Service
Operation for the KX-TA308/624/824 Making Use of the Voice Mail Service Operation Desired Function Making Use of the Voice Mail Service (KX-TA624/824 only) ❑ KX-TVA series Listen to Message VPS extension no. From your Deliver Message VPS password* Mailbox Management extension Automated Attendant If you have no password, you can... -
Page 24: Using The Handset Phonebook
Using the Handset Phonebook Using the Handset Phonebook Handset Phonebook You can store up to 200 items with names, phone numbers and category numbers in the handset for easy access. You can set unique Ringer/LED/Vibrate patterns for each category to identify incoming calls. All Phonebook items are stored in alphabetical order. For security purposes, you can lock the Phonebook. - Page 25 Using the Handset Phonebook • To enter characters, see page 26. • * The valid digits are “0” through “9”, “ ”, “#”, “P ( )” and “F ( )”. FLASH • * Although up to 200 Phonebook items can be stored, each phone number stored in the Phonebook that contains over 24 digits counts as two Phonebook items.
-
Page 26: Entering Characters
Using the Handset Phonebook Entering Characters You can enter characters and digits using the dialing keys. A, a You can select one of 3 character modes by pressing the Right Soft B, b Key while entering a name. The function icon above the soft key C, c displays the current character mode. - Page 27 Using the Handset Phonebook Character Mode Table Keys • Press before or after entering a character to change between uppercase and lowercase. • For example, to enter the letter “C”, press three times.
-
Page 28: Locking The Handset Phonebook
Using the Handset Phonebook Locking the Handset Phonebook You can lock/unlock the Phonebook while the handset is in standby mode. Locking the Handset Phonebook Press the Left Soft Key Locked. for more than 2 seconds. Unlocking the Handset Phonebook Unlock Phonebook Accesses Enter Password the Phonebook... -
Page 29: Deleting Stored Items
Deleting Stored Items Deleting Stored Items Deleting Stored Items in Handset Phonebook/Hot Key Dial/ Outgoing Call Log/Incoming Call Log <Phonebook> Press the Select the Press the Left Soft Key. desired item. Joystick. <Hot Key Dial> Press the dialing key Select the for more than 1 second. -
Page 30: Setting The Handset And Base Unit
Setting the Handset and Base Unit Setting the Handset and Base Unit Setting the Handset and Base Unit You can customize the handset and base unit by editing the settings found under “Setting Handset” or “Setting Base” in the menu list, as follows: Press the Select “... - Page 31 Setting the Handset and Base Unit Handset and Base Unit Menu Layout <Main Item> <Sub Item> Incoming Option Setting Handset Ringer Volume Headset Tone (See page 32.) Vibrate Ring On Charger Single Tone Double Tone Triple Tone S-Double Tone Private Ring Category 1-9 Talk Option Speaker Volume...
- Page 32 Setting the Handset and Base Unit Main Item Sub Item Description Setting Default Adjusts the Step Up Incoming Option Ringer Volume ringer volume. Step Down Level 3 Level 1-6 Selects whether Headset Tone a tone is heard from the attached headset while receiving a call.
- Page 33 Setting the Handset and Base Unit Main Item Sub Item Description Setting Default Adjusts the rear Level 1-6 Talk Option Speaker Volume Level 3 speaker volume. Adjusts the Level 1-4 Receiver Volume Level 2 receiver volume. Adjusts the Level 1-4 Headset Volume headset speaker Level 2...
- Page 34 Setting the Handset and Base Unit Main Item Sub Item Description Setting Default Adjusts the LCD Level 1-5 Display Option LCD Contrast Level 3 contrast. Edits the name Max. 16 characters Standby Display Not stored displayed on the LCD while in standby mode.
- Page 35 Setting the Handset and Base Unit Main Item Description Setting Default Selects the type of PBX that Type 1* PBX Type Type 1 the base unit is connected to.* Type 2 When using a PBX other than Mode 1 Fwd/DND Icon a KX-TAW848/KX-TDA series Mode 2 Mode 1...
-
Page 36: Troubleshooting And Error Messages
Speaker (Voice • You cannot receive an incoming call via LCS (Hands-free Call/Paging/LCS (Hands-free mode) when the PBX is connected to a Panasonic Voice mode)). Processing System (VPS). → Set program [617] Wireless PT Port Assignment to “Not Connect”... - Page 37 Troubleshooting and Error Messages Problem Description and Solution → Only for “PBX Type-Type 2 (KX-TA308) The date and time are not ”: Set the correct date and time on the base unit. The form of the date and displayed correctly when viewing time can be set on the handset.
-
Page 38: Error Messages
Troubleshooting and Error Messages Error Messages Displayed Message Description and Solution • The handset is out of range. No Service → Move closer to the base unit. • The base unit is turned off. → Make sure the power cord is connected. •... -
Page 39: Important Information
3. Open the cover and replace the battery. 4. Close the cover and charge the handset. • Please use a Panasonic battery with the service part number N4HHGMB00005 or HHR-P103. This product is powered by a recyclable nickel-metal hydride battery. - Page 40 Secaucus, New Jersey 07094 http://www.panasonic.com/csd Copyright: This material is copyrighted by Panasonic Communications Co., Ltd., and may be reproduced for internal use only. All other reproduction, in whole or in part, is prohibited without the written consent of Panasonic Communications Co., Ltd.