Table of Contents
Advertisement
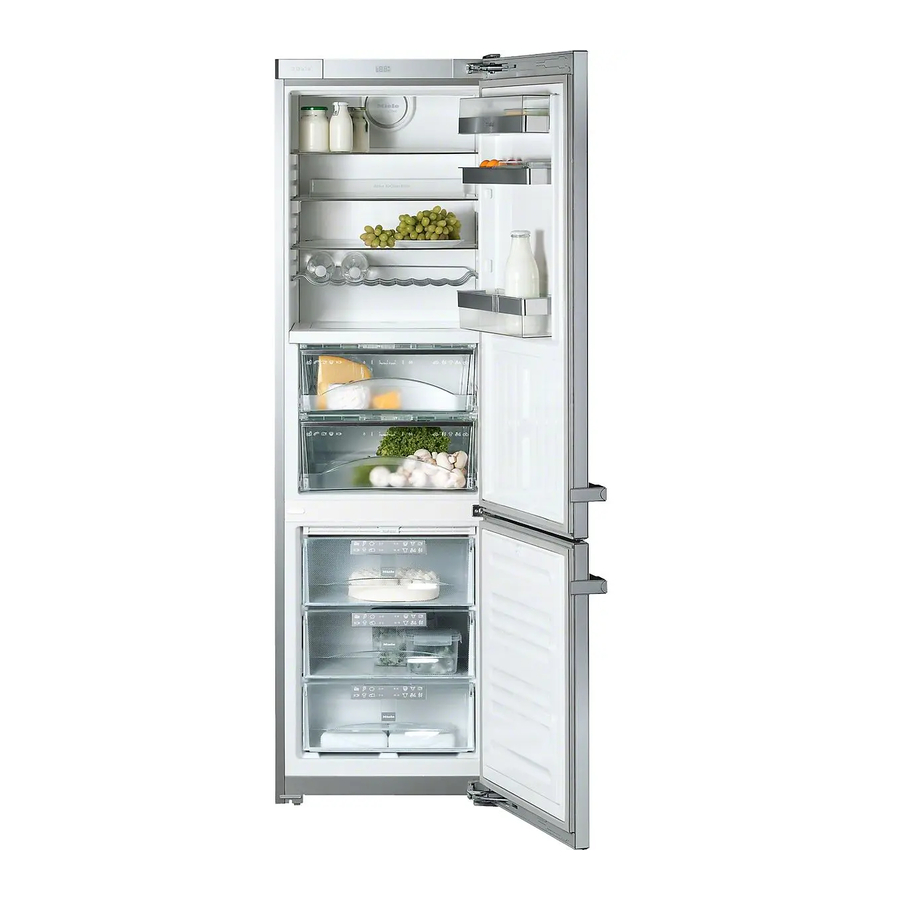
Operating and installation instructions
Frost free fridge freezer
with PerfectFresh zone
and Dynamic cooling
KFN 14927 SD
KFN 14927 SD ed/cs (-1/-3)
en - GB
To avoid the risk of accidents or
damage to the appliance, it is
essential to read these instructions
before it is installed and used for the
first time.
M.-Nr. 09 436 290
Advertisement
Table of Contents

Related Manuals for Miele KFN 14927 SD ed


Summary of Contents for Miele KFN 14927 SD ed
- Page 1 Operating and installation instructions Frost free fridge freezer with PerfectFresh zone and Dynamic cooling KFN 14927 SD KFN 14927 SD ed/cs (-1/-3) en - GB To avoid the risk of accidents or damage to the appliance, it is essential to read these instructions before it is installed and used for the first time.
-
Page 2: Table Of Contents
Contents Guide to the appliance ..........5 Caring for the environment . - Page 3 Contents Storing food in the PerfectFresh zone ....... . 33 Storage temperature .
- Page 4 Contents Electrical connection ..........56 Installation .
-
Page 5: Guide To The Appliance
Guide to the appliance On/Off sensor for the whole Sensor for switching between the appliance and On/Off sensor for refrigerator and the freezer sections switching the refrigerator section on (top = "Refrigerator" symbol; and off separately bottom = "Freezer" symbol) Super cool and Super freeze sensor Sensor for setting a higher temperature (Y) - Page 6 Guide to the appliance Dynamic cooling fan Adjustable shelves PerfectFresh zone compartments Control for setting the humidity in the PerfectFresh zone compartments Butter and cheese compartment Egg tray/Condiment tray/Universal container Active charcoal filter holder Bottle rack Bottle divider Bottle shelf Condensate channel and drain hole Freezer drawers with...
-
Page 7: Caring For The Environment
Caring for the environment Disposal of the packing Disposal of your old appliance material Electrical and electronic appliances often contain materials which, if The transport and protective packing handled or disposed of incorrectly, has been selected from materials which could be potentially hazardous to are environmentally friendly for human health and to the environment. -
Page 8: Warning And Safety Instructions
They contain important information on its safety, installation, use and maintenance. Miele cannot be held liable for damage caused by non-compliance with these Warning and Safety instructions. - Page 9 The appliance is not suitable for use in areas where there is a risk of explosion. Miele cannot be held liable for damage resulting from incorrect or improper use or operation. The appliance can only be used by people with reduced...
- Page 10 Warning and Safety instructions Technical safety Before setting up the appliance, check it for any externally visible damage. Do not install and use a damaged appliance. It could be dangerous. If the connection cable is faulty it must only be replaced by a service technician authorised by the manufacturer to protect the user from danger.
- Page 11 Warning and Safety instructions The more coolant there is in an appliance, the larger the room it should be installed in. In the event of a leakage, if the appliance is in a small room, there is the danger of combustible gases building up. For every 8 g of coolant at least 1 m of room space is required.
- Page 12 The appliance must be isolated from the electricity supply during installation, maintenance and repair work. Faulty components must only be replaced by genuine Miele original spare parts. The manufacturer can only guarantee the safety of the appliance when Miele replacement parts are used.
- Page 13 Warning and Safety instructions Correct use Never handle frozen food with wet hands. Your hands may freeze to the frozen food. Danger of frost burn. Do not take ice cubes out with your bare hands and never place ice cubes or ice lollies in your mouth straight from the freezer. The very low temperature of the frozen ice or lollies can cause frost burn to the lips and tongue.
- Page 14 Warning and Safety instructions Observe the "use-by" dates given on food to avoid the risk of food poisoning. Storage times will depend on several factors, including the freshness and quality of the food as well as the temperature at which it is stored.
- Page 15 Warning and Safety instructions This appliance is designed for use within certain climate ranges (ambient temperatures), and should not be used outside this range. The climate range for your appliance is stated on the data plate inside the appliance. Installing it in a room with too low an ambient temperature, e.g. a garage, can lead to the appliance switching off for longer periods so that it cannot maintain the required temperature.
-
Page 16: How To Save Energy
How to save energy Normal energy Increased energy consumption consumption Installation site In a ventilated room. In an enclosed, unventilated room. Protected from direct In direct sunlight. sunlight. Not near to a heat source Near to a heat source (radiator, oven). (radiator, oven). - Page 17 How to save energy Normal energy consumption Increased energy consumption Drawers, shelves and racks arranged as they were when the appliance was delivered. Only open the doors when Frequent opening of the door necessary and for as short a for long periods will cause a time as possible.
-
Page 18: Switching On And Off
^ On stainless steel appliances also ^ Touch the On/Off sensor until the treat the side panels with the Miele temperature display lights up. stainless steel conditioning agent supplied as soon as you have The temperature display for the removed the protective foil. -
Page 19: Switching Off
Switching on and off The appliance will start to cool, and the Please refer to the relevant section for interior lighting will come on when the more information. refrigerator section door is opened. Cool pack To enable the temperature to get Place the cool pack in the top freezer sufficiently cold inside the drawer. -
Page 20: To Switch The Refrigerator Section/Perfectfresh Zone Off Separately
Switching on and off To switch the refrigerator then touch the On/Off sensor until the temperature display lights up, or section/PerfectFresh zone off separately ^ Switch the appliance off and then The refrigerator section/PerfectFresh back on again. zone can be switched off without The appliance will start to cool, and the having to switch off the freezer section. -
Page 21: Switching The Sensor Tone On/Off
Switching on and off ^ Touch the On/Off sensor to confirm a The door alarm is automatically new setting. disabled when the appliance is in ^ Touch the X sensor repeatedly until c settings mode. As soon as the door is appears in the display. -
Page 22: Switching Off For Longer Periods Of Time
Switching on and off The old setting lights up, and your newly selected setting flashes. ^ Touch the On/Off sensor to confirm a new setting. ^ Touch the X sensor repeatedly until c appears in the display. ^ Touch the On/Off sensor. You have now left settings mode. -
Page 23: The Correct Temperature
The correct temperature Dynamic cooling It is very important to set the correct temperature for storing food in the The dynamic cooling fan automatically appliance. Micro-organisms will cause switches on when the cooling system food which is not stored at the correct for the refrigerator switches on. -
Page 24: Setting The Temperature
The correct temperature Setting the temperature – Leaving a finger on the sensor: changes the temperature The temperatures in the refrigerator continuously. section/PrefectFresh zone and freezer When the highest or lowest section are set independently of one temperature in the range is reached, another. -
Page 25: Temperature Display
The correct temperature ^ You can now adjust the temperature Temperature display in the PerfectFresh zone by touching During normal operation the the X sensor. You can choose from temperature display on the control settings 1 to 9: panel shows the temperature in the §... -
Page 26: Changing The Temperature Display Brightness
The correct temperature ^ Touch the On/Off sensor. Changing the temperature display brightness You have now left settings mode. The temperature display brightness can be adjusted to suit the lighting conditions of the room. ^ Touch and leave your finger on the X sensor. -
Page 27: Alarm
Alarm Switching the temperature Your appliance has been fitted with a warning system which ensures that the alarm off early temperature in the freezer section If the noise disturbs you, you can cannot rise unnoticed and to avoid switch the alarm off early if you wish. energy being wasted if a door is left open. -
Page 28: Door Alarm
Alarm Door alarm The alarm will sound if a door is left open for more than approx. 2 minutes. The alarm off sensor will light up red and the symbol for the section which has the opened door will flash. The alarm will stop and the symbols will go out as soon as the door is closed. -
Page 29: Super Cool And Super Freeze
Super cool and Super freeze Super cool Switching off Super cool The Super cool function can be used to The Super cool function will switch itself rapidly reduce the temperature in the off automatically after approx. 6 - refrigerator to its lowest setting 12 hours. -
Page 30: Super Freeze
Super cool and Super freeze Super freeze power to lower the temperature in the freezer section. Switch the Super freeze function on before putting fresh food into the Switching off Super freeze freezer section. Depending on the amount of food This helps food to freeze quickly and placed in the freezer section, the Super retain its nutrients, vitamins, flavours... -
Page 31: Storing Food In The Refrigerator Section
Storing food in the refrigerator section Different storage zones – pre-packed vegetables and other fresh food with a label stating it Due to the natural circulation of the air should be kept at a temperature of in the appliance, there are different approx. -
Page 32: Food Which Is Not Suitable For Storing In The Refrigerator
Storing food in the refrigerator section Food which is not suitable for refrigerator can cause food to start deteriorating. storing in the refrigerator Not all food is suitable for storing in a Storing food correctly refrigerator at temperatures below 5 °C, as some food is sensitive to cold. -
Page 33: Storing Food In The Perfectfresh Zone
Storing food in the PerfectFresh zone Food is stored at a lower temperature in longer period, as the water content of the PerfectFresh zone than in the the food is largely retained. refrigerator section. The humidity in the PerfectFresh zone compartments can Storing food in the also be regulated to suit the food being PerfectFresh zone... - Page 34 Storing food in the PerfectFresh zone , = low humidity. Can all types of food be stored The regulator opens the vents to the together? compartment to allow the moisture to Do not place all types of food together escape. in one compartment.
- Page 35 Storing food in the PerfectFresh zone The following tips may help if you find that food you have stored does not keep well (e.g. food becomes limp or wilts after only being stored for a short time): ^ Only use the appliance for storing fresh food. The condition of the food when it is first placed in the appliance is an important factor in determining how long it stays fresh.
-
Page 36: Adjusting The Interior Fittings
Adjusting the interior fittings Moving the shelves To move the split shelf: ^ Take both halves of the split glass The shelves can be adjusted according to the height of the food. shelf out, ^ Raise the shelf, and pull it forwards slightly until the notch at the side is in line with the shelf support. -
Page 37: Adjusting The Condiment Tray/Bottle Shelf
Adjusting the interior fittings PerfectFresh zone Adjusting the condiment compartments tray/bottle shelf ^ Lift the tray/shelf up and out of the The compartments in the PerfectFresh zone are on telescopic rails, and can stainless steel frame to remove. be removed for filling, emptying or ^ Push up the stainless steel frame, cleaning purposes. -
Page 38: Universal Container
Adjusting the interior fittings Universal container Moving the bottle divider (depending on model) The bottle divider can be moved to the left or right to ensure that bottles are The universal container can be used held securely in position when the door both to store and serve food. -
Page 39: Freezing And Storing Food
Freezing and storing food Maximum freezing capacity Storing frozen food To ensure that fresh food placed in the When buying frozen food to store in freezer freezes through to the core as your freezer, check quickly as possible, the maximum –... -
Page 40: Home Freezing
Freezing and storing food Home freezing – Do not season fresh foods or blanched vegetables before Only freeze fresh food which is in a freezing. Only season cooked food good condition. lightly before freezing, but care should be taken as the taste of some Hints on home freezing spices alters when frozen. -
Page 41: Before Placing Food In The Freezer
Freezing and storing food ^ Make a note of the contents and the Please note that when removing the date of freezing on the packaging. drawers, the lowest freezer drawer must always remain in the freezer. Before placing food in the freezer When placing food on the glass cold ^ When freezing more than 2 kg of plate make sure it does not obstruct... -
Page 42: Freezer Calendar
Freezing and storing food Freezer calendar Poultry It is particularly important to observe food hygiene rules when The freezer calendar on the freezer defrosting poultry. Do not use the liquid drawer gives the length of time in from defrosted poultry. Pour it away months which various foods can be and wash the container it was in, the stored for effectively. -
Page 43: Ice Cubes
Freezing and storing food Ice cubes Cool pack The cool pack prevents the temperature in the freezer rising too quickly in the event of a power cut. This can help to prolong the storage time. ^ Place the cool pack in the top drawer of the freezer. -
Page 44: Defrosting
Defrosting Refrigerator section and Freezer section PerfectFresh zone This appliance is equipped with a "Frost free" system. The freezer section Condensate and frost can build up on defrosts automatically. the back wall of the refrigerator section and the PerfectFresh zone whilst in use. The moisture generated in the You do not need to remove this, as it appliance collects on the condenser... -
Page 45: Cleaning And Care
Cleaning and care A range of Miele branded cleaning Unlike stainless steel cleaning and conditioning products is agents, the conditioning agent does available to order from Miele or not contain any abrasive substances www.miele-shop.com. and will gently remove soiling. Each... -
Page 46: Cleaning The Interior And Accessories
Cleaning and care ^ The bottle shelf and condiment tray in the door can be removed from their stainless steel frames for cleaning. To remove the stainless steel trim from the lid of the butter and cheese compartment (in the top of the door), proceed as follows: ^ Take the butter and cheese ^ Pull the dividing plate out with both... -
Page 47: Appliance Doors, Side Panels
The appliance doors have a high ^ It is important to treat the stainless quality, special finish which is resistant steel frames and trim with Miele to soiling and is very easy to clean. stainless steel conditioning agent Do not use the following to each time they are cleaned. -
Page 48: Ventilation Gaps
Cleaning and care Metal grille at the back of the – Side panels appliance ^ Use Miele stainless steel conditioning agent to remove any soiling from The compressor and metal grille at the stainless steel surfaces. back of the appliance (heat exchanger) must be dusted at least once a year. -
Page 49: Active Charcoal Filters
If you do not have new active charcoal filters, you can order them from your Miele dealer or from Miele. You can switch off the Change active charcoal filter indicator early, if you would prefer not to have the red indicator showing. - Page 50 – and place more active charcoal filters (in holders) in the appliance. Active charcoal filters and holders ^ At the same time, briefly touch the can be obtained from your Miele dealer or from Miele. On/Off sensor (without letting go of the X sensor).
-
Page 51: Problem Solving Guide
Contact a qualified electrician or Miele..the door to the freezer section will not open because it has been opened and closed too many times in succession. - Page 52 There is a fault. Call Miele Service. become too warm..the Change active charcoal filter . . . food has frozen together.
- Page 53 If you still cannot remedy the fault current temperature in the freezer having followed these suggestions, section. please contact the Miele Service Department..you cannot switch the appliance To prevent unnecessary loss of off.
-
Page 54: Noises
Noises Normal noises What causes them Humming noise made by the motor (compressor). This noise can Brrrrr... get louder for brief periods when the motor is switching on. Blubb, blubb..A gurgling noise can be heard when coolant is circulating through the pipes. -
Page 55: After Sales / Guarantee
– your Miele Dealer – Miele (see back cover for contact details). When contacting your Dealer or Miele, please quote the model and serial number of your appliance. This information is given on the data plate inside your appliance. -
Page 56: Electrical Connection
Electrical connection Electrical connection U.K. If the connection cable has to be replaced, this must be done by a All electrical work should be carried out suitably qualified and competent by a suitably qualified and competent person. person in strict accordance with current local and national safety regulations Do not plug other appliances in behind (BS 7671 in the UK). -
Page 57: Installation
Installation – Do not plug in other appliances Do not place any appliance which behind this appliance. gives off heat, such as a toaster, Important. In environments with mini-oven or double burner hob, on high humidity condensation can top of this appliance There is the build up on the exterior of the danger of these catching fire. -
Page 58: Ventilation
Installation Ventilation Installation Air at the back of the appliance gets Two people are required to install warm. To ensure sufficient ventilation, the appliance. Only move the the ventilation gaps must not be appliance when it is empty. covered or blocked in any way. They should be dusted on a regular basis. -
Page 59: Levelling The Appliance Door
Installation Levelling the appliance door ^ Ensure that you unscrew adjusting foot until it sits on the floor. Then unscrew the foot by a further 90°. -
Page 60: Appliance Dimensions
Installation Appliance dimensions KFN 14927 SD 2010 mm 600 mm 630 mm* KFN 14927 SD ed/cs 2010 mm 600 mm 630 mm* KFN 14927 SD ed/cs-1 KFN 14927 SD ed/cs-3 * Dimensions without wall spacers fitted. Appliance depth is increased by approx. -
Page 61: Changing The Door Hinging
Changing the door hinging The appliance is supplied right-hand Removing the door handles hinged. If left-hand door hinging is required, follow the instructions below. To change the door hinging you will need the following tools: Two people are needed for changing the door hinging. - Page 62 Changing the door hinging Before beginning, make sure that the door shelves are empty. Removing the soft-close mechanism for the upper door ^ Open the upper door. ^ Slide panel towards the appliance, and leave it hanging between the door and the appliance. ^ Fit restraining clip (supplied with the appliance) onto soft-close...
- Page 63 Changing the door hinging ^ Remove cover Removing the upper door The soft-close mechanism is now no longer fixed to the appliance. ^ Remove panel ^ Gently loosen cover by carefully inserting a flat-bladed screwdriver into the gap. ^ Slide soft-close mechanism bracket ^ Remove cover as far as it will go towards the together with...
- Page 64 Changing the door hinging Caution. The upper door is not Take care not to damage the door secure as soon as the upper hinge seal. plate is removed. If the door seal is damaged, the door will not close properly and ^ Close the upper door.
- Page 65 Changing the door hinging Removing the lower door ^ Close the lower appliance door. ^ Push hinge pin up and out from underneath. The soft-close mechanism is now no longer fixed to the appliance. ^ Pull the middle hinge pin upwards ^ Remove panel to remove it.
- Page 66 Changing the door hinging ^ Unscrew part from hinge plate rotate it by 180° and refit into the hole on the opposite side of the hinge plate. ^ Refit cover cap in the other hole. ^ Remove cover and fit it into the holes on the opposite side.
- Page 67 Changing the door hinging ^ Insert the soft-close mechanism back into the door, starting at the right ^ Fit hinge pin into middle hinge hand side. plate in the lower door. Replacing the lower soft-close door mechanism ^ Using a flat-headed screwdriver, slide the soft-close mechanism back into the door as far as it will go towards the appliance so that it clicks...
- Page 68 Changing the door hinging Refitting the upper door ^ Then fit the upper door on middle hinge pin ^ Close the upper door. ^ Attach panel to soft-close mechanism bracket ^ Align bracket to the hinge plate, and insert pin from above so that the right angle fits into the recess.
- Page 69 Changing the door hinging Replacing the upper soft-close door mechanism ^ Slide the soft-close mechanism back into the door as far as it will go towards the appliance using a ^ Remove cover from panel flat-headed screwdriver. rotate it by 180° and refit it on the other side.
- Page 70 Changing the door hinging ^ Clip cover into position. Make sure that cover fits properly so that the door can be closed without hindrance and the pin is protected. ^ Remove retaining clip ^ Replace panel onto the soft-close mechanism from above, clicking it back into place first at the bottom and then at the top.
- Page 71 Changing the door hinging Refitting the handles It is important to check that the side Please make sure you follow the section of the handle does not instructions below carefully when come into contact with the door seal you refit the handles. The door seal when opening the door, as this will be damaged if the handle is would damage the door seal...
-
Page 72: Aligning The Appliance Doors
Aligning the appliance doors The appliance doors can be aligned To align the upper door use the long with the housing after they have been outer slots in the middle hinge plate: fitted. In the following illustration the door is not shown in the closed position to make it easier to see what you have to do. -
Page 73: Installation
Installation The appliance can be installed in a kitchen run. To match the height of the rest of the kitchen, the appliance can be fitted with a suitable top box A ventilation gap of at least 50 mm depth must be allowed for behind the appliance across the entire width of the top box for air to circulate. - Page 76 Alteration rights reserved / 0513 M.-Nr. 09 436 290 / 00 KFN 14927 SD, KFN 14927 SD ed/cs (-1/-3)