Table of Contents
Advertisement
Quick Links
Advertisement
Table of Contents

Related Manuals for Ematic Edan XL EGS109


Summary of Contents for Ematic Edan XL EGS109
- Page 1 User’s Manual Ematic Edan XL - EGS109...
- Page 2 Since the tablet software updates regularly, the user manual may not cover all aspects of new features. Important Notices • The new battery will be in its best condition after being fully charged and discharged 2-3 times. • While using earphones, if the volume is excessively high it may cause hearing damage.
-
Page 3: Table Of Contents
Section 1: Tablet Overview Tablet Overview Screen Basics Touch Screen Basics Section 2: Initial Setup Charging Turn on Connecting to Wi-Fi Setting up your Google Account Section 3: Your Home Screen Icons Adding Icons Moving Icons Removing Icons Take a Screenshot Sleep Mode Change the Wallpaper Section 4: Network Connection... - Page 4 Remove a Google Account Google Play Google Play Widgets Google Play Store Section 10: Google Now Google Now Cards Location Access Google Now Settings Section 11: Tablet Settings Section 12: Tips & Tricks Extending Battery Life Reset/Restore Troubleshooting Customer Support Limitation of Liability Statement...
-
Page 5: Tablet Overview
Tablet Overview Volume Camera Hold for 2 seconds to turn on/off. Press to sleep/wake. Speaker Reset device MicroUSB 3.5mm audio DC 5V MicroSD card HDMI connection... -
Page 6: Screen Basics
Screen Basics Search Tap for Apps & Widgets Swipe left or right to switch between home screens. Slide up to reveal your notifications and settings Wi-Fi Back Home Volume Notifications Signal Recent Apps Battery Touch Screen Basics Tap the screen once to activate or open something. Touch and hold to move an item by dragging. -
Page 7: Section 2: Initial Setup Charging
Turn on To start your tablet, press and hold the power key for 2 seconds. The Ematic logo indicates that the tablet is loading. Once the screen loads, you will see a Welcome Screen. Tap Ok. You can then proceed to your All Apps menu and begin to customize your Home Screen. -
Page 8: Connecting To Wi-Fi
Connecting to Wi-Fi You will be asked to select your Wi-Fi connection. Tap to select your network and enter your password. Setting up your Google Account When prompted, sign in using the email address and password from your Google Account. If you don’t have one yet, create one. -
Page 9: Section 3: Your Home Screen Icons
Your Home Screen Icons You can fill the home screen with any combinations of shortcuts, widgets, and folders you like. When you power up your tablet for the first time, you’ll see the main home screen panel. This panel is typically centered;... -
Page 10: Adding Icons
Adding Icons Within the All Apps menu, choose an app or swipe right to choose a widget. Tap and hold desired app or widget for about 2 seconds until the Home screen appears. Slide it wherever you want and let go. Moving Icons Touch &... -
Page 11: Sleep Mode
Sleep Mode To save battery, you should put your tablet in sleep mode by turning off the LCD display. To do this, press the power key and immediately release it. Do it again to bring up the lock screen. Swipe to the right to unlock screen. Change the Wallpaper Tap and hold your finger on any open space on your home screen. -
Page 12: Section 4: Network Connection
Network Connection Wi-Fi can only be used when it connects with a Wi-Fi Access Point (AP) or a free unsecured Wi-Fi hotspot. Turn on Wi-Fi Within the All Under Wireless & Networks, Apps menu, tap tap the Wi-Fi switch to turn Settings. -
Page 13: Adding A Wi-Fi Network
Adding a Wi-Fi Network Users may also add a Wi-Fi network under Wi-Fi set- tings by tapping the + icon in the upper right corner. Forget a Wi-Fi Network In the Wi-Fi settings screen, tap the name of the net- work. -
Page 14: Section 5: Connecting To A Computer
Connecting to a Computer Connect to your computer by USB. The device driver will install. Choose open folder to view EGS109 (E:) files or select the removable disk. EGS109 (E:) You will now be able to drag and drop the files from your computer EGS109 (E:) onto your tablet... -
Page 15: Mac
® First, install the Android File Transfer application for Mac. Go to android.com/filetransfer on your Mac and choose download now. Install the application. The Android File Transfer application will launch automatically when you connect your tablet. Drag & drop files to transfer. -
Page 16: Section 6: Using The Keyboard Entering Text
Using the Keyboard Entering text Enter text using the onscreen keyboard. In most apps it will open automatically. In others, open the keyboard by touching where you want to type. *Depending on what you are doing, some of the keys on the keyboard may look different. -
Page 17: Basic Editing
Basic Editing Move the insertion point: Touch where you want to type. The cursor will blink in the new position and a blue tab will appear below it. Drag the tab to move the cursor. Select text: Touch & hold or double-tap within the text. -
Page 18: Section 7: Voice Actions
Voice Actions You can use Voice Actions with Google Search to get directions, send messages, and perform a number of other common tasks. To initiate a Voice Action you can: • Tap the Microphone Icon in a search box • Tap the Microphone in the Chrome omnibox •... -
Page 19: Voice Commands
Voice Commands To initiate a Voice Action touch the Micro- phone icon Next, speak the Voice Action you want to use. Some handy voice commands are: Followed By Examples [Words you want “bike shoes” to search for] “Map of” Address, name, “Navigate to Union business name, or Square”... -
Page 20: Section 8: Exploring Apps
Exploring Apps Open up some Apps to better familiarize yourself with your new tablet. Gmail Use Gmail to read and write email from any mobile device or browser. When reading a message, touch the icons and menu along the top of the screen to archive, throw away, label, or perform other actions on that message. -
Page 21: Clock
Clock Setting an alarm: Touch set alarm Select the time you want, then tap Done Camera Tap the camera app to take pictures and videos to share with your friends and family. Taking Photos: • Make sure the small camera icon is selected •... - Page 22 Clock: Set the time and alarms Downloads: Manage your downloads Email: Sync your email accounts Evernote: Keep notes and to-do lists Explorer: Browse for files to open, delete, etc. Gmail: Read & write email Google: Stay up to date with Google Now cards Google Settings: Edit your Google Account settings Google+: Connect with friends and family...
- Page 23 Play Books: Read your favorite e-books Play Magazine: Read magazines Play Movies & TV: Play movies & TV shows Play Music: Music Player Play Store: Shop for apps, movies, shows, books, music, and more Pogoplug: Connect to the internet to access and share your files.
-
Page 24: Uninstalling Apps
Uninstalling Apps To Uninstall an unwanted App: Tap Settings Under Device, tap Apps. Then tap the App that you want to uninstall Tap Uninstall... -
Page 25: Section 9: Google Accounts Why Use A Google Account
Google Accounts Why use a Google Account? Google Accounts let you organize and access your personal information from any computer or mobile device. Sync & Back-up: Whether you draft an email, add a contact, or add an event to your calendar, your work continuously gets backed up and synchronizes with any computer with the same Google Account. -
Page 26: Remove A Google Account
Tap Add account Tap what kind of account you want to add and sign Remove a Google account Tap Settings Under Accounts, tap Google Tap the account that you want to remove. Tap the Menu icon and then Remove account Google Play Google Play brings together all of your favorite content in one place. -
Page 27: Google Play Widgets
Google Play Widgets My Library: Displays your most recently used books, music, and so on. Tap any of the images to view your content - plus free gifts from Google. Recommended Apps: Recommends apps that you can add to your home screen. All Google Play recommendation widgets work the same way: Tap to see a different suggestion... -
Page 28: Section 10: Google Now
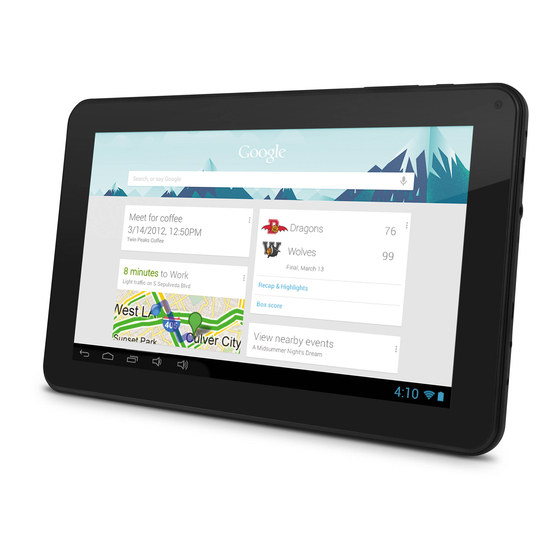
Google Now ™ Google Now uses contextual data from your tablet and from other Google products to supply you with just the right information at just the right time. Touch the icon on the Home screen or swipe up from the icon to open Google Now. -
Page 29: Location Access
Location Access Find out what the weather is like or how the com- mute to work will be by confirming your home and work locations. Google Now Settings In order to get to your Google Now settings from the Google Now Main Screen, touch the Menu icon at the bottom right of the screen. - Page 30 Tablet Search: Select which apps in your tablet are included in Google searches. Privacy & Accounts: Control search-related privacy options for your Google account. • Manage location history: Opens Google Maps set- tings, where you can turn location settings and loca- tion reporting on or off.
-
Page 31: Section 11: Tablet Settings
Tablet Settings Wi-Fi: Turn Wi-Fi on to see available networks and connect. Sound: Adjust the volume, notifications, and alarm sounds. Display: Adjust brightness, change your wallpaper, turn on/off screen rotation, sleep settings, and font size. HDMI: Turn HDMI on/off, adjust resolu- tion and screen zoom. -
Page 32: Section 12: Tips & Tricks Extending Battery Life
Tips & Tricks Extending Battery Life Reducing the Brightness of your screen can help extend your battery life. In Settings tap Display. Tap Brightness. Use the slider to adjust the brightness. Then tap OK. Use a Quick Screen Timeout. Tap Sleep. In Settings tap Display. -
Page 33: Reset/Restore
Reset/Restore Force Shut Down Pressing the button with a small object such as a paperclip to force your tablet to power down. Factory Restore Select Backup & reset in the settings app to restore fac- tory settings. This will erase all data on the tablet. -
Page 34: Customer Support
Limitations of Liability Statement The Ematic User Manual may contain or reference links to third-par- ty sites, however, please be aware that Ematic is not responsible for and cannot control these other sites. Ematic makes no representa- tions or warranties whatsoever about any other website which you may access as a result of reading this user manual, or otherwise. - Page 35 Ematic User Manual or use of any Ematic product and/or software. In no event shall Ematic be liable for any...