Yamaha Clavinova CVP-609 Owner's Manual
Owner's manual
Hide thumbs
Also See for Clavinova CVP-609:
- Reference manual (99 pages) ,
- Data list (60 pages) ,
- Reference (49 pages)
Table of Contents
Advertisement
Quick Links
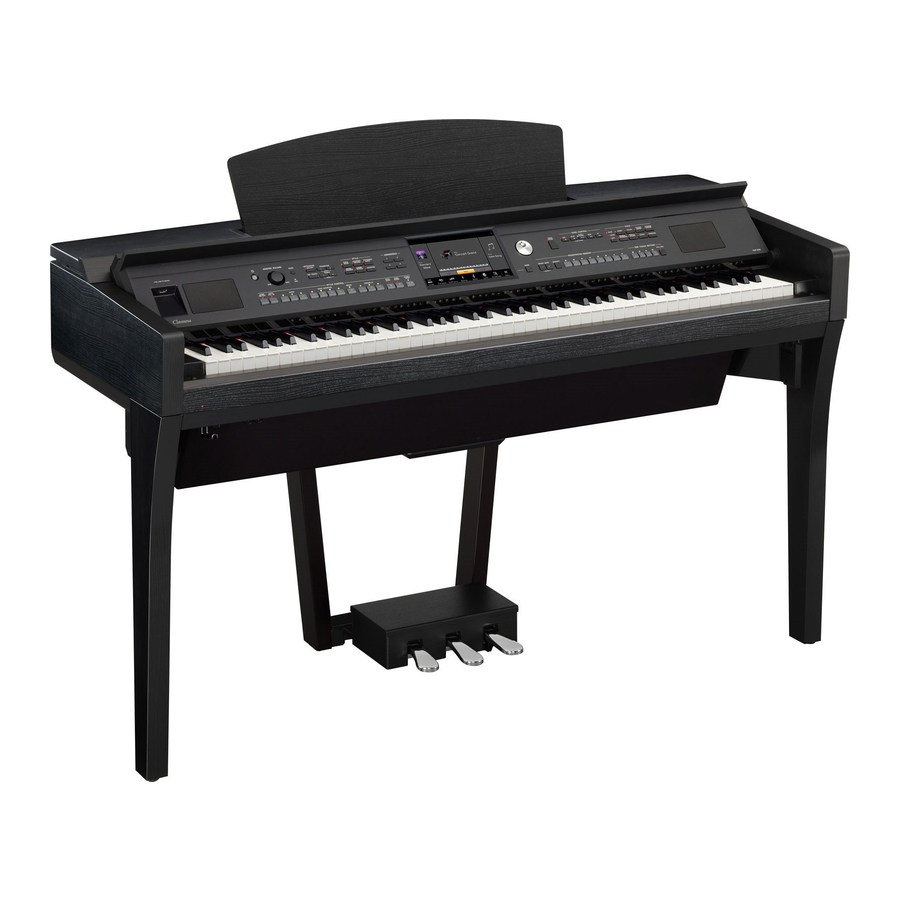
CV P - 609 / CVP-605
Owner's Manual
Mode d'emploi
Manual de instrucciones
IMPORTANT
— Check your power supply —
Make sure that your local AC mains voltage matches the voltage specified on the name plate on the bottom panel. In
some areas a voltage selector may be provided on the bottom panel of the main keyboard unit near the power cord.
Make sure that the voltage selector is set for the voltage in your area. The voltage selector is set at 240V when the unit
is initially shipped. To change the setting use a "minus" screwdriver to rotate the selector dial so that the correct
voltage appears next to the pointer on the panel.
Before using the instrument, be sure to read "PRECAUTIONS" on pages 6-7.
For information on assembling the instrument, refer to the instructions at the end of this manual.
IMPORTANT
– Vérifiez votre alimentation électrique –
Vérifiez que la tension de votre alimentation secteur correspond à celle qui est spécifiée sur la plaque du fabricant,
située sur le panneau inférieur. Dans certaines régions, un sélecteur de tension peut être installé sur le panneau
inférieur du clavier principal, à proximité du cordon d'alimentation. Assurez-vous que le sélecteur de tension est réglé
sur la tension utilisée dans votre région. En usine, le sélecteur est initialement paramétré sur 240 V. Pour modifier ce
réglage, utilisez un tournevis plat et faites tourner le cadran du sélecteur jusqu'à ce que la valeur souhaitée
apparaisse à côté de l'indicateur sur le panneau.
Avant d'utiliser l'instrument, lisez attentivement la section « PRÉCAUTIONS D'USAGE » aux pages 6 et 7.
Pour plus d'informations sur l'assemblage de l'instrument, reportez-vous aux instructions figurant à la fin de
ce manuel.
IMPORTANTE
—compruebe la fuente de alimentación—
Asegúrese de que la tensión de la red local de suministro de CA coincide con la especificada en la placa situada en
el panel inferior. Es posible que en algunas zonas se incluya un selector de tensión en el panel inferior de la unidad
del teclado principal, junto al cable de alimentación. Asegúrese de que este selector está ajustado según la tensión
de la zona. El selector de tensión viene ajustado de fábrica en 240 V. Para cambiar el ajuste, utilice un destornillador
de punta plana para girar el selector hasta aparezca que la tensión correcta al lado del puntero del panel.
Antes de utilizar el instrumento, lea las "PRECAUCIONES", en las páginas 6-7.
Para obtener más información sobre el montaje del instrumento, consulte las instrucciones que encontrará
al final de este manual.
ENGLISH
FRANÇAIS
ESPAÑOL
EN FR ES
Advertisement
Table of Contents

Related Manuals for Yamaha Clavinova CVP-609


Summary of Contents for Yamaha Clavinova CVP-609
- Page 1 CV P - 609 / CVP-605 Owner’s Manual Mode d’emploi Manual de instrucciones IMPORTANT — Check your power supply — Make sure that your local AC mains voltage matches the voltage specified on the name plate on the bottom panel. In some areas a voltage selector may be provided on the bottom panel of the main keyboard unit near the power cord.
-
Page 2: Special Message Section
Implied warranties may also be affected. SPECIFICATIONS SUBJECT TO CHANGE: The information contained in this manual is believed to be correct at the time of printing. However, Yamaha reserves the right to change or modify any of the specifications without notice or obligation to update existing units. -
Page 3: Important Safety Instructions
The above statements apply ONLY to those products distributed cause interference harmful to the operation of other electronic by Yamaha Corporation of America or its subsidiaries. * This applies only to products distributed by YAMAHA CORPORATION OF AMERICA. (class B) COMPLIANCE INFORMATION STATEMENT... -
Page 4: Table Of Contents
– Adding Vocal Harmony Effects to Your Singing – Making the Basic Settings..............16 Using the Music Rest ................17 Connecting a Microphone ..............71 Opening/Closing the Lid (CVP-609 Grand Piano type)....18 Applying Vocal Harmony Effects to Your Voice .......72 Using Headphones................19 Music Finder Display Structure –... -
Page 5: About The Manuals
Yamaha Manual Library http://www.yamaha.co.jp/manual/ • Unless indicated otherwise, the illustrations and displays as shown in this manual are based on the CVP-609 (in English). These are for instructional purposes only, and may appear somewhat different from those on your instrument. -
Page 6: Precautions
If it should appear to be malfunctioning, discontinue use immediately and have it inspected by qualified Yamaha service personnel. Water warning • Do not expose the instrument to rain, use it near water or in damp or wet conditions, place on it any containers (such as vases, bottles or glasses) containing liquids which might spill into any openings. - Page 7 Yamaha cannot be held responsible for damage caused by improper use or modifications to the instrument, or data that is lost or destroyed. Always turn the power off when the instrument is not in use.
-
Page 8: Notices And Information
USB flash memory (page 29). Saving the data to USB flash memory is even more secure, since the data in the instrument may be lost due to malfunction or incorrect operation. • To further protect against data loss through the USB flash memory damage, we recommend that you save your important data onto two USB flash memories. CVP-609/605 Owner’s Manual... -
Page 9: Compatible Formats For This Instrument
GS was developed by the Roland Corporation. In the same way as Yamaha XG, GS is a major enhancement of the GM specifically to provide more Voices and Drum kits and their variations, as well as greater expressive control over Voices and effects. -
Page 10: Welcome To The World Of Cvp - And The New Touch Screen
We’ve combined some sophisticated technologies — including the Real Grand Expression (RGE) Sound Engine and Natural Wood (NW) keyboard (on the CVP-609), or the Graded Hammer 3 (GH3) keyboard (on the CVP-605) — to reproduce the natural touch response and expressive nuances of an actual concert grand piano. - Page 11 Want to learn more about the Clavinova’s features? Press the [DEMO] button and start the demonstration! In the Demo Menu, you can play special Demo Songs or call up brief historical information and function explanations of the Clavinova by touching the display. CVP-609/605 Owner’s Manual...
-
Page 12: Panel Controls
For assigning shortcuts to often used functions. Drum Kit icons ........page 44 STYLE CONTROL buttons ....page 50 These indicate drum instruments assigned to each key when the “Standard Kit 1” Voice is selected. For controlling Style playback. CVP-609/605 Owner’s Manual... - Page 13 (page 14) I/O connectors Guide lamps (page 84) (page 63) CVP-605 Pedals (page 35) Music rest (page 17) Key cover (page 14) Sheet music braces (page 17) Guide lamps (page 63) I/O connectors (page 84) Pedals (page 35) CVP-609/605 Owner’s Manual...
-
Page 14: Starting Up
Once inside, they could cause electric shock, short circuit, fire or other serious damage to the instrument. Power indicator Play the keyboard. While playing the keyboard, adjust the volume level by using the [MASTER VOLUME] control. CVP-609/605 Owner’s Manual... - Page 15 • Depending on the instrument status, the power may not turn off automatically, even after the elapse of the specified period of time. Always turn off the power manually when the instrument is not in use. CVP-609/605 Owner’s Manual...
-
Page 16: Making The Basic Settings
Make the necessary settings by touching the display. Version Indicates the firmware version of this instrument. Yamaha may from time to time update firmware of the product without notice for improvement in functions and usability. To take full advantage of this instrument, we recommend that you upgrade your instrument to the latest version. -
Page 17: Using The Music Rest
Before lowering the music rest, close the sheet music Close the sheet music braces braces. Otherwise you may catch your fingers between the music rest and the music braces and injure them. CAUTION Be careful to avoid catching your fingers. CVP-609/605 Owner’s Manual... -
Page 18: Opening/Closing The Lid (Cvp-609 Grand Piano Type)
Opening/Closing the Lid (CVP-609 Grand Piano type) One long stay and one short stay are provided on the lid. Use one of them to hold the lid open at desired angle. Opening the Lid CAUTION Do not let children open or Raise the music rest. -
Page 19: Using Headphones
Do not hang anything other headphones on the instrument. Install the headphone hanger by following the than the headphones on the instructions at the end of this manual. hanger. Otherwise, the instrument or the hanger may be damaged. CVP-609/605 Owner’s Manual... -
Page 20: Display Structure
Home display This is the portal or home base of the instrument’s display structure. Menu display By touching each of the icons, you can call up various functions, such as Song Score, Volume Balance and other detailed settings. CVP-609/605 Owner’s Manual... - Page 21 Song Selection display By expanding the Song area, you can call up the playback- related controls on the display. CVP-609/605 Owner’s Manual...
-
Page 22: Basic Operations
Touching a shortcut icon will call up the display of the corresponding function. Touch [Menu] icon at the right end to call up the Menu display, from which you can register the desired one to this Menu area (page 27). CVP-609/605 Owner’s Manual... - Page 23 The functions (save, copy, delete, etc.) which can be operated via the File Selection display are shown. The icons shown here differ depending on which File Selection display is selected. For detailed instructions, refer to pages 29 – 33, or the instructions for each function’s File Selection display. CVP-609/605 Owner’s Manual...
-
Page 24: Closing The Current Display
[Close] at the lower right of the display (or window). When a message (information or confirmation dialog) appears, touching the appropriate item such as “Yes” or “No” closes the message. If you want to quickly return to the Home display press the [HOME] button. CVP-609/605 Owner’s Manual... -
Page 25: Display-Based Controls
This instruction means to touch the object in the display and hold it for a while. When setting values by using []/[], a slider or a knob, you can restore the default value by touching and holding the value on the display. CVP-609/605 Owner’s Manual... - Page 26 Data dial to select an item. Data dial Pressing the [HOME] Button You can quickly return to the Home display (the display shown when the power is turned on) by pressing the [HOME] button whenever you want. CVP-609/605 Owner’s Manual...
-
Page 27: Calling Up The Desired Functions From The Home Display
Touch and hold the desired icon until the color changes. NOTE To cancel this operation, touch any blank location on the display before going on to step 2. Touch the same icon again to delete it from the shortcuts. CVP-609/605 Owner’s Manual... -
Page 28: Using The Assignable Buttons
Select the desired item from the functions and shortcuts (equivalent to NOTE the functions in the Menu display). For details about the functions which can be assigned to these buttons, refer to the Reference Manual on the website. CVP-609/605 Owner’s Manual... -
Page 29: File Management
Even if you skip this step, you can rename the file at any time (page 30) after saving. Touch [OK] in the Character Entry window to actually save the file. The saved file will be automatically located at the appropriate position among the files in alphabetical order. CVP-609/605 Owner’s Manual... - Page 30 Touch (Rename) to call up the Character Entry window. NOTE Only one file or folder can be Input the name of the selected file or folder (page 33). renamed at a time. CVP-609/605 Owner’s Manual...
- Page 31 Touch (Delete). After the confirmation message appears, touch [Yes] to actually delete the files/folders you’ve selected in step 3. To cancel this operation, touch [No] instead of [Yes]. CVP-609/605 Owner’s Manual...
- Page 32 Touch the file you want to move. Touch the location to which you want to move the file selected in step 3. Repeat steps 3 – 4 as necessary. Touch [Complete] to exit from the Order Edit display. CVP-609/605 Owner’s Manual...
-
Page 33: Entering Characters
Disklavier Piano Soft Songs. These cannot be copied/moved/saved to external devices. (yellow) Protected 2 Original: • Indicates Yamaha-protection-formatted Songs. These cannot be copied. These can be moved/saved only to the “USER” (User memory) and USB storage devices with ID. (yellow) Protected 2 Edited: •... - Page 34 [] or []. When you find the desired Kanji, touch To change the converted kanji back to “hiragana, ” touch [ To clear the reversed area at once, touch [ Touch [OK] to finalize the characters (name, keywords, etc.) you have input. CVP-609/605 Owner’s Manual...
-
Page 35: Using The Pedals
— including start/stop of Song playback and controlling a Super Articulation Voice. These can be set on the display called up via [Menu] → [Assignable] → [Pedal]. For details, refer to the Reference Manual on the website. CVP-609/605 Owner’s Manual... -
Page 36: Using The Metronome
[TAP] button twice at the desired tempo. When Style and Song are stopped, tapping the [TAP] button (four times for a 4/4 time signature) starts playback of the rhythm part of the Style at the tempo you tapped. CVP-609/605 Owner’s Manual... -
Page 37: Setting The Touch Sensitivity Of The Keyboard
This function is convenient when used along with Style playback since the sound of the chord matching Style playback is maintained. To stop the Left Voice which is sounding, stop Style or Song playback, or set the Left Hold function to “Off. ” CVP-609/605 Owner’s Manual... -
Page 38: Transposing The Pitch In Semitones
Slide your finger vertically for each part to adjust the volume. Since the volume of MIDI Songs and Audio Songs are handled individually, you need to set the volume balance for each case (when a MIDI Song is selected, or when an Audio Song is selected). CVP-609/605 Owner’s Manual... -
Page 39: Restoring The Factory-Programmed Settings
To do this, touch [Restore] of “All” in step 3 above. When the operation is complete, the which are saved to User memory before restoring. If instrument will be restarted automatically. the Songs are not moved, the operation deletes the data. NOTE Completing the backup/ restore operation may take a few minutes. CVP-609/605 Owner’s Manual... -
Page 40: Piano Room – Enjoying The Piano Performance
Piano Room display is shown. The settings you made on another display will not be applied when the Piano Room display is shown. Press the [PIANO ROOM] button to call up the Piano Room display. CVP-609/605 Owner’s Manual... - Page 41 If you turn off the power with Piano Lock enabled, turning on the power next time will call up the Piano Lock display. To disable Piano Lock, press and hold the [PIANO ROOM] button again for two seconds or longer. CVP-609/605 Owner’s Manual...
-
Page 42: Voices – Playing The Keyboard
The center of the display shows the keyboard parts which are turned on and their corresponding Voices. Keyboard parts which are turned on and their Voices On/off status of the keyboard parts Touch the Voice of the desired part to call up the Voice Selection display. CVP-609/605 Owner’s Manual... - Page 43 Voice. Make sure that the desired keyboard part is turned on. The on/off setting for the keyboard part can be made as described in step 1-1 in “Touching the display” above. Play the keyboard. CVP-609/605 Owner’s Manual...
- Page 44 Press and hold down the [PIANO ROOM] button for two seconds or longer. A message appears in the display. Touch [Reset] to call up the default piano settings. CVP-609/605 Owner’s Manual...
-
Page 45: Setting The Split Point
Touch []/[] to select the desired key as Split Point. The Left Split Point cannot be You can set the Split Point also by pressing the actual key while holding down the set lower than the Style Split keyboard illustration on the display. Point. CVP-609/605 Owner’s Manual... -
Page 46: Playing Super Articulation Voices
You can effectively intersperse these into the notes as you play. [Depend On Main Voice]. When an SA2 Voice is selected (CVP-609), pressing a pedal and playing/releasing a note • If you assign the Articulation enables you to add articulation effects, such as bend up/down, glissando up/down, brass falls,... -
Page 47: Creating Original Organ Flutes Voices
(Save) and save the created Organ Voice. NOTICE The settings will be lost if For instructions on saving, refer to page 29. you select another Voice or turn the power to the instrument off without executing the Save operation. CVP-609/605 Owner’s Manual... -
Page 48: Styles – Playing Rhythm And Accompaniment
Touch the desired Style. For the example score above, touch [Country & Blues] category and touch [Modern Country], then touch [Country 8Beat]. ” The Style category can be selected also by pressing one of the STYLE buttons. CVP-609/605 Owner’s Manual... - Page 49 A Style consists of eight parts (channels): rhythm, bass, etc. You can add variations and back on instruments that are change the feeling of a Style by selectively turning channels on/off or by changing the compatible with the SFF GE format. Voices (page 83). CVP-609/605 Owner’s Manual...
-
Page 50: Style Control Operations
Keyboard” or “AI Full of the keyboard. Make sure that the [ACMP ON/OFF] Keyboard,” Sync Stop cannot button is on, press the [SYNC STOP] button, then play be turned on. the keyboard. CVP-609/605 Owner’s Manual... - Page 51 The section will be played next, following the currently selected section. * The Main [A] − [D] button lamps also flash in red. Green: • The section contains data but is not currently selected. Off: • The section contains no data and cannot be played. CVP-609/605 Owner’s Manual...
-
Page 52: Calling Up Panel Settings Appropriate For The Current Style (One Touch Setting)
4 respectively. To use the OTS Link function, turn the [OTS LINK] button touch [Menu] [StyleSetting] [Setting] then set the OTS Link Timing parameter. For details, refer to the Reference Manual on the website. CVP-609/605 Owner’s Manual... -
Page 53: Searching For Suitable Songs For The Current Style
To exit from this status, touch [Cancel]. NOTE Select the desired music piece. Depending on the particular selected Style, there may not The appropriate panel settings for playing the music piece are called up. be any Records available. CVP-609/605 Owner’s Manual... -
Page 54: Calling Up Optimum Styles For Your Performance (Style Recommender)
Bossa Nova Styles or those of a similar feel may be listed on the display. Example 2: Play the following rhythm in the Drum section of the keyboard. Snare Kick 8-beat Styles or those of a similar feel may be listed on the display. CVP-609/605 Owner’s Manual... -
Page 55: Changing The Chord Fingering Type
Simultaneously press the root key and both a white and black key to its left. Multi Finger Automatically detects Single Finger or Fingered chord fingerings, so you can use either type of fingering without having to switch fingering types. CVP-609/605 Owner’s Manual... - Page 56 This type is similar to Full Keyboard, with the exception that less than three notes can be played to indicate the chords (based on the previously played chord, etc.). 9th, 11th and 13th chords cannot be played. This type is available only for Style playback. CVP-609/605 Owner’s Manual...
-
Page 57: Song Playback – Playing And Practice Songs
Song data to the [USB TO DEVICE] terminal beforehand. On the Home display, touch the Song name to call up the Song NOTE Selection display. Song files (MIDI files) corresponding to the included Music Book are available for free downloading from the website (page 5). CVP-609/605 Owner’s Manual... - Page 58 Song you want to play next in the Song Selection display, while a Song is playing back. The [Next] icon appears at the right side of the corresponding Song name. To cancel this setting, touch the [Next] icon. Touch [ ] (STOP) to stop playback. CVP-609/605 Owner’s Manual...
- Page 59 MIDI Song data, MIDI Song containing Phrase Marks is selected. which specifies a certain You can choose to rewind/fast forward the Song in “Bar” or “Phrase Mark” units by touching the pop-up location in the Song. window beforehand. CVP-609/605 Owner’s Manual...
-
Page 60: Displaying Music Notation (Score)
— especially when displaying notation of complicated passages or many short notes. For changing the page. You can change the displayed notation style. For details on the Score display, refer to the Reference manual on the website. CVP-609/605 Owner’s Manual... -
Page 61: Displaying Lyrics
As Song playback starts, the color of the lyrics changes, indicating the display. current position. NOTE The Lyrics can be displayed on an external monitor or For changing the page. television (page 86). For details on the Lyrics display, refer to the Reference manual on the website. CVP-609/605 Owner’s Manual... -
Page 62: Displaying Text
You can change the page by the display, touch [] located at right of the text file name. flicking horizontally on the display. For detailed operations such as changing the font style, refer to the Reference Manual on the website. CVP-609/605 Owner’s Manual... -
Page 63: One-Handed Practice With The Guide Function
Guide features, for practicing the timing of playing the keys (Any Key mode), for Karaoke or for practicing a song at your own pace (Your Tempo). You can select the functions via [Menu] → [SongSetting] → [Guide] → [Type]. For more information, refer to the Reference Manual on the website. CVP-609/605 Owner’s Manual... -
Page 64: Repeat Playback
After your practice, turn off (A-B Repeat). Specifying the repeat range while Songs are stopped 1. Fast-forward the Song to Point A then turn on (A-B Repeat). 2. Fast-forward the Song to Point B then touch (A-B Repeat) again. CVP-609/605 Owner’s Manual... -
Page 65: Adjusting The Pitch In Semitones (Pitch Shift)
To turn the Vocal Cancel function on/off, first select an Audio vocal sound on some songs may not be completely Song, then turn on/off (Vocal Cancel) in the Song area cancelled. of the Home display. CVP-609/605 Owner’s Manual... -
Page 66: Song Recording – Recording Your Performance
SONG CONTROL buttons (page 59). Touch (MIDI Recording) or (Audio Recording). A blank Song for recording is automatically set. If you want to cancel recording, touch [Cancel] in the display or press the SONG CONTROL [REC] button. CVP-609/605 Owner’s Manual... - Page 67 [Menu] in the (User Audio Song tab) on the Song Selection display. If [SongSetting] [Rec] necessary, rename the file name by following the instructions on page 30. [Audio Rec Format]. CVP-609/605 Owner’s Manual...
-
Page 68: Recording To Specified Channels (Midi Recording)
NOTE The Main, Layer and Left parts are assigned to channels 1 – 3 Channel respectively by default, though you can change the Part assignment on the display called up via [Menu] [SongSetting] [Part Ch]. CVP-609/605 Owner’s Manual... - Page 69 Song or you turn the power off without executing Save the recorded data as a file by following the instructions on page 29, the Save operation. steps 2 – 5. CVP-609/605 Owner’s Manual...
-
Page 70: Converting A Midi Song To An Audio Song
When conversion is completed, the message indicating that the conversion is being executed will no longer be shown in the display, and the newly created new Audio Song is shown in the Song Selection display. CVP-609/605 Owner’s Manual... -
Page 71: Microphone
Make sure that the lamp does not light in red, since this indicates that the input level is too high. On the Balance display ([Menu] → [Balance]), adjust the volume balance between the microphone sound and the instrument sound (page 38). CVP-609/605 Owner’s Manual... -
Page 72: Applying Vocal Harmony Effects To Your Voice
NOTE The display shown at left is called up when the Harmony Mode is set to “Vocoder” on Vocal Harmony name the CVP-609. A different display appears when the Mode Harmony Mode is set to “Chordal” or when using the CVP-605. - Page 73 Setting display called up via [Menu] [MicSetting]. To call up the Talk setting, touch [Talk] located at the left on the Vocal Harmony display. To recall the Vocal Harmony settings, touch [Vocal] and turn it on. CVP-609/605 Owner’s Manual...
-
Page 74: Music Finder
As a factory default, some sample Records (panel settings) are provided in the Music Finder. To use the Music Finder function more conveniently and effectively, we recommend that you download the Records (panel settings) from the Yamaha website, and load them to this instrument. -
Page 75: Selecting The Desired Record (Panel Settings)
[Menu] [StyleSetting] Play the Style by specifying the chords with your left hand and play the [Change Behavior]. When set to “Lock,” the tempo will be melody with your right. locked while stopping as well as playing. CVP-609/605 Owner’s Manual... -
Page 76: Searching For Records (Panel Settings)
Select the desired Record. To clear the result and show all Records in the Music Finder, touch [×] in the Search box. Play the Style by specifying the chords with your left hand and playing the melody with your right. CVP-609/605 Owner’s Manual... -
Page 77: Registering A Song Or Style To A Record
“Selecting the Desired Record” (page 75) and “Searching for Records” (page 76). Record, make sure to connect the same USB flash memory to the [USB TO DEVICE] terminal when you call it up via the Music Finder Record. CVP-609/605 Owner’s Manual... -
Page 78: Registration Memory
B6 key (right-most B key on the keyboard). • You can also disable recall of specific item(s) when calling up the registered panel setups: [Menu] [RegistFreeze]. CVP-609/605 Owner’s Manual... -
Page 79: Saving The Registration Memory As A Bank File
This display can be called up also by pressing the REGIST BANK [+] and [-] buttons simultaneously. Touch (Save) to save the Bank file. For instructions on saving, refer to page 29. CVP-609/605 Owner’s Manual... -
Page 80: Recalling A Registered Panel Setup
If you have created a wide variety of Registration Setups, it may be difficult to find the one desired for your particular live performance situation. To remedy this, it is good idea to assign names to both the Registration Memory Bank and its Registration Setups individually. CVP-609/605 Owner’s Manual... -
Page 81: Mixer – Editing The Volume And Tonal Balance
MIDI Song. This is available only when a MIDI Song is 9-16 selected. Master Unlike the other displays, use this display when you want to adjust the tonal characteristics of the entire sound (except for Audio Songs) of this instrument. CVP-609/605 Owner’s Manual... - Page 82 Call up the operation display via [Menu] → [SongCreator] → [Channel Edit]. Touch [Setup]. Touch [Execute] to execute the Setup. Touch (Save) to call up the Song Selection display, then save as a Song file (page 29). CVP-609/605 Owner’s Manual...
-
Page 83: Turning Each Channel Of The Style Or Song On/Off
Touch the instrument icon below the channel number to call up the Voice Selection display, then select the desired Voice. As necessary, make other settings then save them as a Style file or Song file (step 5 on page 82). CVP-609/605 Owner’s Manual... -
Page 84: Connections
[RGB OUT] terminal [PHONES] jacks ....page 19 volume levels to minimum (only for CVP-609) ....page 86 (0). Otherwise, damage to the components, electrical shock, or even permanent hearing loss may occur. -
Page 85: Connecting Audio Devices ([Aux In] Jack, Aux Out [L/L+R]/[R] Jacks)
[AUX IN] jacks is output from the [AUX OUT] jacks. These connections could result in a feedback loop that will make normal performance impossible, and may even damage the equipment. CVP-609/605 Owner’s Manual... -
Page 86: Connecting An External Monitor ([Video Out] Jack, [Rgb Out] Terminal)
On the CVP-609, the instrument can be connected with an since doing so could external monitor also by the [RGB OUT] terminal. -
Page 87: Connecting A Footswitch/Foot Controller ([Aux Pedal] Jack)
Connecting a Footswitch/Foot Controller ([AUX PEDAL] jack) Optional footswitches (Yamaha FC4 or FC5) and an optional Foot controller (Yamaha NOTE Do not connect or disconnect FC7) can be connected to the [AUX PEDAL] jack. A footswitch can be used for... -
Page 88: Connecting Usb Devices ([Usb To Device] Terminal)
Compatible USB devices Formatting USB flash memory • USB flash memory Yamaha recommends that you format the USB flash • USB wireless adaptor (which is included only in some memory with this instrument (page 89). USB flash memory areas) formatted on another device may not operate properly. -
Page 89: Connecting To An Iphone/Ipad ([Usb To Device] Terminal, Midi Terminals)
Yamaha dealer. For inquiries about the included USB wireless LAN adaptor, contact your nearest NOTICE Yamaha representative or the distributor listed at the end of this manual, and not the Do not place your iPhone/ device’s manufacturer. iPad in an unstable position. -
Page 90: Connecting To A Computer ([Usb To Host] Terminal)
For a general overview of MIDI and how you can effectively use it, refer to “MIDI Basics” on MIDI IN the Yamaha Manual Library Receives MIDI messages from another MIDI device. (page 5). MIDI OUT Transmits MIDI messages generated by the instrument to another MIDI device. -
Page 91: Menu Display Function List
Organ Flutes Voice or another kind of Voice Edit Voice is selected. Lets you create a Style by editing the preset Style, or by recording Style – Style Creator channels one by one. CVP-609/605 Owner’s Manual... - Page 92 Determines how the Voice Selection display is opened when one of the Setting VOICE category buttons is pressed. Also determines whether to add articulation effects or not when selecting an SA2 Voice (CVP-609 only). Edits parameters for Style playback such as Stop Accompaniment and OTS Setting Link Timing.
-
Page 93: Cvp-609 (Grand Piano Type) Assembly
CVP-609 (Grand piano type) Assembly How to position the main unit CAUTION • Assemble the unit on a hard and flat floor with ample space. CAUTION • Be careful not to confuse or misplace the parts, and be sure to Be careful not to pinch your fingers. - Page 94 • When you raise the unit, do not hold the key cover. Twist tie Align the cord with the groove on the unit, and attach the pedal box using four screws. 6 x 20 mm fixing screws CVP-609/605 Owner’s Manual...
- Page 95 CAUTION If the unit creaks or is otherwise unsteady when you play on the keyboard, refer to the assembly diagrams and retighten all screws. CVP-609/605 Owner’s Manual...
-
Page 96: Assembly
5 x 30 mm long screws (4) Washers (4) Attach the parts, pressing unit B onto unit A so that the two 4 x 10 mm fit tightly together. Headphone hanger thin screws (2) Protective pads (2) CVP-609/605 Owner’s Manual... - Page 97 Otherwise, the pedal may not function properly. CAUTION • Be careful not to pinch your fingers. • When you raise the unit, do not hold the key cover. CVP-609/605 Owner’s Manual...
- Page 98 Rotate the adjuster until it comes in firm contact with the floor surface. CAUTION If the unit creaks or is otherwise unsteady when you play on the keyboard, refer to the assembly diagrams and retighten all screws. CVP-609/605 Owner’s Manual...
-
Page 99: Assembly
• Be extra careful not to drop the unit or let your fingers be thin screws (2) pinched by the main unit. Cord holders (2) • Do not hold the main unit in any position other than the position specified here. CVP-609/605 Owner’s Manual... - Page 100 → Turn the adjuster so that it is set firmly against the floor. • Are the pedal and power cords inserted securely into the sockets? For models that feature a voltage selector: Set the voltage selector to an appropriate voltage. CVP-609/605 Owner’s Manual...
- Page 101 CAUTION If the unit creaks or is otherwise unsteady when you play on the keyboard, refer to the assembly diagrams and retighten all screws. CVP-609/605 Owner’s Manual...
-
Page 102: Troubleshooting
(Main/Layer/Left), or lower the Song/Style volume in the Balance display (page 38). Some characters of the file/folder name are The language settings have been changed. Set the appropriate language garbled. for the file/folder name (page 16). CVP-609/605 Owner’s Manual... - Page 103 [REW]/[FF] buttons. (MIDI) Playback of these channels may be set to off. Turn playback on for those When playing back a Song, some channels channels that are set to off (page 83). do not play. CVP-609/605 Owner’s Manual...
- Page 104 In the case of Song playback, you can restore the original Mixer. sound by returning to the beginning of the Song and playing back from that point. In the case of Style play, you can restore the original sound by selecting the same Style again. CVP-609/605 Owner’s Manual...
- Page 105 [MASTER VOLUME] control. The Noise Gate function may be cutting the soft sounds. If this happens, turn off the “AUX In Noise Gate” parameter (page 85). CVP-609/605 Owner’s Manual...
-
Page 106: Specifications
Key Cover Style Folding Music Rest Music Clips Voices Tone Generation Tone Generating RGE (Real Grand Expression) Technology Stereo Sustain Samples Key-off Samples String Resonance Smooth Release Damper Resonance Polyphony Number of 128 + 128 Polyphony (Max.) CVP-609/605 Owner’s Manual... - Page 107 Format Playback SMF (Format 0 & 1), ESEQ, XF Songs (Audio) Recording Time (max.) 80 minutes/Song Compatible Data Recording .wav, .mp3 (MPEG-1 Audio Layer-3) Format Playback .wav, .mp3 (MPEG-1 Audio Layer-3) Time Stretch Pitch Shift Vocal Cancel CVP-609/605 Owner’s Manual...
- Page 108 * Specifications and descriptions in this Owner's Manual are for information purposes only. Yamaha Corp. reserves the right to change or modify products or specifications at any time without prior notice. Since specifications, equipment or options may not be the same in every locale, please check with your Yamaha dealer.
-
Page 109: Index
Menu display ..............24, 91 EQ ..................82 Metronome ...............36 Microphone ..............71 MIDI connection .............90 Factory Reset ..............39 MIDI recording ..............66 Fast Forward ..............59 MIDI Song ................57 Favorite ................32 Mixer .................81 File Selection display ............23 Monitor ................86 Filter ...................82 Move ..................31 CVP-609/605 Owner’s Manual... - Page 110 Voice area ................22 Rotary Speaker ..............47 Volume ................14 Volume Balance ...............38 SA Voice ................46 SA2 Voice ................46 Wireless LAN ..............89 Save ..................29 Score ...................60 Screen Out .................86 Shortcut ................27 Single Finger ..............55 Smart device ..............89 Soft pedal ................35 CVP-609/605 Owner’s Manual...
- Page 111 [Information on Disposal in other Countries outside the European Union] This symbol is only valid in the European Union. If you wish to discard these items, please contact your local authorities or dealer and ask for the correct method of disposal. (weee_eu) CVP-609/605 Owner’s Manual...
- Page 112 The followings are the titles, credits and copyright notices for fifty seven Chim Chim Cher-ee (57) of the songs pre-installed in this instrument (CVP-609/605): from Walt Disney’s MARY POPPINS Words and Music by Richard M. Sherman and Robert B. Sherman Alfie ©...
- Page 113 All Rights for the World excluding the United States Controlled and Copyright © 1949 (Renewed 1976) by Famous Music Corporation Administered by Trio Music Company, Inc. and Alley Music Corp. International Copyright Secured All Rights Reserved International Copyright Secured All Rights Reserved Used by Permission CVP-609/605 Owner’s Manual...
- Page 114 International Copyright Secured All Rights Reserved That Old Black Magic from the Paramount Picture STAR SPANGLED RHYTHM Words by Johnny Mercer Music by Harold Arlen Copyright © 1942 (Renewed 1969) by Famous Music Corporation International Copyright Secured All Rights Reserved CVP-609/605 Owner’s Manual...
- Page 115 CVP-609/605 Owner’s Manual...
- Page 116 Niederlassung und bei Yamaha Vertragshändlern in den jeweiligen Bestimmungsländern erhältlich. Pour plus de détails sur les produits, veuillez-vous adresser à Yamaha ou au distributeur le plus proche de vous figurant dans la liste suivante. Para detalles sobre productos, contacte su tienda Yamaha más cercana o el distribuidor autorizado que se lista debajo.
- Page 117 Yamaha Global Site http://www.yamaha.com/ Yamaha Downloads http://download.yamaha.com/ Yamaha Manual Library http://www.yamaha.co.jp/manual/ U.R.G., Digital Musical Instruments Division © 2012 Yamaha Corporation ZA83740 210MWAP*.*-**B0 Printed in Vietnam...