Table of Contents
Advertisement
Quick Links
Download this manual
See also:
System Manual
Advertisement
Table of Contents
Troubleshooting

Related Manuals for Barco Coronis 1MP


Summary of Contents for Barco Coronis 1MP
- Page 1 Coronis 1MP Installation & User Manual...
-
Page 2: Table Of Contents
Windows NT 4.0 BarcoMed C software installation ....41 ORONIS Windows 2000 BarcoMed C software installation ....53 ORONIS Display Controller Tools ............71 Barco Display Tab................73 Introduction ................73 Using the Barco Display Tab ............74 BarcoMed Driver Tab ................. 77... - Page 3 Barco DPMS Screen Saver ..............99 Introduction ................99 Barco DPMS Screen Saver Options........... 100 Getting started with the Barco DPMS Screen Saver ....102 Using the Barco DPMS Screen Saver ........103 Installing or Reinstalling Barco DPMS ........108 Uninstalling Barco DPMS............
- Page 4 Selecting inputs................ 127 Settings ..................128 Preset* ..................130 Getting information..............131 Advanced functions ................. 133 About this chapter..............133 Advanced functions in the Adjustments menu ...... 134 Advanced functions in the Settings menu......135 Advanced functions in the Preset menu......... 138 Advanced functions in the Information menu......
- Page 5 Troubleshooting..............153 Setting the resolution of your C 1MP display ....155 ORONIS Windows NT 4.0 display resolution ......... 155 Windows 2000 display resolution ........... 157 Driver re-installation, updates or removal........161 Reinstalling or updating your BarcoMed C driver..161 ORONIS Uninstalling the BarcoMed C driver.......
-
Page 6: Copyright Notice
- graphical, electronic, or mechanical including photocopying, taping or information storage and retrieval systems - without written permission of Barco © 2005 Barco N.V. All rights reserved. -
Page 7: Preface
BarcoView software products are the property of BarcoView. They are distributed under copyright by Barco N.V. or BarcoView, LLC., for use only under the specific terms of a software license agreement between Barco N.V. or BarcoView LLC. and the licensee. - Page 8 Preface Disposal Information The lamps inside the display contain mercury. Do not throw the display in the trash. Dispose of it as required by local ordinances or regulations.
-
Page 9: Safety Instructions
Safety Instructions Safety Instructions General Recommendations Read the safety and operating instructions before operating the display. Retain safety and operating instructions for future reference. Adhere to all warnings on the display and in the operating instructions manual. Follow all instructions for operation and use. Electrical shock Type of protection (electrical): Class I equipment... - Page 10 Safety Instructions • Power cords: Power cord with CEE 7 plug: The colors of the mains lead are colored in accordance with the following code: Green-and- yellow: Earth (safety earth), Blue: Neutral, Brown: Line Power cord with ANSI 73.11 plug: The wires of the power cord are colored in accordance with the following code: Green/yellow: ground, White: neutral, Black: line (live) •...
- Page 11 Safety Instructions This apparatus conforms to: CE, IEC 60950, UL 60950, CAN/CSA C22.2 No. 60950 (c-UL), CCC. National Scandinavian Deviations for Cl. 1.7.2 : Finland: "Laite on liitettävä suojamaadoituskoskettimilla varustettuun pistorasiaan" Norway: "Apparatet må tilkoples jordet stikkontakt" Sweden: "Apparaten skall anslutas till jordat uttag" Operating precautions Continuous operation of the display with the same screen may result in some image sticking on the LCD panel.
-
Page 12: Display Controller Installation
Display Controller Installation... - Page 13 Display Controller Installation (This page intentionally left blank.)
-
Page 14: Barcomed Coronis Display Controller Overview
BarcoMed C display controller overview ORONIS BarcoMed C display controller overview ORONIS The BarcoMed C display controller delivers a quality image ORONIS with 1024 simultaneous shades of gray for medical viewing applications. Minimum system requirements • Pentium II 266 MHz with 128 MB RAM (Pentium II 800MHz with 256 MB RAM for cineloops) Important: Other hardware and software installed in the system may require more system memory for best... - Page 15 ORONIS Supported resolutions for each head of the BarcoMed C display ORONIS controller For Coronis 1MP Displays • 1024 x 1280 @ 60 HZ (primary) • 1280 x 1024 @ 60Hz For all BarcoMed C display controllers ORONIS The following resolution is also available when the OS is booted in VGA mode.
-
Page 16: Barcomed Coronis Display Controller Installation
BarcoMed C display controller installation ORONIS BarcoMed C display controller installation ORONIS Caution: Wear a grounded, protective ESD strap during installation or handling of the display controller. Electrostatic charges can damage the display controller. Prior to installing your BarcoMed C display controller(s) in ORONIS your PC please take a few minutes to familiarize yourself with... - Page 17 BarcoMed C display controller installation ORONIS Figure 2: VGA Jumper Enlarged View Using the VGA capabilities of the BarcoMed C ORONIS Prior to installing the BarcoMed C , decide if you are going ORONIS to use its on-board VGA capabilities. If you are, check the setting of the Jumper at J-1 on the display controller (see figure 2 VGA Jumper Enlarged View).
- Page 18 BarcoMed C display controller installation ORONIS Figure 3: PCI and RAID Controller Slots Install the BarcoMed C controller in your computer ORONIS following these steps: 1. Turn off the power to your computer and disconnect the power cord, however make sure that the computer chassis is still grounded.
- Page 19 BarcoMed C display controller installation ORONIS below) using the provided DVI cable. For a dual-headed BarcoMed C setup, connect the secondary display to ORONIS the other connector on the display controller. 7. Replace the chassis cover, reconnect the power cord, turn on the power, and boot the system as usual.
-
Page 20: Display Installation
Display Installation... - Page 21 Display Installation (This page intentionally left blank.)
-
Page 22: Overview
Overview Overview Introduction The MFGD 1318, BARCO’s 18” 1 megapixel grayscale LCD display, guarantees perfect image quality in medical imaging applications. The display combines a TFT (thin film transistor) liquid crystal display panel structure and a built-in backlight with inverter for a better picture quality. - Page 23 The recommended refresh rate is 60 Hz. Would you have trouble selecting a proper display setting in Windows, please refer to the Troubleshooting section further. BARCO’s BarcoMed Coronis imaging board is the best choice to drive the MFGD 1318 display. Power saving (DPMS) The MFGD 1318 is equipped with a power saving system.
-
Page 24: Package Contents
Overview Package contents The package should include the following items, please check. If some of the items are missing, please contact the reseller from whom you have purchased the unit. • The MFGD 1318 display • Power supply • DVI cable •... -
Page 25: Controls And Connectors
Overview Controls and connectors Figure 5 Front (1) Ambient Light Compensation (ALC) sensor (2) Power LED • The LED is off when the display is off. • The LED is green when the display is on (when enabled in the on-screen menus). •... - Page 26 Overview Figure 6 Side (3) USB downstream connector (4) Control wheel for navigating through the on-screen display (OSD) menus and changing values in the menus CS/HS VIDEO Figure 7 Rear (5) Digital DVI (video and data) input (6) D15 (VGA) video connector (7) Vertical sync input (8) Composite / Horizontal sync input...
- Page 27 Overview (9) Composite video input (10) USB downstream connector (11) USB upstream connector (12) DC 12V power input...
-
Page 28: Installation
Installation Installation Precautions • Keep your original packaging. It is designed for this display and is the ideal protection during transport. • Avoid reflections in the flat panel to reduce eye strain. • Place the display on a strong and stable table or desk. •... -
Page 29: Portrait Or Landscape Position
Installation To remove the clip: 1. Position the display with its rear side facing you. 2. Lift up the 2 clips of the foot cover to release the cover from the foot. 3. Pull the lower side of the cover towards you and simultaneously slide the cover downward. -
Page 30: Connecting The Cables
Installation Figure 9 Should you change the panel orientation without tilting it first, you might irreversibly damage the tilt & swivel mechanism. 3. To change from portrait to landscape, turn the panel counterclockwise while tilting it slightly. 4. To change from landscape to portrait, turn clockwise. Connecting the cables To get access to the connectors, open the cover of the connector compartment by pulling down the 2 clips of the cover. - Page 31 Installation 2. Connect the other end of the DVI cable to the video output of your DVI signal source. 3. Route the cable so that it enters the connector compartment at the place where the cover is bulged. To connect analog video & sync cables on BNC: Connect the video &...
- Page 32 Installation Notes: • The video inputs cannot be connected in loop-through (daisy-chain). • The required video amplitude: 700 mV ± 3 dB. • The required sync. amplitude: • VS input: 700 mV to 4 V • HS/CS input: 500 mV to 4V •...
-
Page 33: Routing The Signal Cables
Installation 3. Connect the other end of the power cord to a grounded power outlet. 4. Route the cable so that it enters the connector compartment at the place where the cover is bulged. Routing the signal cables After connecting all cables, fix them in the cable tie at the rear of the connector compartment. -
Page 34: Using The Usb Hub
Installation 3. Press the cover to the foot so that both clips make a clicking sound. Using the USB hub The USB interface inside the display allows you to connect USB devices, such as a keyboard, mouse or digital camera, to the display. - Page 35 Installation 2. If necessary, select a suitable resolution or signal format for the signal source.
-
Page 36: Software Installation
Software Installation... - Page 37 Software Installation (This page intentionally left blank.)
-
Page 38: Software Installation Overview
Controller(s), your BarcoMed Software CD also includes several additional tools. They are: the BarcoMed Driver Tab, the BarcoMed Hardware Tab, the BARCO DPMS Screen Saver and the Barco I-Switch Software. The BarcoMed Driver Tab, the BarcoMed Hardware Tab and the BARCO Display Tab are automatically installed with BarcoMed Display Controller driver and become part of the Windows Display Control Panel. - Page 39 The BarcoMed Software Installation Wizard is a Graphical User Interface (GUI) designed to install the BarcoMed Display Controller Driver, the BARCO DPMS Screen Saver and the Barco I- Switch Software in a single operation prior to rebooting. The user may also use the BarcoMed Software Installation Wizard to...
-
Page 40: Windows Nt 4.0 Barcomed Coronis Software Installation
To install your BarcoMed C Windows Display Controller ORONIS Driver, BARCO DPMS Screen Saver and Barco I-Switch Software for the first time follow the steps below. Boot the machine, log in using an account with administrator privileges and follow these steps. - Page 41 Windows NT 4.0 BarcoMed C software installation ORONIS Figure 13 If it determines that the Microsoft Installer is either out of date or missing, it will display the screen shown in figure 14. Click “OK” to continue, the wizard will then install a newer version of the Microsoft Installer.
- Page 42 Windows NT 4.0 BarcoMed C software installation ORONIS 2. By default all the software on the BarcoMed Software CD will be selected (figure 15 below). For the initial installation we recommend that you install all of the software. If you do not want to install a particular BarcoMed Software product, deselect it by clearing the checkbox next to it.
- Page 43 Windows NT 4.0 BarcoMed C software installation ORONIS Figure 16 If you selected a device with an existing driver, the Wizard will warn you if the current driver is newer than the one you are installing (figure 17 below). Figure 17 Click “OK”...
- Page 44 BarcoMed Software. If you are working with the default selections, this will be the “Barco DPMS Screen Saver”. If the installation of the products you selected at the beginning is complete, click “Finish” to exit the BarcoMed...
- Page 45 “Reinstalling or Updating your BarcoMed Drivers” section found later in this chapter. BARCO DPMS Screen Saver installation 8. Click “Next” on the Welcome Screen of the BARCO DPMS InstallShied Wizard to begin the installation. Click “Cancel” to cancel the DPMS installation and return to the BarcoMed...
- Page 46 11. The “Ready to Install Program” page will now appear, click “Install” to install DPMS. During installation the wizard will display a progress screen. 12. When the Windows Installer has finished installing DPMS, the “Installshield Wizard Completed” page will appear, click “Finish” to exit the BARCO DPMS InstallShied Wizard and...
- Page 47 “Cancel” to cancel the Barco I-Switch Software installation and return to the BarcoMed Product Install Wizard. 14. The Barco I-Switch Software must be installed on a local hard drive in order for it to function correctly. We recommend that you install it in the default location: C:\WINNT. If you wish to install the Barco I-Switch Software in a different location use the “browse”...
- Page 48 Windows NT 4.0 BarcoMed C software installation ORONIS 16. When the Barco I-Switch Software InstallShield Wizard has finished installing the software, it will tell you that it has finished installing the software on your computer and prompt you to click “Finish” to complete the setup. Click “Finish”...
- Page 49 Windows NT 4.0 BarcoMed C software installation ORONIS Figure 20: The Windows NT 4.0 Display Properties Control Panel after the drivers have been installed and the resolution set. Note: The system shown in figure 20 is a single BarcoMed C Display Controller, no 3 party VGA card ORONIS...
- Page 50 Windows NT 4.0 BarcoMed C software installation ORONIS Table 1: Display Name/ Portrait Landscape Number of Heads ORONIS Single Head 1536 x 2048 @ 59 Hz 2048 x 1536 @ 60 HZ Dual Head 3072 x 2048 @ 59 Hz 4096 x 1536 @ 60 HZ Tri Head 4608 x 2048 @ 59 Hz...
- Page 51 Windows NT 4.0 BarcoMed C software installation ORONIS must restart it and boot normally for your changes to take effect. 7. When your system restarts select the “NT Version 4.0” NOT the VGA Mode option option ( ). Log in as usual. If you wish to change the number of C display panels you ORONIS...
-
Page 52: Windows 2000 Barcomed Coronis Software Installation
BarcoMed C display controller(s) and power supply(s). ORONIS 3. Decide if you want to install the Barco DPMS Screen Saver and the Barco I-Switch NioWatch Software in addition to the driver. (See “Barco DPMS Screen Saver” on page 99 and “Barco I-Switch Software”... - Page 53 “No”. 4. Insert your Coronis 1MP Software CD into your computer’s CD drive. If the “BarcoMed Product Installation Wizard”...
- Page 54 Single Source Master Windows 2000 BarcoMed C software installation ORONIS the BarcoMed Product Installation Wizard will display the BarcoMed Product Installation Wizard’s welcome screen (see 21 on page 55). If the screen shown in figure 21 appears, please skip to step “5.” on page 56, otherwise continue with the instructions on the next page.
- Page 55 BarcoMed Product Installation Wizard’s welcome screen will again be displayed (figure 23 below). 5. By default all the software on the Coronis 1MP Software CD will be selected. For the initial installation we recommend that you install all of the software. If you do not want to install a particular BarcoMed Software product at this time, deselect it by clearing the checkbox next to it.
- Page 56 Single Source Master Windows 2000 BarcoMed C software installation ORONIS Figure 23 Driver installation 6. Click “Next” on the Display Driver Wizard’s Welcome Screen to continue or “Cancel” to exit the Display Driver Wizard and return to the Software Install Wizard. The Device Selection Screen’s dialog box (figure 24 on page 58) should show only those devices physically installed and supported by the BarcoMed display controller driver on...
- Page 57 Windows 2000 BarcoMed C software installation Single Source Master ORONIS your Coronis 1MP Software CD. Select the device you want to install and then click “Next”. Note: If there are no BarcoMed devices installed, or if Windows does not recognize the installed devices, or if the...
- Page 58 Single Source Master Windows 2000 BarcoMed C software installation ORONIS Figure 25 Click “OK” to install the new driver. If you don’t want to replace the exiting driver, click “OK” and then click “Cancel”. 7. Your selection on the "Enable DualView" screen (figure 26 below) determines if DualView is enabled or not.
- Page 59 Windows 2000 BarcoMed C software installation Single Source Master ORONIS Figure 27: DualView Disabled—Rectangle 2 represents the combined heads of the BarcoMed Controller. Figure 28: DualView Enabled—Rectangles 2 & 3 represent the individual heads of the BarcoMed Controller. Special Note: If you installed the drivers with DualView disabled, Windows will still show two devices installed for each BarcoMed Display Controller installed under "Display...
- Page 60 Single Source Master Windows 2000 BarcoMed C software installation ORONIS Adapters" in the "Device Manager Control Panel". The second device will be disabled. This is normal. Do NOT try to enable any of the disabled display adapters. 8. The “Device Confirmation” screen displays the device driver that will be installed and if DualView will be enabled or not.
- Page 61 Windows 2000 BarcoMed C software installation Single Source Master ORONIS Figure 30: Windows XP Windows Logo Testing Warning 10. When the screen shown in 31 on page 63 appears select the palette mode which is the correct one for your viewing application.
- Page 62 The wizard will now begin installing the next selected piece of BarcoMed Software. If you are working with the default selections, this will be the Barco NioWatch. If you are working with the default selections, this will be the Barco DPMS Screen Saver.
- Page 63 161. BarcoMed NioWatch installationBarco DPMS Screen Saver installation Click “Next” on the Welcome Screen of the Barco DPMS InstallShield Wizard to begin the installation. Click “Cancel” to cancel the DPMS installation and return to the BarcoMed Product Install Wizard (see figure 32 on page 64).
- Page 64 Install Wizard if the Barco I-Switch Software was selected when you began installing the software. 1. Click “Next” on the Welcome Screen of the BARCO NioWatch InstallShield Wizard (figure 33) to begin the installation or click “Cancel” to cancel and return to the BarcoMed Product Install Wizard.
- Page 65 Windows 2000 BarcoMed C software installation Single Source Master ORONIS 3. Click “Next” on the Choose Destination Location screen to install the NioWatch software in the default location. Or click “Browse” to install the software in a different location. Figure 33 4.
- Page 66 BarcoMed Product Install Wizard. 9. The Barco I-Switch Software must be installed on a local hard drive in order for it to function correctly. We recommend that you install it in the default location: C:\WINNT. If you wish to install the Barco I-Switch Software in a different location use the “browse”...
- Page 67 Barco monitor plug and play software After your system restarts and you have logged in, Windows will install the Barco Monitor Plug-n-Play software. If Windows displays the screens shown in figure 34 or figure 35 on page 69, click “Yes” or “Continue Anyway” to continue.
- Page 68 Figure 35: Windows XP Windows Logo Testing Warning The Barco Monitor Plug and Play software should automatically set the resolution for the displays of your Coronis 1MP System. However, the second head of a dual headed system may be inactive. To make this display active you must extend your desktop to this display using the “Windows Display Control...
- Page 69 Windows 2000 BarcoMed C software installation Single Source Master ORONIS (This page intentionally left blank.)
-
Page 70: Display Controller Tools
Display Controller Tools... - Page 71 Display Controller Tools (This page intentionally left blank.)
-
Page 72: Barco Display Tab
Barco Display Tab Barco Display Tab Introduction The Barco Display Tab is used for gathering information about the BarcoMed Flat Panel Display(s). To access the Barco Display Tab do the following: 1. Open the “Display Properties Control Panel” by right clicking on the desktop, then select “Properties”. -
Page 73: Using The Barco Display Tab
Barco Display Tab Single Source Master Figure 37: Barco Display Tab under Windows 2000 and Windows XP Using the Barco Display Tab Displays All of the available display controllers that are of the same type as the current barco display controller are shown here graphically, with one display icon representing each output of a display controller. - Page 74 Single Source Master Barco Display Tab Properties You may access the Properties page of the currently selected display, which is represented by the monitor icon above with the black frame around it, by either clicking on the “Properties” button or double clicking on the icon.
- Page 75 Barco Display Tab Single Source Master Figure 38...
-
Page 76: Barcomed Driver Tab
Single Source Master BarcoMed Driver Tab BarcoMed Driver Tab Introduction After the BarcoMed Windows display controller driver is installed, a new Display Properties tab is available for configuring special features of the BarcoMed display controller. Languages supported The BarcoMed Driver Tab supports the following languages: English (U.S) (default) Dutch German... - Page 77 Figure 39: BarcoMed Driver Tab under Windows NT 4.0 3. Under Windows 2000 or Windows XP, click on “Settings” tab. Double click on the rectangle that represents the Barco display whose settings you wish to change to bring up its property page.
-
Page 78: Status
Single Source Master BarcoMed Driver Tab Figure 40: BarcoMed Driver Tab under Windows 2000 and Windows XP Status The Status section displays information about the current BarcoMed display controller, driver, and the currently selected display resolution. Graphics Board This displays the current BarcoMed display controller. Driver Version This displays the current BarcoMed driver version. -
Page 79: Palette Mode
Use this palette option for applications, such as Java, which require True Color support. Such applications may not work correctly when using one of Barco's three "Standard 8-bit (256- color)" palette modes. All applications that are designed to work correctly with 8-bit (256-color) modes should continue to work normally. - Page 80 Single Source Master BarcoMed Driver Tab Windows operating system, but applications can manipulate the middle 236 entries. This is the standard palette mode as configured by Windows. Figure 41 Static Gray Palette including standard system colors This option sets the palette to be a static set of 256 gray values. Therefore, applications are denied the ability to dynamically change or allocate palette entries.
-
Page 81: Drawing Modes
BarcoMed Driver Tab Single Source Master Static Gray Palette with NO system colors This option sets the palette to be a static linear ramp of 256 shades of gray. Therefore, applications are denied the ability to dynamically change or allocate palette entries. This prevents palette conflicts between applications, which can cause image color values to appear distorted in the background application. - Page 82 Single Source Master BarcoMed Driver Tab Enable DirectDraw This option allows the user to enable or disable DirectDraw. DirectDraw is a software interface that provides direct access to display devices while maintaining compatibility with the Windows graphics device interface (GDI). DirectDraw provides a device-independent way for applications to gain access to the hardware features of specific display devices.
-
Page 83: Monitor Configuration
BarcoMed Driver Tab Single Source Master Disable 10-bit grayscale Use this option for standard Windows®-based applications that require 8-bit color support (256 colors), such as Internet Explorer, Excel, etc. Do not use this option for applications that require 10-bit pixel support (1024 simultaneous shades of gray) and use extended depth graphic libraries such as WinBarco. -
Page 84: Configuring The Windows 2000 Or Windows Xp Desktop
Configuring the Windows 2000 or Windows XP desktop Important: If you are using a color display in conjunction with your Barco grayscale display(s) you should configure your desktop before setting the resolution of the your Barco grayscale display(s). Under Windows 2000 or Windows XP the recommended... -
Page 85: Configuring The Dualview Or Windows Nt Desktop
Not OK to use Display 1 2480 x 2560 @ 59 Hz Display 2 2560 x 2480 @ 59 Hz The following options maybe set individually on each Barco display even if they are connected to the same BarcoMed controller:... -
Page 86: Barcomed Hardware Tab
BarcoMed Hardware Tab BarcoMed Hardware Tab Introduction The BarcoMed Hardware Tab is used for gathering information about BarcoMed display controller(s). For all BarcoMed display controller(s) it will display PCI information. For BarcoMed display controller(s) based on the AURA video chipset it will also display information about the Firmware installed on the board. -
Page 87: Using The Barcomed Hardware Tab
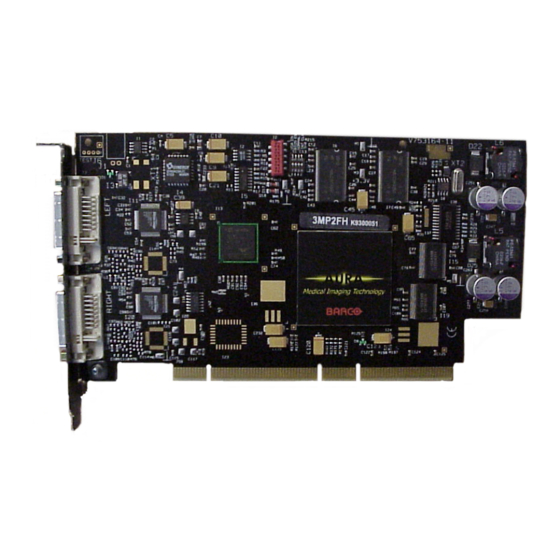
BarcoMed Hardware Tab Table 2: BarcoMed AURA Non-AURA Hardware Tab Controllers Controllers Support PCI and Firmware BarcoMed 3MP2FH Information BarcoMed 5MP1H PCI Information Only PCI and Firmware BarcoMed 5MP1HM Information BarcoMed 5MP2 PCI Information Only BarcoMed PCI and Firmware 5MP2 AURA Information PCI and Firmware BarcoMed... - Page 88 BarcoMed Hardware Tab Figure 44 BarcoMed Hardware Tab under Windows NT 4.0...
- Page 89 BarcoMed Hardware Tab Figure 45 BarcoMed Hardware Tab under Windows 2000 or Windows XP Device Displays the current BarcoMed display controller, driver, and the currently selected display resolution. Identify Device: This button is for BarcoView Medical Imaging Systems (MIS) internal use only and is grayed out.
- Page 90 “Generate Report” Button: Clicking this button will launch the BarcoMed Self Exam utility. BarcoMed Self Exam is an automated Barco Diagnostic Tool that is used to gather the information that support engineers and technicians need to help determine the root cause of a customer...
- Page 91 It probes the system for various types of system information, and saves it to a web-page report that can then be analyzed by the Barco ImageCare team. BarcoMed Self Exam is implemented in a Wizard Format. The BarcoMed Self Exam Wizard will first ask the user to provide detailed customer contact information.
- Page 92 Customer Diagnostic Questions Screen This screen allows the user to tell the Barco ImageCare team as much as possible about the problem. For the Medical Viewing Applications Running field, enter the medical applications that are currently running on the system with the problem.
- Page 93 Submitting the Data to Barco Support Once BarcoMed Self Exam has collected the data, the user can submit it to ImageCare, Barco Medical Imaging Systems’ customer support organization by email. To do this you need a system with access to the World Wide Web.
- Page 94 BarcoMed Hardware Tab 6. Attach the BarcoMed Self Exam report(s) to the email message and send it. You will receive an acknowledgment of receipt of your email by the end of the next business day.
- Page 95 BarcoMed Hardware Tab Update Device... Button: Clicking this button will launch the BarcoMed Hardware Configuration utility. This program allows the user to flash update the firmware stored in the ROM of the currently selected BarcoMed display controller. The BarcoMed Hardware Configuration utility is implemented in a Wizard format, which guides the user through the flash update procedure.
-
Page 96: Display Tools
Display Tools... - Page 97 Display Tools (This page intentionally left blank.)
-
Page 98: Barco Dpms Screen Saver
DPMS to quickly enter the Off state. We recommend setting the work day to be as short as possible to get the maximum power savings on C displays. ORONIS The Barco DPMS Screen Saver can also be used when no one is logged on. -
Page 99: Barco Dpms Screen Saver Options
Barco DPMS Screen Saver Single Source Master Barco DPMS Screen Saver Options From the “Barco DPMS Screen Saver Control Panel” you can change many DPMS screen saver elements simultaneously. The DPMS screen saver elements in each scheme are work schedule, work day screen saver, DPMS settings after work day, and many additional options. - Page 100 DPMS states (Stand-By, Suspend, or Off) by the display controller during user inactivity. Screen Saver During Work Day On LCD based displays, such as the Barco C displays, it is not ORONIS necessary to invoke a screen saver as there is no CRT phosphor to preserve.
-
Page 101: Getting Started With The Barco Dpms Screen Saver
Use As Logon Screen Saver Check the box to use the Barco DPMS Screen Saver when no one is logged into the system. Uncheck the box to use the default screen saver when no one is logged into the system. -
Page 102: Using The Barco Dpms Screen Saver
Using the Barco DPMS Screen Saver is similar to using any other Windows Screen Saver, each user of the system must select the Barco DPMS Screen Saver so that Windows will store the selection in the user’s profile. If a user does not select the Barco... - Page 103 DPMS Screen Saver as his screen saver, the next time he logs on to the system the screen saver selection may be blank. After selecting the Barco DPMS Screen Saver the user must then select a settings scheme for the Screen Saver to follow. To set up...
- Page 104 Single Source Master Barco DPMS Screen Saver Figure 47: Windows 2000 Screen Saver Tab Figure 48: Windows XP Screen Saver Tab 2. Click on the “Settings” button. The “Barco DPMS Screen Saver Control Panel” will open (see figure 49 on page 106).
- Page 105 Barco DPMS Screen Saver Single Source Master Figure 49: Barco DPMS Settings Control Panel 3. Use the default schemes by selecting one of the three default schemes. Click “OK”. Then Click “OK” again. Note: If you make any changes to any of the settings of one...
- Page 106 Stand-By or Suspend, you will automatically go into the Off state. 8. Select the amount of time it takes for your display to warm up. If you have a Barco Medical Display, select “Barco Quick Start”. If you are using a non-Barco display, select the...
-
Page 107: Installing Or Reinstalling Barco Dpms
DPMS settings on your system. Uninstalling Barco DPMS To remove the Barco DPMS Screen Saver from your system insert the Coronis 1MP Software CD in the appropriate device on your computer, run the BarcoMed Product Install Wizard and follow these steps. - Page 108 Single Source Master Barco DPMS Screen Saver 2. Click “Next” on the Welcome Screen of the Barco DPMS InstallShield Wizard to begin the installation. ® 3. Select the radio button next to “Remove” on the Program Maintenance screen of the Wizard and click “Next”.
- Page 109 Barco DPMS Screen Saver Single Source Master (This page intentionally left blank.)
-
Page 110: Barco I-Switch Software
Switch Software. The Barco I-Switch Software may not be available for your system. The Barco I-Switch Software is designed to detect changes in the physical orientation of the rotatable Barco flat-panel display(s) and to change the resolution of the display to match the physical orientation of the display. - Page 111 Barco I-Switch Software (please see the section Software Installation for complete instructions). Removal of Barco I-Switch Software To remove the Barco I-Switch Software from your system use the Windows “Add/Remove Programs” utility found in the Windows Control Panel.
- Page 112 Barco I-Switch Software 5. Type the following text in the command line window: “coronisrotationservice /uninstall”. 6. When the program has finished, closed the command line window.
- Page 113 Barco I-Switch Software (This page intentionally left blank.)
-
Page 114: Display Operation
Display Operation... - Page 115 Display Operation (This page intentionally left blank.)
-
Page 116: Operation
Operation Operation Operating precautions Continuous operation of the display with the same screen may result in some image sticking on the LCD panel. Over 10 hours operation with the same image content is not recommended. Switching on the display DPMS may decrease the risk of image sticking (image retention). - Page 117 Operation • The functions that are not present in DVI mode are indicated with an * throughout this manual. Navigating through the menus • The menu system has a hierarchical structure, with several levels. To display the on-screen menus, turn the wheel (4). The Main Menu appears.
-
Page 118: Saving Changes
Operation • Click the wheel shortly. The adjustment name appears, as well as the current adjustment value • Turn the wheel to change the value • Click the wheel shortly to confirm the change and return to the menu • Some adjustments can be made by selecting from a range of predefined settings. -
Page 119: Using The Autoset* Functions
Operation Using the Autoset* functions * Not in DVI mode The Autoset menu provides a set of functions to adjust the display automatically. When do you need to use the Autoset functions? It is necessary to perform the Auto Gain and Auto Phase calibrations in the following cases: •... - Page 120 Operation To enter the Autoset menu: 1. In the main menu, turn the control wheel to select the Autoset menu. MFGD 1318 MAIN MENU Autoset* Video Contrast* Video Brightness* Luminance Adjustments Input Selection Auto Settings* Preset* Information EXIT * Not in DVI mode 2.
-
Page 121: Controlling Video Contrast* And Video Brightness
Operation The Autoset menu contains the following items: Full Autoset Click the control wheel to perform all Autoset functions (below) one after another. Automatic Geometry Click the control wheel to adjust the image geometry automatically. This function mea- sures the start and the end of the incoming video signal. -
Page 122: Additional Information
Operation To change Video Contrast or Video Brightness manually: 1. Turn the control wheel to select the manual Contrast (Brightness) control. VIDEO CONTRAST Contrast CAL position Man Contrast adj EXIT 2. Click the control wheel to enter the control. 3. Turn the control wheel to change the Video Contrast or Video Brightness value. -
Page 123: Setting The Luminance Value
Operation Setting the Luminance value With this function, the backlight value is stabilized by the I-Guard sensor. The value you enter is the target backlight luminance, expressed in Cd/m². Proceed as follows: 1. In the main menu, turn the control wheel to select the Luminance menu. -
Page 124: Making Adjustments
Operation Making adjustments How to make the adjustments? 1. In the main menu, turn the control wheel to select the Adjustments menu. MFGD 1318 MAIN MENU Autoset Video Contrast* Video Brightness* Luminance Adjustments Input Selection Auto Settings Preset* Information EXIT 2. - Page 125 Operation Geometry adjustments The Geometry menu contains the following items: Automatic Geometry* This is the same function as in the Autoset menu. Please refer to the description of the Autoset functions above. After Automatic Geometry, the image is centered inside the active video window.
-
Page 126: Selecting Inputs
Operation Required test pattern To obtain good results, it is necessary to have a good image on which to perform the functions. For the Phase adjustments, the pattern should contain sharp black-white transitions, like a line pattern or characters. The Phase menu contains the following items: Automatic Phase Click the control wheel to adjust the video sampling phase and frequency automatically... -
Page 127: Settings
Operation 2. Click the control wheel. The Input Selection control appears. 3. Turn the wheel to select the desired input setting. 4. Click the wheel to activate the input selection and return to the main menu. You can select the following input selection settings: Auto If Automatic is selected, the display automatically selects the input to which a video signal is connected. - Page 128 Operation 2. Click the control wheel. The Settings menu appears. 3. Turn the wheel to select the desired menu item. 4. Perform the settings as described below. The Settings menu contains the following items DPMS Click the control wheel to switch on/off the automatic power saving system (DPMS) Power LED...
-
Page 129: Preset
Operation Ambient Light Compensation Click to switch the Ambient Light Compensation system (ALC) on/off. Automatic Menu Exit Click to switch the automatic menu exit feature on/off. When switched on, the OSD menus automatically close when left idle for some time. Preset* *Not in DVI mode To enter the Preset menu:... -
Page 130: Getting Information
Operation The Preset menu contains the following items: (Re)name You can change the name of the preset in the programmable memory location only. Turn the control wheel to change the current character. Click the wheel to move to the next character. Find next preset Select if you wish to select another preset from memory that matches the incoming video and... - Page 131 Operation 4. Click the wheel to select the menu item. The General Information menu contains the following items: Product The display type Serial No Indicates the display serial number SW Version Displays the current internal software version Display Lifetime Indicates the total time the display has been operating, including the time in stand-by Backlight Lifetime Indicates the total time the display has been...
-
Page 132: Advanced Functions
Important The functions described in this chapter are intended for trained service staff only! Improper use of these functions may disorder the display. BARCO cannot be held responsible for the results or damage caused by improper use of these functions. -
Page 133: Advanced Functions In The Adjustments Menu
Advanced functions Advanced functions in the Adjustments menu Geometry In Advanced mode, the Geometry menu additionally contains the following functions: Hor Active Allows you to change the horizontal size of the active video window around the image, expressed in pixels. If you decrease this size, you may blank a part of the image. -
Page 134: Advanced Functions In The Settings Menu
Advanced functions Max ALC Contains two functions to set the maximum point of the ALC control system: - Measure Max Ambient Light: Decrease the light in the room to the maximum possible level you are likely to work in. Next, execute this function. - Max Luminance: Adjust this value until the lumi- nance is at the level you wish to work with when the ambient light is at the maximum level you... - Page 135 Advanced functions • If you select None, no display function will be selected. • The selection Test LUT is meant for internal test purposes. It should not be selected for normal operation. Input Mode* *Not in DVI mode To change the Input Mode setting, click the control wheel. Turn the wheel to select Standard or Extended input mode.
- Page 136 Advanced functions Standard input mode RGB->Y The RGB video signals from the imaging board are calculated and transformed into a single lumi- nance value according to the formula “0.3R + 0.59G + 0.11B”. This single luminance signal drives the RGB sub-pixels of the panel equally. Use this setting in case the imaging board is a color board.
-
Page 137: Advanced Functions In The Preset Menu
Advanced functions GBR->Y The RGB video signals from the imaging board are calculated and transformed into a single lumi- nance value according to the formula “0.3G + 0.59B + 0.11R”. This single luminance signal drives the RGB sub-pixels of the panel equally. BRG->Y The RGB video signals from the imaging board are calculated and transformed into a single lumi-... -
Page 138: Advanced Functions In The Information Menu
Advanced functions Advanced functions in the Information menu The following advanced functions are situated in the General information menu. Service The Service information menu contains the following items: Display Name The display type Display Ser No Indicates the display serial number Display Stock No Indicates the display order number Panel... - Page 139 Advanced functions Backlight Runtime Indicates the time the backlight has been on since the last time it was switched off (e.g., in stand-by). This counter stops after 1092 min- utes.
-
Page 140: Maintenance
We recommend to let this cleaning procedure be done in a BARCO service center. However, when really necessary, you can perform the cleaning on site if you can work in conditions that are as clean and dust- free as possible. - Page 141 Maintenance 2. Tilt the panel. 3. Unscrew the 4 sunken screws at the rear, fixing the glass panel and bezel. 4. Unplug the cable plugged in on the bezel. 5. Remove the bezel with glass panel. Cleaning instructions: • Dust, fingerprints, grease etc. can be removed by using a soft damp cloth (a small amount of mild detergent can be used on the cloth, NOT solvent).
-
Page 142: Troubleshooting
Troubleshooting Troubleshooting Windows does not show the desired display settings Should you have problems selecting display settings for portrait oriented displays in the Windows Display Properties control panel, disable the option Hide modes that this monitor cannot display in the control panel (see below). Figure 53 Information: The display contains a special memory chip that contains... -
Page 143: Pixel Faults
Troubleshooting Pixel Faults Permanently dark or bright pixels can happen to TFT displays. 10 or less permanently dead pixels do not make out a good case for exchanging the unit. Please contact our Customer Service Department if the number of pixel faults exceeds the above-mentioned figure. -
Page 144: Technical Specifications
Technical specifications Technical specifications GEOMETRY • Screen size: 46 cm (18.1") • Display area: 359 mm x 287 mm (14.1" x 11.3") • Aspect ratio: 5:4 VISUAL PERFORMANCE General • Pixel arrangement: sub-pixel vertical stripes • Pixel pitch: 0.2805 mm x 0.2805 mm (0.011" x 0.011") •... -
Page 145: Inputs
Technical specifications INPUTS • Complies to DVI Rev. 1.0 spec up to UXGA 60 Hz Video • Connector type: BNC / D15 • Inputs provided: composite video • Video input voltage: nominal 0.7Vpp • Termination: 75 Ohm Sync • Connector type: BNC / D15 •... -
Page 146: Controls
Technical specifications CONTROLS • On-Screen Display (OSD) • Rotary / push control wheel to navigate through the OSD • • POWER SUPPLY Power source • Input for external 12 VDC power supply unit: 90 ~ 264 VAC • Input for display: 12 VDC. - Page 147 Technical specifications Due to our policy of continuous product improvement, the above specifications are subjected to change without notice. Barco shall not be liable for technical or editorial errors or omissions contained herein; nor for incidental or conse- quential damages whatsoever resulting from furnishing, performance or use of...
-
Page 148: Medical Software
MediCal Software Installation and Operation... - Page 149 MediCal Software Installation and Operation (This page intentionally left blank.)
-
Page 150: Medical Pro Installation And Operation
MediCal Pro installation and operation MediCal Pro installation and operation MediCal Pro software installation Install MediCal Pro on the PC. Follow the instructions from the MediCal Pro User Guide. Important: Do not forget you have to have Administrator privileges to install or uninstall MediCal Pro. Using MediCal Pro You can now use MediCal Pro to configure the complete configuration and set up the Q/A tasks. - Page 151 MediCal Pro installation and operation 8. Run the due tasks. Please refer to the MediCal Pro User Guide for more information.
-
Page 152: Troubleshooting
Troubleshooting... - Page 153 Troubleshooting (This page intentionally left blank.)
-
Page 154: Setting The Resolution Of Your Coronis 1Mp Display
1MP display you ORONIS must be logged in using an account with administrator privileges. 1. To set the resolution of your Coronis 1MP display(s) right click on the desktop and select “Properties”. 2. Select the “Settings” tab.Windows will launch the “Display Properties Control Panel”. - Page 155 Single Source Master 3. Select a resolution from the list that is correct for the maximum number of display adapters installed even if you will later configure for less than the maximum number of displays supported by your configuration. (See Table 4 below for examples.) Table 4: Table of Supported Resolutions Display Name/...
-
Page 156: Windows 2000 Display Resolution
Windows Important: If you are using a color display in conjunction with your Barco grayscale display(s) you should configure your desktop before setting the resolution of the your Barco grayscale display(s). Configuring the Windows 2000 or Windows XP desktop Under Windows 2000 or Windows XP the recommended... - Page 157 1MP display you ORONIS must be logged in using an account with administrator privileges. 1. To set the resolution of your Coronis 1MP display(s) right click on the desktop and select “Properties”. 2. Select the “Settings” tab. 3. Select the rectangle that represents the first C...
- Page 158 5. Select the “Adapter” tab and then click on the “List All Modes” button. Select the resolution and refresh rate that your Coronis 1MP display supports from the dialog box and click “OK”. Tip: In the Adapter box, the Adapter string shows if this display is the First View or the Second View attached to the display controller.
- Page 159 Single Source Master the display you detached in step 2 above, by right clicking on the rectangle that represents it and selecting “Attached”. Now repeat steps 5-8 above for this display. If you are using a Quad-Head Configuration repeat all of the above steps for the two displays on the second display controller.
-
Page 160: Driver Re-Installation, Updates Or Removal
Single Source Master Driver re-installation, updates or removal Driver re-installation, updates or removal Reinstalling or updating your BarcoMed C driver ORONIS Note: These instructions apply to Windows NT 4.0, Windows 2000 and Windows XP. Important for Windows 2000 or Windows XP users only: If you previously uninstalled the driver, do NOT allow the Windows Plug and Play software to reinstall the driver for you. - Page 161 Driver re-installation, updates or removal Single Source Master Figure 56 3. To update the driver, clear the checkbox next to “DPMS Screen Saver” and “I-Switch” (figure 57) and click “Install”.
- Page 162 Single Source Master Driver re-installation, updates or removal Figure 57 4. For Windows NT 4.0 please turn to Step 3 on page 21 in the section titled “Windows NT 4.0 BarcoMed C ORONIS software installation”. For Windows 2000 or Windows XP please turn to Step 6 on ®...
- Page 163 CD drive. If the “BarcoMed Product Installation Wizard” doesn’t start within one minute, browse the contents of your Coronis 1MP Software CD and double click on the file: “Setup.exe” to start the wizard. 2. The BarcoMed Product Installation Wizard will display its welcome screen.
- Page 164 Single Source Master Driver re-installation, updates or removal Figure 58 4. Click “Next”. 5. On the next screen (see figure 59 on page 165), check the checkbox next to “Uninstall this device” and click “Next” to continue. Figure 59 6. Click “Next”.
- Page 165 “BarcoMed Product Installation Wizard” by browsing the contents of your Coronis 1MP Software CD and double clicking on the file: “Setup.exe”. Then follow Step 3 on page 164 through Step 7 on page 166 to finish...
- Page 166 Single Source Master Driver re-installation, updates or removal...
- Page 167 B4100521-01 June 2005 www.barco.com...