Panasonic Lumix DMC-G5 Basic Owner's Manual
Digital camera/ lens kit/body
Hide thumbs
Also See for Lumix DMC-G5:
- Owner's manual (232 pages) ,
- Basic operating instructions manual (284 pages) ,
- Basic owner's manual (54 pages)
Table of Contents
Advertisement
Model No.
Before connecting, operating or adjusting this product,
Register online at www.panasonic.com/register
For USA and Puerto Rico assistance, please call: 1-800-211-PANA(7262) or,
contact us via the web at: http://www.panasonic.com/contactinfo
PP
Basic Owner's Manual
DMC-G5X/DMC-G5K
please read the instructions completely.
More detailed instructions
on the operation of this
camera are contained in
"Owner's Manual for advanced features
(PDF format)" in the supplied CD-ROM.
Install it on your PC to read it.
Digital Camera/
Lens Kit/Body
DMC-G5
(U.S. customers only)
VQT4G94
F0612SM0
Advertisement
Table of Contents

Related Manuals for Panasonic Lumix DMC-G5


Summary of Contents for Panasonic Lumix DMC-G5
-
Page 1: Digital Camera
(PDF format)” in the supplied CD-ROM. Install it on your PC to read it. Register online at www.panasonic.com/register (U.S. customers only) For USA and Puerto Rico assistance, please call: 1-800-211-PANA(7262) or, contact us via the web at: http://www.panasonic.com/contactinfo VQT4G94 F0612SM0... -
Page 2: Information For Your Safety
Dear Customer, Thank you for choosing Panasonic! You have purchased one of the most sophisticated and reliable products on the market today. Used properly, we’re sure it will bring you and your family years of enjoyment. Please take time to fill in the information below. The serial number is on the tag located on the underside of your camera. - Page 3 DMC-G5 Responsible party: Panasonic Corporation of North America One Panasonic Way, Secaucus, NJ 07094 Support Contact: Panasonic Consumer Marketing Company of North America 1-800-211-PANA (7262) This device complies with Part 15 of the FCC Rules. Operation is subject to the...
- Page 4 ∫ About the battery pack CAUTION Battery pack (Lithium ion battery pack) • Use the specified unit to recharge the battery pack. • Do not use the battery pack with equipment other than the specified unit. • Do not get dirt, sand, liquids, or other foreign matter on the terminals. Do not touch the plug terminals (i and j) with metal objects.
- Page 5 ∫ Cautions for Use • Do not use any other USB connection cables except the supplied one or a genuine Panasonic USB connection cable (DMW-USBC1: optional). • Always use a genuine Panasonic HDMI mini cable (RP-CDHM15, RP-CDHM30: optional). Part numbers: RP-CDHM15 (1.5 m) (5 feet), RP-CDHM30 (3.0 m) (10 feet) •...
-
Page 6: Table Of Contents
Contents Information for Your Safety ..................... 2 Care of the camera ......................7 Standard Accessories ...................... 8 Names and Functions of Components ................. 10 Changing the Lens ......................13 Attaching the Shoulder Strap ..................14 Charging the Battery ...................... 15 •... -
Page 7: Care Of The Camera
Care of the camera Do not subject to strong vibration, shock, or pressure. • The lens, LCD monitor, or external case may be damaged if used in the following conditions. It may also malfunction or image may not record if you: –... -
Page 8: Standard Accessories
Description in this Owner’s Manual is based on the interchangeable lens (H-PS14042). • If any accessories are lost, customers in the USA and Puerto Rico should contact Panasonic’s parts department at 1-800-833-9626 for further information about obtaining replacement parts. VQT4G94 (ENG) - Page 9 DMC-G5X DMC-G5K DMC-G5 H-PS14042 H-FS014042 VFC4765 DMW-BLC12PP VYC1009 DE-A79B VYF3443 VYF3201 K1HY08YY0025 VFC4605 VFC4315 VKF4971 VKF4971 VKF4971 VFF1026 (ENG) VQT4G94...
-
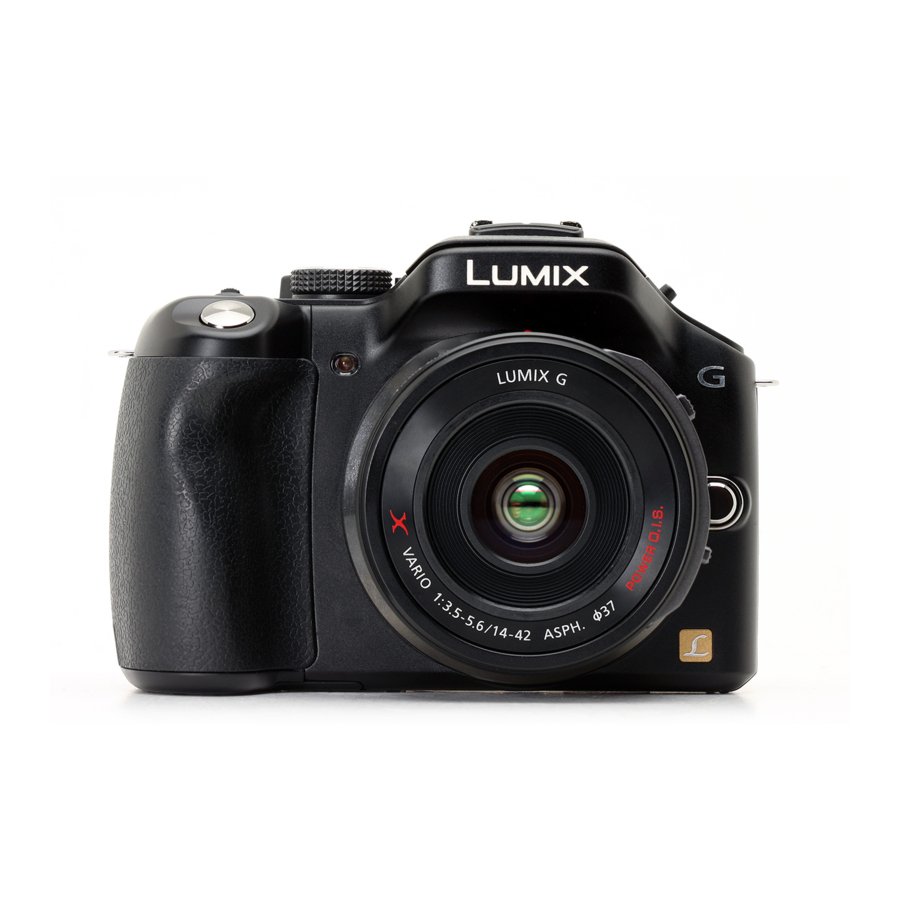
Page 10: Names And Functions Of Components
Names and Functions of Components ∫ Camera body Self-timer indicator/ AF Assist Lamp Sensor Flash Lens fitting mark Mount Lens lock pin Lens release button [LVF/LCD] button/ 11 12 [Fn3] button Diopter adjustment dial 10 Viewfinder 11 Eye Cup 12 Eye sensor •... - Page 11 40 [AV OUT/DIGITAL] socket 41 DC coupler cover • When using an AC adaptor, ensure that the Panasonic DC coupler (DMW-DCC8: optional) and AC adaptor (DMW-AC8PP: optional) are used. • Always use a genuine Panasonic AC adaptor (DMW-AC8PP: optional). •...
- Page 12 ∫ Lens H-PS14042 H-FS014042 Lens surface Zoom lever Focus lever Contact point Lens fitting mark Focus ring Zoom ring Touch screen This touch screen is a type that detects pressure. Touch the screen Drag To touch and release the touch screen. A movement without releasing the touch screen.
-
Page 13: Changing The Lens
Changing the Lens • Check that the camera is turned off. Attaching the lens Preparations: Remove the lens rear cap from the lens, and the body cap from the camera. Align the lens fitting marks A (red marks) and then rotate the lens in the direction of the arrow until it clicks. -
Page 14: Attaching The Shoulder Strap
Attaching the Shoulder Strap • We recommend attaching the shoulder strap when using the camera to prevent it from dropping. Pass the shoulder strap through the shoulder strap eyelet on the camera body. A: Shoulder strap eyelet Pass the end of the shoulder strap through the ring in the direction of the arrow and then pass it through the stopper. -
Page 15: Charging The Battery
Charging the Battery ∫ About batteries that you can use with this unit The battery that can be used with this unit is DMW-BLC12PP. Charging • The battery is not charged when the camera is shipped. Charge the battery before use. •... -
Page 16: Inserting And Removing The Card (Optional)/The Battery
Inserting and Removing the Card (optional)/ the Battery • Check that this unit is turned off. • We recommend using a Panasonic card. Slide the release lever in the direction of the arrow and open the card/battery door. • Always use genuine Panasonic batteries (DMW-BLC12PP). -
Page 17: About The Card
(4 GB to 32 GB) Card compatible equipment. • Check that the PC and other equipment are compatible when using the SDXC Memory Cards. http://panasonic.net/avc/sdcard/information/SDXC.html SDXC Memory Card • This unit is compatible with UHS-I standard SDHC/SDXC (48 GB, 64 GB) memory cards. -
Page 18: Setting Date/Time (Clock Set)
Setting Date/Time (Clock Set) • The clock is not set when the camera is shipped. Turn the camera on. • The status indicator 1 lights when you turn this unit on. Touch [Clock Set]. Touch the items you wish to set (Year/Month/ Day/Hours/Minutes), and set using [ •... -
Page 19: Selecting The Recording Mode
Selecting the Recording Mode ∫ To select a Recording Mode with the mode dial Select the mode by rotating the mode dial. • Rotate the mode dial slowly to select the desired mode A. ∫ To select Intelligent Auto Mode Press [¦]. -
Page 20: Taking A Still Picture
Taking a Still picture Applicable modes: Select the Recording Mode. Press the shutter button halfway to focus. A Aperture value B Shutter speed 60 60 • Aperture value and shutter speed are displayed. (It will flash in red if the correct exposure is not achieved, except when set to flash.) •... -
Page 21: Taking Pictures Using The Automatic Function (Intelligent Auto Mode)
Taking Pictures using the Automatic Function (Intelligent Auto Mode) Recording Mode: In this mode, the camera makes the optimal settings for the subject and scene, so we recommend it when you wish to leave the settings to the camera and record without thinking about them. -
Page 22: Recording Using Intelligent Auto Plus Mode
Recording using Intelligent Auto Plus Mode Recording Mode: The brightness and color optimally set by the camera can be easily matched to your preferences. This mode is useful if you do not like dealing with detailed settings but like the settings made automatically by the camera to match your preferences. -
Page 23: Taking Pictures With Defocus Control Function
∫ Adjusting color Touch [ Touch [ ] to display the setting screen. • The settings screen can also be displayed from the recording screen by pressing cursor button 1. Drag the slide bar to set. • This will adjust the color of the image from a reddish color to a bluish color. -
Page 24: Recording Motion Picture
Recording Motion Picture Applicable modes: Start recording by pressing the motion picture button. A Elapsed recording time B Available recording time • Recording of motion picture appropriate for each mode is possible. • The recording state indicator (red) C will flash while recording motion pictures. -
Page 25: Compensating The Exposure
Compensating the Exposure Applicable modes: Use this function when you cannot achieve appropriate exposure due to the difference in brightness between the subject and the background. Look at the following examples. Press the rear dial to switch to Exposure Compensation operation. Rotate the rear dial to compensate the exposure. -
Page 26: Using The Function Button
Using the function button You can assign recording functions, etc. to specific buttons and icons. To use those functions, press [Fn1], [Fn2] or [Fn3] or touch [Fn4] or [Fn5]. • To use [Fn1], set the [AF/AE LOCK / Fn1] of the [Custom] menu to [Fn1]. -
Page 27: Taking Pictures That Match The Scene Being Recorded (Scene Guide Mode)
Taking Pictures that match the Scene being recorded (Scene Guide Mode) Recording Mode: If you select a scene to suit the subject and recording conditions with reference to the example images, the camera will set optimal exposure, color, and focus, allowing you to record in a manner appropriate to the scene. -
Page 28: Taking Pictures With Different Image Effects (Creative Control Mode)
Taking Pictures with different image effects (Creative Control Mode) Recording Mode: This mode records with additional image effects. You can set the effects to add by selecting example images and checking them on the screen. Set the mode dial to [ Touch the example image to select image effects (filters). -
Page 29: Playing Back Pictures/Motion Pictures
Playing Back Pictures/Motion Pictures Playing Back Pictures Press [(]. Forward or rewind the image by dragging the screen horizontally. Forward: drag from right to left Rewind: drag from left to right Playing Back Motion Pictures This unit was designed to play motion pictures using the AVCHD, MP4 and QuickTime Motion JPEG formats. -
Page 30: Deleting Pictures
Deleting Pictures Once deleted, pictures cannot be recovered. To delete a single picture In Playback Mode, select the picture to delete and touch [ Touch [Delete Single]. • Confirmation screen is displayed. Pictures are deleted by selecting [Yes]. To delete multiple pictures (up to 100) or all the pictures In Playback Mode, touch [ Touch [Delete Multi] or [Delete All]. -
Page 31: Switching The Display Of The Lcd Monitor
Switching the display of the LCD Monitor Press [DISP.] to change. (In Recording Mode) • Screen will switch as follows: (Example of LCD monitor display) 98 98 98 98 98 ¢ A With information ¢ B Without information ¢ C With information (tilt sensor display) ¢... -
Page 32: Setting The Menu
Setting the Menu Press [MENU/SET]. • The top menu screen is displayed. Touch the menu icon. Touch the menu item. • The page can be changed by touching [ Touch the Setting to set. • Depending on the menu item, its setting may not appear or it may be displayed in a different way. -
Page 33: Setting The Quick Menu
Setting the Quick Menu By using the Quick Menu, some of the menu settings can be easily found. • The features that can be adjusted using Quick Menu are determined by the mode or a display style the camera is in. Press [Q.MENU] to display the Quick Menu. -
Page 34: Types Of Menus
Types of menus ∫ [Rec] Menu This menu lets you set the aspect ratio, number of pixels and other aspects of the pictures you are recording. • [Photo Style], [Focus Mode], [Metering Mode], [i.Dynamic], [i.Resolution] and [Digital Zoom] are common to both the [Rec] menu and [Motion Picture] menu. Changing these settings in one of these menus is reflected in other menu. - Page 35 Increases the Tele effect. The higher the level of magnification, [Digital Zoom] the greater the degradation in image quality. The electronic shutter can reduce the picture blur. [Electronic Shutter] [Burst Rate] Sets the burst speed for burst recording. Sets single/burst recording, correction width and recording [Auto Bracket] sequence for Auto Bracket recording.
- Page 36 The shutter speed can be fixed to reduce the flicker or striping [Flkr Decrease] in the motion picture. ∫ [Custom] Menu Operation of the unit, such as displaying of the screen and button operations, can be set up according to your preferences. Also, it is possible to register the modified settings. Registers the current camera settings as custom set.
- Page 37 Sets the time for which the screen is enlarged when the shutter [Pinpoint AF Time] button is pressed halfway with Auto Focus Mode set to [ AF assist lamp will illuminate the subject when the shutter button is pressed half-way making it easier for the camera to [AF Assist Lamp] focus when recording in low light conditions.
- Page 38 ∫ Setup Menu This menu lets you perform the clock settings, select the operating beep tone settings and set other settings which make it easier for you to operate the camera. [Clock Set] Setting Date/Time. Sets the times for the region where you live and your holiday [World Time] destination.
- Page 39 Dust reduction to blow off the debris and dust that have affixed [Sensor Cleaning] to the front of the imaging device is performed. The card is formatted. [Format] ∫ [Playback] Menu This menu lets you set the Protection, Cropping or Print Settings, etc. of recorded pictures. Switches the playback method for 3D images.
-
Page 40: Reading The Owner's Manual (Pdf Format)
You can download and install a version of Adobe Reader that you can use with your OS from the following Web Site. http://get.adobe.com/reader/otherversions ∫ To uninstall the Owner’s Manual (PDF format) Delete the PDF file from the “Program Files\Panasonic\Lumix\” folder. ∫ For Mac Turn the PC on and insert the CD-ROM containing the Owner’s Manual (supplied). -
Page 41: About The Supplied Software
About the supplied software The supplied CD-ROM includes the following software. Install the software on to your computer before use. • PHOTOfunSTUDIO 8.2 PE (Windows XP/Vista/7) This software allows you to acquire pictures to the PC, and also categorize these acquired pictures by their recording date or the model name of the camera used. -
Page 42: Installing Supplied Software
Installing supplied software • Before inserting the CD-ROM, close all running applications. Check the environment of your PC. • Operating environment of “PHOTOfunSTUDIO 8.2 PE” – Windows XP (32bit) SP3, Windows Vista (32bit) SP2, Windows 7 (32bit/64bit) or SP1 – CPU: Pentium III 500 MHz or higher (Windows... -
Page 43: Specifications
Specifications Specifications are subject to change without notice. Digital Camera Body (DMC-G5): Information for your safety Power Source: DC 8.4 V Power Consumption: 2.9 W (When recording with LCD Monitor) [When the Interchangeable lens (H-PS14042) is used] 3.0 W (When recording with LCD Monitor) [When the Interchangeable lens (H-FS014042) is used] 2.5 W (When playing back with LCD Monitor) [When the Interchangeable lens (H-PS14042) is used]... - Page 44 Minimum Illumination Approx. 9 lx (when i-Low light is used, the shutter speed is 1/30th of a second) [When the Interchangeable lens (H-PS14042) is used] Approx. 9 lx (when i-Low light is used, the shutter speed is 1/30th of a second) [When the Interchangeable lens (H-FS014042) is used] Shutter speed B (Bulb) (Max.
- Page 45 Picture size Still picture When the aspect ratio setting is [X] 4608k3456 pixels, 3264k2448 pixels, 2336k1752 pixels When the aspect ratio setting is [Y] 4608k3072 pixels, 3264k2176 pixels, 2336k1560 pixels When the aspect ratio setting is [W] 4608k2592 pixels, 3264k1840 pixels, 1920k1080 pixels When the aspect ratio setting is [ 3456k3456 pixels, 2448k2448 pixels, 1744k1744 pixels Recording quality...
- Page 46 Battery Charger (Panasonic DE-A79B): Information for your safety Input: 110 V to 240 V, 50/60 Hz, 0.2 A Output: 8.4 V, 0.65 A Equipment mobility: Movable Battery Pack (lithium-ion) (Panasonic DMW-BLC12PP): Information for your safety Voltage/capacity: 7.2 V/1200 mAh VQT4G94 (ENG)
- Page 47 Interchangeable Lens (H-PS14042) “LUMIX G X VARIO PZ 14 –42 mm/F3.5– 5.6 ASPH./POWER O.I.S.” Focal length f=14 mm to 42 mm (35 mm film camera equivalent: 28 mm to 84 mm) Aperture type 7 diaphragm blades/circular aperture diaphragm Aperture range F3.5 (Wide) to F5.6 (Tele) Minimum aperture value...
- Page 48 Interchangeable Lens (H-FS014042) “LUMIX G VARIO 14 –42 mm/F3.5 –5.6 ASPH./MEGA O.I.S.” Focal length f=14 mm to 42 mm (35 mm film camera equivalent: 28 mm to 84 mm) Aperture type 7 diaphragm blades/circular aperture diaphragm Aperture range F3.5 (Wide) to F5.6 (Tele) Minimum aperture value Lens construction...
-
Page 49: Digital Camera Accessory System
H-FT012 Mount Adaptor DMW-MA1, DMW-MA2M, DMW-MA3R ¢1 The AC Adaptor (optional) can only be used with the designated Panasonic DC Coupler (optional). The AC adaptor (optional) cannot be used by itself. ¢2 When the interchangeable lens (H-PS14042) is used ¢3 When the interchangeable lens (H-FS014042) is used ¢... - Page 50 Refer to P15 for information about the battery charging time. • NOTE: Accessories and/or model numbers may vary between countries. Consult your local dealer. • Refer to catalogs/Web pages for most current information regarding optional accessories. http://panasonic.jp/support/global/cs/dsc/ (This Site is English only.) VQT4G94 (ENG)
-
Page 51: Digital Camera Accessory Order Form (For Usa And Puerto Rico Customers)
TO OBTAIN ANY OF OUR DIGITAL CAMERA ACCESSORIES YOU CAN DO ANY OF THE FOLLOWING: VISIT YOUR LOCAL PANASONIC DEALER CALL PANASONIC’S ACCESSORY ORDER LINE AT 1-800-332-5368 [6 AM-6 PM M-F, PACIFIC TIME] MAIL THIS ORDER TO: PANASONIC NATIONAL PARTS CENTER 20421 84th Ave S., Kent, WA 98032 (ENG) VQT4G94... -
Page 52: Limited Warranty (Only For U.s.a. And Puerto Rico)
If your product does not work properly because of a defect in materials or workmanship, Panasonic Consumer Marketing Company of North America (referred to as “the warrantor”) will, for the length of the period indicated on the chart below, which starts with the date of original purchase (“warranty period”), at its option either (a) repair your product... - Page 53 Owner's Manual, and send it prepaid, adequately insured and packed well in a carton box. When shipping Lithium Ion batteries please visit our Web Site at www.panasonic.com/BatteryHandling as Panasonic is committed to providing the most up to date information. Include a letter detailing the complaint, a return address and provide a daytime phone number where you can be reached.
- Page 54 Monday-Friday 9am-9pm, Saturday-Sunday 10am-7pm EST For hearing or speech impaired TTY users, TTY: 1-877-833-8855 Accessory Purchases (United States and Puerto Rico) Purchase Parts, Accessories and Instruction Books online for all Panasonic Products by visiting our Web Site at: http://www.pstc.panasonic.com Or, send your request by E-mail to: npcparts@us.panasonic.com...
-
Page 55: Useful Information (For Latin American Countries Only)
(ENG) VQT4G94... - Page 56 • SDXC Logo is a trademark of SD-3C, LLC. • “AVCHD”, “AVCHD Progressive” and the “AVCHD Progressive” logo are trademarks of Panasonic Corporation and Sony Corporation. • Manufactured under license from Dolby Laboratories. Dolby and the double-D symbol are trademarks of Dolby Laboratories.