TP-Link TD-8816 User Manual
Adsl2+ modem router
Hide thumbs
Also See for TD-8816:
- User manual (73 pages) ,
- Quick installation manual (2 pages) ,
- User manual (67 pages)
Table of Contents
Advertisement
Quick Links
Advertisement
Table of Contents

Related Manuals for TP-Link TD-8816


Summary of Contents for TP-Link TD-8816
- Page 1 TD-8816 ADSL2+ Modem Router Rev:2.0.0 1910010536...
- Page 2 Specifications are subject to change without notice. is a registered trademark of TP-LINK TECHNOLOGIES CO., LTD. Other brands and product names are trademarks or registered trademarks of their respective holders. No part of the specifications may be reproduced in any form or by any means or used to make any derivative such as translation, transformation, or adaptation without permission from TP-LINK TECHNOLOGIES CO., LTD.
-
Page 3: Fcc Statement
FCC STATEMENT This equipment has been tested and found to comply with the limits for a Class B digital device, pursuant to part 15 of the FCC Rules. These limits are designed to pro-vide reasonable protection against harmful interference in a residential installation. This equipment generates, uses and can radiate radio frequency energy and, if not in-stalled and used in accordance with the instructions, may cause harmful interference to radio communications. -
Page 4: Table Of Contents
CONTENTS Package Contents ....................1 Chapter 1. Introduction ..................2 Product Overview ...................... 2 Main Features ......................2 Conventions ......................3 Chapter 2. Hardware Installation ................. 4 The Front Panel ......................4 The Back Panel......................5 Installation Environment .................... 5 Connecting the Router .................... - Page 5 Maintenance......................44 4.6.1 Administration.........................45 4.6.2 Time Zone ........................45 4.6.3 Firmware.........................47 4.6.4 SysRestart........................49 4.6.5 Diagnostics........................49 Help......................... 50 Appendix A: Specifications................... 51 Appendix B: Troubleshooting ................52 Appendix C: Technical Support ................62...
-
Page 6: Package Contents
ADSL2+ Modem Router User Guide Package Contents The following items should be found in your package: One TD-8816 ADSL2+ Modem Router One Power Adapter for TD-8816 ADSL2+ Modem Router Quick Installation Guide One RJ45 cable Two RJ11 cables One ADSL splitter... -
Page 7: Chapter 1. Introduction
The device is designed to provide a simple and cost-effective ADSL Internet connection for a private Ethernet network. The Router is easy to use. The TD-8816 connects to an Ethernet LAN or computers via standard Ethernet ports. The ADSL connection is made using ordinary telephone line with standard connectors. -
Page 8: Conventions
Supports firmware upgrade and Web management. 1.3 Conventions The Router or device mentioned in this User Guide stands for TD-8816 without any explanations. Parameters provided in the pictures are just references for setting up the product, which may differ from the actual situation. -
Page 9: Chapter 2. Hardware Installation
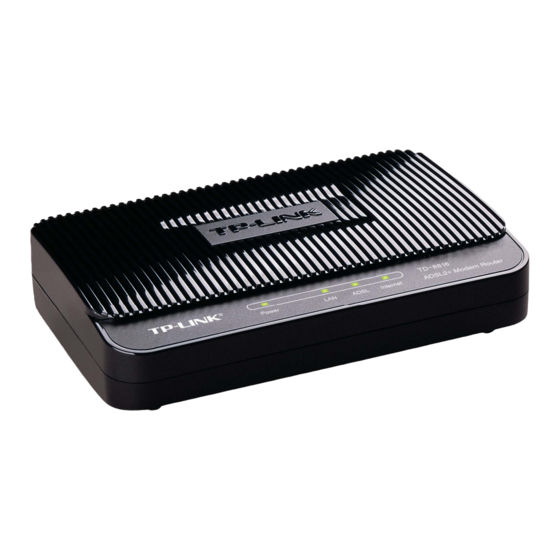
TD-8816 ADSL2+ Modem Router User Guide Chapter 2. Hardware Installation 2.1 The Front Panel Figure 2-1 The LEDs locate on the front panel, which indicate the device’s working status. For details, please refer to LED Explanation. LED Explanation: Name Status Indication The modem router is powered on. -
Page 10: The Back Panel
Method one: Plug one end of the twisted-pair ADSL cable into the ADSL LINE port on the rear panel of TD-8816, and insert the other end into the wall socket. Method two:You can use a separate splitter. External splitter can divide the data and voice, and then you can access the Internet and make calls at the same time. - Page 11 Plug one end of the twisted-pair ADSL cable into the ADSL LINE port on the rear panel of TD-8816. Connect the other end to the MODEM port of the external splitter. Step 2: Connect the Ethernet cable. Attach one end of a network cable to your computer’s Ethernet port or a regular hub/switch port, and the other end to the LAN port on the TD-8816.
-
Page 12: Chapter 3. Quick Installation Guide
Chapter 3. Quick Installation Guide 3.1 Configure PC After you directly connect your PC to the TD-8816 or connect your adapter to a Hub/Switch which has connected to the Router, you need to configure your PC’s IP address. Follow the steps below to configure it. - Page 13 TD-8816 ADSL2+ Modem Router User Guide Figure 3-3 Step 4: Configure the IP address as Figure 3-4 shows. After that, click OK. Figure 3-4...
-
Page 14: Login
TD-8816 ADSL2+ Modem Router User Guide Note: You can configure the PC to get an IP address automatically, select “Obtain an IP address automatically” and “Obtain DNS server address automatically” in the screen above. Now, you can run the Ping command in the command prompt to verify the network connection. - Page 15 TD-8816 ADSL2+ Modem Router User Guide After that, you will see the screen shown below, enter the default User Name admin and the default Password admin, and then click OK to access to the Quick Start screen. You can follow the steps below to complete the Quick Setup.
- Page 16 TD-8816 ADSL2+ Modem Router User Guide Step 3: Select the connection type to connect to the ISP (We select PPPoE/PPPoA mode for example here), and then click the NEXT button. Figure 3-10 Step 4: Configure the following options provided by your ISP: Username, Password, VPI, VCI and Connection Type.
-
Page 17: Chapter 4. Software Configuration
TD-8816 ADSL2+ Modem Router User Guide Chapter 4. Software Configuration This User Guide recommends using the “Quick Installation Guide” for first-time installation. For advanced users, if you want to know more about this device and make use of its functions adequately, maybe you will get help from this chapter to configure the advanced settings through the Web-based Utility. -
Page 18: System Log
TD-8816 ADSL2+ Modem Router User Guide Figure 4-2 4.1.2 System Log Choose “Status→System Log” menu, and you will be able to query the logs of the Router. -
Page 19: Statistics
TD-8816 ADSL2+ Modem Router User Guide Figure 4-3 The Router can keep logs of all traffic. You can query the logs to find what happened to the Router. Click the CLEAR LOG button to clear the logs. Click the SAVE LOG button to save the logs. - Page 20 TD-8816 ADSL2+ Modem Router User Guide Select Ethernet, and you will see the statistics table as below. Statistics Table: Transmit Frames The frames transmitted over the Ethernet port. The multicast frames transmitted over the Ethernet Transmit Multicast Frames port. Transmit Transmit total Bytes The total bytes transmitted over the Ethernet port.
-
Page 21: Quick Start
TD-8816 ADSL2+ Modem Router User Guide 4.2 Quick Start Please refer to " 3.2: Login". 4.3 Interface Setup Choose “Interface Setup”, you can see the next submenus: Internet and LAN. Figure 4-5 Click any of them, and you will be able to configure the corresponding function. - Page 22 TD-8816 ADSL2+ Modem Router User Guide Figure 4-6 ATM VC: ATM settings are used to connect to your ISP. Your ISP provides VPI (Virtual Path Identifier), VCI (Virtual Channel Identifier) settings to you. In this Device, you can totally setup 8 VCs on different encapsulations, if you apply 8 different virtual circuits from your ISP.
- Page 23 TD-8816 ADSL2+ Modem Router User Guide 32 to 65535 (1 to 31 is reserved for well-known protocols). Please input the value provided by your ISP. • PVCs Summary: Click the button, you can view the summary information about the PVCs.
- Page 24 TD-8816 ADSL2+ Modem Router User Guide • Direction: Select this option to specify the RIP direction. None is for disabling the RIP function. Both means the ADSL Router will periodically send routing information and accept routing information, and then incorporate them into routing table. IN only means the ADSL router will only accept but will not send RIP packet.
- Page 25 TD-8816 ADSL2+ Modem Router User Guide Figure 4-9 Service name: Specify a name for the PPPoA/PPPoE connection for recognition. Username: Enter your username for your PPPoA/PPPoE connection to identify and verify your account to the ISP. Password: Enter your password for your PPPoA/PPPoE connection.
-
Page 26: Lan
TD-8816 ADSL2+ Modem Router User Guide given IP address provided by your ISP. For Static IP, you need to specify the IP address, Subnet Mask and Gateway IP address. Default Route: You should select Yes to configure the PVC as the default gateway to internet from this device. - Page 27 TD-8816 ADSL2+ Modem Router User Guide Figure 4-11 Router Local IP: These are the IP settings of the LAN interface for the device. These settings may be referred to as Private settings. You may change the LAN IP address if needed.
- Page 28 TD-8816 ADSL2+ Modem Router User Guide The Router will work as a DHCP Server, it becomes the default gateway for DHCP client connected to it. DHCP stands for Dynamic Host Control Protocol. The DHCP Server gives out IP addresses when a device is booting up and request an IP address to be logged on to the network.
- Page 29 TD-8816 ADSL2+ Modem Router User Guide DHCP Relay: Select Relay, then you will see the next screen (shown in Figure 4-13), the Router will work as a DHCP Relay. A DHCP relay is a computer that forwards DHCP data between computers that request IP addresses and the DHCP server that assigns the addresses.
-
Page 30: Advanced Setup
TD-8816 ADSL2+ Modem Router User Guide 4.4 Advanced Setup Choose “Advanced Setup”, you can see the next submenus: Figure 4-14 Click any of them, and you will be able to configure the corresponding function. 4.4.1 Firewall Choose “Advanced Setup→Firewall” menu, and you will see the next screen (shown in Figure 4-15). -
Page 31: Nat
TD-8816 ADSL2+ Modem Router User Guide Click ADD ROUTE button to add a new route in the next screen (shown in Figure 4-17). Figure 4-17 Destination IP Address: This parameter specifies the IP network address of the final destination. IP Subnet Mask: Enter the subnet mask for this destination. - Page 32 TD-8816 ADSL2+ Modem Router User Guide Virtual Circuit: Enter Virtual Circuit Index that you plan to setup for the NAT function. NAT Status: This field shows the current status of the NAT function for the current VC. You can go to the previous screen (shown in Figure 4-6) to activate the function.
- Page 33 TD-8816 ADSL2+ Modem Router User Guide Figure 4-20 Rule Index: The Virtual server rule index for this VC. You can specify 10 rules in maximum. All the VCs with single IP will use the same Virtual Server rules. Start & End port number: Enter the specific Start and End Port number you want to forward.
- Page 34 TD-8816 ADSL2+ Modem Router User Guide Figure 4-21 Figure 4-22 Rule Index: Select the Virtual server rule index for this VC. You can specify 10 rules in maximum. All the VCs with single IP will use the same Virtual Server rules.
-
Page 35: Qos
TD-8816 ADSL2+ Modem Router User Guide Step 3: Select the rule type you want from the drop-down list. Step 4: Enter the local and public IP addresses in the corresponding fields. Step 5: After that, click SAVE to make the entry take effect. -
Page 36: Vlan
TD-8816 ADSL2+ Modem Router User Guide QoS: Select this option to Activated/Deactivated the IP QoS on different types (IP ToS and DiffServ). Summary: Click the button to view the configurations of QoS. Rule: Configure the rules for QoS. If the traffic complies with the rule, then the Router will take the corresponding action to deal with it. - Page 37 TD-8816 ADSL2+ Modem Router User Guide Virtual LAN (VLAN) is a group of devices on one or more LANs that are configured so that they can communicate as if they were attached to the same wire, when in fact they are located on a number of different LAN segments.
-
Page 38: Adsl
TD-8816 ADSL2+ Modem Router User Guide Click Define VLAN Group in Figure 4-24, you can define VLAN groups in the next screen (shown in Figure 4-26). Figure 4-26 VLAN Index: Select the VLAN index for this VC. You can specify 8 groups in maximum. -
Page 39: Access Management
TD-8816 ADSL2+ Modem Router User Guide Figure 4-27 ADSL Mode: Select the ADSL operation mode which your ADSL connection uses. ADSL Type: Select the ADSL operation type which your ADSL connection uses. 4.5 Access Management Choose “Access Management”, you can see the next submenus: Figure 4-28 Click any of them, and you will be able to configure the corresponding function. -
Page 40: Filter
TD-8816 ADSL2+ Modem Router User Guide ACL: If Activated, the IP addresses which are contained in the Access Control List can access to the Router. If Deactivated, all IP addresses can access to the Router. ACL Rule Index: Select the ACL rule index for the entry. - Page 41 TD-8816 ADSL2+ Modem Router User Guide Figure 4-30 Filter Type Selection: Select the filter type for the next configuration. IP/MAC Filter Set Index: Select the Set index for the IP Filter entry. This index can match with six IP / MAC Filter Rule Indexes.
- Page 42 TD-8816 ADSL2+ Modem Router User Guide be shown in the row 2 for the matching with 1. Rule Type: For IP Filter, please select IP here. Active: Select “Yes” to make the rule to take effect. Source IP Address: Enter the source IP address for the rule. You can enter 0.0.0.0; it means that all IP addresses are controlled by the rule.
- Page 43 TD-8816 ADSL2+ Modem Router User Guide Step 4: Select the Protocol as “TCP” and select the Unmatched rule as “Next”. Step 5: Finally, click the SAVE to save the entry. Step 6: Go to Step 2 to configure the next two rules: Block E-mail received by the IP address 192.168.1.7 on your local network;...
- Page 44 TD-8816 ADSL2+ Modem Router User Guide Figure 4-31 Rule Type: Select MAC for the MAC Filter rule. Active: Select “Yes” to make the rule to take effect. MAC Address: Enter the MAC address for the rule. Rule Unmatched: If the current rule can not match, and you select Forward, the router will skip the rule and transmit directly.
- Page 45 TD-8816 ADSL2+ Modem Router User Guide Note: If you want to make the rule take effect, please select Yes to active the rule. Step 3: Enter the “MAC Address” and select the Unmatched rule as “Next”. Step 4: Finally, click the SAVE to save the entry.
- Page 46 TD-8816 ADSL2+ Modem Router User Guide Figure 4-32 Filter Type Selection: Select the Application Filter for the next configuration. Application Filter: Activate or deactivate the function. ICQ & MSN & YMSG & Real Audio/Video: Select Allow or Deny for these applications. If you select Allow, the Router will accept the application;...
-
Page 47: Snmp
TD-8816 ADSL2+ Modem Router User Guide Filter Type Selection: Select the URL Filter for the next configuration. Active: Select “Yes” to make the rule to take effect. URL Index: Select the index for the URL Filter entry. URL: Enter the URL for this URL Filter. -
Page 48: Ddns
TD-8816 ADSL2+ Modem Router User Guide simple peer-to-peer network connectivity between devices. An UPnP device can dynamically join a network, obtain an IP address, convey its capabilities and learn about other devices on the network. In turn, a device can leave a network smoothly and automatically when it is no longer in use. -
Page 49: Cwmp
TD-8816 ADSL2+ Modem Router User Guide My Host Name: Enter your host name here. E-mail Address: Enter your E-mail address here. Username & Password: Type the “User Name” and “Password” for your DDNS account. Wildcard support: Select the option to use Wildcard function 4.5.6 CWMP... -
Page 50: Administration
TD-8816 ADSL2+ Modem Router User Guide Figure 4-38 Click any of them, and you will be able to configure the corresponding function. 4.6.1 Administration Choose “Maintenance→Administration”, you can set new password for admin in the screen (shown in Figure 4-39). - Page 51 TD-8816 ADSL2+ Modem Router User Guide Figure 4-40 Note: The ADSL Router built-in some NTP Servers, when the Router connects to the Internet, the Router will get the system time automatically from the NTP Server. You can also configure the NTP Server address automatically, and then the Router will get the time from the specific Server firstly.
-
Page 52: Firmware
Figure 4-43 To upgrade the router's firmware, follow these instructions below: Step 1: Download a more recent firmware upgrade file from the TP-LINK website (www.tp-link.com). Step 2: Type the path and file name of the update file into the “New Firmware Location” field. Or click the Browse button to locate the update file. - Page 53 TD-8816 ADSL2+ Modem Router User Guide When you upgrade the router's firmware, you may lose its current configurations, so please back up the router’s current settings before you upgrade its firmware. Do not turn off the router or press the Reset button while the firmware is being upgraded.
-
Page 54: Sysrestart
TD-8816 ADSL2+ Modem Router User Guide Step 2: Click the UPGRADE button to complete. 4.6.4 SysRestart Choose “Maintenance→SysRestart”, you can select to restart the device with current settings or restore to factory default settings in the screen (shown in Figure 4-46). -
Page 55: Help
TD-8816 ADSL2+ Modem Router User Guide 4.7 Help Choose “Help”, you can view the help information for configuration of any function. Figure 4-48 Note: Click the tab, and you will be able to get the corresponding information. -
Page 56: Appendix A: Specifications
TD-8816 ADSL2+ Modem Router User Guide Appendix A: Specifications General ANSI T1.413, ITU G.992.1, ITU G.992.2, ITU G.992.3, ITU G.992.5 Standards and Protocols IEEE 802.3, IEEE 802.3u, TCP/IP, PPPoA , PPPoE, SNTP, HTTP, DHCP, ICMP, NAT,CWMP Safety & Emission FCC, CE 1 10/100M Auto-Negotiation RJ45 port(Auto MDI/MDIX) -
Page 57: Appendix B: Troubleshooting
TD-8816 ADSL2+ Modem Router User Guide Appendix B: Troubleshooting 1. How do I restore my Router’s configuration to its factory default settings? With the Router powered on, press and hold the RESET button on the rear panel for 8 to 10 seconds before releasing it. - Page 58 TD-8816 ADSL2+ Modem Router User Guide Click Network Connections Right-click Local Area Connection Click Properties...
- Page 59 TD-8816 ADSL2+ Modem Router User Guide Double-click Internet Protocol (TCP/IP) Select Obtain an IP address automatically Select Obtain DNS server address automatically Click OK...
- Page 60 TD-8816 ADSL2+ Modem Router User Guide Click OK...
- Page 61 TD-8816 ADSL2+ Modem Router User Guide For Windows Vista OS Go to Start > Settings >Control Panel, and then you will see the following page. Click View network status and tasks Click View status Click Properties...
- Page 62 TD-8816 ADSL2+ Modem Router User Guide Double-click Internet Protocol Version 4 (TCP/IPv4) Select Obtain an IP address automatically Select Obtain DNS server address automatically Click OK...
- Page 63 TD-8816 ADSL2+ Modem Router User Guide For Windows 7 OS Go to Start > Settings > Control Panel, and then you will see the following page. Click View network status and tasks Click Change adapter settings Right-click Local Area Connection...
- Page 64 TD-8816 ADSL2+ Modem Router User Guide Double-click Internet Protocol Version 4 (TCP/IPv4) Select Obtain an IP address automatically Select Obtain DNS server address automatically Click OK...
- Page 65 TD-8816 ADSL2+ Modem Router User Guide 2) Configure your IE browser Open your IE browser, click Tools tab and you will see the following screen. Click Internet Options Select Never dial a connection Click OK Now, try to log on to the Web-based configuration page again after the above settings have been configured.
- Page 66 Router by following the instructions of this QIG. 5) Please feel free to contact our Technical Support if the problem still exists. Note: For more details about Troubleshooting and Technical Support contact information, please log on to our Technical Support Website: http://www.tp-link.com/support/Support.asp...
-
Page 67: Appendix C: Technical Support
TD-8816 ADSL2+ Modem Router User Guide Appendix C: Technical Support Technical Support For more troubleshooting help, go to: www.tp-link.com/support/faq.asp To download the latest Firmware, Driver, Utility and User Guide, go to: www.tp-link.com/support/download.asp For all other technical support, please contact us by using the following details: Global Australia &...