Table of Contents
Advertisement
Quick Links
Download this manual
See also:
Operating Manual
5. FRONT PANEL OPERATION
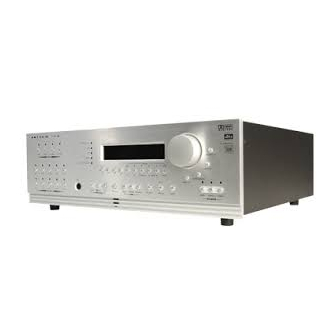
The AVM 20 is best understood as a piece of equipment that contains three components in one chassis. Path
best describes how this tremendous flexibility of the AVM 20 is arranged:
5.1
When turned on, the AVM 20 will have all of the same settings it had when it was last turned off, except for
Volume, which comes on at the pre-programmed value (see section 7.4.7).
5.2
Path routes Sources to the MAIN, ZONE2, ZONE3, or RECORD outputs.
The AVM 20 automatically returns to MAIN a few seconds after an adjustment is made in ZONE2, ZONE3,
RECORD, or HEADPHONE*. This is designed to prevent accidents. Say, for example, someone enters the
MAIN room and turns up the volume – if the AVM 20 stayed in ZONE2, then the volume would increase in
ZONE2, not MAIN. Since the person adjusting the volume doesn't hear any change, chances are he or she
would just keep turning it up and wonder what's wrong, until something potentially 'bad' happens in ZONE2.
If you've seen "The Party" and remember the hilarious scene where Peter Sellers messes with the console,
you probably understand. The timeout setting can be changed in the Setup (see section 7.4.10 menu 10.m).
* Except when MAIN is off or HEADPHONE is set to 'Mute' the MAIN speakers (see section 7.4.4 menu 4.i).
21
• It is first of all a state-of-the-art Music and Home Theater Preamplifier • Processor • Tuner
(MAIN Path) with independent Source selection for recording (RECORD Path).
• It is also a high-end Whole House Entertainment Control Center that allows you to direct and adjust
the output of a variety of source components to other rooms in your home (ZONE2 and ZONE3 Paths).
POWER ON/OFF
• MAIN On: There are various of ways of switching MAIN on:
• Press MAIN in the POWER group (fig. right).
• Press MAIN in the PATH group (fig. below).
• If ZONE2 and ZONE3 are off, press any SOURCE, FM • AM preset
(1 through 6), or TUNE to immediately power-up MAIN.
• MAIN Off: Press MAIN in the POWER group.
• ZONE2 or ZONE3 On: Press ZONE2 or ZONE3 in the POWER group or in the PATH group.
• ZONE2 or ZONE3 Off: Press ZONE2 or ZONE3 in the POWER group.
• RECORD On: Press RECORD in PATH group. MAIN will turn on simultaneously. The Front Panel
Display will show MAIN Path information (see highlighted notation in section 5.2).
• RECORD Off: Press MAIN in the POWER group. This turns off MAIN and RECORD simultaneously.
PATH SELECTION
• MAIN: As the name suggests, MAIN routes the audio/video
sources to your main listening/viewing room, with outputs for
your MAIN TV monitor and 7.1-channel audio.
• ZONE2 and ZONE3: Routes any audio/video source to other listening/viewing rooms in your home.
The chosen Source can be either the same or different from the Source selected in other paths.
ZONE2 and ZONE3 each have outputs for a TV monitor and 2-channel audio. To listen to a Source
that does not have Analog Audio-In connection, you must 'copy' it from MAIN (see section 5.2.1).
• RECORD: Allows you to record audio/video sources independently of what is selected in other
paths. Composite and S-Video, and fixed-level analog audio outputs are available for your tape
recorder and VCR. In addition, there are two configurable coaxial digital outputs: DIGITAL1 can be
set to output the audio of any digital Source, or convert an analog Source to digital (must be set to
Anlg-DSP in the Setup). DIGITAL2 can be set to output the same signal as DIGITAL1, or any of the
Sources set to Digital. See sections 7.4.2 and 7.4.3 for an explanation on how to set input and output
formats. As with ZONE2 and ZONE3, RECORD only operates with an analog input or by 'copying'
MAIN (see section 5.2.1).
LOGIC
Advertisement
Table of Contents

Related Manuals for Anthem AVM 20


Summary of Contents for Anthem AVM 20
-
Page 1: Front Panel Operation
(ZONE2 and ZONE3 Paths). POWER ON/OFF When turned on, the AVM 20 will have all of the same settings it had when it was last turned off, except for Volume, which comes on at the pre-programmed value (see section 7.4.7). - Page 2 ZONE3, TAPE, and VCR outputs. This can be done by the DVD player or the AVM 20: • AVM 20 Down-mix: If the digital audio output from your DVD player is connected to the AVM 20, the 2-channel down-mix from Dolby Digital or DTS will be done by the AVM 20 whenever you copy MAIN to ZONE2, ZONE3, or RECORD.
- Page 3 5.4.2 FM • AM TUNER The AVM 20 has a built-in FM • AM tuner, which is common to all Paths. The station that is selected in either MAIN, ZONE2, ZONE3, or RECORD is automatically shared with all other Paths.
-
Page 4: Volume Control
Some of these discs exhibit prodigious levels of bass, and may need LFE adjustment. The AVM 20 memorizes all speaker level settings for each of Dolby Digital, Dolby Pro Logic, DTS, Stereo (including Music Modes), and for the 6-Ch S/E input. This eliminates the need to constantly adjust individual speaker levels when changing different types of source material. -
Page 5: Bass / Treble / Balance
Mode that can be applied – Dolby Digital EX (for DD-5.1) and DTS Neo:6 (for DTS-5.1). To make operation easier, these can only be turned on or off after the movie has started and the AVM 20 has detected the format. As soon as the display reads either DD-5.1 or DTS-5.1, you can set the additional surround mode On or Off –... - Page 6 (Speaker Configuration menu – section 7.4.4), rear channel information will not be lost, but will remain in the L/R Surround speakers. LOGIC 5.8.1 AnthemLogic ™ These are proprietary surround modes developed by Anthem that offer outstanding surround performance and can be applied to any 2-channel source material: AnthemLogic-Music ™ AnthemLogic-Music ™...
-
Page 7: Surround Modes For Stereo Source Material
Signal is unchanged. DVDs flagged for Dolby Pro Logic automatically override this. AnthemLogic-Music: 6.1 – One of Anthem’s proprietary surround modes specifically designed to expand the stereo soundstage of stereo music in a very natural way without any loss of soundstage integrity or image focus. The Center channel is not used. -
Page 8: Dolby Digital Ex
Note: To use Dolby Digital EX without THX processing, THX Ultra2 must be ‘Off’ (see section 5.8.6). 5.8.4 DTS-ES MATRIX All DVDs encoded with DTS-ES Matrix contain the ES-Matrix flag. The AVM 20 automatically engages DTS-Neo:6 to decode DTS-ES Matrix. Neo:6 can also be turned on and applied to DTS-5.1 channel material that is not DTS-ES Matrix encoded –... - Page 9 5. FRONT PANEL OPERATION continued … • ASA (Advanced Speaker Array) – ASA is a proprietary THX technology which processes the sound fed to the two surround and two rear speakers to provide an optimal surround sound experience. When you set up your home theater system using all 7.1 speaker outputs (L-Front, Center, R-Front, R-Surround, R-Rear, L-Rear, L-Surround, Subwoofer), placing the two Rear speakers close together will provide the largest sweet spot.
- Page 10 THX Surround EX mode. The AVM 20 also allows you to engage THX Surround EX during the playback of 5.1 channel material that is not Dolby Digital EX encoded. The information delivered to the Rear channel will be program dependent and may or may not be very pleasing depending on the particular soundtrack and your individual listening tastes.
- Page 11 Pro Logic or Neo:6 Cinema, however THX can not be applied to any other surround mode. * DVDs with Dolby Digital Surround EX may be flagged for auto-detection by the AVM 20. § DVDs with DTS-ES Matrix and DTS-ES Discrete are flagged for auto-detection by the AVM 20.
- Page 12 5. FRONT PANEL OPERATION continued … 5.8.7 Mode and THX Operation for Stereo Program Material (THX operation is optional) Note: THX must be Off for all Surround Modes on this page to be available (see section 5.8.6). Stereo Program Press Mode Cycle Through Modes: Select using MCK (or N/S keys on remote control –...
- Page 13 5. FRONT PANEL OPERATION continued … 5.8.8 Mode and THX Operation for Dolby Digital 5.1 Program Material (THX operation is optional) THX Options Dolby Digital 5.1 Press THX THX Ultra2: On using MCK (or N/S keys) Press THX 2nd Time Cycles THX Modes: Select using MCK (or N/S keys) THX Cinema Processing –...
- Page 14 5. FRONT PANEL OPERATION continued … 5.8.9 Mode and THX Operation for DTS Program Material (THX operation is optional) DTS 5.1 DTS Neo:6: On using MCK (or N/S keys on remote control – see section 6) Press Mode Output channels – 6.1 (LF, C, RF, RS, LS, Rear, LFE/Sub) THX Options DTS 5.1 Press THX...
-
Page 15: Front Panel Display
5. FRONT PANEL OPERATION continued … 5.8.10 DYNAMICS This feature allows you to control the difference between the softest and loudest passages on certain DVDs, depending on whether or not they contain dynamic scaling information. Press DYNAMICS and then use the Master Control Knob to cycle through the following settings: Normal: Reproduces the full dynamic range of the recording without changing it.
Need help?
Do you have a question about the AVM 20 and is the answer not in the manual?
Questions and answers