Table of Contents
Advertisement
Quick Links
Advertisement
Table of Contents

Related Manuals for MF DIGITAL P-55


Summary of Contents for MF DIGITAL P-55
- Page 1 Rev. 6-22-07...
-
Page 2: Unpacking And Inspection
Unpacking and Inspection The packing-case contains the following items, as well as the P-55 itself. Please make certain that all the items are present. Accessories for P-55 Utility Software CD-ROM "Before Getting Started" (including Operation Manual, Printer Driver and Disc Label Editor) - Page 3 To prevent the product from being damaged in shipment, install the shipping protection materials in reverse order to the removal procedure. The P-55 is a precision machine. Be careful not to drop or subject the unit to severe impact (it weighs more than 22 kg).
-
Page 4: Identifying The Parts
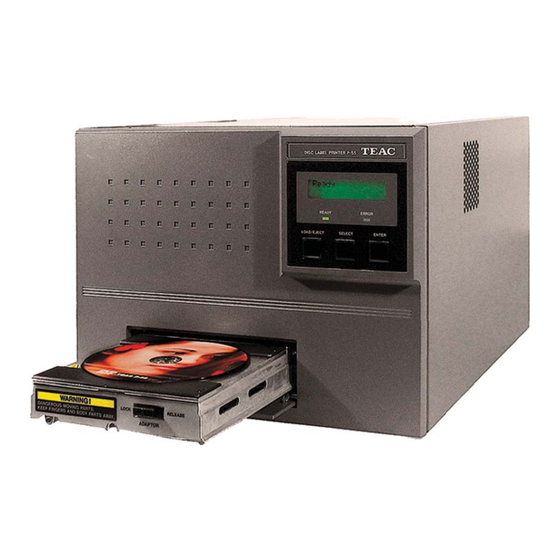
Identifying the Parts Exhaust Fan (on the right side) This is an air outlet for dropping the temperature inside the unit. Do not let foreign objects get in through this opening, or the results may be damage to the unit and could hazardous to the operator. - Page 5 Identifying the Parts STATUS AUX Connector (optional) This connector allows connection of the P-55 to an external device for the combined use with the robotics system. *Please contact us before use. Parallel Port Multi-connector This provides a parallel interface between your PC's printer port and the P-55 over the supplied printer cable.
-
Page 6: Section 10 : Installing The Printer Driver
SECTION 10 : Installing the Printer Driver If both the PC and P-55 are on before installing the driver, turn off the PC first and then the P-55, Then, turn on the P-55 first and then the PC again. The window Found New Hardware Wizard appears on the screen. - Page 7 Allows the P-55 to create PRN files (*Note1) when the P-55 is offline or not connected to your Windows computer. You need to specify the ribbon type you want to use in Printing Preferences as the P-55 does not communicate directly with your PC for the information.
- Page 8 When The P-55 and Duplicator Are Purchased Together The SureThing Software Is Pre-Installed At The Factory* *2000 & 9000 Series Only 1. Place CD in Drive. Installation will start automatically. 2. Click “I Accept” to the licensing and warranty information.
- Page 9 3. Click “ Next” to begin software installation. 4. Click “ Next” to add a shortcut to your desktop and start menu.
- Page 10 5. Click “N ext” to Complete the software installation. 6. When installation is complete, click “ Finish” to exit, and Double Click the Sure Thing icon on your desktop.
-
Page 11: Important Notes
If print image exceeds 600 dpi, a .PRN file must be used. Note: When submitting the PDF file to print, please make sure the Default printer is the P-55. (For Example If printing to P55 - P55 must be the default printer) Any Questions Please Contact... - Page 12 Creating an STD file 1. Open SureThing CD Label Software as shown in Fig. 1. 2. Add text and images to your label. 3. Save the STD file that you just created and you are ready to go!
- Page 13 ________________________________________________ Note: For information on creating .PRN files, Please see your user manual. The user manual is located on the User Manual CD that came with your MF Digital Duplicator. ________________________________________________...
-
Page 14: Loading Ribbons
Loading Ribbons 2. Loading Ink Ribbon Ink Ribbon Cartridge 1) Flip up the lock lever that holds the Ink ribbon cartridge in place. 2) Take out the ink ribbon cartridge by Pulling it toward you. 3) Take the ink ribbon out from the package And remove all the pads from the ribbon as Shown on the left. - Page 15 NOTE If you perform the next step without taking up ribbon slack, there is a chance that the ribbon might be broken. Mount the ink ribbon cartridge in the P-55 itself. When mounting the ribbon cartridge, push it directly and slowly. If you try to force it in slantwise, there is a chance that the ribbon might be broken.
- Page 16 Loading Ribbons 3. Loading Re-transfer Ribbon Flip up the lock lever that holds the Re-transfer Ribbon Cartridge re-transfer ribbon cartridge in place. Take out the re-transfer ribbon cartridge by pulling it toward you 3) Take the transfer ribbon out from the package and remove all the pads from the ribbon as shown on the left.
- Page 17 If you perform the next step without taking up ribbon slack, there is a chance that the ribbon might be broken. Mount the re-transfer ribbon cartridge in the P-55 itself. When mounting the ribbon cartridge, push it directly and slowly. If you try to force it in...
- Page 18 - Caution in ribbon replacement: It is imperative to take out the cartridge from the P-55. If you try to force the ribbon replacement with the cartridge mounted, there is a chance that the ribbon or components involved might be damaged.
- Page 19 (The remaining ribbon amount shown on the LCD is not absolute but just a rough "barometer".) *The P-55 displays the remaining ink level for the ink ribbon as “INK FF%” if no single print operation is performed after the P-55 is turned on.
-
Page 20: Re-Order Information
Re-Order Information P55 Dye Sublimation Re-Transfer Printer Supplies P55-CRS -- Color Ribbon Set 500 - 1 color (500) & 1 transfer (500) P55-PRS -- Photo Ribbon Set 500 - 1 photo (500) & 1 transfer (500) P55-BR -- Black Ribbon 2000 - NO transfer (order 2 P55-TR) P55-TR -- Transfer Ribbons 1000 - 2 ea.Transfers (500) P55-CK -- P55 Cleaning Kit P55-CINK -- Ribbon Rack for Color &...
Need help?
Do you have a question about the P-55 and is the answer not in the manual?
Questions and answers