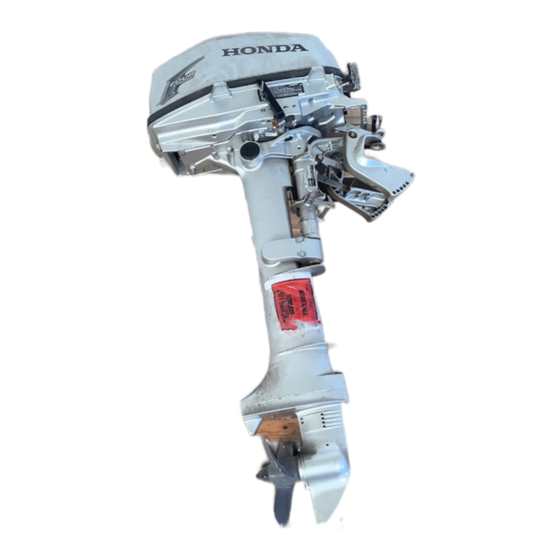
Honda BF5A Owner's Manual
Hide thumbs
Also See for BF5A:
- Owner's manual (103 pages) ,
- Owners manualyamna (88 pages) ,
- Owner's manual (90 pages)
Table of Contents
Advertisement
Quick Links
Download this manual
See also:
Owner's Manual
Advertisement
Table of Contents

Related Manuals for Honda BF5A


Summary of Contents for Honda BF5A
- Page 1 OvVner’s Manual Outboard Motor BFSA 01997 American Honda Motor Co., Inc. - All Rights Reserved...
- Page 2 The engine exhaust from this product contains chemicals known to the State defects or other reproductive harm. Keep this owner’s manual handy, so you can refer to it at any time. This owner’s manual is considered a permanent part of the outboard motor and should remain with the outboard motor if resold.
- Page 3 INTRODUCTION Congratulations on your selection of a Honda outboard motor. We are certain you will be pleased with your purchase of one of the finest outboard motors on the market. We want to help you get the best results from your new outboard motor and to operate it safely.
- Page 4 INTRODUCTION A FEW WORDS ABOUT SAFETY Your safety and the safety of others are very important. And using this outboard motor safely is an important responsibility. To help you make informed decisions about safety, we have provided operating procedures and other information on labels and in this manual. This information alerts you to potential hazards that could hurt you or others.
-
Page 5: Table Of Contents
CONTENTS MOTOR SAFETY ..............OUTBOARD IMPORTANT SAFETY INFORMATION ..........7 Operator Responsibility ..............7 Refuel With Care ................Carbon Monoxide Hazard ..............8 SAFETY LABEL LOCATIONS .............. .9 ..............CONTROLS & FEATURES COMPONENT & CONTROL LOCATIONS .......... 10 CONTROLS ..................Engine Stop Switch ................ - Page 6 CONTENTS INSTALLATION (continued) MOTOR ANGLE FOR CRUISING ............20 MOTOR ANGLE ADJUSTMENT .
- Page 7 CONTENTS SERVICING YOUR HONDA OUTBOARD MOTOR (continued) TOOL KIT AND SPARE PARTS ............39 MAINTENANCE SCHEDULE .............. 40 REFUELING..................FUEL RECOMMENDATIONS ............. .42 COOLING SYSTEM CLEANING AND FLUSHING ......43 Cleaning and Flushing With the Flush Kit........43 Cleaning and Flushing Without the Flush Kit..
- Page 8 CONTENTS INFORMATION CONSUMER TECHNICAL’& ........TECHNICAL INFORMATION............... 63 Serial Number Locations ..............Carburetor Modification for High Altitude Operation ......64 Oxygenated Fuels................65 Emission Control System Information..........66 Specifications................... WIRING DIAGRAMS ................CONSUMER INFORMATION .............. 71 Honda Publications ................
-
Page 9: Outboard Motor Safety
OUTBOARD MOTOR SAFETY IMPORTANT SAFETY INFORMATION Honda BF5A outboard motor is designed for use with boats that have a suitable manufacturers power recommendation, and other uses can result in injury to the operator or damage to the outboard motor and other property. Most accidents can be prevented if you follow all instructions in this manual and on the outboard motor. -
Page 10: Refuel With Care
OUTBOARD MOTOR SAFETY Refuel With Care Gasoline is extremely flammable, and gasoline vapor can explode. Refuel outdoors, in a well-ventilaed area, with the engine stopped. Never smoke near gasoline, and keep other flames and sparks away. Remove any portable fuel tank from the boat for refueling. Keep the portable fuel tank away from the battery or other potential spark sources. -
Page 11: Safety Label Locations
OUTBOARD MOTOR SAFETY SAFETY LABEL LOCATIONS The labels shown here contain important safety information. Please read them carefully. These labels are considered permanent parts of your out- board motor. If a label comes off or becomes hard to read, contact an authorized Honda servicing dealer for a replacement. -
Page 12: Controls & Features
CONTROLS & FEATURES COMPONENT & CONTROL LOCATIONS GEARS IFT LEVER CHOKE KNOB ENGINE COVER ENGINE STOP TILT LEVER TRANSOM ANGLE ADJUSTING ROD ‘TOP MERGENCY ENGINE S ANTICAVITATION PLATE EMERGENCY ENGINE STOP SWITCH LANYARD PROPELLER FUEL GAUGE VENT KNOB FUEL TANK FUEL CAP FUEL HOSE PRIMING BULB... - Page 13 CONTROLS & FEATURES OIL FILLER CAP SPARK PLUG STARTER GRIP THROlTLE GRIP ENGINE COVER LOCK LEVER FRICTION KNOB WATER CHECK HOLE OIL PRESSURE INDICATOR LAMP ENGINE OIL DRAIN PLUG CLAMP SCREW STERN BRACKET - FLUSHlfrG PORT STEERING FRlCTlON ANODE BOLT GEAR OIL LEVEL PLUG EXHAUST GEAR OIL DRAIN PLUG...
-
Page 14: Controls
CONTROLS & FEATURES CONTROLS Engine Stop Switch ENGINE STOP SWITCH The engine stop switch has controls for normal engine stopping and emergency engine stopping. In normal operation, press the en- gine stop button to stop the engine. A clip and lanyard system stops the engine automatically if the operator falls away from the controls. -
Page 15: Throttle Grip
Throttle Grip The throttle grip controls engine INDEX MARK speed. An index mark on the tiller arm indicates throttle position. The gearshift mechanism limits throttle grip movement when the gearshift lever (p. 14) is in the R THROlTLE GRIP (reverse) or N (neutral) position. Throttle Friction Knob The throttle friction knob adjusts THROl-fLE... -
Page 16: Gearshift Lever
CONTROLS & FEATURES Gearshift Lever The gearshift lever is used to select F (forward), N (neutral), or R (re- verse) gears. The engine can be started with the gearshift lever in the N (neutral) position only. If the gearshift lever is in the F (forward) or R (reverse) position, GEARSHIFT LEVER the recoil starter will not operate. -
Page 17: Steering Friction Bolt
CONTROLS & FEATURES Steering Friction Bolt STEERING FRICTION BOLT The steering friction bolt adjusts steering resistance. iASE Turn the bolt clockwise to increase friction for holding a steady course while cruising or to prevent the out- TO INCREASE board motor from swinging while trailering the boat. -
Page 18: Transom Angle Adjusting Rod
CONTROLS & FEATURES Transom Angle Adjusting Rod The transom angle adjusting rod is used to adjust the angle of the out- board motor in the normal operating position (see page 21). To adjust, first tilt the outboard mo- tor, so it is not resting on the rod. Push the rod in, and turn the end of TRANS6M ANGLE the rod up, so the latch will fall into... -
Page 19: Fuel Priming Bulb
CONTROLS & FEATURES Fuel Priming Bulb A priming bulb is built into the fuel hose that connects the portable fuel tank to the outboard motor. PRIMING BULB Before operating the outboard mo- tor, squeeze the priming bulb until it feels firm. This will ensure that fuel is supplied to the engine (see page 24). -
Page 20: Anode
CONTROLS ‘& FEATURES Anode The anode is a sacrificial material which helps to protect the outboard motor from corrosion. -
Page 21: Installation
INSTALLATION It is your responsibility to choose a boat suitable for the outboard motor. INSTALLATION POSITION STERN CENTER Install at the stern, at the center line of the boat. INSTALLATION HEIGHT For proper propeller depth and engine cooling, the boats transom height must match the motor’s shah length. -
Page 22: Outboard Motor Attachment
INSTALLATION OUTBOARD MOTOR ATTACHMENT Attach the stern bracket to the tran- som and tighten the clamp screws. Before operating the boat, check the tightness of the clamp screws. Tie a rope through the hole in the stem bracket and secure the other CLAMP SCREW end of the rope to the boat. -
Page 23: Motor Angle Adjustment
MOTOR ANGLE ADJUSTMENT If the propeller shaft is not parallel with the water surface, adjust by changing the transom angle adjust- ing rod position. There are four adjusting stages. 1. Push in (A) the adjusting rod, twist upwards (B) and pull out to TRANSdM ANGLE remove. -
Page 24: Before Operation
BEFORE OPERATION ARE YOU READY TO GET UNDERWAY? Your safety is your responsibility. A little time spent in preparation will significantly reduce your risk of injury. Knowledge Read and understand this manual. Know what the controls do and how to operate them. -
Page 25: Safety Inspection
BEFORE OPERATION Safety Inspection Look around for signs of oil or gasoline leaks. Make sure the fuel tank is in good condition and properly secured in the boat (see page 24). Check that the fuel hose is undamaged and properly connected (see page 25). Wipe up any spills before starting the engine. -
Page 26: Operation
OPERATION SAFE OPERATING PRECAUTIONS To safely realize the full potential of this outboard motor, you need a complete understanding of its operation and a certain amount of practice with its contfols. Before operating the outboard.motor for the first time, please review the on page 7 and the chapter titled IMPORTANT SAFETY... -
Page 27: Fuel Hose Connections
OPERATION To ensure that the outboard motor VFNT KNOB will be able to draw fuel from the tank, place the tank within 6 feet of the outboard motor and not more FUEL than 3 feet below the fuel connector TANK on the outboard motor. -
Page 28: Starting The Engine
OPERATION STARTING THE ENGINE 1. Put the emergency engine stop switch clip in the engine stop switch, and attach the lanyard to your wrist. The engine will not start or run, unless the clip is in the switch. The emergency engine stop switch clip and lanyard system is a safety device that will stop the engine if you fall away from the controls while operating the boat. - Page 29 3. Align the throttle grip START position with the mark on the tiller handle. MARK THROTTLE GRIP 4. To start a cold engine, pull out the choke knob. To restart a warm engine, leave the choke knob pushed in. CHOKE KNOB 5.
- Page 30 6. After starting, check the oil pressure indicator light. The light should be on while the engine is running. If the light is off, stop the engine immediately, check the engine oil level, and inspect the engine for oil leaks. OIL PRESSURE INDICATOR LIGHT If the oil level is OK, but the light stays off while the engine is running, take the motor to an authorized Honda marine dealer immediately.
- Page 31 OPERATION 7. After starting, be sure water is flowing out of the water check hole. If water does not flow out, or if steam comes out, stop the engine. check to see if the screen in the cooling water inlet is obstructed. Do not operate the engine until the problem has been corrected.
-
Page 32: Emergency Starting
OPERATION EMERGENCY STARTING If the recoil starter is not working properly, the engine can be started with the spare starter rope in the tool kit. 1. Remove the engine cover. 2. Follow steps 1 through 4 of the normal engine starting procedure (see pages 26 and 27). -
Page 33: Stopping The Engine
OPERATION STOPPING THE ENGINE Emergency Engine Stopping Disengage the emergency engine stop switch clip from the engine stop switch by pulling the lanyard. It is a good idea to stop the engine with the emergency engine stop switch lanyard from time to time to be sure that the switch is operating properly. ENGINE STOP SWITCH LANYARD EMEiiGENCY ENGINE STOP... -
Page 34: Gear Shifting
OPERATION GEAR SHIFTING Put the tilt lever in the RUN position to prevent the outboard motor from tilting up when operating in reverse (refer to page 35). The gearshift lever has 3 positions : FORWARD, NEUTRAL, and REVERSE. An indicator at the base of the gearshift lever aligns with letters F, N, or R on the engine case to show the gear that has been selected. -
Page 35: Steering
OPERATION STEERING To turn to the right, swing the tiller handle to the left. To turn to the left, swing the tiller handle to the right. Boats equipped with a remove control steering wheel are controlled in the same way as a car. RIGHT TURN LEFT TURN Swing the tiller handle to the right. -
Page 36: Cruising
OPERATION CRUISING FORWARD With the gearshift lever in the for- ward position F, turn the throttle grip toward FAST to increase speed. For normal cruising, open the throttle about 314. To hold the throttle at a steady set- ting, turn the throttle friction knob GEARsHIFT LEVER clockwise. -
Page 37: Tilting The Outboard Motor
TILTING THE OUTBOARD MOT& Tilt the motor prevent the propeller and gear case from hitting bottom when the boat is beached or stopped in shallow water. 1. Stop the engine and put the gearshift lever into NEUTRAL. 2. Pull the tilt lever toward you, set the lever in the TILT position, and raise the engine to either the 30“, 45”... - Page 38 OPERATION pcciEq To avoid damaging the motor, be very careful when mooring a boat, especially when its motor is tilted up. Don’t allow the motor to strike against the pier or other boats.
-
Page 39: Servicing Your Honda Outboard Motor
SERVICING YOUR HONDA OUTBOARD MOTOR THE IMPORTANCE OF MAINTENANCE Good maintenance is essential for safe, economical, and trouble-free opera- tion. It will also help reduce air pollution. improperly maintaining this outboard motor, or failure to correct a problem before operation, can cause a malfunction in which you can be seriously hurt or killed. -
Page 40: Maintenance Safety
SERVICING YOUR HONDA OUTBOARD MOTOR MAINTENANCE SAFETY Some of the most important safety precautions follow. However, we cannot warn you of every conceivable hazard that can arise in performing mainte- nance. Only you can decide whether or not you should perform a given task. Failure to properly follow maintenance instructions and precautions can cause you to... -
Page 41: Tool Kit And Spare Parts
SERVICING YOUR HONDA OUTBOARD MOTOR TOOL KIT AND SPARE PARTS The following tools and spare parts are supplied with the outboard motor for maintenance, adjustment, and emergency repairs. Spare shear pins and cotter pins are located near the oil filler cap inside the engine cover. -
Page 42: Maintenance Schedule
SERVICING YOUR HONDA OUTBOARD MOTOR MAINTENANCE SCHEDULE REGULAR SERVICE PERIOD (3) EACH ITEM Perform at every indicated month or operating hour inter- vals, whichever comes first. Engine oil Check level Change Gear case oil Check level Change Check for water contamination Check Starter rope... -
Page 43: Refueling
SERVICING YOUR HONDA OUTBOARD MOTOR REFUELING Fuel tank capacity 3.2 US gal (12.0 4,2.6 Imp gal) SAFE FILL LEVEL FiJEL GAUGE Check the fuel gauge and refill the tank to the SAFE FILL LEVER mark if necessary. Gasoline is highly flammable and explosive. You can be burned or seriously injured when handling fuel. -
Page 44: Fuel Recommendations
SERVICING YOUR HONDA OUTBOARD MOTOR FUEL RECOMMENDATIONS Use unleaded gasoline with a pump octane rating of 86 or higher. This outboard motor is certified to operate on unleaded gasoline. Unleaded gasoline produces fewer engine and spark plug deposits and extends exhaust system life. -
Page 45: Cooling System Cleaning And Flushing
SERVICING YOUR HONDA OUTBOARD MOTOR COOLING SYSTEM CLEANING AND FLUSHING After each use in salt water or dirty water, thoroughly clean and flush the outboard motor. For safety, the propeller must be removed. Be sure the outboard motor is securely mounted, and do not leave it unattended while running. -
Page 46: Cleaning And Flushing Without The Flush Kit
SERVICING YOUR HONDA OUTBOARD MOTOR Cleaning and Flushing Without the Flush Kit 1. Wash the outside of the outboard motor with clean, fresh water. 2. Remove the propeller. 3. Stand the motor in a suitable container of water. The water level must be at least 2 inches above the anticavitation plate. -
Page 47: Engine Oil Level Check
ENGINE OIL LEVEL CHECK Check the engine oil level with the engine stopped and the outboard motor in a vertical position. 1. Move the engine cover lock lever down to unlock the cover, and remove the cover. 2. Remove the oil filler cap/dipstick and wipe it clean. Insert and remove the dipstick without screwing it into the filler neck. -
Page 48: Engine Oil Change
SERVICING YOUR HONDA OUTBOARD MOTOR ENGINE OIL CHANGE Drain the used oil while the engine is warm. Warm oil drains quickly and completely. 1. Move the engine cover lock lever (p. 45) down to unlock the cover, and remove the cover. 2. -
Page 49: Engine Oil Recommendations
SERVICING YOUR HONDA OUTBOARD MOTOR ENGINE OIL RECOMMENDATIONS Oil is a major factor affecting performance and service life. Use 4-stroke automotive detergent oil. SAE 1 OW-30 is recommended for general use. Other viscosities shown in the chart may be used when the average temperature in your area is within the recommended range. -
Page 50: Gear Oil Level Check
SERVICING YOUR HONDA OUTBOARD MOTOR GEAR OIL LEVEL CHECK Check the oil level when the motor is in the vertical position. Remove the level plug and see if oil flows out. If no oil flows out, use a commercially available oil pump or squeeze tube to fill the gear case with gear oil recommended on page 49. -
Page 51: Gear Oil Change
SERVICING YOUR HONDA OUTBOARD MOTOR GEAR OIL CHANGE Recommended oil : Marine SAESO hypoid gear oil API Service Classification (GL-4 or GL-5) Oil Capacity : 0.1 US qt (0.1 !, 0.1 Imp qt) Remove the level plug and drain plug and allow the gear oil to thoroughly drain into a suitable container. -
Page 52: Lubrication
SERVICING YOUR HONDA OUTBOARD MOTOR LUBRICATION Apply marine anticorrosion grease to the following areas: THROTTLE CABLE AND PIVOT SHIFT SHAFT AND PIVOT SWIVEL CASE TILLER HANDLE PIVOT TlLT LINKAGE CLAMP SCREWS TILT RELEASE LEVER AND PROPELLER SHAFT REVERSE LOCK LEVER Apply anticorrosion oil to pivot surfaces where grease cannot penetrate. -
Page 53: Spark Plug Service
SPARK PLUG SERVICE Recommended spark plug: BPRSES (NGK), WlGEPR-U (DENSO) W14EPR-iJ (DENSO) Remove the engine cover. Remove the spark plug cap. Use the wrench supplied in the tool kit to remove the spark plug. Visually inspect the spark plug. Discard the spark plug if there is apparent wear, or if the insulators are cracked or chipped. -
Page 54: Fuel Filter Replacement
SERVICING YOUR HONDA OUTBOARD MOTOR 6. Check that the spark plug washer are in good condition, and thread the spark plug in by hand to prevent cross-threading. 7. After the spark plug are seated, tighten with a spark plug wrench to compress the washer. - Page 55 SERVICING YOUR HONDA OUTBOARD MOTOR Disconnect the fuel tank line from the motor. Remove the engine cover, and remove the fuel filter. Before removing the filter, place clamps on the fuel tubes on each side of the filter to prevent fuel leakage.
-
Page 56: Recoil Starter Rope Inspection
SERVICING YOUR HONDA OUTBOARD MOTOR RECOIL STARTER ROPE INSPECTION Inspect the recoil starter rope, and replace it if it becomes frayed. Always keep the tool kit’s emer- gency starter rope onboard in case the recoil starter rope fails. ANODE REPLACEMENT The anode is a sacrificial material ANODE which helps to protect the outboard... -
Page 57: Shear Pin Replacement
SERVICING YOUR HONDA OUTBOARD MOTOR SHEAR PIN REPLACEMENT A shear pin is used to protect the propeller and drive mechanism from damage when the propeller strikes an obstruction. 1. Remove the cotter pin, the propeller cap, and the propeller. 2. Remove the broken shear pin and replace it with a new one. 3. -
Page 58: Helpfultips & Suggestions
HELPFULTIPS & SUGGESTIONS STORING YOUR OUTBOARD MOTOR Storage Preparation Proper storage preparation is essential for keeping your pump troublefree and looking good. The following steps will help to keep rust and corrosion from impairing your outboard motor’s function and appearance, and will make the engine easier to start when you use the outboard motor again. - Page 59 HELPFUL TIPS & SUGGESTIONS 1. Disconnect the fuel hose from the outboard motor. 2. With the outboard motor in a vertical position, place an approved gasoline container below the fuel drain outlet, and use a funnel to avoid spilling fuel. Loosen the drain screw to drain fuel from the carburetor.
-
Page 60: Storage Precautions
HELPFULTIPS & SUGGESTIONS Storage Precautions Select a welllventilated storage area. If possible, avoid storage areas with high humidity. If your portable fuel tank contains gasoline, store it away from any appliance that operates with a flame, such as a furnace, water heater, or clothes dryer. Also avoid any area with a spark-producing electric motor, or where power tools are operated. -
Page 61: Removal From Storage
HELPFULTIPS & SUGGESTIONS Removal From Storage Check your outboard motor as described in the BEFORE OPERATION chapter of this manual. If the cylinder was coated with oil during storage preparation, the engine may smoke briefly at startup. This is normal. TRANSPORTING When trailering a boat with the outboard motor attached, leave the engine in the normal running position, if possible, and tighten the steering friction bolt... -
Page 62: Taking Care Of Unexpected Problems
TAKING CARE OF UNEXPECTED PROBLEMS ENGINE WILL NOT START 1. Is the emergency stop switch clip in place? 2. Is the gearshift lever in neutral? 3. Is there fuel in the fuel tank? 4. Is the fuel cap vent knob turned to open? 5. -
Page 63: Submerged Motor
TAKING CARE OF UNEXPECTED PROBLEMS SUBMERGED MOTOR A submerged motor must be serviced immediately after it is recovered from the water in order to minimize corrosion. If there is a Honda marine dealership nearby, take the motor immediately to the dealer. If you are far from a dealership, proceed as follows: 1. - Page 64 TAKING CARE OF UNEXPECTED PROBLEMS 5. Pour a teaspoon of engine oil into each spark plug hole, then pull the recoil starter several times to lubricate the inside of the cylinders. Reinstall the spark plugs and engage the emergency engine stop switch clip with the engine stop switch.
-
Page 65: Technical'& Consumer Information
TECHNICAL & COljJSUMER INFORMATION TECHNICAL INFORMATION Serial Number Locations ENGINE SERIAL NUMBER Record the engine and frame serial numbers in the space below. You will need these serial numbers when ordering parts, and when making technical or waranty inquiries (see page 72). Engine serial number: Frame serial number:... -
Page 66: Carburetor Modification For High Altitude Operation
TECHNICAL & CONSUMER INFORMATION Carburetor Modification for High Altitude Operation At high altitude, the standard carburetor air-fuel mixture will be too rich. Performance will decrease, and fuel consumption will increase. A very rich mixture will also foul the spark plug and cause hard starting. High altitude performance can be improved by specific modifications to the carburetor. -
Page 67: Oxygenated Fuels
TECHNICAL & CONSUMER INFORMATION Oxygenated Fuels Some conventional gasolines are being blended with alcohol or an ether compound. These gasolines are collectively referred to as oxygenated fuels. To meet clean air standards, some areas of the United States and Canada use oxygenated fuels to help reduce emissions. -
Page 68: Emission Control System Information
TECHNICAL & CONSUMER INFORMATION Emission Control System Information Source of Emissions The combustion process produces carbon monoxide, oxides of nitrogen, and hydrocarbons. Control of hydrocarbons and oxides of nitrogen is very impor- tant because, under certain conditions, they react to form photochemical smog when subjected to sunlight. - Page 69 TECHNICAL & CONSUMER INFORMATION Problems That May Affect Emissions If you are aware of any of the following symptoms, have your engine inspected and repaired by your servicing dealer. Hard starting or stalling after starting. Rough idle. Misfiring or backfiring under load. Afterburning (backfiring).
-
Page 70: Specifications
TECHNICAL & CONSUMER INFORMATION Specifications 1 BFSA Model 1 S Model BADS Description code L Model BADL kW (5 HP) 4,000 - 5,000 rpm Recommended full throttle range 4-stroke. vertical, single cylinder, OHV type 7.7 cu-in (127 cm3) 0.028 - 0.031 in (0.70 - 0.80 mm) Recoil starter Transisterized magneto Trochoid pump pressure lubrication... - Page 71 TECHNICAL & CONSUMER INFORMATION Tuneup Spark plug gap 0.028-0.031 in (0.70-0.80 mm) See page 51. Idle speed l,lOOf50rpm See shop manual. Valve clearance Intake: 0.12 f 0.02 mm See shop manual. 0.20 f 0.02 mm (cold) Exhaust: Other specifications No other adjustments needed.
-
Page 73: Consumer Information
TECHNICAL & CONSUMER INFORMATION CONSUMER INFORMATION Honda Publications These publications will give you additional information for maintaining and repairing your engine. You may order them from your Honda marine dealer. Shop Manual This manual covers complete maintenance and overhaul procedures. It is intended to be used by a skilled technician. -
Page 74: Warranty Service Information
TECHNICAL & CONSUMER INFORMATION Warranty Service Information Honda marinedealership personnel are trained professionals. They should be able to answer any question you may have. If you encounter a problem that your dealer does not solve to your satisfaction, please discuss it with the dealership’s management. - Page 75 Current customer service contact information: Your owner's manual was written to cover most of the questions you might ask about your Honda. Any questions not answered in the owner's manual can be answered by your Honda dealer. If your dealer doesn't have an immediate answer, they should be able to get it for you.
-
Page 76: Index
INDEX ..............................Anode ANODE REPLACEMENT ........................BEFORE OPERATION ........................ARE YOU READY TO GET UNDER WAY? ................... Knowledge ........................... 22 Safety Apparel ..........................IS YOUR OUTBOAf3D MO-I-OR READY TO GO? ................22 Maintenance Inspection ......................23 Safety Inspection ......................... BREAK-IN PROCEDURE ....................... - Page 77 INDEX Emergency Engine Slopping ....................... Emission Control System Information ....................Engine Cover Lock Lever ........................Engine Stop Switch ..........................FEATURES ............................Anode.............................. Fuel Gauge ............................Oil Pressure indicator Light ......................Water Check Hole ........................... FUEL FILTER REPLACEMENT ......................FUEL RECOMMENDATIONS ......................Fuel Cap Vent Knob ..........................
- Page 78 INDEX Maintenance Inspection ........................MAINTENANCE SAFETY ........................Safety Precautions ................................. MAINTENANCE SCHEDULE MOTOR ANGLE ADJUSTMENT......................MOTOR ANGLE FOR CRUISING....................... Normal Engine Stopping ........................Oil Pressure Indicator Light ......................... OPERATION ............................BREAK-IN PROCEDURE ....................... 24 CRUISING ............................EMERGENCY STARTING ......................
- Page 79 INDEX SAFE OPERATING PRECAUTIONS ....................SAFETY, A FEW WORDS ABOUT ....................... Safety Inspection ..........................SAFETY, OUTBOARD MOTOR ......................IMPORTANT SAFETY INFORMATION..................... Carbon Monoxide Hazard ......................Operating Responsibility ....................... Refuel With Care ........................... SAFETY LABEL LOCATIONS ......................SHEAR PIN REPLACEMENT ..................:.
-
Page 80: Quick Reference Information
QUICK REFERENCE INFORMATION Unleaded gasoline with a pump octane Type rating of 86 or higher (page 42) Fuel 3.2 US gal (12.0 Q) Capacity SAE 1 OW-30, API SF or SG, for general Type use (page 50) Engine Oil Capacity 0.58 US qt (0.55 II) Marine SAE 90 hypoid, API GL-4 or GL-5 Type... - Page 81 I i i i i i i i i i i i i I I I I I I’ i)lAHul 00509801 1 I I . - -. . 31ZV1630 ..- 00X31-ZVl-6300 1 1 PRINTED IN U.S.A. 1 1 Recycled Paper...