Table of Contents
Advertisement
Advertisement
Table of Contents

Related Manuals for Pfaff hobbylock 799


Summary of Contents for Pfaff hobbylock 799
- Page 3 Contents Controls of the sewing machine Accessory box Electrical connection Main switch and sewing light Foot control Notes on safety Handling the thread spool stand Thread guides behind the carrying handle Opening the looper cover and the swingout work support Threading diagram on waste box Threading thread guides 2 and 34 Needle combinations...
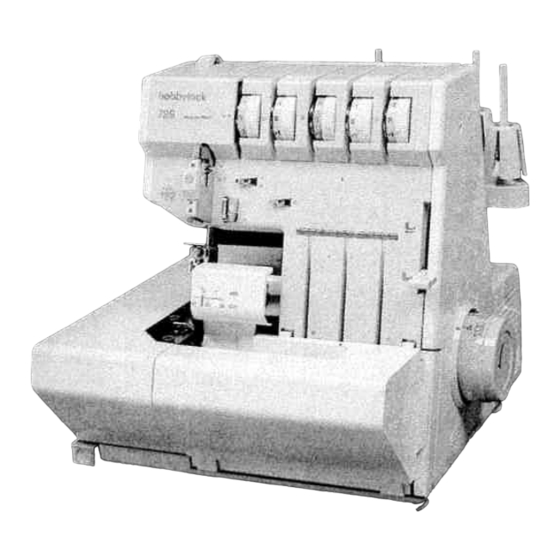
- Page 5 ____ ____ ____ ____ ____ ____ ____ ___ Need le hold er...
- Page 6 Accessory box Fully open work support 15 and take out the accessory box. The accessory box can only be inserted in its compartment as shown in the illustration. The guide groove of the box must face downwards. Electrical connection This machine must only be used on a flat and even surface or on a special sewing table.
- Page 7 , the machine must be disconne cted from the mains. C) The maximu m approved wattage of the light bulb is 1 5 watts. 0) The drive belt tension must only be adjusted by a Pfaff mechani c.
- Page 9 Opening and closing looper cover and work support Push looper cover 12 fully to the right, hold it, and swing it down. To close the looper cover, push it up until it locks. To open work support 15, push it in the direction shown by the arrow.
- Page 10 Threading thread guides 2 and 34 Place thread spools on the spool pins. Threading must be done carefully. First thread up guides 2 according to colours. Then lift carrying handle 3 and place the thread in rear guides 34. Set the thread tensions at N and thread the machine in the following sequence: 1.
- Page 11 Threading the right looper Thread the right looper in sequence 1 to B and pull about four inches of thread through the looper eye. The thread path is marked in green in the threading diagram on the rear side of the waste box.
- Page 16 After threading, close work support 1, fold down carrying handle 2 and close looper cover 3. Fitting the waste box Insert the tonues of the box in the cutouts on the front cover. Seam depth graduations: Application example: If the seam allowance of a cut part is 20 mm, the edge of the butting must be guided along the 20 mm graduation on knife guard 10.
- Page 19 during Points to remember sewing! Sew the first stitches sIowy. If the machine has been rethreaded, place the fabric under sewing foot 8 and push it up to the needle before starting to sew. Since the fabric is fed automatically, do not pull or push the fabric.
- Page 24 Correcting the Thread tensions: The thread tensions can be set from —5 to +5. The tension is set at the minus range or plus range according to the seam appearance. Towards stronger tension weaker tension Towards — Chainstitch The thread tension of needle A is too weak.
- Page 25 3-thread overedge seam The left looper thread is too tight (yel low tension) or the right looper is too loose (green tension). It is possible that both tensions are incorrectly set. Adjust tensions accordingly. 4-thread overedge seam The left looper thread is too tight (yel low tension) or the right looper thread is too loose (green tension).
- Page 28 Engaging and disengaging the con verter Hand wheel 11 must be set as shown in the illustration. Set 2 at the marking line on the hou sing. Before you work with converter 40 the right looper thread must be cut and unthreaded from the looper eye.
- Page 30 — — — — — — — — — — — — — — — — —...
- Page 31 Thread chart for 2-, 3- and 4-thread overedge seams Stitch length Thread Fabric Lighth fabrics: Size 80 Organdy, light- Cotton — 2,0 to 4,0 mm Size 80 Silk knits, silk, — Synthetic Size 70 lining fabrics — Medium-heavy fabrics: Cotton Size 60 Cotton, light-knits, 2,0 to 4,0 mm...
- Page 32 Setting the stitch length Still holding pushlock 39 (see page 29), now turn hand wheel ‘Ii to set the required stitch length at mark A. The stitch length settings range from 1 mm to 4 mm. The numbers on the hand wheel indicate the stitch length in mm. When you have set the required stitch length, release pushlock 39 again.
- Page 33 Adjusting the differential feed The differential feed prevents interply shift. It consists of two feed dogs, arranged one behind the other, which simultaneously take hold of the workpiece and move it. The feed amount of either feed dog can be set separately. It is possible to have the workpiece moved more by the front feed dog than by the rear one, and vice versa.
- Page 34 This table indicates possible settings of the differential feed. Carry out a sewing test to find out the correct setting for your fabric. The differential feed can also be set during sewing. Differential- Correct Illustration Fabric feed setting seam Nylon, tricot, lining fabrics, 0,5 to N satin, popelin, and silk Light cotton, jeans...
- Page 38 Twothread rolled hems sewn with converter 40: the slide must be set in position A (see page 26). Use right needle Needle: Rolledhem sewing foot R Sewing foot: Seam width: N (3,5 mm) 1,0 to 2.0 mm Stitch length: Set slide 41 at R (see top of page 37) A rolled hem is used for light, delicate fabrics and is an attractive finish for raw edges.
- Page 40 Rolled hem with polyeste r thread (Figs. 1 and 2, page 37, bottom) Preparat ion of the sewing machine : Remove needles A and B Needle: Fit rolled hem foot ,,R” Sewing foot: From 2.5 to 3.0 mm (dependi ng on material ) Seam width: From 1 .5 to 2.5 (short stitch length) Stitch length:...
- Page 42 Changing the needles Pull out the mains plug. Lower the sewing foot. Turn the hand wheel as shown by the arrow to set the needle bar in its highest position. Hold the needle to be changed with the twee zers. Loosen set screws A, B or C with the small screwdriver.
- Page 47 Sewing foot N 2 for Rolled hem sewing Sewing foot N 3 for Sewing foot N for seam widths seam widths of 5,5 foot R seam widths of 3 to 7,2 mm of 4 to 6 mm to 4,5 mm...
- Page 48 — — — — — — — — — — — — — —...
-
Page 50: Stitch Selection Table
Needle system Fabric Sewing Looper thread Needle thread 130/705 H (s.p. 28 Stitch type foot tension tension l5xlH and29) yellow mauve pink green blue 3-thread serging seam light without edge thread N or N 3 (narrow) —— (see top medium page 45) —5 heavy... - Page 52 Needle system Fabric Needle thread Sewir Looper thread 130/705 H Stitch type (sp. 28 foot tension tension l5xlH and29( green blue pink yellow mauve 2-needle 3-thread light —1 overedge closing seam — — without edge thread N or N (see tc medium 5tf!5\ —...
- Page 54 Sewing problems and their remedies This machine has been developed for easy operation, and there are no difficult adjustments to be made. Sewing problems of the kind described below may occur due to minor adjustment- and operation errors. They can easily be corrected if you follow the instructions listed below. Problem Cause Remedy...
- Page 56 Use the lint brush (accessories) to parts are made of special material and remove lint from upper and lower knife. need oiling only once or twice a month. One or two drops of PFAFF sewing machine oil are sufficient.
- Page 58 —...
- Page 59 Stoff Perlen Fig. 2 Bead sewing foot (Fig. 1> This special sewing foot is for sewing on beads, sequins, strass bands, lead- and ordi nary cords. These operations are carried out with one needle only. 1. Set thread regulator 41 at N 2.
- Page 60 Elastic tape sewing foot This special foot is for sewing on ela stic tape; in the same operation the fabric is trimmed and serged, and also gathered by the contracting elastic tape. Preparing the machine Set thread regulator 41 at N Differential set at feed setting:...
- Page 61 Taping foot This special sewing foot is for sewing on tapes. On stretch materials (knit- wear) the seams are prevented from stretching when a tape is sewn on. Preparing the machine Set thread regulator 41 at N Differential feed setting; set at —...
- Page 62 —...
- Page 63 Gimp thread sewing foot This special sewing foot is used for sewing in gimp threads (cords, synthe tic threads) up to a thickness of 1.0 mm. By this means a wavy, i.e. more firm hem finish is achieved (e.g. on wedding dresses, curtains, etc.).
- Page 64 — —...
- Page 65 Specifications: stitches/mm. Maximum sewing speed 3-7.2mm Seam width —4mm(HL788) Stitch length 5 mm (HL 787) — system Sewing foot Manual Lubrication,..Max. sewing foot height Needle system 75-90or1114 Needle size 2,3,4,5 Number of threads 315x280x330mm Dimensions approx. 8.5 kg Weight Contents of cardboard box Machine Foot control...
- Page 66 PFAFF G. M. Pfaff A kt len g ese I I sc ha ft Werk Karisruhe-Durlach Gritznerstrae 11 7500 Karlsruhe 41 Printed in West Germany Druckerel Gablenc GmbH 7504 Weingarten Stettiner Stralte 17 Subject to alterations in design. No, 29-62999g74/ooo...