Table of Contents
Advertisement
Instruction
Manual
I CRRFTSMRN°I
4.6 Amp Motor / 0.080 In. Line
ELECTRIC
WEEDWACKER
®
Model
No.
358.745321
•
Safety
• Assembly
•
Operation
•
Maintenance
•
Espa6ol
®
WARNING:
Read and follow all Safety
Rules and Operating
Instructions
before first use of this product.
For answers
to your questions
about this product:
Call 7 am-7
pm, Mon-Sat;
Sun, 10 am-7
pm
•
1-800-235-5878
(Hours listed are Central
Time)
Sears,
Roebuck
and Co., Hoffman
Estates,
IL 60179
U.S.A.
545001489
5/24/05
Advertisement
Table of Contents

Related Manuals for Craftsman WEEDWACKER 358.745321


Summary of Contents for Craftsman WEEDWACKER 358.745321
- Page 1 Instruction Manual I CRRFTSMRN°I 4.6 Amp Motor / 0.080 In. Line ELECTRIC WEEDWACKER ® Model 358.745321 • Safety • Assembly • Operation • Maintenance • Espa6ol ® Read and follow all Safety Rules and Operating WARNING: Instructions before first use of this product. For answers to your questions about this product:...
- Page 2 Sears will replace it free of charge. This warranty does not cover the nylon line. WARRANTY SERVICE IS AVAILABLE BY RETURNING THE CRAFTSMAN ELECTRIC WEEDWACKER LINE TRIMMER TO THE NEAREST SEARS STORE OR SERVICE CEN- TER IN THE UNITED STATES.
- Page 3 available.) Always wear face ordust • To reduce risk of electrical shock, mask i foperation isdusty. Always use extension cords specifically wear heavy, long pants, long sleeves, marked as suitable for outdoor ap- boots, and gloves. Donot g obarefoot pliances having electrical rating not orwear sandals.
- Page 4 (on underside of shield) can- sure spool isproperly installed and not cause injury. allparts a re securely fastened. • Store unit indoors in a high, dry • Use only Craftsman replacement place out of the reach of children. parts a nd accessories asrecom- Store unit unplugged.
- Page 5 CARTON CONTENTS NOTE: Edge guide must be posi- Check carton contents against the fol- tioned on shield prior to installation lowing list. on motor housing (see following Model 358.745321 illustration). • Trimmer Edge Guide • Shield • Assist handle with wing nut and bolt •...
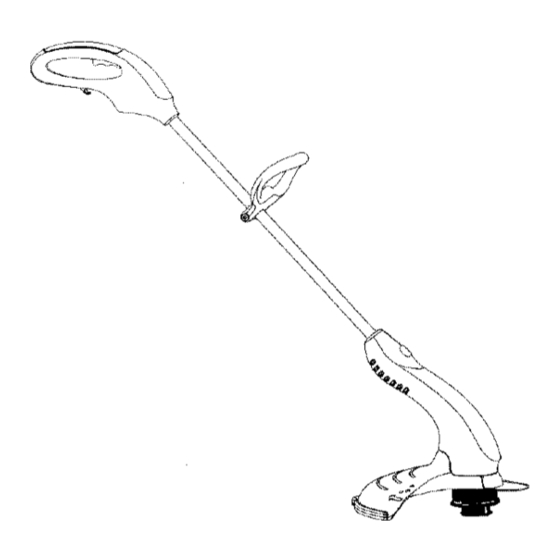
- Page 6 KNOW YOUR TRIMMER READ THIS INSTRUCTION MANUAL AND SAFETY RULES BEFORE OPERATING YOUR UNIT. Compare the illustrations with your unit to familiarize yourself with the loca- tion of the various controls and adjustments. Save this manual for future refer- ence. Trigger Switch Assist Handle ? ,jr...
- Page 7 CORRECT OPERATING POSITION EDGING POSITION You can press this button and twist the lower portion 180" counterclock- wise into an edging position. EDGING While edging allow tile tip of the line to make contact. Do not force the line. Trimming Edging The edge guard helps protect the unit and keeps the unit from contacting...
- Page 8 • Wipe off unit with a clean dry cloth. 1. Remove the old line from the cut- REPLACING THE LINE ting head. • Always use Craftsman replacement line. Clean entire surface of cutting head= Insert both ends of your line...
- Page 9 Correctly installed line will be the same length on both ends. Positioning Tunnel CAUTION: If line is installed incor- rectly, the cutting head will not function properly and damage to the unit may occur, NOTE: Line glide plate must be installed in cutting head before insert- ing new line.
- Page 10 TROUBLESHOOTING TABLE WARNING: Always stop unit and disconnect from tile power source before performing all of the recommended remedies below except remedies that re- quire unit to be operating. TROUBLE CAUSE REMEDY Trimmer head 1. Crowdh_g line against 1. Allow tip of line to do the cutth_g. stops under a material being cut.