Table of Contents
Advertisement
/_
Save This Manual
_-'_
For Future Reference
MODEL NO.
113.236400
SCROLL
SAW
Variable Speed
With Stand
Serial
Number
Model
and
serial
numbers
may be found attached at rear
of saw.
You should record both model
and serial number in a safe
ptace for future use.
FOR YOUR
SAFETY
READ ALL
iNSTRUCTIONS
CAREFULLY
Pa_ No. SP5498
...)
®
CONTRACTOR
SERIES
20" VARIABLE
SPEED
SCROLL
SAW
- assembly
,, operating
8
* repa=r parts
Sears, Roebuck
and Co. Hoffman
Estates,
iL
60179
U.S.A.
P nnted in Taiwan
I
J
J
Advertisement
Table of Contents

Related Manuals for Craftsman Contactor 113.236400


Summary of Contents for Craftsman Contactor 113.236400
-
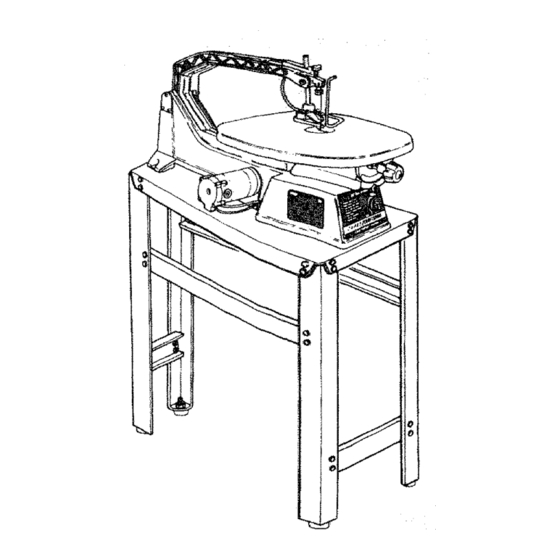
Page 1: A 20" Scroll Saw (Completely Assembled)
Save This Manual _-'_ For Future Reference MODEL NO. 113.236400 SCROLL Variable Speed With Stand Serial Number Model serial numbers may be found attached at rear of saw. ® You should record both model and serial number in a safe CONTRACTOR SERIES ptace for future use. -
Page 2: Warranty Information
TOOLS within one year from the date of THE UNITED STATES, and free of charge. ' commercial or rental purposes, warranty will apply for ninety days from .:the:date of purchase, -_ This warranty applies only while this product is in the United States. you specific legal rights and you may also have other rights which vary from state Sears, Roebuck and Co., D817 WA Hoffman Estates, IL. -
Page 3: Safety Instructions For Scroll Saws
CHECK FOR DAMAGED PARTS. Check for: • UsethiS scroll s#,w to cut only wo0d, wo0diike products, plastics and nonferrous: metals ..• Alignment of moving pads. • Binding of moving parts. CAUTION: This :Saw:i_ NOT designed for cutting ferrous metals like it0n 0r steel When cutting non- °... -
Page 4: Electrical Information
safetyinstructions for scroll saw When c[itt _g:irreg;u|adY-shaped workpieces plan your Before starting Your cut watch the saw while it runs. If it work sO it Will dot pii_ch the blade. A piece:of, molding, makes an unfamiliar noise or vibrates a lot, stop immedi- -f0i;... -
Page 5: Glossary Of Terms For Woodworking
Improper connection of the equipment grounding con- Motor Safety Protection • ductor can result in a risk of electric shock. The conduc- !. Connect this too! to a power source with the appropri- tor with insulation having an outer surface that is green ate voltage for your model and a 15-amp branch circu t with or without yellow stripes is the equipment grounding with a 15-amp time delay fuse or circuit breaker. -
Page 6: Table Of Contents
table of contents Warranty Information ..........Adjusting Guide Post ........... Safety Instructions For Scroll Saws ......3 Adjusting Dust Blower .......... Electrical Information..........Adjusting Blade Guard ......... Glossary of Terms for Woodworking ......5 Quick Change Upper Blade Holder ...... 14 Unpacking &... -
Page 7: Assen_Ly And Alignment
unpacking and checking contents WARNING: For your own safety, never connect Separate all parts from packaging materials and check plug to power source outlet until all assembly each item with illustration and "Table of Loose Parts". steps are complete, and you have read and under- Make certain all items are accounted for before discard- stand the safety and operating instructions. -
Page 8: Mounting Saw To Stand
d alignrnent MSX30 aSSembiy+ an HEX HEAD BOLT MOUNTING THE SAW TO THE STAND ..•..Y.+:i:i_:From ihb loose parts bag, 1ind the following items: : : *+Hex:Head Bolt:,M8 x30 ......2 M8X16 * Hex Head Bolt, M8 x 16 ..... :.... ,..2 +++ B_e Box+ .. -
Page 9: Setting The Table For Horizontal Or Bevel Cutting
Familiarize yourself with thecontr0fs and feaiures of this WARNING: For your own safety, never connect plug to power source OUtlet untll all assembly Scroll SaW indicated in illustration. steps a_e complete, and you have read and un- derstand the safety and operating instructions, DO NOT LIFT SAW BY THIS ARM... -
Page 10: Z Saw Blade
provided. 3. Remove hold-down by iooseningthe screwtolhe rear of hold-down foot. SUPPORT SCREW "--_" HOLD-DOWN SCREW 4. Use a small square to check the angle between the table and the blade. If the space between the square and the blade is not uniform, the table must be adjusted, 5. -
Page 11: Removing Or Replacing Blades
TABLE STOP BOL T Adjust 90° stop bolt and lower hex nut until head of bolt rests against underside of table. Lock upper hex nut against lower hex nut using 13ram wrenches. NUTS iiiiiiiii, ,,i,l.lmlll 6. Loosenthe screw holding the bevelscaie pointerand adjust pointer to 0°, Tighten screw. -
Page 12: Installing Plain End Blades
assembly and a|ignrnent 6. Loosen the lower blade holder hex socket screw in INSTALLING PLAIN BLADES NOTE: Saw comes set up for plain end blades. If you are going lo use pin end blades, refer tot he instructions under "installing Pin End Blades" below. "T"... -
Page 13: Adjusting Blade Guide
ADJUSTING BLADE GUIDE The blade may be supported from the rear and held in line to prevent excessive bending while cutting, Accu- rate work and minimum blade breakage, especially with thin blades, depends on proper adjustment of the blade SUPPORT SCREW guide. -
Page 14: Quick Change Upper Blade Holder
REMOVE SCREW . assembly and alignment WITH "T" WRENCH r_ (L0ckKnob With Screw) parts This access0ry is supplied in the loose bag. it enables the user to remove the upper portion of the blade quickly when making interior cuts in a workpiece. i.1Remove the hex socket screw in the upper blade INSTALL QUICK CHANGE... -
Page 15: On-Off Knob
ON-OFF KNOB 1. To turn machine 'ON', place fingers on Speed Con_ trol!On-Off Knob and pull out. NOTE: A hesitation before blade movement, after machine is turned 'ON', is a normal condition ol this saw, , illll 2. Toturnmachine'OFF',pushin SpeedControl/On-Off Knob. -
Page 16: Basic Saw Operation
3. Use: a blade that will have at least 2 teeth in the mate- 1: Use a finer tooth blade for cutting thin workpieces, rial at all times. When a smoother Cut is required, for hard materials, or 4. Use thin narrow blades for tight radius work, and thick, when using slower saw speeds. - Page 17 your work so it will not pinch the blade. A piece of AVOID ACCIDENTAL STARTING. Make sure switch is molding, for example, must lay flat or be held by a "OFF" before plugging saw into a power outlet. fixture or iig that will not let it twist, rock or slip while Plan your work.
- Page 18 . OPERATION OF YOUR SCROLL PLEASE, read and understand the following items about 10. When choosing a blade to use with your scroll saw, your scroll saw before attempting to use the saw. consider the following carefully, • Very fine, narrow blades should be used to scroll 1.
-
Page 19: Making Interior Scroll Cuts
MAKING INTERIOR SCROLL CUTS 1. One of the features of th{s saw is that it can be used 1J4" HOLE IN to make scroll cuts on the interiorof a board without WORKPIECE CENTERED OVE breaking or cutting into the outline or perimeter of the HOLE tN TABLE board. -
Page 20: Recommended Accessories
the following accessories Sears may recommend other accessories not listed in the manual. See your nearest Sears store or Catalog department for other accessoires. Do not use any accessory unless you have received and read complete instructions for its use. [ WARNING: For your own safety, push control knob 'OFF' and remove plug I I from power source outlet before troubleshooting your scroll saw. -
Page 21: Repair Parts
PARTSUST FOR CRAFTSMAN 20 INCH SCROLL MODEL 113.236490 FIGURE 1 Part Description II,HI, 820331 Lid, Blade Box 820332 Box, Blade 820366 Top, Stand 820481 Leg, Left Rear 820368 Leg, Right Rear STD840812 Nut, Hex M8 x 1.25 STD852008... -
Page 22: Parts List
pARdi LIST FOR CRA_MAN 20 INCH SCROLL MODEL 11 Figure 2... - Page 23 PARTS LiST FOR CRAFTSMAN 20 iNCH SCROLL MODEL 113.236400 FIGURE 2 Part Part Description Description .... iiiiiiiif 820230 Arm, "C" Nut, M10 x 1.5 x 60 820394 Bearing, Tapered Roller 820237-4 Washer, M5 x 19 x 1.2 820242-2 Ring, Retaining 11-100...
-
Page 24: Service Information
120 INCH SCROLL MODEL 113,236400 & Flgum 3... - Page 25 PARTS LiST FOR CRAFTSMAN 20 iNCH SCROLL MODEL 113.236400 FIGURE 3 Key! Pa..] No , 1 ..No., .... ,Descrlp,tlon- ..Descr!ptlon 820405 Bott, Hex M10 x 1.5 x 60 820358 Counterbalance, Vertical STD852006 820245-2 * Lockwasher, M6 Screw, Soc.
- Page 26 CONTRACTOR SERmES 20" VARIABLE SPEED SCROLL SAW For the repair or replacement parts you need MODEL NO. Call 7 am - 7 pro, 7 days a week 113.236400 1-800-366-PART (1-800-368-7278) SCROLL SAW Variable Speed With Stand For in-home major brand repair service Col{ 24 hours a day, 7 days a week 1-800-4-RIEPAIR (1-800-473-7247)