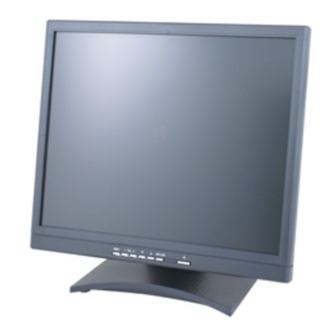
Speco VM15LCD User Manual
Hide thumbs
Also See for VM15LCD:
- User manual (30 pages) ,
- Specifications (1 page) ,
- Specifications (1 page)
Table of Contents
Advertisement
Quick Links
Download this manual
See also:
User Manual
Advertisement
Table of Contents

Subscribe to Our Youtube Channel
Summary of Contents for Speco VM15LCD
-
Page 1: User Manual
Thank you for purchasing our product. Please read this User’s Manual before using the product. Changes may be made without notice. VM15LCD, VM17LCD, VM19LCD LCD MONITOR User manual... -
Page 2: Table Of Contents
Table of Contents Safety Information Important Information The power supply cord is used as the main disconnect device. Ensure that Table of Contents ----------------------------------------------------------------------------- 2 an outlet is located near the monitor and is easily accessible. Safety Information ------------------------------------------------------------------------- 3~5 ENVIRONMENT Connection ---------------------------------------------------------------------------------- 4~8 ●... - Page 3 type plug has two blades and a third grounding prong. ● This monitor is designed to operate on 100-240V AC supply. Do not connect too many appliances to the same outlet as this can cause electric shock. CLEANING MOUNTING ● Unplug the unit from the wall outlet before cleaning. ●...
-
Page 4: Connection
Connection 1. Rear interface 2. Connection under various signal input mode (Ⅰ)Connecting with PC, DVR at VGA This connection allows you to connect to a PC or DVR. Connect one end of a 15-pin monitor cable to the VGA VIDEO jack on the monitor and the other end to the PC or the DVR's video output jack. -
Page 5: Controls
Connect the audio (red and white) cables to the AUDIO INPUT R and L 3. Make sure the video image is centered within the screen area. Use the Controls jacks on the back of the monitor and to the Audio Output jacks on the monitor controls to adjust the image, if necessary. -
Page 6: Menu Setup
If you want to use an external input source, before to select the source, you Menu Setup Controls need to connect the devices, otherwise when you select the source, the PICTURE none or no signal will appear on the screen. Press the source button on the CONTRAST: Adjusts the difference monitor or remote control and the menu will appear on the screen. - Page 7 BASS: Adjustment range:0-100 TREBLE: Adjustment range:0-100 BALANCE: Adjusts how much audio is SLEEP-TIMER: Adjusts the amount of sent to the left and right (-50 to +50). time until the screen goes to sleep. (OFF, FUNCTION The intermediate value is 0. When 15min, 30min, 45min, 60min) AUDIO indication value of balance increases...
-
Page 8: Av Input Mode
LANGUAGE: Lets you select your 2. AV Input Mode preferred language for the menus: (English, Chinese, German, French, BRIGHTNESS: Adjusts the brightness of Spanish, Italian, Portuguese, Russian) the picture. OSD H-POSITION: Adjust the OSD image CONTRAST: Adjusts the difference horizontally by pressing the + or – buttons. between the light and dark areas of the PICTURE OSD V-POSITION: Adjust the OSD image... -
Page 9: Dvi Input Mode
3. DVI Input mode LANGUAGE: Lets you select your preferred language for the menus: CONTRAST: Adjusts the difference (English, Chinese, German, French, between the light and dark areas of the Italian, Spanish, Portuguese, Russian) picture. PICTURE BRIGHTNESS: Adjusts the brightness of H-POSITION: Adjust the OSD image the picture. -
Page 10: Specifications
Specifications Model VM15LCD VM17LCD VM19LCD Model VM15LCD VM17LCD VM19LCD Audio Inputs Stereo PC / Audio R and L Size 15 inch 17 inch 19 inch Auto Adjustment Wall Hanging VESA Standard Aspect Ratio VESA Size 100 x 100 mm Resolution (H x V) 1024 x 768 1280 x 1024 Stand...


Need help?
Do you have a question about the VM15LCD and is the answer not in the manual?
Questions and answers