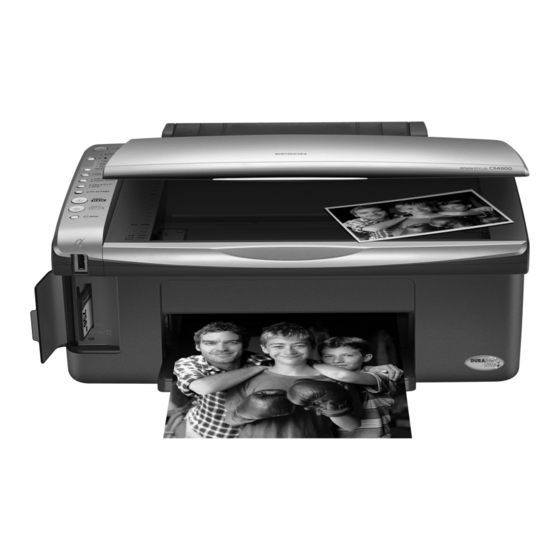
Epson Stylus CX4200 Series Quick Manual
Epson all in one printer
Hide thumbs
Also See for Stylus CX4200 Series:
- Installation instruction (7 pages) ,
- Service manual (223 pages) ,
- User manual (18 pages)

Related Manuals for Epson Stylus CX4200 Series


Summary of Contents for Epson Stylus CX4200 Series
- Page 1 ® Epson Stylus CX4200 Series/CX4800 Series Quick Guide Basic Copying, Printing, and Scanning Maintaining Your Epson Stylus CX All-in-One Solving Problems...
-
Page 2: Table Of Contents
Restoring Color in Faded Photos ......28 Maintaining Your Epson Stylus CX All-in-One Checking the Print Head Nozzles and Ink . - Page 3 ■ Solve simple problems This book tells you how to do most of these things without ever turning on your computer! Of course your Epson Stylus CX can do lots more when you connect it ® to your Windows or Macintosh on-screen User’s Guide by selecting the icon for it on your desktop.
-
Page 4: Loading Paper
Loading Paper Follow the steps here to load paper in your Epson Stylus CX all-in-one. 1. Open the paper support and output tray, then slide out the extensions. 2. Flip the feeder guard forward. Then slide the left edge guide to the left. - Page 5 However, for the best results, you’ll want to use one of Epson’s special ink jet papers designed for your printer. For example, your photos will look great printed on Epson Premium Glossy Photo Paper.
-
Page 6: Copying A Photo Or Document
2. Close the cover gently so you don’t move the original. Caution: Never open the document cover beyond where it stops and do not place heavy objects on top of the Epson Stylus CX all-in-one. Copying a Photo or Document Move the original about 0.04 inch (1 mm) away... - Page 7 If you need to copy or scan a thick or large document, you can remove the document cover. Just open it and pull it straight up. If you need to press the document flat while you copy or scan it, do not press too hard and be careful not to move it.
-
Page 8: Copying
4 × 6-inch, or 5 × 7-inch photo paper. Copying a Document 1. Make sure the Epson Stylus CX is turned on. 2. Place the document on the glass as described on page 6. Be sure to close the document cover. -
Page 9: Copying A Photo
Start B&W The P light flashes and after a moment the Epson Stylus CX starts printing. If you need to stop copying at any time, just press the y out paper that is being printed; it will be ejected automatically to the output tray. - Page 10 6. Press the paper size button to select 7. Press the x Start Color The Epson Stylus CX makes copies until it runs out of paper. Then the red light comes on. Error 8. To make more copies, load more paper and press the x Start B&W...
-
Page 11: Printing From A Memory Card (Epson Stylus Cx4800 Series Only)
If your digital camera supports DPOF (Digital Print Order Format), you can pre-select the photos you want to print while the card is still in the camera. Then, when you insert the card in the Epson Stylus CX4800 Series, it knows which photos to print and how many copies of each. -
Page 12: Compatible Cards And Image Formats
Compatible Cards and Image Formats You can use the following types of cards with your Epson Stylus CX4800 Series: Memory card access light The Epson Stylus CX4800 Series supports image files that meet the following requirements: Media format File format... -
Page 13: Inserting The Card
1. Make sure the Epson Stylus CX4800 Series all-in-one is turned on. Note: When you print directly from a memory card, it is best if the Epson Stylus CX4800 Series is not connected to your computer (or your computer should be turned off). -
Page 14: Printing An Index Sheet To Select Photos
Caution: Do not remove the card or turn off the Epson Stylus CX4800 Series while the memory card access light is flashing; you may lose data on the card. Printing an Index Sheet to Select Photos You can print an index sheet (which is like a photographer’s contact or proof sheet) - Page 15 If you want one copy of all the photos on the index sheet, fill in the ALL oval at the top of the page. Printing From a Memory Card (Epson Stylus CX4800 Series Only) button. The P light flashes, and the Epson Stylus...
- Page 16 If you need to stop printing, press the y Stop button. 9. When you are done printing, remove the memory card by pulling it straight out of its slot. Printing From a Memory Card (Epson Stylus CX4800 Series Only) light is on. (whichever you loaded).
-
Page 17: Printing All Photos Or Dpof Photos
If you need to stop printing, press the y Stop button. 7. When you are done printing, remove the memory card by pulling it straight out of its slot. Printing From a Memory Card (Epson Stylus CX4800 Series Only) button until the Print All/DPOF/ (whichever you loaded). -
Page 18: Printing From A Digital Camera
Camera If your camera is PictBridge- or USB DIRECT-PRINT print your JPEG photos by connecting your digital camera directly to your Epson Stylus CX4200 Series or Epson Stylus CX4800 Series all-in-one. Your photos must be sized from 80 × 80 pixels to 9200 × 9200 pixels. -
Page 19: Printing From Your Computer
Before you start, make sure you’ve installed your printer software and connected the Epson Stylus CX all-in-one to your computer as described on the Start Here sheet. Also be sure to use the right paper and select the correct paper type setting in the printer driver. - Page 20 4. Make sure Epson Stylus CX4200 Series is selected, then click the (If you see a Setup Preferences 5. On the Main tab, select the basic print settings: Select the type of document you’re printing (choose Photo or Best Photo for pictures)
- Page 21 6. For more printing options, click the following settings as necessary: Select Paper & Quality Options as necessary Select Print Options as necessary Note: For more information about advanced settings, or instructions on saving them as a group so you can reuse them later, click ? or Help. 7.
-
Page 22: Printing With Macintosh Os X
File menu. You see a window like this one: Print Printing From Your Computer from the File menu. Make the following settings: Select Stylus CX4200 or Stylus CX4800 Select your Paper Size* Select your document or image orientation... - Page 23 6. Choose Print Settings settings as necessary: Note: For more information about printer settings, click the 7. Depending on your settings, you can choose these other options from the pop-up menu: ■ Copies & Pages ■ : Select page layout options. Layout ■...
- Page 24 10. To monitor the progress of your print job, click the appears in the dock on the bottom of your desktop. If you’re using OS X 10.2.x, click the double-click Stylus CX4200 You see a screen like this: Cancel printing Select the print job 11.
-
Page 25: Using Special Papers
Using Special Papers You can purchase genuine Epson ink and paper from an authorized Epson reseller. To find the nearest reseller, please call 800-GO-EPSON (800-463-7766). To purchase online, visit www.epsonstore.com (U.S. sales only). In Canada, please call 800-463-7766 for reseller referral. -
Page 26: Scanning A Photo Or Document
Scanning a Photo or Document You can use your Epson Stylus CX all-in-one to scan a photo or document and save it on your computer or other device, or to fax or e-mail it to someone else. You can even automatically restore faded color photographs as you scan. See page 28 for details. - Page 27 If you need to scan a thick document, you can remove the document cover; see page 7. 2. Close the cover gently so you don’t move the original. 3. Do one of the following to start EPSON Scan: ■ Windows: Double-click the ■...
-
Page 28: Restoring Color In Faded Photos
Restoring Color in Faded Photos You can automatically transform an old, faded, or badly exposed color photo into one with true-to-life color and sharpness as you scan. Look for the option in EPSON Scan’s Full Auto, Home, and Professional Mode Restoration screens:... -
Page 29: Maintaining Your Epson Stylus Cx All-In-One
2. Load letter-size paper in the sheet feeder. 3. Press the ink and P 3 seconds. The Epson Stylus CX turns on and prints a test pattern. It also shows the percentage of ink left in each cartridge: Print head does... -
Page 30: Cleaning The Print Head
31. Tip: If you do not use your Epson Stylus CX often, it is a good idea to print a few pages at least once a month to maintain good print quality. -
Page 31: Replacing Ink Cartridges
Leave the empty cartridge installed until you have obtained a replacement, or the ink remaining in the print head nozzles may dry out. We recommend that you use genuine Epson cartridges. The use of other products may affect your print quality and could result in printer damage. See www.epson.com for more cartridge information. - Page 32 3. Press and release the If one of the cartridges is low or empty, the Epson Stylus CX moves that cartridge to the _ ink out mark. Go to step 4. If no cartridges are low or empty, the ink cartridge holder moves to the ink replacement position.
- Page 33 Then remove it from the package. Caution: Do not remove or tear the label on the cartridge; otherwise, ink will leak. Do not touch the green chip on the front of the cartridge. This can damage the ink cartridge. Maintaining Your Epson Stylus CX All-in-One...
- Page 34 7. Place the new ink cartridge into the cartridge holder and push it down until it clicks into place. 8. Replace any other cartridges that need to be replaced. 9. Close the ink cartridge cover and press it until it clicks into place. 10. Close the scanner. Maintaining Your Epson Stylus CX All-in-One...
- Page 35 P light stops flashing and remains on, and the ink light goes out. Caution: Never turn off the Epson Stylus CX while the P On light is flashing or you’ll waste ink. Note: If the ink light stays on (not flashing), the ink cartridge may not be installed correctly.
-
Page 36: Solving Problems
Solving Problems If you have a problem with your Epson Stylus CX all-in- one, check the lights on the control panel and the number or letter in the Copy You can also check “Problems and Solutions” on page 38 for basic troubleshooting suggestions, or double-click the User’s Guide icon on your computer desktop for more... - Page 37 Epson for a replaced. referral; see page 40. There is a problem Turn the Epson Stylus CX off and with the Epson Stylus then back on. If the error does not clear, contact your local authorized servicer or contact Epson for a referral;...
-
Page 38: Problems And Solutions
Problems and Solutions Check the solutions below if you’re having trouble using your Epson Stylus CX all- in-one. Copying Problems ■ Make sure your original is positioned in the top left corner of the glass. Place it 0.04 inch (1 mm) from the edges to avoid cropping. -
Page 39: Print Quality Problems
Make sure the type of paper you loaded matches the paper size and paper type settings on the control panel or in your printer software (see page 25). ■ For the best print quality, use Epson special paper (see page 25) and genuine Epson ink cartridges (see page 31). ■... -
Page 40: Where To Get Help
To use these services, you must have a touch tone Services telephone and call (800) 922-8911. Your Epson SoundAdvice Code is 70660. Use this code to quickly select the Epson Stylus CX4200 Series or Epson Stylus CX4800 Series in SoundAdvice. To speak to a technical support representative, dial: ■... -
Page 41: Notices
Place the Epson Stylus CX on a flat, stable surface that extends beyond its base in all directions. It will not operate properly if it is tilted or at an angle. ■ Make sure the back of the Epson Stylus CX is at least 3.9 inches (10 cm) away from the wall. ■... -
Page 42: Ink Cartridge Safety Instructions
Adjust only those controls that are covered by the operating instructions. ■ When storing or transporting the Epson Stylus CX, do not tilt it, stand it on its side, or turn it upside down; otherwise ink may leak from the cartridge. ■... -
Page 43: Energy Star Compliance
ENERGY STAR Compliance As an ENERGY STAR Partner, Epson has determined that this product meets the ENERGY STAR guidelines for energy efficiency. The EPA ENERGY STAR office equipment program is a voluntary partnership with the computer and office equipment industry to promote the introduction of energy-efficient personal computers, monitors, printers, fax machines, and copiers in an effort to reduce air pollution caused by power generation. -
Page 44: For Canadian Users
(1) this device may not cause harmful interference, and (2) this device must accept any interference received, including interference that may cause undesired operation. Trade Name: Epson Type of Product: Multifunction printer Model: C231B (Epson Stylus CX4200 Series) C231A (Epson Stylus CX4800 Series) Notices... - Page 45 If service is needed, Epson will, at its option, exchange or repair the printer without charge for parts or labor. If Epson authorizes an exchange for the defective unit, Epson will ship a replacement printer to you, freight prepaid, so long as you use an address in Canada or the U.S.
- Page 46 Epson is not responsible for warranty service should the Epson label or logo or the rating label or serial number be removed or should the product fail to be properly maintained or fail to function properly as a result of misuse, abuse,...
-
Page 47: Copyright Notice
(excluding the U.S.) failure to strictly comply with Seiko Epson Corporation’s operating and maintenance instructions. Seiko Epson Corporation shall not be liable for any damages or problems arising from the use of any options or any consumable products other than those designated as Original Epson Products or Epson Approved Products by Seiko Epson Corporation. - Page 48 CPD-19831 Printed in XXXXXX XX.XX-XX XXX...