Table of Contents
Advertisement
Advertisement
Table of Contents

Subscribe to Our Youtube Channel
Related Manuals for Emotiva LPA-1


Summary of Contents for Emotiva LPA-1
- Page 1 USER’S GUIDE...
-
Page 2: Table Of Contents
Connection using a 7 channel preout to LPA-1 Connecting a 5.1 Preamp/Processor Connection using a 5.1 channel preout to LPA-1 (including LFE Channel) Connecting a 5.1 and Second Zone System Connection 5 main channels plus a second (2 channel) zone... - Page 3 Technical Note about Multiple Speaker Connections Troubleshooting Guide No Sound (from one or more speakers connected to the LPA-1) The amplifier shuts down often or the line circuit breaker trips often Poor Bass Performance From Full Range Speakers connected to the LPA-1 Turn-on and turn-off thumps “Hum”...
-
Page 4: Safety Precautions
The Emotiva LPA-1 Amplifier should be connected to a power supply only of the type described in this User’s Guide and what is labeled on the LPA-1 component. Power supply cords should be routed so... - Page 5 The user should not attempt to service the LPA-1 Amplifier beyond the means described in this Owner’s Guide. All other servicing should be referred to qualified service personnel. To prevent electric shock, do not use this polarized plug with an extension cord, receptacle or other outlet unless the blades can be fully inserted to prevent blade exposure.
-
Page 6: Nec (National Electrical Code) Standards
NEC (National Electrical Code) Standards A Note for the Cable Television (CATV) Installer This reminder is to call the CATV system installer’s attention to Article 820-40 of the NEC that provides guidelines for proper grounding and in particular, specifies that the cable ground shall be connected to the grounding system of the building as close to the point of cable entry as practical. -
Page 7: Thank You For Your Lpa-1 Purchase
By employing cutting edge technology, the Emotiva LPA-1 easily power to your speakers at high power levels, at the same time remaining as efficient as possible, regardless of volume levels. This allows you to fully enjoy audio and video sources without concern for dynamic headroom during complex musical passages and high level effects. -
Page 8: Unpacking The Lpa-1
It is important to save all the packing materials and the box in case your Emotiva LPA-1 ever needs to be moved or shipped back to the factory for service. -
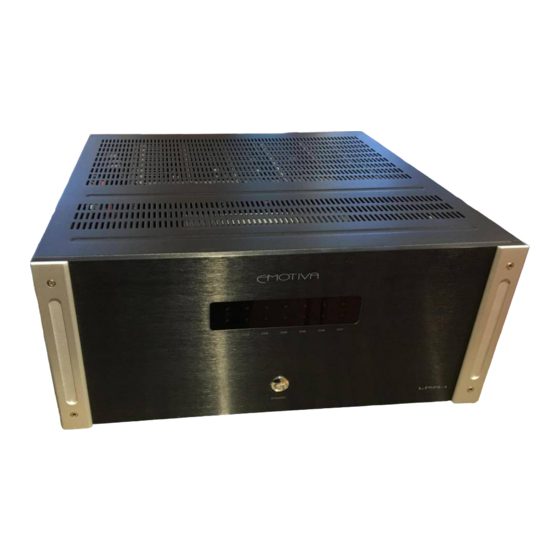
Page 9: Emotiva Lpa-1 Seven Channel Amplifi Er
Automatic switching is accomplished with the 3.5mm trigger input on the back panel using a 3-12VDC control signal. Rubber Feet These rubber feet keep the LPA-1 elevated for bottom ventilation as well as for vibration isolation. Page 9... -
Page 10: Rear Panel Layout
Page 10 Master Power Switch This rocker switch provides the master power for the LPA-1. After it is in the ON position, the amplifier can be turned on manually from the front panel switch or automatically with the trigger input via 3.5mm input jack. -
Page 11: Installation And Connections
When all seven of the power modules are driven, the Emotiva LPA-1 requires a minimum of 10 amperes @ 120 volts or 5 amperes @ 230 volts. It should be sufficient to allow the other devices such as preamplifiers and A/V source units to share a wall socket, but power amplifiers such as the LPA-1 and a video display (big screen TV or video projector) should be provided a SEPARATE electrical connection on a SEPARATE circuit. -
Page 12: Input Connection Considerations
POSITIVE BRIDGED output and the left side positive terminal is the NEGATIVE BRIDGED output. The switch on the back of LPA-1 must be placed in the “BRIDGED” position. Minimum impedance on this bridged channel is 8 ohms. -
Page 13: Connection Diagrams Connecting A 7.1 Preamp/Processor
5 way binding posts, please see Page 18 When connecting the LPA-1 to drive a 7.1 system, you can use channels 1-5 for the “Main” speakers as you wish, but Emotiva recommends using channels 6 and 7 as the “Rear Back”... -
Page 14: Connecting A 5.1 Preamp/Processor
Connection using a 5.1 channel preout to LPA-1 (including LFE Channel) CD or DVD Player This configuration shows the LPA-1 driving five full range channels and using channels 6 and 7 in a bridged configuration for a non powered subwoofer. This type of configuration is ideal for enthusiasts who have (or will) make their own subwoofer and want to utilize an amplifier that will drive the entire system in one chassis. -
Page 15: Connecting A 5.1 And Second Zone System
LPA-1 and the speakers in the Zone 2 This configuration shows the LPA-1 driving five full range channels and using channels 6 and 7 for a second zone that is fed from the Zone 2 preamp output of the main preamplfier/processor. -
Page 16: Connecting Multiple Zones
From there, the preamp outputs for each zone connect to the LPA-1 and then each zone connects to two channels of LPA-1 power. In this configuration, channels 6 and 7 would be bridged to complete the channel 5/6 pair. -
Page 17: Connecting An Expanded Second Zone System
Please note that if the receiver does not provide a separate volume control capability for the Zone 2 output, or if it is simply “split” from the front left and right channels, an impedance matching volume control will be necessary to install between the LPA-1 and the speakers in each Zone. Page 17... -
Page 18: 12V Trigger Connections
Speaker Output Connections The speaker output terminals for each amplifier channel are located across the bottom of the LPA-1. The top post of each binding post pair is the positive output, and connects to the positive (red) post of your speaker. -
Page 19: Series And Parallel Speaker Connections
Series and Parallel Speaker Connections Whenever connecting more than one speaker per channel to an amplifier (regardless of the brand), you must consider the way in which the amplifier will be impacted by adding the additional speaker(s). Additionally, speakers with dual voice coils also apply to this consideration. Two voice coils in a single speaker also cause different reactions from an amplifier depending on the way in which they connect to the amplifier. -
Page 20: Technical Note About Multiple Speaker Connections
Two ohm single channel loads are NOT RECOMMENDED for the LPA-1! Furthermore, if you are bridging channels 6 and 7, the minimum load is 8 ohms. Running the LPA-1 below recommended impedance level can cause excessive heat and will eventually drive the amplifier into protection (blinking red LED’s on the front of the unit). -
Page 21: Troubleshooting Guide
“Phantom.” • If the unit is not on, the ON/OFFswitch on the LPA-1 might be in the off position. • A internal fuse on the unit may have blown. Contact your Emotiva Dealer or AV123 for assistance. -
Page 22: Turn-On And Turn-Off Thumps
Preamplifi er/Processor). This should allow the amplifi er to turn on and off silently. • If your powered subwoofer is the cause of the “thump” sound (not the other speakers connected to LPA-1), plug it into a different 110VAC outlet than the LPA-1 amplifi er so there is no power surge confl ict. -
Page 23: Other Probable Causes Of Noise
• Try connecting your system to another AC socket on a separate line. • If the hum is heard from within the LPA-1 and not through the speakers, this may also be caused by interference on the AC or DC lines. The power transformers may turn this interference into an audible noise. -
Page 24: Lpa-1 Technical Specifi Cations
LPA-1 Technical Specifi cations Rated Power Output: Channels 1-5 Channels 6-7 Frequency Response: 20-20Khz: 10-100Khz: Total Harmonic Distortion (THD): Channels 1-5: Channels 6-7: Signal-to-Noise Ratio: DC Offset: Crosstalk: Damping Factor: Input Sensitivity Range (Gain): Channels 1-5 Channels 6-7 Input Impedance (RCA Input) -
Page 25: Limited Warranty
Limited Warranty The Emotiva LPA-1 has been created to perform flawlessly for many years. As a result of this quality and craftsmanship, Emotiva offers the following warranty to owners of the LPA-1. Emotiva Audio warrants the LPA-1 to be free from defects in materials and workmanship for a period of fi ve years from the original date of purchase. - Page 26 Toll Free - Website - Distributed Exclusively in the US by: Toll Free - Website - e-mail - Rev 1.06 4/2006 Emotiva 106 Mission Court, Suite 101 Franklin, TN. 37067 (877) EMO-TECH www.emotivaaudio.com AV123 2150 W. 6th Ave, Suite L...
Need help?
Do you have a question about the LPA-1 and is the answer not in the manual?
Questions and answers