
Related Manuals for Elite Screens A56-E25B2


Summary of Contents for Elite Screens A56-E25B2
- Page 1 Universal Ceiling Projector Mount A56-E25B2 User Guide Rev.030111‐AS www.elitescreens.com info@elitescreens.com 1 ...
-
Page 2: Specifications
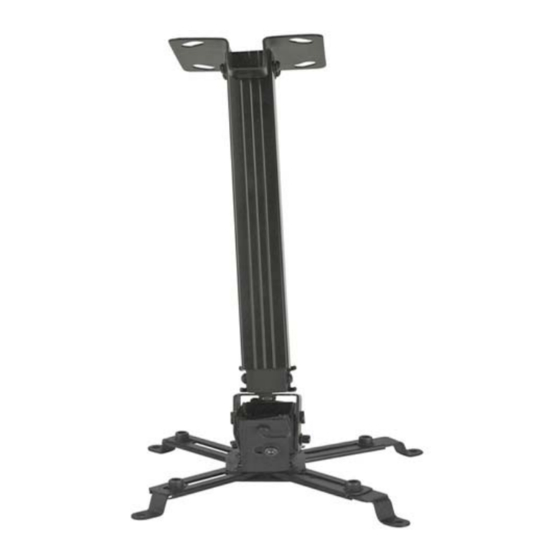
The A56‐E25B2 Projector mount is 90% compatible with most projector footprint designs. It is easy to use for low/high ceilings and short‐throw wall projector installations. It can be adjusted in both length and height to optimize the right level of projection. SPECIFICATIONS Max weight for ceiling and wall installation. 37.4 lbs. Total weight of the A56‐E25B2. 3 lbs. Overall dimensions of the A56‐E25B2. (L x W x H) 12.5” x 4.3” x 2.3” Example of the A56‐E25B2 Example of A56‐E25B2 with extension bar for high without extension bar for a or angled ceilings. flush mount to the ceiling. Example of A56‐ E25B2 as a short‐ throw mount for wall installation. Rev.030111‐AS www.elitescreens.com ... - Page 3 #1 Flush Ceiling Mount This installation is designed to bring the M5 x 12 Hex screws projector closer to the ceiling to accommodate M5 x 12 Hex screws room size. The extension does not necessarily have to be removed for the projector to be M5 Washer mounted. The design of this particular mount has the ability to be extended or flushed closer M5 x 12 Hex screws to the ceiling. The extra accessories can be M5 x 12 Hex screws removed and replaced with additional parts. The ...
- Page 4 #2 Mount assembly with extension bar M6 Anchors (4 nos.) Projector a M5 Washer outlet b M5 x 12 Hex screws Ceiling plate Adjustable drop height up Upper Extension can be to 23” ¾ extension removed for low ceiling.
- Page 5 #3 Short-throw mount assembly Remove the 2.5” Phillips head screw from the Pan/ Tilt Swivel to easily modify your mount to be used as a short‐throw Mount. Next is to remove the Straight Blade head screws (2) from the Pan /Tilt Swivel. Connect the Spider Body to the Pan Tilt Swivel (as shown in picture), and secure with one M4x8 Phillips screw and the M5x55 screw and M5 Nut. Connect the Extension Bar to the Pan/Tilt Swivel and secure on both sides with the M4x8 Phillips screws. At the other end of the Extension Bar, connect the Wall Plate and secure with the M5x10 Phillips screws. Note: Extension Bar will need to be adjusted to connect to the Pan/Tilt Swivel and the Wall Plate. After connecting the Spider Legs to the Spider Body, the mount is ready to be attached to the projector and mounted directly to the wall or on the optional ZA56‐WP (Wall Plates). Optional ZA56‐WP (wall plate mount for short‐throw wall mount on wood studs) Available at www.shop.elitescreens.com Rev.030111‐AS www.elitescreens.com info@elitescreens.com 5 ...
-
Page 6: Warranty Policy
For Warranty and Service requests please fill out a RMA /Service Form at: www.elitescreens.com/warrantysupportform Please Visit this link for full Warranty information: http://www.elitescreens.com/warranty For Customer Service and Technical questions, please contact Elite Screens at: Telephone: (877) 511‐1211 Fax: (562) 926‐8433 REMEMBER TO REGISTER YOUR PRODUCT AT ... -
Page 7: Contact Info
Longcheng Longgang District, ShenZhen 92150 Suresnes, France GuangDong, China Tel: +33‐1‐45064735 Tel: +86‐(0)755‐8461‐7989 Fax: +33‐1‐45064735 Fax: +86‐(0)755‐8461‐7669 info.fr@elitescreens.com info@elitescreens.com.cn www.elitescreens.com/fr www.elitescreens.com.cn Latin America Contact info.la@elitescreens.com Asia Elite Screens Taiwan Corp. 4F., No. 42‐1 Wuguan Rd. Wugu Township Taipei East Asia Contact County 248, Taiwan (Wugu Industrial Park) info.ea@elitescreens.com Taiwan (R.O.C) Tel: + 886+2+8990‐1999 India Contact Fax: + 866+2+8990+1366 info.india@elitescreens.com info@elitescreens.com.tw www.elitescreens.com.tw Japan Contact info.japan@elitescreens.com ...
Need help?
Do you have a question about the A56-E25B2 and is the answer not in the manual?
Questions and answers