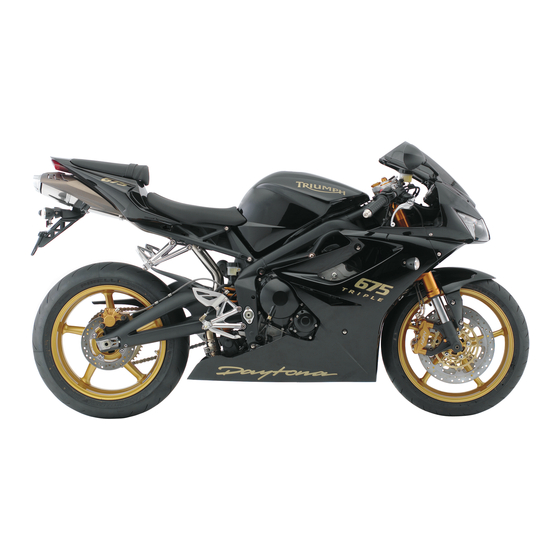
Triumph Daytona 675 Owner's Handbook Manual
Hide thumbs
Also See for Daytona 675:
- Service manual (535 pages) ,
- Owner's handbook manual (158 pages) ,
- Handbook (136 pages)
Table of Contents
Advertisement
Advertisement
Chapters
Table of Contents

Related Manuals for Triumph Daytona 675


Summary of Contents for Triumph Daytona 675
- Page 1 OWNERS HANDBOOK...
- Page 2 However NHTSA cannot become involved in individual problems between you, your dealer, or Triumph Motorcycles America Limited. To contact NHTSA, you may either call the Auto Safety Hotline toll-free at 1-800-424-9393 (or 366-0123 in Washington, DC area) or write to: NHTSA, U.S.
-
Page 3: Foreword
Foreword FOREWORD This handbook contains information on the Triumph Daytona 675 motorcycle. Always store this owner's handbook with the motorcycle and refer t o it for information whenever necessary. Warnings, Cautions and Notes Cautic Throughout this owner's handbook This caution... - Page 4 Triumph motorcycle correctly. subject concerned. To locate your nearest Triumph Never attempt t o ride the motorcycle dealer, visit the Triumph web-site a t o r make any adjustments without www.triumph.co.uk telephone reference t o the relevant instructions Triumph...
- Page 5 Foreword Owner's Handbook Thank you for choosing a Triumph warning motorcycle. This motorcycle is the This owner's handbook. and all product of Triumph's use of proven other instructions that arb supplied engineering, exhaustive testing, and with your motorcycle, should be...
-
Page 6: Table Of Contents
Information The information contained in this publication is based on the latest information available at the time of printing. Triumph reserves the right to make changes at any time without prior notice, or obligation. Not t o be reproduced wholly or in part without the written permission of Triumph Motorcycles America Limited. -
Page 7: The Motorcycle
Foreword Safety First FOREWORD SAFETY FIRST The Motorcycle Fuel and Exhaust Fumes - --- -- This motorcycle is designed for on- road use only. I t is not suitable for FLAMMABLE: off-road use. Off-road operation could lead t o Always turn off the engine when loss of control of the motorcycle refuelling. - Page 8 Foreword Safety First Safety Helmet Clothing wear a motorcycle safety helmet, Failure to wear a crash helmet eye protection, gloves, trousers increases the risk of serious injury (close fitting around the knee and or death in an accident. A crash and a ankle) brightly...
- Page 9 Foreword Safety First Parking Parts and Accessories Always turn off the engine an ed parts, accessories 'ons for any Triumph re those which carry the risk of use of the motorc ph approval and are unauthorized untrai persons is reduced.
- Page 10 ~ s ~ o n or fall, ~t must aximum limit (when the bank be taken t o an authorized Triumph le indicator is worn t o m u m of 0.19 in (5 mm) in...
- Page 11 Foreword Safety First Riding w a r n i r T h ~ s Trlumph motorcycle should be operated w ~ t h i n the legal speed Never ride the motorcycle when l ~ m ~ t s for particular road fatigued o r under the influence of...
- Page 12 Foreword Safety First A weave relatively slow oscillation the rear o f the 'MOTORCYCLE SAFEW', 'YOU AN motorcycle, while a wobble is a YOUR MOTORCYCLE, RIDING TIP rapid, possibly strong shaking of and also read and become familia the handlebar. These are related contents distinct stability...
- Page 13 Foreword Safety First Handlebars Footrests motorcycle components and will otorcycle will adversely also reduce the risk of injury from ffected if the rider removes his...
-
Page 14: Warning Labels
Warning Labels WARNING LABELS The labels detailed on this and t h e following pages draw your attention t o important safety information in this handbook. Before riding, ensure that all riders have understood and complied with all the information to which these labels relate. - Page 15 Warning Labels Warning Label Locations (continued)
-
Page 16: Parts Identification
Parts Identification PARTS IDENTIFICATION 1 Front turn signal 8 Gear-change pedal 2 Headlight 9 Front brake disc 3 Rear lamp Front brake caliper Radiator/coolant pressure cap 1 1 Fuel tank 5 Oil cooler/heat exchanger 12 Fuel filler cap 6 Drive chain 13 Seat lock 7 Side stand 14 Coolant expansion tank... - Page 17 Parts Identification 16 Tool kit Clutch cable 17 Rear brake disc Front fork 18 Rear brake caliper Rear brake pedal 19 Rear brake fluid reservoir Dipstick 2 0 Rear suspension unit Muffler...
- Page 18 Parts Identification 1 Clutch lever 8 Front brake lever 2 Passing button Engine stop switch 3 Headlight dipswitch 10 Starter button Horn button 11 Tachometer 5 Turn Signal switch 12 Speedometer 6 Ignition switch Warning lights Front brake fluid reservoir 14 Trip computer display...
-
Page 19: Serial Numbers
Serial Numbers SERIAL NUMBERS Vehicle Identification Engine Serial Number Number (V.I.N.) 1 Engine serial number 1 V.1.N number The engine serial number is stamped The Vehicle Identification Number engine cmnkcase, 0" immediately above the clutch cover. (v.1.~) is stamped into the steering head area of the frame. - Page 20 Serial Numbers This page intentionally left blank...
-
Page 21: General Information
General Information GENERAL INFORMATION Table of Contents ..............Instrument Panel Layout ............Speedometer and Odometer .................. Tachometer ..............Odometerflrip Meter ..............Clockflrip Computer ..................Lap Timer ............... Gear Change Lights ..............Gear Position Display ............Coolant Temperature Gauge ................Warning Lights ................. -
Page 22: Instrument Panel Layout
General Information Instrument Panel Layout Engine management Tachometer malfunction indicator light Tachometer 'red zone' Low fuel level indicator light Speedometer Neutral indicator light Odometer/trip meters High beam indicator light Clock/trip computer display Turn signal light Scroll/set/trip buttons Gear change lights Coolant temperature display Alarm status... -
Page 23: Speedometer And Odometer
General Information Speedometer Odometer/Trip Meter Odometer The digital speedometer indicates the road speed of the motorcycle. The read-out displays the motorcycle road speed in increments of one kilometre (or mile) per hour. I n the speedometer face is the electronic odometer and two trip meters. -
Page 24: Clockflrip Computer
General Information Clock/Trip Computer odometer and trip meter display modes or reset t h e trip meter with the motorcycle motion as this may lead t o loss of motorcycle Use the ' T r i ~ ' button t o switch between the odometer and trip... - Page 25 Genera I Information Maximum Speed Journey Distance Journey Distance The total distance travelled, since Journey Time the last reset. Average Fuel Consumption Instantaneous Fuel Journey Time Consumption. The total time elapsed, since the last reset. Clock Adjustment Average Speed The average speed is calculated from when the trip computer was last reset.
-
Page 26: Lap Timer
General Information Lap Timer When the correct hour display is shown, press the 'Set' button. The minutes display will begin t o flash. The minutes display is adjusted in the same way as for the hours. Once both hours and minutes are correctly set, press the 'Set' button t o confirm the setting. - Page 27 General Information maximum of 99 laps can be stored Data Recording Mode by the lap timer. Maximum Speed The maximum speed achieved per lap (the lap number will be displayed in the speedometer display position) or the maximum speed achieved during all recorded laps.
- Page 28 General Information N e w lap recording Data Retrieval Mode 1 Starter button 1 Lap time Lap number Each new lap is recorded by a brief Set button press of the starter button (with the 4 Trip button engine running only). Whilst in the data recording mode, pressing the Accessing t h e...
- Page 29 General Information The lap timer display will scroll Data Retrieval Mode through in the order: When the Data Retrieval Mode is Lap time accessed, the lap time for the first Maximum speed (per lap or lap will be displayed. The lap number maximum speed achieved) will be displayed in the speedometer Average speed (per lap o r total...
-
Page 30: Gear Change Lights
General Information Gear Change Lights pressing 'Scroll' button repeatedly will display the following: Total time for all laps Maximum speed achieved Average speed of all laps Total distance travelled 1 Gear change lights 2 Display screen 3 Scroll button 4 Set button Data Retrieval Mode total time 5 Trip button... - Page 31 General Information Adjusting Gear Change light Modes 3,000 rprn before 1 s t To adjust the gear change light set change-up modes, turn the ignition to the 'ON' speed position. 2,250 rprn before Press the 'Trip' and 'Scroll' buttons set change-up simultaneously for 4 seconds, after 4 speed seconds the current mode will be...
- Page 32 General Information I f the 'OFF' mode is selected a t this The corresponding lights for the point, the instruments will return t o current mode will be illuminated and their normal mode of operation, the clock will display the selected otherwise the gear change lights mode either 'SCALE', 'LEd 3: 'LEd...
- Page 33 General Information 1 Gear change lights 1 Gear change lights 2 Display screen 2 Display screen 3 Scroll button 3 Scroll button 4 Set button 4 Set button 5 Trip button Trip button To change the setting in increments Pressing the 'Set' button at this point of 1,000 rprn, press the 'Scroll' will return the instruments to their...
-
Page 34: Gear Position Display
General Information Gear Position Display 1 Gear change lights 2 Display screen position shown) 3 Scroll button The gear position display indicates 4 Set button gear position. When 5 Trip button transmission is in neutral (no gear The setting can now be changed in selected), the display will show ' n : increments of 100 rpm, again up t o a limit of 14,000 rpm. -
Page 35: Coolant Temperature Gauge
General Information Coolant Temperature I f the coolant temperature increases further, all 10 bars of the display will Gauge flash. The high temperature warning light in the tachometer will remain illuminated. Do not continue to run the engine if either of the high temperature warnings are displayed as severe 1 Coolant temperature gauge coolant... -
Page 36: Warning Lights
General Information Warning Lights Low Oil Pressure Warning Light Turn Signals With engine running, if the engine When the turn signal oil pressure becomes switch is turned t o left 4 C 3 dangerously low, o r right, the turn signal low oil pressure warning light will flash on and light... - Page 37 Contact an authorized on without running the engine. Triumph dealer as soon as possible to have the fault checked and Engine Management System rectified. Malfunction Indicator Light...
-
Page 38: Ignition Key
OFF, LOCK or P (PARK) position. Your authorized Triumph dealer can TO LOCK: Turn t h e key t o the 'OFF' supply a replacement key cut from position, push and fully release the... -
Page 39: Brake Lever Adjuster
General Information Brake Lever Adjuster N O T E Do not leave the steering lock in the 'P' position for long periods of time as this will cause the battery to discharge. unauthorized 1 Lever s and may also cause Adjuster wheel 3 Triangular mark An adjuster is fitted t o the front... -
Page 40: Right Handlebar Switches
General Information engine stop switch must be in the & 'RUN' position for the motorcycle t o operate. engine stop switch Do not attempt to adjust the lever emergency use. I f an emergency with the motorcycle ~n motion as arises which requires the engine t o this may lead t o loss of motorcycle be stopped, move the engine stop... -
Page 41: Left Handlebar Switches
General Information With the engine running, the starter NOTE button functions as the lap timer lighting ON/OFF s w i t c h i s 'trigger' button. Momentarily n o t f i t t e d to t h i s model. T h e pressing the starter button will start headlight, r e a r l i g h t a n d... -
Page 42: Fuel Requirement/Refuelling
Check local regulations The use of gasolines containing up t o before using leaded gasoline. (Methyl Tertiary Butyl MTBE Ether) is permitted in this Triumph motorcycle. NOTE 'knocking' or 'pinging' occurs a t a steady engine speed under normal load,... - Page 43 General Information Methanol Caution To help reduce hazards associated with refuelling, always observe the Fuels containing methanol should following fuel safety instructions: used damage Gasoline (fuel) is highly flammable components in the fuel system can and can be explosive under certain caused contact with...
-
Page 44: Fuel Tank Cap
General Information Fuel Tank Cap Filling the Fuel Tank Avoid filling the tank in rainy or dusty conditions where airborne material can contaminate the fuel. Contaminated fuel cause components. Fill the fuel tank slowly to help prevent spillage. Do not fill the tank to a level above the bottom of the filler neck. -
Page 45: Tool Kit And Handbook
General Information Stand Side Stand up the spillage immediately an dispose of the materials use Take care not t o spill any fuel the engine, exhaust pipes, tires any other part of the motorcycle. Because fuel is highly flammabl any fuel leak or spillage, or an failure to observe the safety advic given above may lead to a fir hazard, which could cause damag... -
Page 46: Seat Lock
General Information Whenever the side stand is used, down at the rear t o engage in the before riding, always ensure that the seat lock. stand is fully up after first sitting on the motorcycle. For instructions on safe parking, refer t o the 'How t o Ride the Motorcycle' section. -
Page 47: Breaking-In
General Information Both during and after breaking Brea ki ng-In pF?q in has been completed: Breaking-in Do not over-rev the engine is the name when cold. given to the R.P.M. Do not let the engine labour. process that Always downshift before the occurs engine begins to 'struggle'. -
Page 48: Safe Operation
Nuts, bolts, fasteners: Visually Maintenance and Adjustment section check that steering and suspension or see your authorized Triumph components, axles, and all controls dealer for the action required to are properly tightened o r fastened. return the motorcycle t o a safe Inspect all areas for loose/damaged operating condition. - Page 49 General Information Throttle: Throttle grip free-play Electrical equipment: All lights and the horn function correctly 0.08-0.12 i n (2-3mm). Ensure that the throttle grip returns to the idle (page 36) . position without sticking (page 74). Engine stop: Stop switch turns the Clutch: Smooth operation...
- Page 50 General Information This page intentionally left blank...
-
Page 51: How T O Ride The Motorcycle
How t o Ride the Motorcycle HOW TO RIDE THE MOTORCYCLE Table of Contents ................ To Stop the Engine ............... To Start the Engine ................... Moving Off ................Changing Gears ..................Braking ..................Parking ......... Considerations for High Speed Operation... -
Page 52: To Stop The Engine
How t o Ride the Motorcycle To Stop the Engine To Start the Engine 1 Engine stop switch 2 Starter button Check that the engine stop switch is 3 Neutral indicator light in the run position. 4 On position Ensure transmission neutral. -
Page 53: Moving Off
How to Ride t h e Motorcycle to zero before starting the engine. caution I n very cold conditions, part open the throttle to aid cold The low oil pressure warning light starting. Return it to the should go out shortly after the closed position once the engine starts. -
Page 54: How To Ride The Motorcycle
How to Ride the Motorcycle Changing Gears NOTE The gear change mechanism is the 'positive stop' type. This means that, for each movement gear change pedal, you can only select each gear, one after the other, in ascending or descending order. Do not change to a lower gear a t speeds that will cause excessive engine rpm (rlmin). - Page 55 Change down one gear a t a time Triumph strongly recommends that such that the transmission is in riders take course first gear when the motorcycle instruction, which includes advice comes t o a complete stop.
- Page 56 How to Ride t h e Motorcycle intermittently. Continuous brake ontrol accident. application overheat ndependent use of the front o r brakes reduce their brakes reduces overall effectiveness. performance. Extreme Riding with your foot on the brake ing may cause either wheel t o pedal or your hands on the brake lever may actuate the brake light, giving a false indication t o other...
- Page 57 How t o Ride the Motorcycle Parking lights are required by law, leave the tail, licence plate and position lights on by turning the ignition switch to P (Park). Do not leave the switch in the position for long periods-of-time as this will discharge the battery.
- Page 58 How to Ride the Motorcycle Considerations for High Speed Operation ne nandling character~st~cs or a motorcycle a t high speed may vary from those you are familiar with a t legal road speeds. Do n o t attempt high-speed operation unless you have received sufficient training and have the required skills as a serious accident may result from...
- Page 59 How to Ride Motorcycle Brakes grade and type of oil is used when topping-up. Check that the front and rear brakes are functioning properly. Coolant Check that the coolant level is at the Tires upper level line in the expansion tank.
-
Page 60: Accessories, Loading And Passengers
Accessories and Loading ACCESSORIES AND LOADING The addition of accessories and carriage of additional weight can affect t h e motorcycle's handling characteristics causing changes in stability and necessitating a reduction in speed. The following information has been prepared as a guide t o the potential hazards of adding accessories t o a motorcycle and carrying passengers and additional loads. - Page 61 Accessories and Loading r on closed course racetracks. circumstances. h-speed operation should only be attempted by riders who Speeds in excess of 8 0 mph (130 been instructed kmlh) should not be attempted on an accessory equipped motorcycle iques necessary high riding and are familiar with e motorcycle's characteristics in...
- Page 62 Accessories and Loading the operation of the motorcycle. with the changes in motorcycle passenger footrests and t o firmly hold onto the seat strap or the rider's waist o r hips. The passenger should also be advised to lean with the rider when travelling around corners and not t o lean unless the rider does so.
- Page 63 Accessories and Loading the footrests provided. must not impair control of the A passenger who is not tall enough motorcycle, must securely to reach the footrests will be attached and must not extend beyond the rear or sides of the Carriage of objects in excess of lb (5 kg) in weight, that are insecure, impair control or extend...
- Page 64 Accessories Loading This page intentionally left blank...
-
Page 65: Maintenance And Adjustment
Maintenance and Adjustment MAINTENANCE A N D ADJUSTMENT Table of Contents ..............Scheduled Maintenance ..................Engine Oil ................Cooling System ................Throttle Control ..................Clutch .................. Drive Chain ..................Brakes ..............Windshield Cleaning ..............Steering/Wheel Bearings ................Front Suspension ................... Tires .................. -
Page 66: Scheduled Maintenance
Only The US Environmental Protection an authorized Triumph dealer will Agency California have this knowledge Resources Board require that your... - Page 67 Maintenance and Adjustment malfunction. ather, terrain and geographical location affects maintenance. Th aintenance schedule should be adjusted t o match the particula e can lead t o a dangerous ridin Triumph dealer carry out t h...
- Page 68 Maintenance and Adjustment...
- Page 69 Maintenance and Adjustment *Evaporative system fitted t o California models only.
-
Page 70: Engine Oil
Maintenance and Adjustment Engine Oil order engine, transmiss- ion, clutch to function correctly, maintain the engine oil a t the correct level, and change the oil and oil filter in accordance with scheduled maintenance requirements. - Page 71 Maintenance and Adjustment Start the engine and run a t idle for Oil Level Inspection approximately five minutes. Stop t h e engine, then wait for at least three minutes for the oil to settle. Remove the dipstick, wipe the blade clean and screw fully home.
- Page 72 Place an oil drain pan beneath the engine. Remove the oil drain plug. tc. Contact with hot oil may caus Unscrew and remove the oil filter using Triumph service tool T3880312. Dispose of the old filter in 1 Oil drain plug an environmentally friendly way.
- Page 73 Running the engine with Oil Specification and Grade low oil pressure will cause engine Triumph high performance fuel damage. injected engines are designed to use 10W/40 or 15W/50 semi o r fully...
-
Page 74: Cooling System
Maintenance and Adjustment Cooling System Coolant Level Inspection To ensure efficient before riding the motorcycle, and top up the coolant if the level is low. Corrosion Inhibitors To protect the cooling system from corrosion, of corrosion inhibitor chemicals in the coolant is essential. - Page 75 Have your authorized Triumph dealer replace any defective Allow the engine t o cool. items. The expansion tank cap can be removed from the left hand of the caution motorcycle, between the rear of the lower fairing and the frame.
-
Page 76: Throttle Control
Maintenance and Adjustment Throttle Control Caution Using high-pressure water sprays, such as from a car wash facility o r household pressure washer, can damage the radiator fins, cause leaks and impair the radiator's efficiency. Do not obstruct or deflect airflow through the radiator by installing unauthorized accessories, either in front of the radiator o r behind the... - Page 77 Triumph dealer. However, emergency, throttle adjustment may be made as follows: throttle system checked by an authorized Triumph dealer if any ! . " changes are detected. Changes Warning can be due t o wear...
- Page 78 Maintenance and Adjustment 1 Opening cable adjuster rnm) of play using the adjuster near the throttle grip end of the cable. 2 Closing cable adjuster Tighten the adjuster locknut. 3 Closing cable free play With the throttle fully closed, ensure measurement point that there is 0.08-0.12 in (2-3 rnm) Throttle grip...
-
Page 79: Clutch
Ride carefully your nearest scheduled maintenance authorized Triumph dealer and have requirements. check throttle system thoroughly before riding again. Inspection Check that there is 0.08-0.12 in (2- Clutch 3 mm) clutch lever free-play at the lever. -
Page 80: Drive Chain
Therefore, first and then apply oil as mentioned always replace worn o r damaged above. chains using genuine Triumph parts supplied by an authorized Triumph dealer. Do not use a pressure wash to clean the chain as this may cause... - Page 81 Maintenance and Adjustment Chain Free Movement Chain Free Movement Inspection Adjustment The vertical movement of the drive chain must be in the range 1.38- 1.57 in (35-40 mm). Maximum movement position 1 Adjuster bolt 2 Adjuster bolt locknut Rear wheel spindle nut Loosen the wheel spindle nut.
- Page 82 Remove the chain guard. must have your Stretch the chain taut by hanging a authorized Triumph dealer take 22 Ib 44 Ib (10-20 Kg) weight on the chain. Measure the length of 20 links on the re t o take remedial...
- Page 83 The use of non-approved chains may result in a broken chain or may cause the chain to jump off Use a genuine Triumph supplied chain as specified in the Triumph Parts Catalogue. Never neglect chain maintenanc and always have chains installe...
-
Page 84: Brakes
Maintenance and Adjustment Brakes Brake Wear Inspection on the same wheel, replace all the brake pads in both calipers. Replacing individual pads will reduce braking efficiency and may cause an accident. After replacement brake pads have been fitted, ride with extreme caution until the new pads have Brake Wear... - Page 85 Triumph maintenance dealer must rectify t h e fault before lways use new brake fluid from a Riding with defective brakes m ealed container and never use...
- Page 86 I f there has been an appreciable drop in the level o f the f l u ~ d in either fluid reservoir, consult your authorized Triumph dealer advice before riding. Riding with depleted brake fluid levels, or with a brake fluid leak is dangerous and...
-
Page 87: Windshield Cleaning
Minor scratches pressed, your authorized can be removed using a commercial Triumph dealer to investigate and polishing compound suitable rectify the fault. plastic. The windshield must be replaced if... -
Page 88: Steering/Wheel Bearings
NOTE I f any free-play can be detected in Always inspect the wheel the steering (headstock) bearings, bearings at the same time ask your authorized Triumph dealer as the steering bearings. to inspect and rectify any faults before riding. - Page 89 I f any free-play can be detected, ask your authorized Triumph dealer t o inspect and rectify any faults before riding. Reposition t h e lifting device and repeat the procedure for t h e rear wheel.
-
Page 90: Front Suspension
To check that the forks operate smoothly: Position the motorcycle on level ground. While holding the handlebars and applying t h e front brake, pump the forks up and down several times. roughness excessive stiffness is detected, consult your authorized Triumph dealer. - Page 91 Maintenance and Adjustment Suspension Setting Chart NOTE This chart is only a guide. Setting requirements may vary for rider weight and personal preferences. See following pages ettings which vary from left to information regarding suspension adjustment. The standard suspension settings provide a comfortable ride and good Front Suspension Settings handling characteristics for general,...
- Page 92 Maintenance and Adjustment Compression Damping Spring Pre-Load Adjustment Adjustment The spring pre-load adjusters are The compression damping adjuster located at the top of each fork. is located near the bottom of both change the spring pre-load, forks, adjacent to the wheel spindle. rotate the adjuster clockwise to increase pre-load, or anti-clockwise to decrease pre-load.
- Page 93 Maintenance and Adjustment Compression Damping Adjustment Adjustment 1 Rebound damping adjuster 1 Compression damping adjuster The rebound damping adjuster is located a t t h e bottom of the rear The compression damping adjuster suspension unit on the left hand side is situated adjacent t o the rear of the motorcycle.
-
Page 94: Tires
Maintenance and Adjustment Tires Wheel marking Tire marking This Incorrect tlre lnflatlon will cause abnormal tread wear ;OtOrcycle instability problems that may lead equipped t o loss of control and an accident. with Under-inflation may result in the tubeless tires, valves and wheel tire slipping on, or coming off the rims. - Page 95 Recommended Tread Depth I n accordance with the periodic Only operate this Triumph maintenance chart, measure the motorcycle at high speed in closed depth o f the tread with a depth course on-road competition o r on gauge, and replace any tire that has closed course race tracks.
- Page 96 Tire Replacement rims, causing rapid tire deflation All Triumph motorcycles are carefully that may result in a loss of vehicle and extensively tested in a range of control and an accident. Never...
- Page 97 24 hours after fitting, t h e tire your authorized Triumph dealer. pressures must be checked and Only use self-adhesive weights. adjusted, and the tires examined Clip on weights may damage the for correct seating.
-
Page 98: Battery
Maintenance and Adjustment Battery 've off explosive arks, flames and Provide adequate charging or using attery In an enclosed space. he battery contains sulphuric acid which would lectrolyte). Contact with skin or may cause severe burns. protective clothing and a ctrolyte gets on your skin, ush with water for a t least 15 inutes... - Page 99 Maintenance and Adjustment Battery Disposal Battery Removal Should t h e battery ever require replacement, t h e original battery must be handed t o a recycling agent who will ensure that the dangerous substances from which the battery is manufactured do n o t pollute t h e environment.
-
Page 100: Fuse Box
Maintenance and Adjustment Fuse Box Battery Installation Ensure that t h e battery terminals do not touch t h e motorcycle frame as this may cause a short circuit or Place the battery in the battery case. Reconnect the battery, positive (red) lead first. - Page 101 Maintenance and Adjustment Fuse Identification fuse identification numbers listed in the table correspond with A blown fuse is indicated when all of those printed on the fuse box cover, the systems p rotected that fuse shown below. Spare fuses are become inoperative.
-
Page 102: Headlights
Maintenance and Adjustment Headlight Adjustment Headlights Each headlight can be adjusted by Headlights means of vertical and horizontal adjustment screws located on the rear o f each headlight. Adjust road speed t o suit the visibility and weather conditions in which the motorcycle is being operated. - Page 103 Maintenance and Adjustment Caution Do not adjust the pivot screws as this will cause headlight reflector to become detached from pivot screw, leading irreparable damage headlight. Turn the vertical adjustment screws on each headlight clockwise to raise t h e beam or anti-clockwise t o lower t h e beam.
- Page 104 Maintenance and Adjustment Remove the bulb from the bulb retainer. Installation is the reverse of the removal procedure. Position Lamp Bulb Replacement When reconnecting the battery, connect the positive (red) lead first. 1 Bulb holder 2 Position lamp bulb The position lamps are fitted to the lei7 and right each headlight.
-
Page 105: Rear Light
Maintenance and Adjustment Rear Light Licence Plate Light Rear Light Replacement Bulb Replacement The rear light unit is a sealed, Carefully remove t h e rubber bulb maintenance free LED unit. retainer from back of the number plate light unit and detach the bulb. -
Page 106: Cleaning
Maintenance and Adjustment Cleaning Where to be Careful Avoid spraying water with any great Frequent, regular cleaning is an force near the following places: essential part of the maintenance of Instruments. your motorcycle. regularly Brake cylinders brake cleaned, the appearance will be calipers. - Page 107 Maintenance and Adjustment Cleaning Exhaust After Washing System Remove the plastic bags and tape, and clear the air intakes. All parts of the exhaust system o f your motorcycle must be cleaned Lubricate the pivots, bolts and nuts. regularly t o avoid a deterioration o f Test the brakes before motorcycle its appearance.
- Page 108 Maintenance and Adjustment Drying Dry the exhaust system as far as possible with a soft cloth. Do not run The use of silicone containing the engine t o dry the system or products will cause discoloration of spotting will occur. the chrome and must not be used.
-
Page 109: Storage
Storage STORAGE Remove the battery, and store i t Preparation for Storage where it will not be exposed to direct Clean the entire vehicle thoroughly. sunlight, moisture, freezing Empty the fuel from the fuel tank temperatures. During storage into a secure container. should be given a slow charge (one Ampere or less) - Page 110 Storage Preparation after Storage Charge the battery if necessary, and install it in the motorcycle. Fill the fuel tank with fuel. Change the engine oil and filter. Check all the points listed in the daily safety checks section. Before starting the engine, remove one of the spark plugs from each cylinder.
-
Page 111: Specifications
Specifications SPECIFICATIONS Dimensions ....Overall length. 79.1 in (2010 mm) ....Overall width 27.5 in (700 mm) . - Page 112 Specifications Cooling ....Coolant Type Mobil Antifreeze ..Waterlanti-freeze ratio .50/50 ... Coolant Capacity .0.63 US gal (2.4 litres) .
- Page 113 Specifications Tires Tire Pressures (Cold) : ....Front .34 lb/in2 (2.35 Bar) ....Rear .36 lb/in2 (2.50 Bar) .
- Page 114 Specifications Fluids and Lubricants ... . . Engine Oil .Semi o r fully synthetic 10W/40 or 15W/50 motorcycle engine which meets specification API SH (or higher) and JASO MA, such as Mobil 1 Racing 4T .
- Page 115 Index INDEX Change, 73 Corrosion Inhibitors, 72 Accessories, 58 Level Adjustment, 73 Level Inspection, 72 Battery, 96 Disposal, 97 Dimensions, 109 Installation, 98 Drive Chain, 78 Maintenance, 97 Lubrication, 78 Removal, 97 Movement Adjustment, 79 Brakes, 82 Movement Inspection, 79 Brake and Clutch Lever Wear Inspection, 80 Adjusters, 37...
-
Page 116: Tool Kit,
Index Fuel, 110 Fuel Requirement, 40 Safety, 5 Filling the Fuel Tank, 42 Daily Checks, 46 Fuel Grade, 40 Fuel and Exhaust Fumes, 5 Fuel Tank Cap, 42 Handlebars and Footrests, 11 Fuel System, 110 Helmet and Clothing, 6 Fuse Box, 98 Maintenance/Equipment, 8 Motorcycle, 5 Parking, 7... - Page 117 Index Warning Label Locations, 12 Warning Labels, 2 Warnings, Cautions and Notes, 1 Weights, 109 Windscreen Cleaning, 85...