
Subscribe to Our Youtube Channel
Related Manuals for Clarke Power FG5100ES


Summary of Contents for Clarke Power FG5100ES
- Page 1 GENERATOR MODEL NO: FG4050ES / FG5100ES PART NO: 8857715, 8857720 OPERATION & MAINTENANCE INSTRUCTIONS LS0310...
-
Page 2: Introduction
INTRODUCTION Thank you for purchasing this CLARKE Generator. Before attempting to use this product, please read this manual thoroughly and follow the instructions carefully. In doing so you will ensure the safety of yourself and that of others around you, and you can look forward to your purchase giving you long and satisfactory service. -
Page 3: Table Of Contents
TABLE OF CONTENTS INTRODUCTION ............... 2 GUARANTEE ..............2 TABLE OF CONTENTS ............3 GENERAL SAFETY RULES ..........4 SAFETY SYMBOLS ............6 GENERATOR OVERVIEW ..........7 UNPACKING AND ASSEMBLY ........8 BEFORE USING THE GENERATOR ........11 USING YOUR GENERATOR ..........14 MAINTENANCE ............... -
Page 4: General Safety Rules
GENERAL SAFETY RULES WARNING: EXHAUST FUMES CAN BE EXTREMELY DANGEROUS IF INHALED WORK AREA • Always use in a well ventilated area. • Always position the exhaust outlet away from people. • Never use indoors or in a confined space. •... - Page 5 6. Never start the engine if there is spilled fuel. Any spillage must be wiped clean and the generator allowed to dry before attempting to start the engine. PREVENTION OF ELECTRIC SHOCK 1. Never use the generator in wet conditions unless it is well protected/ covered.
-
Page 6: Safety Symbols
SAFETY SYMBOLS Caution - The user should be aware of a general hazard Dangerous voltage Flammable Hot Surface - Do not touch Poisonous fumes - Do not use the generator in an enclosed space. Read Instruction manual before use. Corrosive material Explosive risk... -
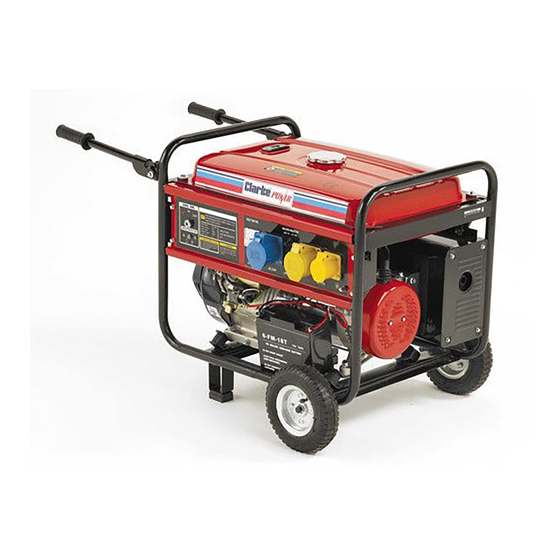
Page 7: Generator Overview
GENERATOR OVERVIEW DESCRIPTION NO DESCRIPTION Fuel level gauge Starting handle Fuel tank cap Fuel supply valve Ignition panel Handle Control panel Air Filter Wheel Choke lever Battery Muffler Dipstick Spark plug Drain plug... -
Page 8: Unpacking And Assembly
UNPACKING AND ASSEMBLY Unpack your generator and check to ensure the following items are present. Should there be any deficiency or damage caused during transit contact your Clarke dealer immediately. • The generator • Spark plug box spanner • Tommy bar •... - Page 9 4. Place the axle against the frame on the generator as shown. 5. Fix the axle to the frame using 2 x Long bolts, 2 x Washers, 2 x Spring washers and 2 x Nuts. 6. Carefully place the generator onto its wheels/feet.
- Page 10 CONNECTING THE BATTERY • Connect the negative wire to the negative terminal on the battery as shown on the right. • Connect the positive wire to the positive terminal on the battery. • Ensure both terminals are covered by the plastic covers as shown.
-
Page 11: Before Using The Generator
BEFORE USING THE GENERATOR IMPORTANT: Generators should ALWAYS be earthed. Attach a suitable earth lead to a good earth - water pipe, ground spike etc., whenever you use this generator. Before using your generator check that: • The generator is in good condition and free from any damage. •... - Page 12 CHECKING THE ENGINE OIL LEVEL WARNING: TO CARRY OUT THIS CHECK, PLACE THE GENERATOR ON LEVEL GROUND WITH THE ENGINE SWITCHED OFF. WARNING: TAKE CARE NOT TO TOUCH ANY HOT PARTS OF THE GENERATOR WHEN CHECKING THE OIL LEVEL. 1. Turn the oil filler cap anti- clockwise and remove from the oil tank, wipe the dipstick with a clean cloth.
- Page 13 CHECKING THE FUEL LEVEL 1. Check the fuel level on the fuel gauge. The fuel gauge will show as red when you have fuel in the tank turning white as the fuel level decreases Empty Full To add fuel, open the fuel filler Fuel filler cap cap.
-
Page 14: Using Your Generator
USING YOUR GENERATOR STARTING THE ENGINE 1. Remove all connections from the AC sockets. 2. Set the AC circuit breaker to the off position. 3. Turn on the fuel supply valve. 4. If you are starting the generator ‘cold’ set the choke lever to the ON position. - Page 15 5. Insert the key into the ignition. 6. Turn and hold the key in the START position. 7. Once the engine starts to run turn the key back to the ON position. 8. Once the engine has warmed up, set the choke lever to the OFF position pushed in).
- Page 16 CONNECTING ELECTRICAL DEVICES The generator can supply both 230V AC and 115V AC. The ports are laid out in the following order: (from left to right): 1 x 32amp 230v (Blue),1 x 32amp 115v (Large Yellow) and 1 x 16amp 115v (Small Yellow).
- Page 17 SHUTTING DOWN THE GENERATOR 1. Disconnect all appliances connected to the generator. 2. Set the circuit breaker to ‘OFF’. 3. Turn the ignition key to the OFF position. 4. Set the fuel supply valve to OFF. NOTE: To stop the generator in an emergency simply turn the ignition key to the off position.
-
Page 18: Maintenance
MAINTENANCE CHANGING THE ENGINE OIL CAUTION: PROLONGED EXPOSURE TO USED ENGINE OIL IS DANGEROUS, ALWAYS WASH YOUR HANDS THOROUGHLY AFTER HANDLING USED ENGINE OIL. 1. Unscrew and remove the oil filler cap/dipstick. 2. Place an oil collection tray under the drain plug. 3. - Page 19 CHANGING THE SPARK PLUGS CAUTION: ALLOW THE ENGINE TO COOL BEFORE REMOVING THE SPARK PLUG. 1. Remove the spark plug cap from the spark plug. Use the supplied spark plug spanner to remove the spark plug. 3. Remove any carbon that has accumulated around the sparkplug.
- Page 20 3. Make sure that the air filter is clean and not damaged. • If the air filter is damaged contact Clarke spare parts department for a replacement. • If the filter is dirty, wash the filter in a solution of warm water and mild detergent and rinse thoroughly.
- Page 21 CLEANING THE FUEL VALVE FILTER / DRAINING THE FUEL TANK 1. Set the fuel supply valve to OFF. 2. U nscrew and remove the cup, then remove the valve filter and ‘O’ ring. 3. Wash these parts in a non- inflammable solvent.
-
Page 22: Troubleshooting
The air filter is dirty Clean the air filter, See page 20 difficult to start The fuel filter is dirty Clean the fuel filter, See page 21 If this does not solve your problem, please contact the Clarke service department. See page 27... -
Page 23: Specifications
SPECIFICATIONS FG4050ES FG5100ES Engine Engine Model 182FD 188FD Type Petrol Displacement (cm Max. power output (hp/rpm) 11/3600 13/3600 Ignition type Non contact transisterised ignition Start system Electric with recoil backup Fuel tank capacity (L) Fuel consumption (L/hr.) 2.45 Maximum run time (h) Engine oil capacity (L) Guaranteed sound power (L Generator... -
Page 24: Exploded Diagram & Parts List
EXPLODED DIAGRAM & PARTS LIST... - Page 25 EXPLODED DIAGRAM & PARTS LIST DESCRIPTION PART NO DESCRIPTION PART NO Crankcase RKFGES001 Bolt RKFGES032 Oil seal, crankshaft RKFGES002 Cylinder head Assy RKFGES033 Washer RKFGES003 Outlet pipe RKFGES034 9×4.5×160 Drain plug RKFGES004 Connecting rod RKFGES035 Oil seal, regulating RKFGES005 Assy sway bar Piston pin circlip RKFGES036...
- Page 26 EXPLODED DIAGRAM & PARTS LIST DESCRIPTION PART NO DESCRIPTION PART NO Clamp, check RKFGES065 Fuel cock RKFGES099 valve Cushion RKFGES100 Bolt M6×12 RKFGES066 Fitting brush, fuel RKFGES101 Supporting plate RKFGES067 tank Washer RKFGES102 Back spring RKFGES068 Flange bolt M6×22 RKFGES103 Fine regulating RKFGES069 Gasket, fuel sensor...
-
Page 27: Parts And Servicing
Control panel case 1 RKFGES141 Circuit protector RKFGES142 For Parts & Servicing, please Consent RKFGES143 contact your nearest dealer, o CLARKE International, on one of Main wire harness RKFGES144 the following numbers. Assy Bolt M6×12 RKFGES145 PARTS & SERVICE TEL: 020 8988 7400... -
Page 28: Declaration Of Conformity
DECLARATION OF CONFORMITY (FG4050ES) - Page 29 DECLARATION OF CONFORMITY (FG4050ES)
- Page 30 DECLARATION OF CONFORMITY (FG5100ES)
- Page 31 DECLARATION OF CONFORMITY (FG5100ES)
Need help?
Do you have a question about the Power FG5100ES and is the answer not in the manual?
Questions and answers