Table of Contents
Advertisement
Advertisement
Table of Contents

Related Manuals for Cisco Linksys NAS200


Summary of Contents for Cisco Linksys NAS200
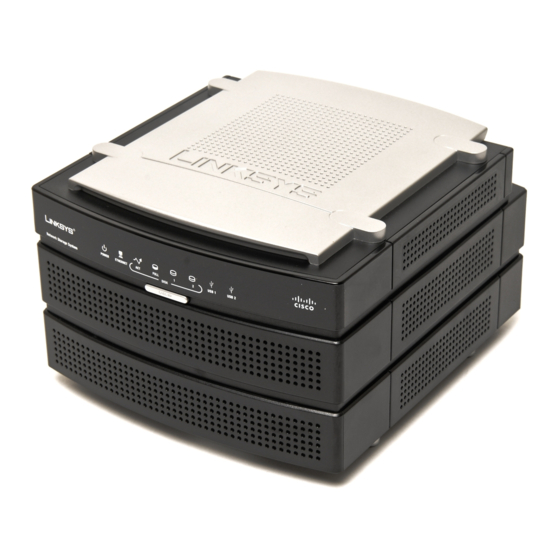
- Page 1 USER GUIDE Network Storage System with 2 Bays NAS200 Model:...
-
Page 2: About This Guide
Glossary www.linksys.com/glossary Network Security www.linksys.com/security Copyright and Trademarks Linksys, Cisco and the Cisco Logo are registered trademarks or trademarks of Cisco Systems, Inc. and/or its affiliates in the U.S. and certain other countries. Copyright © 2008 Cisco Systems, Inc. All rights reserved. -
Page 3: Table Of Contents
Table of Contents Chapter 1: Product Overview Front Panel..........1 Back Panel . - Page 4 Table of Contents Industry Canada Statement ........36 User Information for Consumer Products Covered by EU Directive 2002/96/EC on Waste Electric and Electronic Equipment (WEEE) .
-
Page 5: Chapter 1: Product Overview
Product Overview Chapter 1 Chapter 1: DISK 1 (Green) The DISK 1 LED serves two purposes. The LED is continuously lit when Product Overview the hard drive in the top bay is ready for use. It flashes when the hard drive is reformatting or rebuilding with Disk 2 (RAID 1 mode). -
Page 6: Drive Bay Doors
Product Overview Chapter 1 USB 2 The USB 2 port connects to your second USB storage device. Press the USB 2 button to eject the device from the USB 2 port. After the Network Storage System beeps once and the USB 2 LED powers off, you can remove the device. -
Page 7: Chapter 2: Configuration Using The Setup Wizard
Storage System Add a second hard drive to the already configured • Welcome Screen with Options Network Storage System Set up NAS200 Install the Network Storage – Install backup software on your computer • System for the first time. (The instructions are Access the web-based utility •... -
Page 8: Set Up Second Drive
Configuration Using the Setup Wizard Chapter 2 For the public folder, keep the default drive letter, or The network drive(s) are mapped to your computer. select a different letter from the drop-down menu. Click Next. Click Exit to exit the Setup Wizard, or click Next to return to the Welcome screen. - Page 9 Configuration Using the Setup Wizard Chapter 2 Click Set up Second Drive. Physical Installation of the Second Hard Drive The Setup Wizard automatically searches for any Set up Second Drive Network Storage System on your network. If it is not The Setup Wizard explains that these instructions detected, check its cable connections, and make sure cover the physical installation and drive configuration.
- Page 10 Configuration Using the Setup Wizard Chapter 2 Select the appropriate configuration for your drive Review the new settings. If they are correct, click Save. If you would like to change them, click Back to return usage: to the previous screen. NOTE: If you change the drive configuration setting (for example, from Separate Disks to...
-
Page 11: Backup Software
Configuration Using the Setup Wizard Chapter 2 Click Set up Computer. The network drive(s) are mapped to your computer. Click Exit to exit the Setup Wizard, or click Next to return to the Welcome screen. Set up Computer For the public folder of the second hard drive, keep the default drive letter, or select a different letter from the Network Drive Mapped drop-down menu. - Page 12 Configuration Using the Setup Wizard Chapter 2 Click Install. Enter your information in the User Name and Company Name fields. Then select the users of the backup software: Anyone who uses this computer (all users) • Only for me • Click Next.
-
Page 13: Advanced Setup
Configuration Using the Setup Wizard Chapter 2 Double-click the desktop icon to access the software. The Setup Wizard notifies you that a user name and password are required for access. Click OK. Desktop Icon for Backup Software For more information, click Help on the main menu of the backup software. - Page 14 Configuration Using the Setup Wizard Chapter 2 Click Yes. The shared folder automatically opens in a separate window. Repeat steps 5-8 to map additional network drives. Close on the Shared Folder To exit the utility, click Mapping screen. Install Drive Mapping Utility For more information about the utility, refer to “Chapter 4: Use”.
-
Page 15: Chapter 3: Advanced Configuration
Advanced Configuration Chapter 3 Chapter 3: The web-based utility appears. Advanced Configuration NOTE: When first installing the Network Storage System, you should use the Setup Wizard on the Setup CD-ROM. If you want to configure advanced settings, use this chapter. After setting up the Network Storage System with the Setup Wizard (located on the CD-ROM), it is ready for use. -
Page 16: My Files > My Downloads
Advanced Configuration Chapter 3 My Files > My Downloads Login The login you use to access your files is displayed. If the Download Manager feature has been enabled through the Administration > System Options screen and your login has Download Manager access, then the My Downloads screen will be available. -
Page 17: My Files > Personal Info
Advanced Configuration Chapter 3 My Files > Personal Info Change your password on this screen. Folders Browser Current Folder Select the location of the shared – folder that you want to specify as the current folder. My Files > Personal Info New Folder To create a new folder, enter its name, –... -
Page 18: Administration > Users
Advanced Configuration Chapter 3 Disk Status Information about the hard drive(s) is displayed. Internal Disks Volume Mode The disk configuration is displayed. Volume Status The format status of each hard drive is displayed. Disk 1-2, LVM, RAID 1, or RAID 0 The amount of free and total space is displayed. - Page 19 Advanced Configuration Chapter 3 Password Enter the password this user will use to Allow Download Manager Access If you want to • • access the Network Storage System. allow this user to use the Download Manager, then select this option. Verify Password Enter the password again.
-
Page 20: Administration > Shared Folders
Advanced Configuration Chapter 3 Administration > Shared Folders The Shared Folders screen allows you to create and manage shared folders. Within a shared folder, users with access to that shared folder can create other folders and files. Folders Browser Current Folder Select the location of the shared –... -
Page 21: Administration > System Options
Advanced Configuration Chapter 3 Location The location cannot be changed. WINS • • Display Name Change the display name of the folder. DDNS • • Punctuation and other special characters (for example, Date & Time • * / | \ ) cannot be used in the name. E-Mail Alert •... - Page 22 Advanced Configuration Chapter 3 Network Mask Enter the Network or Subnet Mask, • which must match the Subnet Mask of the other devices on your network. The default is 255.255.255.0. Gateway If you have a router on your network, enter its IP address.
-
Page 23: E-Mail Alert
Advanced Configuration Chapter 3 DDNS NTP Server To use a pre-selected NTP server, select • Choose and select an NTP server from the drop-down The Network Storage System offers a Dynamic Domain menu. Name System (DDNS) feature. DDNS lets you assign a fixed To manually select an NTP server, select Specify and host and domain name to a dynamic Internet IP address, enter the URL or IP address of an NTP server. -
Page 24: Firmware Upgrade
Advanced Configuration Chapter 3 Scheduled Shutdown Convert Failed Logins to “guest” Logins (Windows Networks) If you want to allow all Windows users to Shutdown Select the day and time you want the access the Network Storage System with guest access automatic shutdown to occur. -
Page 25: Media Server
Advanced Configuration Chapter 3 Current Firmware Restore Click Restore to restore a previously saved configuration file. The Restore Configuration File screen Use this section to search for updated firmware. appears. Current Firmware Version The firmware version of the Network Storage System is displayed. Check for Upgrade Click this option to visit the Linksys website, www.linksys.com, and check for updated... -
Page 26: Disk Utility
Advanced Configuration Chapter 3 Directory The path and name of the selected folder are displayed. If you wish, each directory can be limited to a specific media type. The default setting, All, scans for all content types. Select the appropriate media type(s): All, Music, Picture, or Video. - Page 27 Advanced Configuration Chapter 3 remaining memory, and additional partitions cannot WARNING: Before you format drive(s), back be created. up pre-existing data because all data on your drive(s) will be erased when they are Click Apply to save your changes, or click Cancel to formatted.
-
Page 28: Disk Configuration
Advanced Configuration Chapter 3 Self-Monitoring Analysis and Reporting Technology (S.M.A.R.T.) can warn you of impending drive problems before the drive fails. Disk 1-2, LVM, RAID 1, or RAID 0 The S.M.A.R.T. status of the drive is displayed. Click Test Now to begin the S.M.A.R.T. - Page 29 Advanced Configuration Chapter 3 Maximum Security Mirroring (RAID 1) Disk 1 is mirrored into Disk 2. Total capacity is equal to the capacity of the smaller disk. NOTE: Mirroring (RAID 1) and Striping (RAID 0) require two hard drives. Maximum Speed Striping (RAID 0) Disk 1 and Disk 2 are striped into one logical volume.
-
Page 30: Chapter 4: Use
Chapter 4 Chapter 4: Use Web Access To access the Network Storage System from any computer This chapter describes access rights, access methods, and using a web browser, follow these instructions: use of USB storage devices. Open your web browser. In the Address field, enter http://<IP_address_of_ WARNING:... - Page 31 Chapter 4 NOTE: The Download Manager feature lets you specify download tasks for the Network Storage System. The advantage is that the Network Storage System can run the download task separately, without using your computer. For example, if you order a movie online, then you can have the Network Storage System—instead of your computer—download the movie.
-
Page 32: Usb Storage Devices
Chapter 4 Enter your new password in the New Password and Confirm New Password fields. Save to save your new password, or click Cancel Click to clear your change. Folders Browser Current Folder Select the location of the shared – folder that you want to specify as the current folder. -
Page 33: How To Use The Network Drive Mapping Utility
Chapter 4 After the Network Storage System beeps once and Shared Folder Mapping screen appears. Select the the appropriate USB LED powers off, disconnect the appropriate Network Storage System. device. You can also use the Network Drive Mapping Utility to remove the device. - Page 34 Chapter 4 Program Folder How to Remove a USB Storage Device Right-click the icon in the system tray. If the utility is inactive, its icon is not displayed in the system tray. Click Safely Remove USB Device. If you need to map a shared folder or USB storage device, Select the appropriate USB storage device, and click Eject.
-
Page 35: Appendix A: Troubleshooting
Troubleshooting Appendix A Appendix A: Click Start. Click Search. Click Computers or people. Click A computer on the network. Enter the name of Troubleshooting the Network Storage System, and click Search. In all Windows operating systems, the TCP/IP protocol is installed by default. If you have uninstalled the The Setup Wizard does not detect any Network Storage TCP/IP protocol, refer to Windows Help for instructions Systems. - Page 36 Troubleshooting Appendix A NOTE: Windows uses the computer name as WEB: If your questions are not addressed here, the default user name on the login screen. To refer to the Linksys website, www.linksys.com create a new Windows user name, enter a new user name and password on the login screen.
-
Page 37: Appendix B: Specifications
Specifications Appendix B Appendix B: Specifications Model NAS200 Standards IEEE 802.3, IEEE 802.3u Ports Power, Ethernet, USB 1, USB 2 Buttons Power, USB 1, USB 2, RESET, BACK UP LEDs Power, Ethernet, Disk (Act, Full, 1, 2), USB 1, USB 2... -
Page 38: Appendix C: Warranty Information
Warranty Information Appendix C Appendix C: service offerings. This limited warranty shall not apply to such third party software or service offerings. This limited Warranty Information warranty does not guarantee any continued availability of a third party’s service for which this product’s use or operation may require. - Page 39 Warranty Information Appendix C rejected. Do not include any other items with the product you are returning to Linksys. Defective product covered by this limited warranty will be repaired or replaced and returned to you without charge. Customers outside of the United States of America and Canada are responsible for all shipping and handling charges, custom duties, VAT and other associated taxes and charges.
-
Page 40: Appendix D: Regulatory Information
Regulatory Information Appendix D Appendix D: Avis d’Industrie Canada Regulatory Information Cet appareil numérique de la classe B est conforme à la norme NMB-003 du Canada. Le fonctionnement est soumis aux conditions suivantes : FCC Statement Ce périphérique ne doit pas causer d’interférences; This product has been tested and complies with the Ce périphérique doit accepter toutes les interférences specifications for a Class B digital device, pursuant to Part... -
Page 41: User Information For Consumer Products Covered By Eu Directive 2002/96/Ec On Waste Electric And Electronic Equipment (Weee)
Regulatory Information Appendix D User Information for Consumer Products Čeština (Czech) - Informace o ochraně životního prostředí pro zákazníky v zemích Evropské unie Covered by EU Directive 2002/96/EC on Evropská směrnice 2002/96/ES zakazuje, aby zařízení označené tímto symbolem na produktu anebo na obalu bylo likvidováno Waste Electric and Electronic Equipment s netříděným komunálním odpadem. - Page 42 Regulatory Information Appendix D Eesti (Estonian) - Keskkonnaalane informatsioon Français (French) - Informations environnementales Euroopa Liidus asuvatele klientidele pour les clients de l’Union européenne Euroopa Liidu direktiivi 2002/96/EÜ nõuete kohaselt on La directive européenne 2002/96/CE exige que l’équipement seadmeid, millel on tootel või pakendil käesolev sümbol sur lequel est apposé...
- Page 43 Regulatory Information Appendix D Lietuvškai (Lithuanian) - Aplinkosaugos informacija, Nederlands (Dutch) - Milieu-informatie voor klanten skirta Europos Sąjungos vartotojams in de Europese Unie Europos direktyva 2002/96/EC numato, kad įrangos, kuri ir De Europese Richtlijn 2002/96/EC schrijft voor dat apparatuur die kurios pakuotė...
- Page 44 Regulatory Information Appendix D Português (Portuguese) - Informação ambiental para Slovenščina (Slovene) - Okoljske informacije za stranke clientes da União Europeia v Evropski uniji A Directiva Europeia 2002/96/CE exige que o equipamento Evropska direktiva 2002/96/ES prepoveduje odlaganje opreme s que exibe este símbolo no produto e/ou na sua embalagem tem simbolom –...
-
Page 45: Appendix E: Software License Agreement
CISCO-LINKSYS LLC. BY DOWNLOADING OR INSTALLING THE SOFTWARE, OR USING THE PRODUCT CONTAINING This product from Cisco-Linksys LLC or from one of its THE SOFTWARE, YOU ARE CONSENTING TO BE BOUND BY affiliates Cisco Systems-Linksys (Asia) Pte Ltd. or Cisco- THIS AGREEMENT. - Page 46 Software License Agreement Appendix E your Linksys product and/or the Software is being used in OR RELATED TO THE USE OF OR INABILITY TO USE THE accordance with the terms of this Agreement; (iii) to provide SOFTWARE, EVEN IF LINKSYS HAS BEEN ADVISED OF improvements to the way Linksys delivers technology to THE POSSIBILITY OF SUCH DAMAGES.
- Page 47 Software License Agreement Appendix E GNU General Public License is intended to guarantee your TERMS AND CONDITIONS FOR COPYING, DISTRIBUTION AND freedom to share and change free software–to make sure MODIFICATION the software is free for all its users. This General Public This License applies to any program or other work License applies to most of the Free Software Foundation’s which contains a notice placed by the copyright...
- Page 48 Software License Agreement Appendix E If the modified program normally reads commands Accompany it with the information you received as interactively when run, you must cause it, when to the offer to distribute corresponding source code. started running for such interactive use in the most (This alternative is allowed only for noncommercial ordinary way, to print or display an announcement distribution and only if you received the program...
- Page 49 Software License Agreement Appendix E If, as a consequence of a court judgment or allegation not specify a version number of this License, you of patent infringement or for any other reason (not may choose any version ever published by the Free limited to patent issues), conditions are imposed on Software Foundation.
- Page 50 Software License Agreement Appendix E GNU LESSER GENERAL PUBLIC LICENSE To protect each distributor, we want to make it very clear that there is no warranty for the free library. Also, if the Version 2.1, February 1999 library is modified by someone else and passed on, the recipients should know that what they have is not the Copyright (C) 1991, 1999 Free Software Foundation, Inc.
- Page 51 Software License Agreement Appendix E freedom and the wherewithal to run that program using a You may copy and distribute verbatim copies of the modified version of the Library. Library’s complete source code as you receive it, in any medium, provided that you conspicuously and The precise terms and conditions for copying, distribution appropriately publish on each copy an appropriate and modification follow.
- Page 52 Software License Agreement Appendix E Thus, it is not the intent of this section to claim When a “work that uses the Library” uses material from rights or contest your rights to work written entirely a header file that is part of the Library, the object code by you;...
- Page 53 Software License Agreement Appendix E Use a suitable shared library mechanism for linking You may not copy, modify, sublicense, link with, or with the Library. A suitable mechanism is one that distribute the Library except as expressly provided (1) uses at run time a copy of the library already under this License.
- Page 54 Software License Agreement Appendix E software distributed through that system in reliance BECAUSE THE LIBRARY IS LICENSED FREE OF CHARGE, on consistent application of that system; it is up to THERE IS NO WARRANTY FOR THE LIBRARY, TO THE the author/donor to decide if he or she is willing to EXTENT PERMITTED BY APPLICABLE LAW.
- Page 55 Software License Agreement Appendix E OpenSSL License Original SSLeay License Copyright © 1998-2007 The OpenSSL Project. All rights Copyright © 1995-1998 Eric Young (eay@cryptsoft.com)All reserved. rights reserved. Redistribution and use in source and binary forms, with This package is an SSL implementation written by Eric or without modification, are permitted provided that the Young (eay@cryptsoft.com).
- Page 56 Software License Agreement Appendix E DIRECT, INDIRECT, INCIDENTAL, SPECIAL, EXEMPLARY, OR CONSEQUENTIAL DAMAGES (INCLUDING, BUT NOT LIMITED TO, PROCUREMENT OF SUBSTITUTE GOODS OR SERVICES; LOSS OF USE, DATA, OR PROFITS; OR BUSINESS INTERRUPTION) HOWEVER CAUSED AND ON ANY THEORY OF LIABILITY, WHETHER IN CONTRACT, STRICT LIABILITY, OR TORT (INCLUDING NEGLIGENCE OR OTHERWISE) ARISING IN ANY WAY OUT OF THE USE OF THIS SOFTWARE, EVEN IF ADVISED OF THE POSSIBILITY OF SUCH DAMAGE.