Table of Contents
Advertisement
Quick Links
Advertisement
Table of Contents

Related Manuals for Akura ASDVCR210R-S


Summary of Contents for Akura ASDVCR210R-S
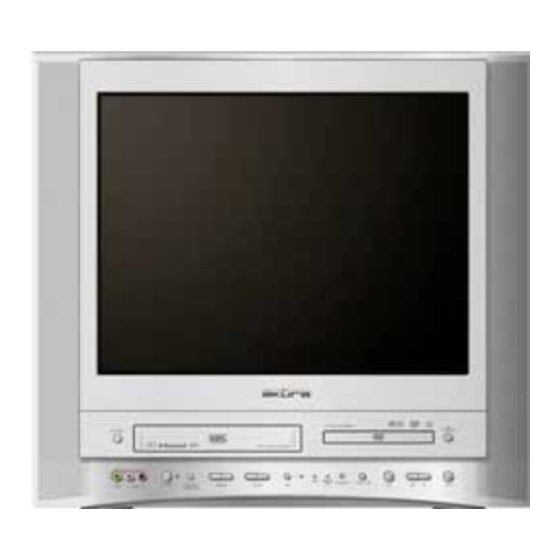
- Page 1 ASDVCR210R-S TV/VCR/DVD COMBINATION User’ s Manual...
-
Page 2: Installation
CAUTION: TO REDUCE THE RISK OF ELECTRIC SHOCK. DO NOT REMOVE COVER (OR BACK). NO USER SERVICEABLE PARTS INSIDE. REFER SERVICING TO QUALIFIED SERVICE PERSONNEL. The graphic symbols on the back cover of the set mean the following: The lightning flash with arrowhead symbol within an equilateral triangle is intended to alert the user to the presence of uninsulated "dangerous voltage"... - Page 3 CAUTION Never tamper with any components inside your set, or any other adjustment controls not men- tioned in this manual. All television receivers are high voltage instruments. Your Picture Tube is highly evacuated. If it is broken, glass fragments will be expelled at a high velocity. Scratching, Chipping or undue pressure must be avoided.
-
Page 4: Important Safeguards
IMPORTANT SAFEGUARDS PREFITTED MAINS PLUGS For you convenience a mains plug has been fitted to this appliance. For your safety please ob- serve the following information. 1. Should the fuse in the plug fail, remove the plug from the wall socket and replace the fuse with a 3 Amp ASTA approved to BS 1362 fuse. -
Page 5: Features Of This Product
FEATURES OF THIS PRODUCT DVD, VCD, CD, CD-R(MP3), CD-RW, VHS playback function DVD one-touch record function Watching DVD for recording broadcast Integrated REMOTE (VCR, DVD) Index Search GUI (Graphical User Interface) OSD (On Screen Display) By using the [DISPLAY] button on the remote control, information on the DVD / VCD / CD player and disc, can be displayed on the TV screen. - Page 6 Not in use If the unit is not to be used for long periods, it is wise to remove tapes and discs. Disconnect the mains power and the external aerial, if fitted. Remove the batteries from the Remote control to prevent battery I eakage. Occasionally plug the set in and test it.
-
Page 7: Overview Of The Equipment
Overview of the equipment VCR Eject Timer indicator Press to stop tape movement and Eject When a TIMER recording is set, the LED tapes. will light. Video in/Audio in(L/R) Screen off indicator VCR External video and audio inputs. When screen is off the LED will illuminate. Standby switch Remote sensor Press to turn... -
Page 8: Back Panel
Overview of the equipment,continued Back panel 1. Main Power Switch 2. DVD Digital Audio Output (Coaxial) 3. Euro AV2 / DECODER 4. Euro AV1 5. TV Antenna In... -
Page 9: Remote Control
Overview of the equipment,continued Remote control 1. Open/close Button(DVD) Eject/(VCR) 2. Display Button 3. +10 Button 4. Numeric Buttons(TRACKING) 5. SP/LP Button 6. Channel / Direction Buttons( Up Down Left Right 7. Setup Button 8. Play Button 9. Stop Button 10. -
Page 10: Setting Up Your Unit
Setting up your unit 1. Once you have connected your unit and put batteries in the remote control, you must do the following :- Connect the TV aerial located at the back. Press the Power switch to ON. (Located at the back) Press the standby button on the handset or front panel. - Page 11 Setting up your unit, continued SETUP CLOCK SET Clock set Record timer Time --:-- Installation Search Date -- / -- / ---- -----------------> Preferences ENTER:Confirm SETUP:End SETUP:End CLOCK SET CLOCK SET Time 11:-- Time 11:11 Date -- / -- / ---- ----------------->...
-
Page 12: Record Timer
SETUP Clock set Record timer Installation Search Preferences ENTER:Confirm SETUP:End RECORD TIMER 1. TIMER REVIEW (Erasure & Correction) 1-1.ERASURE (1) Press the [SETUP] button to call the SETUP menu in TV state or press the [PROGRAM] button. Press the [ ] buttons to select the line of “Record Timer”... - Page 13 Setting up your unit, continued (2) At that time, the VCR will check whether there are some errors or not: - If the clock has not been set, it will change to “Clock Set” screen automatically. - If the PRs have not been set, it will change to “Installation” screen automatically. - If there is no error, (2) screen appears.
- Page 14 Setting up your unit, continued 2. NEW PROGRAMMING 2-1.MENU OPERATIONS (1) Press the [SETUP] button to call the Setup Menu . Press the [ ] buttons to select the line of “Record Timer” and press the [ENTER] button to confirm that. (2) At that time, the VCR will check whether there are some errors or not: - If the clock has not been set, then it will change to “Clock Set”...
- Page 15 Setting up your unit, continued * ONCE TIMER 1 TIMER 1 TIMER 1 Starttime - -: -- Starttime 12: -- Starttime 11:10 Endtime - -:- - Endtime - -:- - Endtime 12:00 --> --> --> Startdate 11/11(Wed) Startdate 11/11(Wed) Startdate 11/11(Wed) Howoften Once...
- Page 16 Setting up your unit, continued TIMER 1 TIMER 1 Starttime 12: 20 Starttime 12: 20 Endtime 14: - - Endtime - -:- - Startdate 11/11(Wed) Startdate 11/11(Wed) --> ----> Howoften Once Howoften Once Tapespeed Tapespeed : Up/Down SETUP:End : Up/Down SETUP:End TIMER 1 TIMER 1 TIMER 1...
-
Page 17: Auto Search
Setting up your unit, continued 1. AUTO SEARCH (1) Press the [SETUP] button to display the Setup Menu screen in TV mode. Press the [ ] buttons to select the line of “Installation” and press the [ENTER] button to confirm that. (2) Press the [ ] buttons to select the line of “Auto Installation”... -
Page 18: Manual Installation
Setting up your unit, continued 2. MANUAL INSTALLATION (1) Press the [SETUP] button to display the Setup Menu screen in TV state. Press the [ buttons to select the line of “Installation” and press the [ENTER] button to confirm that. (2) Press the [ ] buttons to select the line of “Manual Installation”... - Page 19 Setting up your unit, continued 3. ORGANIZER 3-1.NAME Creating of New Names : Press the [ ] buttons to select the wanted characters. (the [ ] button will be used to move the position of digit). The [ENTER] button is pressed to confirm that. To make and memorize the new names for the other channels, repeat the procedure.
- Page 20 Setting up your unit, continued 3-3. SWAP WITH PR (1) Press the [SETUP] button to call the Setup Menu in TV mode. Press the [ ] buttons to select the line of “Installation” an press the [ENTER] button to cofirm that. (2) Press the [ ] buttons to select the line of “organizer”...
- Page 21 Setting up your unit, continued SEARCH 1. GO TO ZERO (1) Press the [SETUP] button to call the Main SETUP screen in [cassette-in] state. Press the ] buttons to select the line of “Search” and press the [ENTER] button to confirm that. (2) Press the [ ] buttons to select the line of “GO TO ZERO”...
- Page 22 Setting up your unit, continued 2. INDEX + (1) Press the [SETUP] button to call the Main SETUP screen in [cassette-in] state. Press the [ / ] buttons to select the line of “Search” and press the [ENTER] button to confirm that.
- Page 23 Setting up your unit, continued 3. INDEX- (1) Press the [SETUP] button to call the Main SETUP screen in [cassette-in] state. Press the [ ] buttons to select the line of “Search” and press the [ENTER] button to confirm that. (2) Press the [ ] buttons to select the line of “Index +”...
- Page 24 SPECIAL PLAYBACK/PICTURE SEARCH 1. VARIABLE SLOW (1) During playback mode, press the [SLOW] button once to see the slow picture. Whenever the [SLOW] button is pressed in slow mode, the slow speed will be changed: 1/15 -> 1/10 -> 1/5 -> 1/30 -> 1/25 -> 1/20 -> 1/15 -> ..And the VCR goes to playback mode automatically, if the slow mode exceeds 5 minutes without a mode change, the VCR will automatically return to...
-
Page 25: Picture Adjustment
(3) Press the [INDEX+/-] buttons, the VCR will wind(fast forward or rewind) a tape and play the first part for 5 seconds whenever the index mark is found. After 5 seconds it will wind (fast forward OR rewind) again until it reaches the next index mark. If the [Play] button is pressed during temporary playback (within 5 seconds), the VCR will go to normal playback mode. - Page 26 2. V-LOCK CONTROL In “Still” mode, press the [ ] buttons to adjust V-LOCK. The optimal V-Lock setting can only be done visually, as there is no OSD to show optimum setting. OPERATING A TAPE MODE When the VCR operates a tape, the tape mode display, the tape speed indicator and the tape counter will be displayed.
-
Page 27: Auto Power Off
THE OTHER OPERATIONS 1. AUTO POWER OFF If no signal is detected via the antenna for 5 minutes, the set switches to “Standby” automatically. This will not happ en if DVD, VCR or AV input is selected. 2. SELECTING AV MODE There are 3 ways of selecting AV. -
Page 28: Vcr Recording
VCR PLAYBACK/RECORDING 1. Press [ ] to turn set on. 2. Insert your tape. 3. Press the [PLAY] button, either using the front controls or the Remote control handset. 4. To [Pause] a playing tape, press [Pause]. Note: (if the pause is more than five minutes, the tape will revert to [Play] ). -
Page 29: One-Touch Timer Recording (Otr)
One Touch timer Recording(OTR) Should you decide to record a programme that you are watching, and have no time to set the timer, follow the next procedure. 1. Insert a recordable tape and press [REC]. 2. Press [REC] again and you will see on the screen a display of (Recording length). Each press will increase the recording time by 30 minutes “up to 4 hours”. -
Page 30: Other Information
OTHER INFORMATION TO RECORD AGAIN TO PREVENT ACCIDENTAL ERASURE - Cover the hole with sticky - After recording, break off the safety tab with tape. a screwdriver if you don’ t want to record over the tape. WHAT IS DEW CONDENSATION SYMPTOM? If the set is moved from a cool place to a warm room, condensation may occur on the tape head drum. -
Page 31: General Operation
GENERAL OPERATION 1. PICTURE PICTURE Press the MENU button to enter to the picture mode. CONTRAST Press the Direction button / button to select the BRIGHTNESS function to be adjusted. COLOR SHARPNESS Press Direction button / to adjust the level of the selected function. -
Page 32: Dvd Player Operation
DVD PLAYER OPERATION Basic Operation 1. Press “TV+VCR/DVD” button on the unit or press the “TV+VCR/DVD” button on the remote handset to turn ON DVD. 2. Press “OPEN / CLOSE (EJECT)” button to load disc in disc tray. 3. Press “OPEN / CLOSE” button to close the tray. •... -
Page 33: Angle Mark
DVD player operation,continued Set Menu Items: -- GENERAL SETUP PAGE -- Press the SETUP Button on the remote TV Display controller. The following menu will be shown: Angle Mark OSD Lang 1. GENERAL SETUP Captions TV DISPLAY Screen Saver Go To General Setup Page •... -
Page 34: Screen Saver
DVD player operation,continued SCREEN SAVER Start the screen saver, the screen saver image -- GENERAL SETUP PAGE -- appears when the player stops or the image is TV Display frozen for a few minutes. This saver can keep Angle Mark OSD Lang the screen from being damaged. - Page 35 DVD player operation,continued 4. Preference Setup -- PREFERENCE PAGE -- TV Type TV Type • Audio This is selected when the player is Subtitle connected to a PAL TV. Disc Menu Parental Password Default Go To Preference Page AUDIO -- PREFERENCE SETUP PAGE -- If a language listed below is recorded on the disc, you can play the sound in TV Type...
- Page 36 DVD player operation,continued DISC MENU -- PREFERENCE SETUP PAGE -- If a language listed below is recorded on TV Type the disc, you can set the Menu to be Audio displayed in such language. If not, the Subtitle English language recorded will be used. Disc Menu French •...
- Page 37 DVD player operation,continued DVD ROOT Menu The DVD Menu Play function is only applicable for DVD movie. User can access the Casting information, Production History, Movie Introduction etc. directly through this function. 1. Press the DVD MENU Button on the remote controller to enter the Root Menu. 2.
- Page 38 DVD player operation,continued Slow F.F/REW The Slow Forward is applicable for DVD. There are 4 steps of slow motion speed, 1/2, 1/4, 1/8, 1/16. Successive key presses will decrement the playback speed. Note : Press Play Key to switch back to normal playback speed. Repeat Mode This function is applicable for DVD and CD audio but with different effects.
- Page 39 DVD player operation,continued Display (Remain Time) This function is applicable for DVD only. It will display the timing information of the playback on the screen. • For DVD playback, subsequent key press on the DISPLAY Button will show the Title Elapsed Time, Title Remain Time, Chapter Elapse Time and Chapter Remain Time one by one.
- Page 40 DVD player operation, continued PROGRAM 1. Press the PROGRAM button. The Program Se- quence table will be shown on the screen. 2. Enter the track numbers according to the user EXIT NEXT preference through the Number keys (0-9). PROGRAM 3. After assigning the playback sequence, move the highlight cursor to the START option by using the Navigation Arrows.Press ENTER on the re- mote controller to confirm.
-
Page 41: Mp3 Operation
DVD player operation, continued MP3 Operation This unit can support ISO9660 file system CD-ROM navigation. Multi-Media files such as MP3 thus can be played in the player. Operation • Insert the MP3 disc into the tray.The navigation menu will be displayed. The menu will show the files in the root directory, and the MP3 files can then be played automatically. -
Page 42: Troubleshooting
Trouble Shooting Symptom Checks Remedy The unit does not Check the mains switch is Turn mains switch on (at rear of work. (No power) turned on. set). Re insert the mains plug. Check that the mains plug is Power ON does not inserted correctly. - Page 43 Trouble Shooting Symptom Checks Remedy Wait 10 minutes and retry. If still no Tape will not eject. Tape may be stretched. eject, call a qualified engineer. “Screen Error” As above. Tape heads may be dirty. message on screen. Pre recorded tape in machine, Replace tape cassette or cover Tape ejects as soon “Tab”...
-
Page 44: Specification
SPECIFICATION TV System PAL I VCR System FAV INPUT Video 1.0V(PP)75 Ohm Negative sync. pin jack x1 Audio 0.5V (RMS) 1K Ohm R/L pin jack x2 EURO SCART Scart 1(AV1) Video input 1.0V(PP) 75 Ohm Negative sync. Audio input 0.5V(RMS) 10K Ohm Video output 1.0V(PP) 75 Ohm Negative sync.(TV +VCR/DVD Monitor output) Audio output...
Need help?
Do you have a question about the ASDVCR210R-S and is the answer not in the manual?
Questions and answers