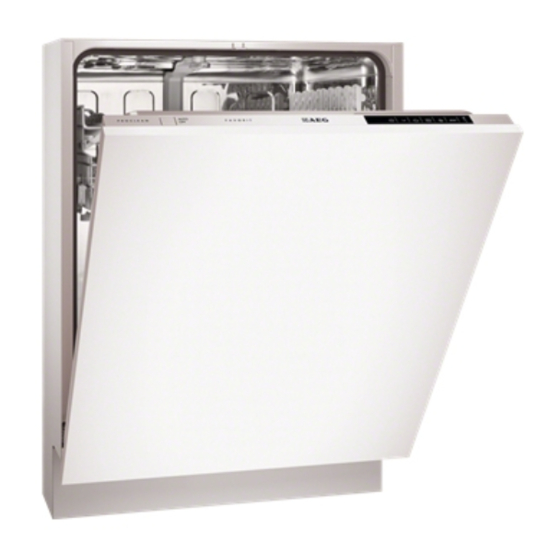
AEG FAVORIT 88060 VI User Manual
Electrolux dishwasher user manual
Hide thumbs
Also See for FAVORIT 88060 VI:
- User manual (24 pages) ,
- User manual (26 pages) ,
- User manual (88 pages)
Table of Contents
Advertisement
Available languages
Available languages
Quick Links
Advertisement
Table of Contents

Related Manuals for AEG FAVORIT 88060 VI


Summary of Contents for AEG FAVORIT 88060 VI
- Page 1 FAVORIT 88060 VI DA OPVASKEMASKINE BRUGSANVISNING EN DISHWASHER USER MANUAL...
- Page 2 AEG-apparater flotte og perfekt fungerende. Sammen med et stort udvalg af tilbehør, der er designet og udviklet til de høje kvalitetsstandarder, du ville forvente – fra specialkogegrej og bestikkurve til flaskeholdere og fine vaskeposer ... Besøg webbutikken på www.aeg-electrolux.com/shop...
- Page 3 INDHOLD Indhold 4 Om sikkerhed 8 Produktbeskrivelse 9 Betjeningspanel 12 Brug af apparatet 12 Indstilling af blødgøringsanlæg 13 Brug af filtersalt 14 Brug af vaske- og afspændingsmiddel 15 Multitab-funktion 15 Placering af bestik og service 16 Tørreprogrammer 18 Valg og start af opvaskeprogram 20 Vedligeholdelse og rengøring 21 Hvis noget går galt 24 Tekniske data...
- Page 4 Om sikkerhed OM SIKKERHED Læs denne brugervejledning grundigt før installation og ibrugtagning af maskinen : • Af hensyn til din og din ejendoms sikkerhed. • Af hensyn til miljøet. • For korrekt betjening og brug af opvaskemaskinen. Opbevar altid brugervejledningen sammen med opvaskemaskinen, og lad den følge med, hvis du flytter eller giver den til en anden.
- Page 5 • Påfyld salt i maskinen, inden du starter et opvaskeprogram. Saltrester i opvaskemaski- nen kan forårsage rust eller lave hul i bunden af maskinen. • Fyld aldrig andre midler (afkalkningsmiddel til opvaskemaskine, flydende opvaskemid- del) i beholderen til afspændingsmiddel. Det kan skade maskinen. •...
- Page 6 Om sikkerhed • Tilløbsslangen har en sikkerhedsventil og en dobbelt kappe med et indvendigt elkabel. Der er kun tryk i indløbsslangen, når vandet løber. Hvis der er en lækage i tilløbsslan- gen, afbryder sikkerhedsventilen det løbende vand. – Pas på, når du tilslutter tilløbsslangen: –...
- Page 7 Ved nødvendig udskiftning af den indvendige belysning: Kontakt vores servicecenter. Tag ledningen ud af stikkontakten, inden den indvendige belysning udskiftes. Servicecenter • Reparation eller arbejde på apparatet må kun udføres af en godkendt tekniker. Kon- takt servicecentret. • Brug kun originale reservedele. Kassering af apparatet •...
- Page 8 Produktbeskrivelse PRODUKTBESKRIVELSE Den øverste kurv Justering af vandets hårdhedsgrad Saltbeholder Beholder til opvaskemiddel Beholder til afspændingsmiddel Typeskilt Filtre Nederste spulearm Mellemste spulearm Øverste spulearm TimeBeam TimeBeam viser på køkkengulvet opvaskepro- gramtiden eller nedtællingen af den udskudte start. Med TimeBeam ved man altid hvor lang tid, der er tilbage af vaskeprogrammet og den udskudte start.
- Page 9 TimeBeam viser: • Opvaskeprogramtiden. Det tæller ned i trin af ét minut • Når opvaskeprogrammet er slut, viser der sig et nul på køkkengulvet • Nedtællingen til udskudt start i trin af én time (24t, 23t...). TimeBeam slås fra, når maskinen slukkes. BETJENINGSPANEL Betjeningsknapperne er placeret øverst på...
- Page 10 Betjeningspanel Visning Displayet viser: • Den elektroniske indstilling af blødgøringsanlægget. • Om tilsætning af afspændingsmiddel er slået til/fra (kun når Multitab-funktionen er slået til) • Opvaskeprogrammets nummer • Resttid, indtil opvaskeprogrammet er slut • Afslutning af et opvaskeprogram (displayet viser nul) •...
- Page 11 Indstillingsfunktion Ved følgende operationer skal apparatet stå på indstillingsfunktion: • Valg og start af et opvaskeprogram. • Valg og start af en udskudt start. • Ved elektronisk indstilling af niveauet for blødgøringsniveau. • Om tilsætning af afspændingsmiddel er slået til/fra (kun når Multitab-funktionen er slået til).
- Page 12 Brug af apparatet BRUG AF APPARATET 1. Kontrollér, om det indstillede niveau for blødgøringsanlægget passer til det lokale vands hårdhedsgrad. Hvis ikke, skal blødgøringsanlægget indstilles. 2. Fyld saltbeholderen op med filtersalt. 3. Fyld beholderen til afspændingsmiddel op. 4. Sæt bestik og tallerkener i opvaskemaskinen. 5.
- Page 13 Manuel indstilling Sæt knappen til indstilling af hårdhedsgrad i po- sition 1 eller 2 (se tabel). Elektronisk indstilling 1. Tænd for apparatet. 2. Sørg for, at apparatet står på indstillingsfunktionen. 3. Tryk på knap (4) og knap (5) og hold dem nede på samme tid, indtil kontrollamperne for knap (3), (4) og (5) blinker.
- Page 14 Brug af vaske- og afspændingsmiddel BRUG AF VASKE- OG AFSPÆNDINGSMIDDEL Brug af opvaskemiddel Brug ikke mere end den korrekte mængde opvaskemiddel af hensyn til miljøet. Følg anbefalingerne fra producenten af opvaskemidlet på pakningen. Sådan fyldes beholderen til opvaskemiddel: 1. Tryk på udløserknappen 2.
- Page 15 4. Luk beholderen til afspændingsmiddel. Tryk på låget, indtil det låses fast. Indstil dosering af afspændingsmiddel Fabriksindstilling: Position 3. Doseringen af afspændingsmiddel kan indstilles fra position 1 (laveste dosering) til positi- on 4 (højeste dosering). Drej på vælgeren til afspændingsmiddel MULTITAB-FUNKTION Multitab-funktionen er til kombinerede opvaskemidler i tabletform (tabs).
- Page 16 Tørreprogrammer • Stil hule ting (f.eks. kopper, glas og gryder) med åbningen nedad. • Sørg for, at vandet ikke samler sig i beholdere eller skåle. • Sørg for, at bestik og tallerkener m.m. ikke ligger sammen. • Sørg for, at glas ikke rører andre glas. •...
- Page 17 Program Graden af snavs Brug dette program til hurtig skylning af tallerke- ner. Det forhindrer, at tiloversbleven mad sætter sig fast på tallerkenerne, og at der trænger ubeha- gelig lugt ud fra opvaskemaskinen. Brug ikke opvaskemidler til dette program. 1) Apparatet registrerer typen af snavs og antallet af genstande i kurvene. Temperaturen, mængden af vand, energiforbruget og programtiden justeres automatisk.
- Page 18 Valg og start af opvaskeprogram Forbrugsværdier Program Energiforbruget kan variere, alt efter vandtemperatur og -tryk, udsving i netspænding og opvaskens størrelse. VALG OG START AF OPVASKEPROGRAM Start af opvaskeprogrammet uden senere start 1. Tænd for apparatet. 2. Sørg for, at apparatet står på indstillingsfunktionen. 3.
- Page 19 Start af opvaskeprogrammet med udskudt start 1. Tænd for apparatet. 2. Sørg for, at apparatet står på indstillingsfunktionen. 3. Indstil opvaskeprogrammet og funktionerne. 4. Tryk gentagne gange på knappen til udskudt start, indtil displayet viser tiden for den udskudte start. •...
- Page 20 Vedligeholdelse og rengøring Afslutning på opvaskeprogrammet Når opvaskeprogrammet er færdigt, udsendes der et lydsignal. 1. Åbn lågen. • Slutlampen lyser. • Displayet viser et nul. 2. Sluk for apparatet. 3. Lad lågen stå på klem i nogle minutter for at opnå bedre tørring. Fjern tingene fra kurvene •...
- Page 21 2. Filteret (A) består af to dele. Filteret ad- skilles ved at trække delene fra hinanden. 3. Rens delene grundigt med vand. 4. Sæt det todelte filter (A) sammen, og pres. Sørg for, at delene samles korrekt. 5. Fjern filteret (B). 6.
- Page 22 Hvis noget går galt ADVARSEL Sluk for maskinen, inden du udfører eftersynet. Fejl Maskinen tager ikke vand ind. Maskinen tømmes ikke for vand. Overløbssikringen er tændt. Opvaskeprogrammet går ikke i gang. Tænd for maskinen, når den er kontrolleret. Programmet fortsætter det sted, hvor det blev afbrudt.
- Page 23 Opvaske- og tørringsresultaterne er utilfredsstillende Fejl Opvasken er ikke ren. Der er kalkaflejringer på ser- vicet. Der er striber, hvide pletter el- ler en blålig belægning på glas og service. Der er spor efter indtørrede vanddråber på glas og service. Opvasken er våd.
-
Page 24: Tekniske Data
Tekniske data 4. Giv slip på knap (4) og knap (5). 5. Tryk på knap (4). • Lamperne for knap (3) og (5) slukkes. • Lamperne for knap (4) fortsætter med at blinke. • Displayet viser indstillingen af beholderen til afspændingsmiddel. 6. - Page 25 AEG appliances looking spotless and working perfectly. Along with a wide range of accessories designed and built to the high quality standards you would expect, from specialist cookware to cutlery baskets, from bottle holders to delicate laundry bags… Visit the webshop at: www.aeg-electrolux.com/shop...
-
Page 26: Table Of Contents
27 Safety information 31 Product description 32 Control panel 34 Use of the appliance 35 Setting the water softener 36 Use of dishwasher salt 37 Use of detergent and rinse aid 38 Multitab function 38 Loading cutlery and dishes 39 Washing programmes... -
Page 27: Safety Information
SAFETY INFORMATION Before the installation and use, read this manual carefully: • For your safety and the safety of your property. • To help the environment. • For the correct operation of the appliance. Always keep these instructions with the appliance also if you move or give it to a differ- ent person. -
Page 28: Frost Precautions
Safety information • Do not fill the rinse aid dispenser with other products than the rinse aid, (dishwasher cleaning agent, liquid detergent). This can cause damage to the appliance. • Make sure that the spray arms can move freely before you start a washing programme. -
Page 29: Electrical Connection
• The water inlet hose has a safety valve and a double sheath with an inner mains cable. There is pressure in the water inlet hose only when the water flows. If there is a leak in the water inlet hose, the safety valve interrupts the flow of water. –... -
Page 30: Service Centre
• If the detergent gets into the eyes, contact immediately a physician and clean the eyes with water. • Keep dishwasher detergents in a safe area and out of children touch. • Do not keep the appliance door open when there is detergent in the detergent dispenser. -
Page 31: Product Description
PRODUCT DESCRIPTION Upper basket Water hardness dial Salt container Detergent dispenser Rinse aid dispenser Rating plate Filters Lower spray arm Upper spray arm Top spray arm TimeBeam TimeBeam shows, on the kitchen floor, the wash- ing programme time or the countdown of the de- lay start. -
Page 32: Control Panel
Control panel The TimeBeam shows: • The washing programme time. It decreases with steps of one minute • The end of the washing programme, a zero shows on the kitchen floor • The countdown of the delay start with steps of one hour (24h, 23h...). TimeBeam goes off when the appliance is deactivated. -
Page 33: Multitab Button
Display The display shows: • The electronic adjustment of the level of the water softener • The activation and deactivation of the rinse aid dispenser (only with the multitab func- tion on) • The number of the washing programme • The remaining time to the end of the washing programme •... -
Page 34: Use Of The Appliance
1. Be sure that the set level of the water softener agrees with the water hardness in your area. If not, adjust the water softener. 2. Fill the salt container with dishwasher salt. 3. Fill the rinse aid dispenser with rinse aid. -
Page 35: Setting The Water Softener
5. Set the correct washing programme for the type of load and soil. 6. Fill the detergent dispenser with the correct quantity of detergent. 7. Start the washing programme. If you use the combi detergent tablets ('3 in 1', '4 in 1', '5 in 1'), use the multitab function (refer to 'Multitab function'). -
Page 36: Manual Adjustment
Use of dishwasher salt Manual adjustment Turn the water hardness dial to the position 1 or 2 (refer to the table). Electronic adjustment 1. Activate the appliance. Make sure that the appliance is in setting mode. 2. Press and hold touchpad (4) and touchpad (5) at the same time until the indicators of touchpads (3), (4) and (5) flash. -
Page 37: Use Of Detergent And Rinse Aid
USE OF DETERGENT AND RINSE AID Use of detergent To help the environment, do not use more than the correct quantity of detergent. Obey the instructions on the detergent packaging. How to fill the detergent dispenser: 1. Press the release button 2. -
Page 38: Multitab Function
MULTITAB FUNCTION The multitab function is for combi detergent tablets. These tablets contain agents as detergent, rinse aid and dishwasher salt. Some types of tablets can contain other agents. Be sure that these tablets are applicable for the water hardness in your area (refer to the instructions on the packaging of the products). -
Page 39: Washing Programmes
• Put small items in the cutlery basket. • Mix the spoons with other cutlery to prevent them to bond together. • When you put the items in the baskets, make sure that the water can touch all surfaces. • Put light items in the upper basket. Make sure that the items do not move. •... - Page 40 Washing programmes Programme Use this programme to quickly rinse the dishes. This prevents the remaining food to bond on the dishes and bad odours to come out from the appli- ance. Do not use detergent with this programme. 1) The appliance senses the type of soil and the quantity of items in the baskets. It automatically adjusts the temperature and quantity of the water, the energy consumption and the programme time.
-
Page 41: Select And Start A Washing Programme
Consumption values Programme The water pressure and temperature, the variations of the mains supply and the quantity of dishes can change the consumption values. SELECT AND START A WASHING PROGRAMME Starting the washing programme without delay start 1. Activate the appliance. Make sure that the appliance is in setting mode. 2. - Page 42 Select and start a washing programme Starting the washing programme with delay start 1. Activate the appliance. 2. Make sure that the appliance is in setting mode. 3. Set the washing programme and functions. 4. Press the delay touchpad again and again until the display shows the time of the delay start.
-
Page 43: Care And Cleaning
End of the washing programme When the washing programme is completed, an intermittent acoustic signal sounds. 1. Open the appliance door. • The end indicator is on • The display shows a zero. 2. Deactivate the appliance. 3. For better drying results, keep the appliance door ajar for some minutes. Remove the items from the baskets •... -
Page 44: What To Do If
What to do if… 2. Filter (A) has two parts. To disassemble the filter, pull them apart. 3. Fully clean the parts with water. 4. Put the two parts of the filter (A) togeth- er and push. Make sure that they assem- ble correctly in each other. - Page 45 WARNING! Deactivate the appliance before you do the checks. Malfunction The appliance does not fill with water. The appliance does not drain the water. The anti-flood device is on. The start of the washing pro- gramme does not occur. After the check, activate the appliance. The programme continues from the point of inter- ruption.
-
Page 46: The Washing Results And Drying Results Are Not Satisfactory
What to do if… The washing results and drying results are not satisfactory Problem The dishes are not clean. Limescale particles on the dishes. There are streaks, whitish stains, or a bluish layer on glasses and dishes. Dry water drop stains on glasses and dishes. -
Page 47: Technical Data
3. Press and hold touchpad (4) and touchpad (5) at the same time until the indicators of touchpads (3), (4) and (5) flash. 4. Release touchpad (4) and touchpad (5). 5. Press touchpad (4). • The indicators of touchpads (3) and (5) go off . •... - Page 48 117938240-A-312010...