Table of Contents
Advertisement
Advertisement
Table of Contents

Related Manuals for AEG Electrolux LAVAMAT 54840


Summary of Contents for AEG Electrolux LAVAMAT 54840
- Page 1 LAVAMAT 54840 Instruction booklet Washing machine...
- Page 2 Dear Customer Thank you for choosing one of our high-quality products. With this appliance you will experience the perfect combination of functional design and cutting edge technology. Convince yourself that our appliances are engineered to deliver the best performance and control - indeed we are setting the highest standards of excellence.
-
Page 3: Table Of Contents
Contents Contents Instruction booklet Safety information Product description Detergent dispenser drawer Control panel First use Daily use Laod the laundry Measure out the detergent and the fabric softener Select the required programme Select the spin speed or the Rinse Hold option 12-13 Programm option button Select the Stain option... - Page 4 Contents Preparing the wash cycle 20-23 Sorting out the laundry Temperatures Before loading the laundry Maximum loads 20-21 Laundry weights Removing stains 21-22 Detergents and additives Quantity of detergent to be used Degrees of water hardness International wash code symbols Care and cleaning Descaling After each wash...
- Page 5 Contents Installation 36-39 Unpacking Positioning and levelling Water inlet 38-39 Water drainage Electrical connection Permanent connection Enviroment concerns Packaging materials Old machine Ecological hints Guarantee 41-43...
-
Page 6: Instruction Booklet
Safety information Prior to using for the first time • The safety of AEG/ELECTROLUX appliances complies with the industry standards and with legal requirements on the safety of appliances. However, as manufacturers, we feel it is our duty to provide the following safety notes. - Page 7 Safety information Wash small items such as socks, laces, washable belts etc in a washing bag or pillow case as it is possible for such items to slip down between the tub and the inner drum. Do not use your washing machine to wash articles with whalebones, material without hems or torn material.
- Page 8 Safety information This appliance is designed for domestic use. It must not be used for purposes other than those for which it was designed. Only wash fabrics which are designed to be machine washed. Follow the instructions on each garment label. Do not overload the appliance.
-
Page 9: Product Description
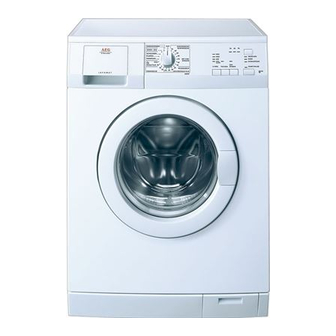
Product description Product description Your new appliance meets all modern requirements for effective treatment of laundry with low water, energy and detergent consumption. The ECO valve system allows total use of detergent and reduces water consumption so saving energy. Detergent dispenser drawer Rating plate Control panel Drain pump... -
Page 10: Control Panel
Control panel Control panel Programme selector dial «Start/Pause» button Spin reduction button «Delay start» button «Stain» button «Extra quick» button Programme progress display First Use Ensure that the electrical and water connections comply with the installation instructions. Remove the polystyrene block and any material from the drum. Pour 2 litres of water into the main wash compartment of the detergent drawer in order to activate the ECO valve. -
Page 11: Daily Use
Daily Use Load the laundry 1. Open the door by carefully pulling the door handle outwards. Place the laundry in the drum, one item at a time, shaking them out as much as possible. 2. Close firmly the door. You must hear a click during closing. -
Page 12: Select The Required Programme
Select the required programme You can choose the right programme for any type of laundry following the descriptions on the washing programme tables (see Washing Programmes). Turn the programme selector dial to the required programme. The programme selector determines the type of washing cycle (e.g. water level, drum movement, number of rinses) and the washing temperature according to the type of laundry. -
Page 13: Programm Option Button
will light up. Maximum speeds are: 1400 rpm for cotton, ECO, Rinses and Spin programmes 900 rpm for the remaining of the programmes. Rinse Hold : by selecting this option the water of the last rinse is not emptied out to prevent the fabrics from creasing. When the programme has finished the pilot light «EINDE FIN DE CYCLE»... -
Page 14: Select The Extra Quick Option
Select the Extra Quick option By pressing «SUPERSNEL RAPIDE» (Extra quick) button, the washing duration will be reduced by few minutes. The corresponding pilot light illuminates. This option is suitable for items that have been used or worn for a short time. With this option selected, the max recommended load for cottons is 3 kg and 1.5 for synthetics. -
Page 15: Programme Progress Display
press the Delay Start button once, the light relevant to the selected delay goes off; press the Start/Pause button again to start the programme. Important! The selected delay can be changed only after selecting the washing programme again. The door will be locked throughout the delay time. If you need to open the door, you must first set the washing machine to PAUSE by pressing the Start/Pause button and then wait some minutes. -
Page 16: Interrupting A Programme
Changing a running programme is possible only by resetting it. Turn the programme selector dial to «O» and then to the new programme position. Start the new programme by pressing the Start/Pause button again. The washing water in the tub will not emptied out. Interrupting a programme Press the Start/Pause button to interrupt a programme which is running, the corresponding light starts to flash. -
Page 17: Washing Programmes
Washing programmes Washing programmes Programme/ Description of Type of laundry Options Temperature programme Cottons Spin reduction/ White cotton: Main wash at 95°C e.g. Rinse Hold KATOEN BLANC 3 rinses sheets, tablecloths, Stain, Extra Quick COULEURS Long spin (max speed) household linen. Extra rinse 95°... - Page 18 Washing programmes Washing programmes Description of Programme Type of laundry Options programme Spin reduction/ Rinses Separate rinse cycle for 3 rinses SPOELEN Rinse Hold hand washed cotton Long spin (max speed) items. RINCAGES Extra rinse For emptying out the last Drain rinse water in POMPEN...
-
Page 19: Programme Informations
Programme informations Programme informations Easy iron Selecting this programme the laundry is gently washed and STRIJKVRIJ PLUS REPASSAGE spun to avoid any creasing. In this way ironing is easier. FACILE PLUS Furthermore the machine will perform additional rinses. Washing programme for machine washable wool (Handwash) Wool/ Silk well as for hand washable woollens and delicate fabrics WOL/ZIJDE LAINE/SOIE... -
Page 20: Preparing The Wash Cycle
Preparing the wash cycle Preparing the wash cycle Sorting out the laundry Follow the wash code symbols on each garment label and the manufacturer’s washing instructions. Sort the laundry as follows: whites, coloureds, synthetics, delicates, woollens. Temperatures for normally soiled white cottons and linen (e.g. tea cloths, 95°... -
Page 21: Laundry Weights
Preparing the wash cycle Washing a maximum load makes the most efficient use of water and energy. For heavily soiled laundry, reduce the load size. Washing a maximum load makes the most efficient use of water and energy. For heavily soiled laundry, reduce the load size. Laundry weights The following weights are indicative: bathrobe... -
Page 22: Detergents And Additives
Preparing the wash cycle Lipstick: moisten with acetone as above, then treat stains with methylated spirits. Treat any residual marks with bleach. Red wine: soak in water and detergent, rinse and treat with acetic or citric acid, then rinse. Treat any residual marks with bleach. Ink: depending on the type of ink, moisten the fabric first with acetone (*), then with acetic acid;... -
Page 23: Quantity Of Detergent To Be Used
Preparing the wash cycle Quantity of detergent to be used The type and quantity of detergent will depend on the type of fabric, load size, degree of soiling and hardness of the water used. Follow the product manufacturers’ instructions on quantities to use. Use less detergent if: •... -
Page 24: International Wash Code Symbols
International wash code symbols International wash code symbols These symbols appear on fabric labels, in order to help you choose the best way to treat your laundry. Energetic wash Max. wash Max. wash Max. wash Max. wash temperature temperature temperature temperature 95°C 60°C... -
Page 25: Care And Cleaning
Care and cleaning Care and cleaning You must DISCONNECT the appliance from the electricity supply, before you can carry out any cleaning or maintenance work. Descaling The water we use normally contains lime. It is a good idea to periodically use a water softening powder in the machine. -
Page 26: Washing Drum
Care and cleaning 2. Remove the conditioner insert from the middle compartment. 3. Clean all parts with water. 4. Put the conditioner insert in as far as it will go, so that it is firmly in place. 5. Clean all parts of the washing ma- chine, especially the nozzles in the top of the washing-in chamber, with a brush. - Page 27 Care and cleaning 4. Place a container close to the pump to collect any spillage. 5. Release the emergency emptying hose, place it in the container and remove its cap. 6. When no more water comes out, unscrew the pump and remove it. Always keep a rag nearby to dry up spillage of water when removing the pump.
-
Page 28: Water Inlet Filter
Care and cleaning Water inlet filter If you notice that the machine is taking longer to fill, check that the filter in the water inlet hose is not blocked. 1. Turn off the water tap. 2. Unscrew the hose from the tap. 3. -
Page 29: Frost Precautions
Care and cleaning Frost precautions If the machine is installed in a place where the temperature could drop below 0°C, proceed as follows: 1. Close the water tap and unscrew the water inlet hose from the tap. 2. Place the end of the emergency emptying hose and that of the inlet hose in a bowl placed on the floor and let water drain out. -
Page 30: Something Not Working
Something not working Something not working Certain problems are due to lack of simple maintenance or oversights, which can be solved easily without calling out an engineer. Before contacting your local Service Centre, please carry out the checks listed below. During machine operation it is possible that the yellow Start/Pause pilot light flashes to indicate that the machine is not working. - Page 31 Something not working Problem Possible cause/Solution The end of the drain hose is too low. The machine fills then empties • Refer to relevant paragraph in «water drainage» immediately: section. The drain hose is squashed or kinked. (Yellow Start/Pause pilot light flashes) •...
- Page 32 Something not working Problem Possible cause/Solution Too little detergent or unsuitable detergent has been used. • Increase the detergent quantity or use another one. Stubborn stains have not been treated prior to washing. • Use commercial products to treat the stubborn Unsatisfactory washing results: stains The correct temperature was not selected.
- Page 33 Something not working Problem Possible cause/Solution The machine is fitted with a type of motor which makes an unusual noise compared with other The machine makes an unusual traditional motors. This new motor ensures a softer start and more even distribution of the laundry in the noise: drum when spinning, as well as increased stability of the machine.
-
Page 34: Techinical Data
Technical data Techinical Data Width 60 cm Height 85 cm Dimensions Depth 63 cm (door included) Electrical connection Voltage - Information on the electrical connection is given on the rating Overall power - Fuse plate on the inner edge of the appliance door Minimum 0,05 MPa Water supply pressure... -
Page 35: Consumption Value
Consumption value Consumption value Water consumption Energy consumption Programme duration Programme (in litres) (in kWh) (in minutes) 95° White Cottons 40° Cottons 95° 2.15 Cottons + Prewash 60° Synthetics 40° Easy Iron 0.35 40° 0.55 Delicates 30° 0.25 Wool/Handwash/Silk Rinses Drain Spin Refresh... -
Page 36: Installation Unpacking
Installation Installation Unpacking All transit bolts and packing must be removed before using the appliance. You are advised to keep all transit devices so that they can be refitted if the machine ever has to be transported again. 1. After removing all the packaging, carefully lay machine on it’s back to remove the polystyrene base from the bottom. -
Page 37: Positioning And Levelling
Installation 5. Open the porthole and remove the polystyrene block fitted on the door seal. 6. Fill the smaller upper hole and the two large ones with the corresponding plastic plug caps supplied in the bag containing the instruction booklet. Positioning and levelling Install the machine on a flat hard floor. -
Page 38: Water Inlet
Installation Water inlet This appliance must be connected to a cold water supply. 1. TConnect the water inlet hose supplied with the machine to a tap with a 3/4" thread. Always use the hose supplied with the appliance. 2. The other end of the inlet hose which connects to the machine can be turned as showed in the picture. -
Page 39: Electrical Connection
Installation i.e. the inside diameter of the drain pipe must be larger than the outside diameter of the drain hose. The drain hose must not be kinked. Important! The drain hose may be extended to a maximum of 4 metres. An additional drain hose and joining piece is available from your local Service Centre. -
Page 40: Enviroment Concerns
Environment concerns Enviroment concerns Packaging materials The materials marked with the symbol are recyclable. >PE<=polyethylene >PS<=polystyrene >PP<=polypropylene This means that they can be recycled by disposing of them properly in appropriate collection containers. Old machine Use authorised disposal sites for your old appliance. Help to keep your country tidy! The symbol on the product or on its packaging indicates that this product may not be treated as household waste. -
Page 41: Guarantee
Guarantee Belgium DECLARATION OF GUARANTEE TERMS Our appliances are produced with the greatest of care. However, a defect may stilloccur. Our consumer services department will repair this upon request, either during or after the guarantee period. The service life of the appliance will not, however, be reduced as a result. - Page 42 9. Defects that result from repairs or measures carried out by people who are not qualified or expert or defects that result from the addition of non- original accessories or spare parts are not covered by the guarantee. 10. Appliances that are easy to transport may be delivered or sent to the consumer services department.
- Page 43 Guarantee Téléphone 02/363.04.44 Téléfax 02/363.04.00 ou 02/363.04.60 E-mail: consumer.services@electrolux.be Luxembourg Grand-Duché de Luxembourg ELECTROLUXHOME PRODUCTS Consumer services Rue de Bitbourg, 7 L-1273 Luxembourg -Hamm Téléphone 00 352 42 431 -1 Téléfax 00 352 42 431-360 E-mail: consumer-service.luxembourg@electrolux.lu European Guarantee This appliance is guaranteed by Electrolux in each of the countries listed at the back of this user manual, for the period specified in the appliance guarantee orotherwise by law.
- Page 44 www.aeg-electrolux.be...