OneTouch ULTRASMART Manual
Meter and electronic logbook in one
Hide thumbs
Also See for ONETOUCH ULTRASMART:
- Owner's booklet (148 pages) ,
- Manual (148 pages) ,
- Test instructions (2 pages)
Table of Contents
Advertisement
OneTouch
®
Customer Care Line:
Canada 1 800 663-5521
U.S.A.
Monday-Friday
9am-8pm Eastern Time
6am-5pm Pacific Time
www.OneTouch.ca
Distributed by:
LifeScan Canada Ltd.
Burnaby, B.C. V5C 6C6
Manufactured by:
LifeScan Inc.
Milpitas, CA 95035 U.S.A.
© Lifescan, Inc. 2006 Milpitas, CA 95035 U.S.A. 08/06
The system described herein is covered by one or more of the following U.S.
patents: D428, 150, 5,708,247, 5,951,836, 6,045,567, 6,156,051, 6,197,040,
6,241,862, 6,284,125, 6,413,410, and 6,733,655
1 800 227-8862
AW06139303A
Advertisement
Table of Contents

Related Manuals for OneTouch ONETOUCH ULTRASMART


Summary of Contents for OneTouch ONETOUCH ULTRASMART
- Page 1 Manufactured by: LifeScan Inc. Milpitas, CA 95035 U.S.A. © Lifescan, Inc. 2006 Milpitas, CA 95035 U.S.A. 08/06 The system described herein is covered by one or more of the following U.S. patents: D428, 150, 5,708,247, 5,951,836, 6,045,567, 6,156,051, 6,197,040, 6,241,862, 6,284,125, 6,413,410, and 6,733,655...
- Page 2 ® Meter and Electronic Logbook In One Owner’s Booklet...
- Page 4 ® UltraSmart raSmart Blood Glucose Monitoring System Owner’s Booklet...
- Page 6 ® ® Dear OneTouch UltraSmart System Owner: You have chosen one of the best blood glucose monitoring systems available. This booklet has important information you ® ® must know about the OneTouch UltraSmart Blood Glucose Monitoring System. Read it carefully. Blood glucose monitoring plays an important role in diabetes control.
- Page 7 INTENDED USE: The OneTouch ® ® UltraSmart Blood Glucose Monitoring System is intended to be used for the quantitative measurement of glucose in fresh capillary whole blood. The ® ® OneTouch UltraSmart System is intended for use outside the body (for in vitro diagnostic use) by people with diabetes at home and healthcare professionals in a clinical setting as an aid ®...
-
Page 8: Important Information
Important Information • Dehydration: Severe dehydration and excessive water loss may cause false low results. If you believe you are suffering from dehydration, consult a healthcare professional immediately. • Low glucose results: If your test result is lower than 3.9 mmol/L or is shown as “LOW GLUCOSE”, it may mean hypoglycemia (low blood glucose). -
Page 9: Table Of Contents
Table of Contents Table of Contents ® ® THE OneTouch UltraSmart SYSTEM ....1 ® ® OneTouch UltraSmart Meter ....2 Navigation Buttons . - Page 10 Batteries ........43 DISPLAY MESSAGES ......46 WARNINGS AND ERROR MESSAGES .
- Page 11 Table of Contents (continued) Ketones ......89 HbA1c .......91 Microalbumin .
- Page 12 Hypoglycemia Information ....120 Food Averages ......121 Health Checks .
-
Page 14: The Onetouch ® Ultrasmart
® ® THE OneTouch UltraSmart SYSTEM ® ® The OneTouch UltraSmart System uses the latest blood glucose monitoring technology. It measures the glucose content of a blood sample by means of an electrical current produced in the test strip and is measured by the meter. Test results are “plasma-calibrated.” This makes it easier for you and your diabetes-care team to compare your meter results with laboratory tests. -
Page 15: Onetouch ® Ultrasmart
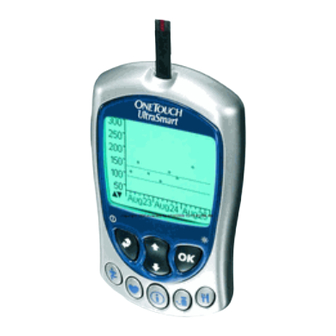
® ® OneTouch UltraSmart Meter OneTouch ® Ultra ® Test Strip Test Port The meter turns on when you insert the OneTouch ® Ultra ® Test Strip here. Data Port Used to download logbook memory to a computer. Display with Backlight Test results, messages, symbols, and other data appear here. -
Page 16: Navigation Buttons
Navigation Buttons Note: Press and release buttons. Do Not hold buttons down for an extended period of time. Back Button (Off Button) Go back to previous display on certain screens. Press and hold for two seconds to turn off the meter. Arrow Button Scroll through menus, code numbers, and logbook. -
Page 17: Smartbuttons
® SmartButtons The SmartButtons ® are your keys to getting the most ® ® out of your OneTouch UltraSmart Meter. They allow you to enter information about your diabetes management plan into the large logbook memory. There are SmartButtons ® for exercise, health, ®... - Page 18 Food SmartButton ® Exercise SmartButton ® Enter meal and snack Enter exercise amount and information. level. Health SmartButton ® Medication Enter information on SmartButton ® health. Enter insulin and diabetes pill information. FastFacts ® SmartButton ® Review test results and logbook memory.
-
Page 19: Display Symbols
Display Symbols These symbols guide you while using your meter: Symbol Meaning ▲ Scroll (move) up only. ▼ Scroll down only. ▲▼ Scroll up or down. ▲ Scroll up or down. ▼ – – – No entry. Shows where you are on the HIGHLIGHT display. -
Page 20: Onetouch ® Ultra
® ® OneTouch Ultra Test Strips ® ® The OneTouch UltraSmart System measures the amount of glucose in whole blood. Blood is applied to the Top Edge of the OneTouch ® ® Ultra Test Strip and is automatically drawn into the reaction cell where the reaction takes place. -
Page 21: Important Test Strip Information
Important Test Strip Information • Store test strip vials in a cool, dry place below 30˚C (86˚F). Keep away from direct sunlight and heat. Do Not refrigerate. • Store test strips in their original vial only. To avoid damage or contamination, Do Not transfer test strips to any other place. -
Page 22: Before Testing
Checking the Meter Display Each time you turn the meter on, the display background will quickly change from dark to light and form the words “OneTouch UltraSmart”. This tells you that the system is performing several self- UltraSmart aSmart checks to confirm that the meter is working properly. -
Page 23: Coding The Meter
Coding the Meter ® Code numbers are used to calibrate the OneTouch ® ® ® UltraSmart Meter with the OneTouch Ultra Test Strips for accurate results. You must code the meter before using it for the first time and then every time you change to another vial of test strips. - Page 24 STEP 2 See the Code Number. The code number will appear on the display. (After every 25 tests the meter will display the code number and will prompt “Check Code Press OK”. Press the OK button if the code number is still correct.) (Example) STEP 3...
-
Page 25: Checking The System With Control Solution
STEP 4 Code the Meter. Move up or down using the Arrow button to the code number that matches the code number on the test strip vial. The new code number will flash on the display for about three seconds, after which the meter will prompt you to “Apply Blood”. -
Page 26: Before You Begin
Before you begin: ® ® • Use only OneTouch Ultra Control Solution. • Check the expiration date on the control solution vial. Record the discard date (date opened plus three months) on the vial label. Do Not use after expiration or discard date, whichever comes first. - Page 27 When you should do a control solution test: • To practice the test process instead of using blood. • When you open a new vial of test strips. • Once a week. • Whenever you suspect that the meter or test strips are not working properly.
- Page 28 To turn on the meter, insert a test strip, contact bars end first and facing up, into the test port. Push it all the way in until it will go no further. “OneTouch UltraSmart” will appear briefly (Example) on the display. Then “Code 9 (Example), Check Code” is displayed.
- Page 29 Note: You must select “Control Solution” to distinguish control solution tests from blood glucose tests. Marked control solution tests will not be included in your averages. Do Not use Control Solution mode for testing blood. STEP 3 Apply Control Solution to the Test Strip. To ensure an accurate control solution test, shake the vial, discard the first drop and wipe the dispenser tip before you begin.
- Page 30 CONFIRMATION WINDOW WARNING: If mmol/L does ➧ not appear with the Control Solution result, call the OneTouch ® Customer Care Line at 1 800 663-5521. The control solution will be drawn into the narrow (Example) channel. When the confirmation window is The control solution full, the meter will count test result will appear...
- Page 31 If the results are not within the control range printed on the test strip vial, the meter and strips may not be working properly. Repeat the control solution test. When using Control Solution mode, very high or very low readings will be displayed as a number rather than a “HIGH”...
-
Page 32: Testing Your Blood
(see pages 33–35). If you do not apply blood to the test strip correctly you may get an inaccurately low or high test result or an error message. LifeScan recommends that you develop good technique by practicing with control solution prior ®... -
Page 33: Preparing The Onetouch
® ® Preparing the OneTouch UltraSoft Adjustable Blood Sampler (Sampler) ® ® OneTouch UltraSoft Adjustable Blood Sampler Depth Adjustment Knob Lancet with Ejection/Cocking Control Protective Disk ® OneTouch ® UltraClear (for Alternate Site Release Button Sampling) Puncture Settings Depth Indicator Lancet Point Protective Disk... - Page 34 Choosing the right sampling site at the right time: ® ® The OneTouch UltraSmart Meter allows you to sample blood from your fingertip, forearm or palm. At times, results obtained at the forearm or palm may be different from a fingertip measurement. Talk to your healthcare professional before you begin using your forearm or palm for sampling.
- Page 35 CAUTION: Do Not test on your forearm or palm when: • You think your blood glucose is rapidly falling, such as within two hours of exercise or a rapid-acting insulin injection or insulin pump bolus. Testing with a fingertip sample may identify hypoglycemia or an insulin reaction sooner than testing with a forearm or palm sample.
-
Page 36: Lancing And Sampling From Your Fingertip
Choose a different puncture site each time you test. Repeated punctures in the same spot may cause soreness and calluses. If bruising occurs at an alternate site or you have difficulty getting a sample, consider sampling from a fingertip instead. You may want to review the choice of sites with your healthcare professional. - Page 37 STEP 2 Insert a Sterile Lancet Into the Sampler. Insert the lancet into the holder and push in firmly. Twist the protective disk until it separates from the lancet and save the disk for later use. Do Not twist the lancet. STEP 3 Replace the OneTouch ®...
- Page 38 STEP 5 Cock the Sampler. Slide the ejection/cocking control back until it clicks. If it does not click, it may have been cocked when you inserted the lancet. STEP 6 Puncture Your Finger. Hold the Sampler firmly against the side of your finger.
- Page 39 STEP 7 Get a Round Drop of Blood. Gently squeeze and/or massage your fingertip until a round drop of blood at least 1μL ( actual size) forms on your fingertip. Do Not squeeze excessively on the puncture site. If the blood smears or runs, Do Not use that sample.
-
Page 40: Lancing And Sampling From An Alternate Site
Lancing and Sampling From an Alternate Site Sampling from your forearm or palm allows you to use your fingertips less often. You may find that obtaining a blood sample from an alternate site is less painful than using a fingertip. Getting a blood sample from your forearm or palm is different than getting a sample from your fingertips. - Page 41 ® ® OneTouch UltraClear is used for forearm and palm sampling only. Replace the ® ® blue OneTouch UltraSoft ® Cap with the OneTouch ® UltraClear Cap. Blue cap for fingertip sampling only STEP 1 Remove the OneTouch ® UltraSoft ®...
- Page 42 STEP 3 ® Twist On the OneTouch ® UltraClear Cap Until it is Snug. STEP 4 Adjust the Depth Setting. You may have to adjust the Sampler to a deeper setting to get a large enough drop of blood from your forearm or palm. Twist the depth adjustment knob toward the larger dots to increase the depth.
- Page 43 STEP 6 Puncture Your Forearm or Palm. Press and hold the Sampler against your forearm or palm for a few seconds, then press the release button. Keep holding the Sampler and ® ® OneTouch UltraClear Cap against your skin until a round drop of blood forms under the cap.
-
Page 44: Step-By-Step Test Procedure
Push it all the way in until it will go no further. The meter will turn on automatically. “OneTouch UltraSmart” Insert This End will appear briefly on the display. Then the code number will appear. Be sure the meter and test strip codes match. - Page 45 STEP 2 Select Test Mode. Note: There are three choices in test mode. For blood testing, use the Arrow button to select: • “Apply Blood” for fingertip blood sample • “Alternate Site” for forearm and palm blood samples Do Not use Control Solution mode when testing blood. •...
- Page 46 STEP 3 Prepare to Apply Sample. The drop of blood should be next to the top edge of the test strip. Blood should not be applied to the flat surface of the test strip. When applying a drop of blood from your forearm or palm, keep your forearm or palm steady and bring the top edge of the test strip to the drop of blood with your other hand.
- Page 47 STEP 4 Apply Sample. Obtain a round drop of blood using the Sampler. The blood sample must be at least 1μL in volume ( actual size) to fill the confirmation window. Touch and hold the drop of blood to the narrow channel in the top edge of the test strip.
- Page 48 If the confirmation window does not fill completely before the meter begins to count down, Do Not add more blood to the test strip; discard the test strip and retest. If you have trouble filling the test strip, ® call the OneTouch Customer Care Line at Sample Good...
- Page 49 WARNING: If mmol/L does not appear with the test result, call ® the OneTouch Customer Care Line at 1 800 663-5521. CAUTION: If you test at the low end of the operating range (6°C/43°F) and your glucose is high (over 10.0 mmol/L), the reading on your meter may be lower than your actual glucose.
-
Page 50: Discarding Used Test Strips And Lancets
Discarding Used Test Strips and Lancets CAUTION: It is important to discard the used lancet carefully after each use to avoid unintended lancet stick injuries. Used test strips and lancets may be considered biohazardous waste in your area. Be sure to follow your local regulations for proper disposal. STEP 1 ®... -
Page 51: Special Messages
Special Messages ® ® The OneTouch UltraSmart Meter displays results between 1.1 mmol/L and 33.3 mmol/L. If your test result is lower than 1.1 mmol/L, WARNING “LOW GLUCOSE” will appear on the meter display. This may mean severe hypoglycemia (low blood glucose) that G UCOSE requires immediate treatment according to your healthcare professional’s... - Page 52 Sep 14-02 8:30 am When your blood glucose test result is outside the before meal-range of 4.0-7.0 mmol/L or after-meal range of 5.0-11.0 mmol/L mmol/L, or the personal glucose range you set in Custom Meter Set-up omment? Press OK Sequence, the meter will prompt you to (Example) add a comment.
-
Page 53: Comparing Meter And Laboratory Results
COMPARING METER AND LABORATORY RESULTS ® ® OneTouch UltraSmart Meter test results and laboratory test results are both expressed in plasma-equivalent units. However, your meter result may differ somewhat from your laboratory result due to normal variation. Meter results can be affected by factors and conditions that do not affect laboratory results in the ®... - Page 54 While at the lab: • Make sure that the meter test and the lab test are performed within 15 minutes of each other. • Wash your hands before obtaining a blood sample. • Use only fresh capillary blood. You may still have a variation between the results because blood glucose levels can change significantly over short periods, especially if you have recently eaten, exercised, taken medication, or experienced stress.
-
Page 55: Caring For Your System
LifeScan recommends that you store the meter in its carrying case after each use. A cloth dampened with water and mild detergent can be used to wipe down the outside of the meter. -
Page 56: Batteries
Batteries ® ® Your OneTouch UltraSmart Meter comes with two AAA alkaline batteries already installed. The batteries will provide you with enough power to perform up to 540 tests, depending on backlight use. When replacing the batteries, use only two AAA alkaline batteries. - Page 57 To replace the batteries, first turn off the meter. Turn the meter over and locate the battery compartment. 1. Open the battery compartment by pressing the tab to the left and lifting the battery compartment cover to remove it. 2. Remove the old batteries by pulling the black ribbon upward.
- Page 58 Note: • Replacing the batteries does not affect the electronic logbook. However, the date and time settings may need to be updated. • The first time you turn on the meter after replacing the batteries, the meter will go into the Set-up mode (see pages 58–61).
-
Page 59: Display Messages
DISPLAY MESSAGES Following is a summary of screen messages and symbols. MESSAGE WHAT IT MEANS ACTION Initial display that If, at any time during appears whenever the life of the meter, the meter is turned these graphics UltraSmart aSmart on. It indicates that appear to be the system has different, call... - Page 60 MESSAGE WHAT IT MEANS ACTION This is the code Make sure that Code number stored in the this code number meter. matches the code number on the vial of the test strips Check Code you are using. (Example) CAUTION: Matching the code on the meter and the code on the test strip vial is essential to obtain accurate results.
- Page 61 MESSAGE WHAT IT MEANS ACTION You may now apply The system is ready Apply Blood the fingertip blood to accept a blood sample. sample from the fingertip. You may now apply The system is ready Alternate Site the forearm or palm to accept a blood blood sample.
- Page 62 MESSAGE WHAT IT MEANS ACTION Five-second None required. countdown. After the countdown, the meter will display the test result. A test result in None required. Sep 8-02 8:30 am mmol/L. mmol/L (Example) WARNING: If mmol/L does not appear with the test result, ®...
- Page 63 MESSAGE WHAT IT MEANS ACTION 23.0 A blood glucose test Follow the Sep 14-02 8:30 am result in the range of instructions of your 13.3 mmol/L to 33.3 healthcare m mol/L mmol/L with a professional heck Ketones suggestion to check regarding ketone omment? Press OK your ketone levels.
-
Page 64: Warnings And Error Messages
WARNINGS AND ERROR MESSAGES These messages help to identify certain problems but do not appear in all cases when a problem has occurred. Improper use may cause an inaccurate result without producing a warning or an error message. In the event of a problem, refer to the information under ®... - Page 65 MESSAGE WHAT IT MEANS ACTION There may be a To reset the meter, WARNING problem with the you must turn the Error 1 meter or the meter meter off and enter may need to be Set-up mode (see Call customer service reset.
- Page 66 MESSAGE WHAT IT MEANS ACTION Repeat the test with Error message that WARNING a new test strip. indicates that the Error 3 Apply the blood or blood or control Meter not ready control solution solution sample was Please repeat test sample only after applied before See Owner's Booklet...
- Page 67 MESSAGE ACTION WHAT IT MEANS 2)If you applied the 2)The sample was WARNING blood incorrectly, improperly applied. Error 4 review pages Strip problem 33–35 on blood Please repeat test application and See Owner's Booklet repeat the test with a new test strip. 3)If the error 3)There may be a message appears...
- Page 68 MESSAGE ACTION WHAT IT MEANS Test results will The battery sign appears WARNING still be accurate, on the display. The Low Batteries ! but replace the power of the batteries is batteries as soon getting low. The backlight You should replace the batteries soon as possible.
-
Page 69: Problems And Possible Causes
PROBLEMS AND POSSIBLE CAUSES If the meter does not turn on after inserting a test strip or the display is not active: POSSIBLE CAUSES WHAT TO DO No power. Replace the batteries. No batteries or batteries Check that the batteries are incorrectly installed. - Page 70 If the test does not start after applying the sample: POSSIBLE CAUSES WHAT TO DO Insufficient blood sample. Repeat the test with a new test strip and a larger sample, making sure blood is placed to the narrow channel in the top edge of the test strip.
-
Page 71: Meter Set-Up
METER SET-UP Note: • It is important that the time of day is correct and that your medication set-up and mealtimes are set according to ® your personal daily schedule. Otherwise, some FastFacts information will not be correct. • You do not need to change any of the meter settings in order to begin testing. -
Page 72: Selecting Display Language
This message will appear briefly. The language menu will follow immediately. The meter is now in Set-up mode. The ® SmartButtons cannot be used while you UltraSmart aSmart are in Set-up mode. (You may still test at any time simply by inserting a test strip.) Selecting Display Language The meter is set at the factory to use English. -
Page 73: Setting Date And Time
Setting Date and Time After the language has been set, the meter will display the factory-set time and date. If the date and/or time are incorrect, follow these steps in Set-up mode (see page 58, Entering Basic Set-up Mode). You can ONLY change “am” and “pm” when you pass 12:00. If you use the 12-hour format, make sure “am”... - Page 74 asic Set-up Then select the correct year and press the Time 12:00 am OK button . Repeat these steps to Sep 15- Date select the month and day. Note: It is important to select the correct date and time or your logbook may not show the most recent result first.
-
Page 75: Custom Meter Set-Up Sequence
CUSTOM METER SET-UP SEQUENCE ® ® The OneTouch UltraSmart Meter has a number of optional features that you may use to track all your diabetes information. The Set-up Menu allows you to customize the meter with your personal diabetes management plan including the type and amount of medication you take, your target glucose range, your usual meal times, and much more information. - Page 76 lease use your Owner's Booklet to help you set ® You should have your OneTouch up your ® UltraSmart Owner’s Booklet available OneTouch to refer to while customizing the meter. UltraSmart et-up Menu ettings “Set-up Menu” will appear on the display Diabetes Pill et-up with a list of options.
- Page 77 Following is a summary of meter settings: Meter Settings OPTION FACTORY SETTINGS CUSTOM SETTINGS Settings: Time Format am/pm 24-hour Date Format MM/DD/YY DD/MM/YY Begin of Week Sunday Monday Cholesterol Units mmol/L mg/dL Beep Diabetes Pill Set-Up: Pill A Pill A to E Pill B or Customize with ®...
- Page 78 Meter Settings (continued) OPTION FACTORY SETTINGS CUSTOM SETTINGS Insulin Pump: Advanced Features: Averages 14 days 7, 30, 60, 90 days Schedule Pre-set (see pages Personal 74–75) Glucose Range Before Meal 4.0–7.0 mmol/L Personal After Meal – Personal 11.0 mmol/L Hypo Level 3.9 mmol/L Personal...
-
Page 79: Settings
Settings “Settings” include: • Time format • Date format • Beginning of the week • Cholesterol unit of measure • Beep on or off To change any of these settings, press the OK button with “Settings” highlighted on the Set-up Menu. Each setting has a pop-up menu of available choices. - Page 80 Settings For record-keeping purposes you may Time Format am/pm begin your week on Sunday or Monday. Date Format MM/DD/YY Begin of week Begin of week Sunday Use the Arrow button to highlight your Monday holesterol Units choice and press the OK button Beep ettings The cholesterol unit of measure may be...
-
Page 81: Diabetes Pill Set-Up
Diabetes Pill Set-up You may record up to five types of diabetes pills. This feature helps you track when you have taken each of your medications. The names of the medications may be chosen from a menu (Pills A through E) or the brand or generic names entered using a personal ®... - Page 82 A pop-up menu of pill choices will appear on the display. Use Pills A–E to label up to iabetes Pill Set-up five pills. For example, if you take glipizide Select Pills pills you could label them as “Pill A” . Pill A Pill B Pill 1:...
-
Page 83: Insulin Set-Up
Insulin Set-up You can record your daily insulin usage by type of insulin and number of units for up to three different insulin types. Insulin types may be chosen from a menu of ten choices. Eleven other insulin types (up to eight characters in length) may be entered using a ®... - Page 84 To enter your first insulin type, review the nsulin Set-up menu choices: Select insulin(s) Rapid Premixed R a p i d Regular Other nsulin 1: R e g u l a r L e n t e Lente InsulinA nsulin 2: InsulinB U l t r a l e n Ultralen (Ultralente)
-
Page 85: Insulin Pump Set-Up
Insulin Pump Set-up If you are using an insulin pump, the ® ® OneTouch UltraSmart Meter allows you to store current information about your pump. The factory setting will be set as if you do not use a pump. et-up Menu ettings Diabetes Pill et-up Select “Insulin Pump”... - Page 86 ADVANCED FEATURES FACTORY SETTINGS CUSTOM SETTINGS Averages 14 days 7, 30, 60, 90 days Schedule Pre-set Personal (see pages 74–75) Glucose Range Before Meal 4.0–7.0 mmol/L Personal After Meal 5.0–11.0 mmol/L Personal Hypo Level 3.9 mmol/L Personal Select “Advanced Features” as follows: et-up Menu ettings Diabetes Pill et-up...
- Page 87 Next, the meter will prompt you to select dvanced Features time periods for your usual meal schedule. verages Pre-set Schedule When you set this feature all of your test Personal Glucose Range results will be tagged with the mealtime. Before Meal 4.0-7.0 fter Meal 5.0-11.0...
- Page 88 You will only be able to set beginning or ersonal Schedule Bef Brkft 5:00 a- 8:00 a start times for each mealtime. End times Aft Brkft 8:00 a- 10:00 a will change to match the start time of the 10:00 a- Bef Lunch 12:00 p Aft Lunch...
- Page 89 Next, the meter will prompt you to set a before-meal blood glucose range. The meter dvanced Features is pre-set to 4.0–7.0 mmol/L. To use this 14 day range, press the OK button twice. You Pre-set may change this range to one recommended Glucose Range by your healthcare professional.
-
Page 90: Your Electronic Logbook
YOUR ELECTRONIC LOGBOOK ® ® The OneTouch UltraSmart electronic logbook is the meter memory. It stores over 3,000 records. The ® SmartButtons allow you to enter information about your diabetes management plan, including exercise, health, medication, and food. Comments Information that you store in your electronic logbook along with a test result is called a “comment.”... -
Page 91: Rules For Adding Comments
Rules for Adding Comments Following are rules for adding comments in your logbook. • If you wish to add a comment to a test result, press the OK button while viewing the test result. • Use the Arrow button to scroll up and down through the various menus and choices. - Page 92 The meter will automatically prompt you to add a comment when you have a test result outside of your glucose target range. You can, however, add a comment to a test result whether or not “Comment? Press OK” appears. In this example, we will comment on a test result with food, exercise, and health information.
- Page 93 Sep 8-02 8:30 am Once you select your mealtime, “Health” Gluc. 7.5 Comment is automatically highlighted. If you are Food ft Brkft through commenting, scroll to “Save” -------- Health and press the OK button . If you do Exer not press the OK button , your Save entries will not be saved.
- Page 94 Sep 8-02 8:30 am Gluc. 7.5 Comment When you have completed making Food ft Brkft comments, scroll to “Save” and press Stress Health 1 -------- . If you do not press Health 2 the OK button Exer -------- the OK button , your entries will not Save be saved.
-
Page 95: Logbook Entries
Logbook Entries “Logbook entries” are activities concerning exercise, health, medication, and food that are not associated with a test. You do not have to perform a blood glucose test in order to add valuable diabetes information to your electronic logbook. ®... - Page 96 Following is a list of logbook entries you can make. LOGBOOK ENTRIES SmartButton ® Exercise Mild Duration (enter Moderate length of time) Hard Health Health Notes: Stress Menses (menstruation) Feel Hypo Illness Vacation Other Health Checks: Ketones Eye Exam HbA1c Foot Exam Microalbumin Weight/Height...
-
Page 97: Rules For Logbook Entries
Rules for Logbook Entries • If you wish to add a logbook entry, press a ® SmartButton to turn on the meter. The icon for the category you are choosing will appear in the upper-left-hand corner of the display and the title of the category will appear at the top of the ®... -
Page 98: Entering The Date And Time
Entering the Date and Time Exercise Entry dd New Entry for If the logbook entry is for the current date and time, press the OK button Sep 15-02 3:30 pm Other Time Exercise Entry If the entry is for a previous date and dd New Entry for time, select “Other Time”... -
Page 99: Exercise Logbook Entries
EXERCISE LOGBOOK ENTRIES With the meter turned off, press the Exercise Entry ® Exercise SmartButton. These choices will appear on the display. Select the current dd New Entry for date and time to add an exercise logbook Sep 15-02 3:30 pm entry at this time. -
Page 100: Health Logbook Entries
The exercise logbook entry you recorded Logbook will be saved this way in your ep 15-02 3:30 pm electronic logbook. You may also scroll Exercise tress through the logbook to view previous Hard 00:10 entries. Press the OK button while you are in the logbook to edit or delete the highlighted entry (see pages 105–107). - Page 101 Logbook ep 15-02 3:30 pm The logbook entry with your Health Note tress tress will be saved this way in the electronic logbook. “Health Checks” are another type of health logbook entry that you can record. Health Checks include home and laboratory tests as well as doctors’ examinations.
-
Page 102: Ketones
Many Health Checks allow you to input numeric values. In order to adjust the number, use the Arrow button to scroll up and down. Press the OK button to save your selection and return to the Health Checks menu. Following are sample entries possible under “Health Checks”. - Page 103 You will return to the Health Checks menu Sep 15-02 3:30 pm with “Exit Health Checks” highlighted. If Health Checks you are finished with your entries, press Blood Pressure Eye Exam the OK button with “Exit Health Foot Exam Checks” highlighted. If you wish to enter eight/Height Dr.
-
Page 104: Hba1C
HbA1c Sep 15-02 3:30 pm Tests for hemoglobin A1c, also known ealth Checks as HbA1c or A1c, can be recorded from 4% to 15% in 0.1% steps. When entering bA1c 5.2% data, the value will start at the value you last saved. -
Page 105: Cholesterol
Cholesterol You may enter cholesterol test results in 0.1-mmol/L steps for: ep 15-02 3:30 pm • Total (up to > 25.9 mmol/L) Health Checks • LDL (up to > 13.0 mmol/L) Cholesterol • HDL (up to > 13.0 mmol/L) Total: •... -
Page 106: Eye Exam
Eye Exam Sep 15-02 3:30 pm Health Checks To record an eye examination, select -------- “Enter Eye Exam” and press the OK nter ye xam button Foot Exam Sep 15-02 3:30 pm Health Checks To record a foot examination, select -------- “Enter Foot Exam”... -
Page 107: Weight/Height
Weight/Height Sep 15-02 3:30 pm Health Checks Enter your weight in 0.5-pound steps eight 160.5 and your height in 0.5-inch steps. When entering data, the value will start at the Height 70.0 value you last saved. Doctor Visit Sep 15-02 3:30 pm Health Checks To record the date of your last visit to the --------... -
Page 108: Medication Logbook Entries
MEDICATION LOGBOOK ENTRIES eds Entry ® Press the Medication SmartButton access the menu. You may track your Add New Entry for diabetes pills, insulin types and dosages, Sep 8-02 9:20 pm and insulin pump information. Select the Other Time current date and time or “Other Time” (see page 85). - Page 109 Diabetes Pills ep 8-02 9:20 pm Meds Entry To enter your diabetes pills, select the Pill A Pill B pill you have taken and press the OK InsulinA button InsulinB Exit Meds Entry Sep 8-02 9:20 pm Meds Entry Enter the number of pills you have taken (in 0.5 or one-half pill steps) and press the ill A OK button...
- Page 110 Insulin Dosages ep 8-02 9:20 pm Meds Entry Pill A Enter an insulin dosage by highlighting an Pill B insulin type and press the OK button InsulinA InsulinB Exit Meds Entry Sep 8-02 9:20 pm Then record the units of insulin. The Meds Entry meter was set at the factory to record units in 0.1 increments.
- Page 111 Insulin Pump You can enter insulin pump information as bolus entries or as a daily total. ep 8-02 9:20 pm Meds Entry Pill A If you are entering bolus information, Pill B select “Pump Bolus” and press the OK InsulinA button InsulinB Pump Bolus...
- Page 112 ep 8-02 9:20 pm Meds Entry Pill A If you have completed your medication Pill B InsulinA logbook entry, select “Exit Meds Entry”. InsulinB Pump Daily Total Exit Meds Entry ogbook Sep 8-02 9:20 pm Pump The dosage will be saved this way in your Bolus electronic logbook.
- Page 113 Sep 8-02 9:20 pm eds Entry Use the Arrow button to scroll to the number of units you have taken over the Pump Daily Total past 24 hours and press the OK button 25.2 When entering data, the value will start at the value you last saved.
-
Page 114: Food Logbook Entries
FOOD LOGBOOK ENTRIES Food and blood glucose levels are closely linked. Logbook entries allow you to keep track of important nutritional information for each meal or snack by type of nutrient. Food Entry dd New Entry for ® Press the Food SmartButton select either the current date and time Sep 15-02 5:26 pm or “Other Time”. - Page 115 You may enter carbohydrates (carbs), fats, and proteins in the range of 0 to 250 in 1-unit steps. Carbohydrates may be entered inner as units or grams, whichever you prefer. Information Calories may be entered in 5-unit steps Carbs: in the range of 0 to 2550. Use the Arrow Fats: button to change the units for each...
-
Page 116: Adding, Changing, Or Deleting
Adding, Changing, or Deleting Logbook Information ® ® Step 1. Press the FastFacts SmartButton ® to enter the FastFacts menu. Step 2. Select “Logbook” from the ® FastFacts menu and press the OK button . The most recent entry in your electronic logbook will appear on the display. - Page 117 Sep 8-02 10:30 am luc. 6.9 Comment Food Aft Brkft To change the mealtime, select “Food” -------- Health and press the OK button Exer -------- Save Sep 8-02 10:30 am Gluc. 6.9 Comment Food -------- Scroll to the desired mealtime and press Bef Brkft Health the OK button...
- Page 118 ogbook Sep 8-02 10:30 am Glucose 6.9 mmol/ Your edited comment will appear this way Bef unch in your electronic logbook. EDITING OR DELETING ELECTRONIC LOGBOOK ENTRY (Example) ogbook All electronic logbook entries are edited Sep 15-02 5:26 pm or deleted in the same way. Use the Dinner Arrow button to highlight the electronic...
- Page 119 Make sure the icon, date and time, and Sep 15-02 5:26 pm description are correct. (If you make an Food Entry error, press the Back button to return --------- to the menu.) Press the OK button Breakfast unch on the selected mealtime. If you wish to Dinner change the entry to another mealtime, Snack...
- Page 120 ogbook Sep 15-02 5:26 pm The edited entry will appear this way in Dinner Carbs: your electronic logbook. Fats: Logbook ep 15-02 3:30 pm Exercise To delete an entry, highlight the entry and tress Hard 00:10 press the OK button Sep 15-02 3:30 pm xercise ntry Use the Arrow button...
-
Page 121: Fastfacts ® Feature
® ® ® OneTouch UltraSmart FastFacts FEATURE FastFacts ® Menu ® Enter FastFacts by pressing the ® ® FastFacts SmartButton. This will put you in the meter memory. The ® FastFacts feature allows you to view charts and graphs of your test results and other logbook information you have entered. -
Page 122: Fastfacts Menu
7, 14, 30, 60, and 90 days Food Averages Average daily intake of carbohydrates, fats, ■ calories, and proteins for the last 7, 14, 30, 60, and 90 days Health Checks Dates and results of medical tests ■ Help LifeScan Web site address ■... -
Page 123: Logbook Memory
LOGBOOK MEMORY To review the details of each glucose test, comments, and logbook entries, select “Logbook”. The logbook is the meter memory. You may review all entries in your electronic logbook, by date and time, by pressing the Arrow button . -
Page 124: Glucose Analysis
GLUCOSE ANALYSIS ® When you select “Glucose Analysis” on the FastFacts menu, an additional menu of choices appears. Use the Arrow button to move to the desired menu and press the OK button lucose Analysis raph of All Results raph by Time of Day Average of All Results Average by Time of Day Average by Exercise... -
Page 125: Graph By Time Of Day
You may scroll backward or forward in time using the Arrow button to move from one point to another. Individual test results will flash as you scroll. To view the details of a test, press the OK button while that test result is flashing. Press the Back button to return to the graph. -
Page 126: Average Of All Results
Results by time period are shown day by day, one week at a time. Each time you reach the end of the graph, it will move by one day. Weekends are noted by a bold bar above the dates. Graph daily results by time period efore reakfast Glucose Results... -
Page 127: Average By Time Of Day
Average by Time of Day Test averages by time of day are available for the last 7, 14, 30, 60, and 90 days. The number of tests that make up each average is shown on the left in parentheses. vg. by time of Average by Day - 14 Days time of Day... -
Page 128: Glucose Range Info
Glucose Range Info If you entered your before- and after-meal glucose ranges in the Set-up mode, you may review the percentage of your test results that are above, below, and within your target ranges. The number of tests that make up each percentage is shown on the left in parentheses. -
Page 129: Insulin Intake
INSULIN INTAKE ® Choose “Insulin Intake” from the FastFacts Menu. Insulin Intake The individual insulins, in this example egular Regular and NPH, are based on insulins selected in the Set-up mode (see pages 70–71). Use the Arrow button to move to Syringe Totals your selection and press the OK button Pump... - Page 130 Syringe Totals Insulin Intake To view the total of all individual insulins egular taken by syringe or insulin pen that you have previously stored in the logbook, Syringe Totals select “Syringe Totals” and press the OK Pump button nsulin ntake Syringe Totals You may view the daily average of your insulin intake over the last 7, 14, 30, 60,...
- Page 131 Insulin Intake Syringe Totals To view your total syringe insulin intake aily Average for each day, scroll to “Daily Totals” and press the OK button aily Totals nsulin ntake Daily Totals If you did not record a syringe insulin Sep 15 - 02 85.0 Sep 14 - 02 92.0...
- Page 132 nsulin ntake Pump “Bolus” will display your average bolus Bolus intake for each mealtime (Breakfast, Lunch, Dinner, Night) based on your Daily Average schedule (see pages 73–76). Daily Totals ump Bolus 14 Day (Avg.) (14) Breakfast This example shows the average bolus 6:00am - 11:00am intake in units by time.
-
Page 133: Hypoglycemia Information
Insulin Intake Pump Daily Totals “Pump Daily Totals” gives the pump totals you have entered for each day. If you did not enter a pump total for a day, “- - -” will appear. Insulin Intake Pump Daily Totals Sep 14-02 85.0 Sep 14-02 92.0... -
Page 134: Food Averages
FOOD AVERAGES Select “Food Averages” to view average daily intake of carbohydrates, fats, calories, and proteins over the last 7, 14, 30, 60, and 90 days. The number of tests that make up each average is shown on the left in parentheses. -
Page 135: Data Downloading
SOURCES FOR HELP This choice prompts you to contact LifeScan Customer Service or visit our Web site when you need help with ® testing. Call the OneTouch Customer Care Line at 1 800 663-5521. Data Downloading Transferring test results to your personal computer ®... - Page 136 STEP 1 ® Install OneTouch Diabetes Management Software. ® Install OneTouch Diabetes Management Software on your computer following the ® instructions provided in the OneTouch Diabetes Management Software User Manual. STEP 2 Connect the OneTouch ® Interface Cable. ® Connect the OneTouch Interface Cable to an available port on your computer.
- Page 137 STEP 3 Transfer Data. ® Follow the instructions in the OneTouch Diabetes Management Software User Manual to initiate the data transfer command. “PC” will appear on the display once the first command is received, indicating that the meter is in the communication mode.
-
Page 138: Specifications
SPECIFICATIONS Result Range: 1.1 to 33.3 mmol/L Calibration: Plasma-equivalent Sample: Fresh capillary whole blood Sample Size: Minimum 1 microlitre (μL) Test Time: 5 seconds Assay Method: Glucose oxidase biosensor Power Source: Two AAA alkaline batteries Battery Life: About six months at three tests per day (one test using backlight) Glucose Units:... -
Page 139: Product Safety Information
PRODUCT SAFETY INFORMATION ® ® The OneTouch UltraSmart System complies with the following standards: CAN/CSA (Canadian Standards Association) CAN/CSA 22.2 No. 601.1-94; CAN/CSA 22.2 No. 601.1.2-94 • Internally powered equipment. Battery operated with two 1.5 volt AAA alkaline batteries. • This unit is not suitable for use in the presence of flammable anesthetic mixture with air, oxygen or nitrous oxide. -
Page 140: Explanation Of Symbols On The Meter
EXPLANATION OF SYMBOLS ON THE METER See Accompanying Documentation. Read and understand your Owner’s Booklet and test strip package insert before using this system. This indicates electrical safety certification by the Canadian Standards Association (CSA) in accordance with UL 60601-1, CAN/CSA 22.2 No. 601.1-94 and CAN/CSA 22.2 No. -
Page 141: Index
INDEX Advanced Features ......72–76 Alternate Site Testing ..15, 21–23, 27-30, 32 Arrow Button. - Page 142 Comment? Press OK......36 Confirmation Window ....7, 34–35 Contact Bars .
- Page 143 ® Exercise SmartButton ..4–5, 77, 82–83, 86 ® FastFacts ......108–122 ®...
- Page 144 High Glucose......v, 38, 51 Hyperglycemia ....v, 38–39, 50–51 Hypoglycemia .
- Page 145 Meal Schedule ......72–75 Medication Logbook Entries ... . 83, 95–100 Medication Menu .
- Page 146 Product Safety Information ....126 Quick Reference Guide......1 Reduce Chance of Infection .